

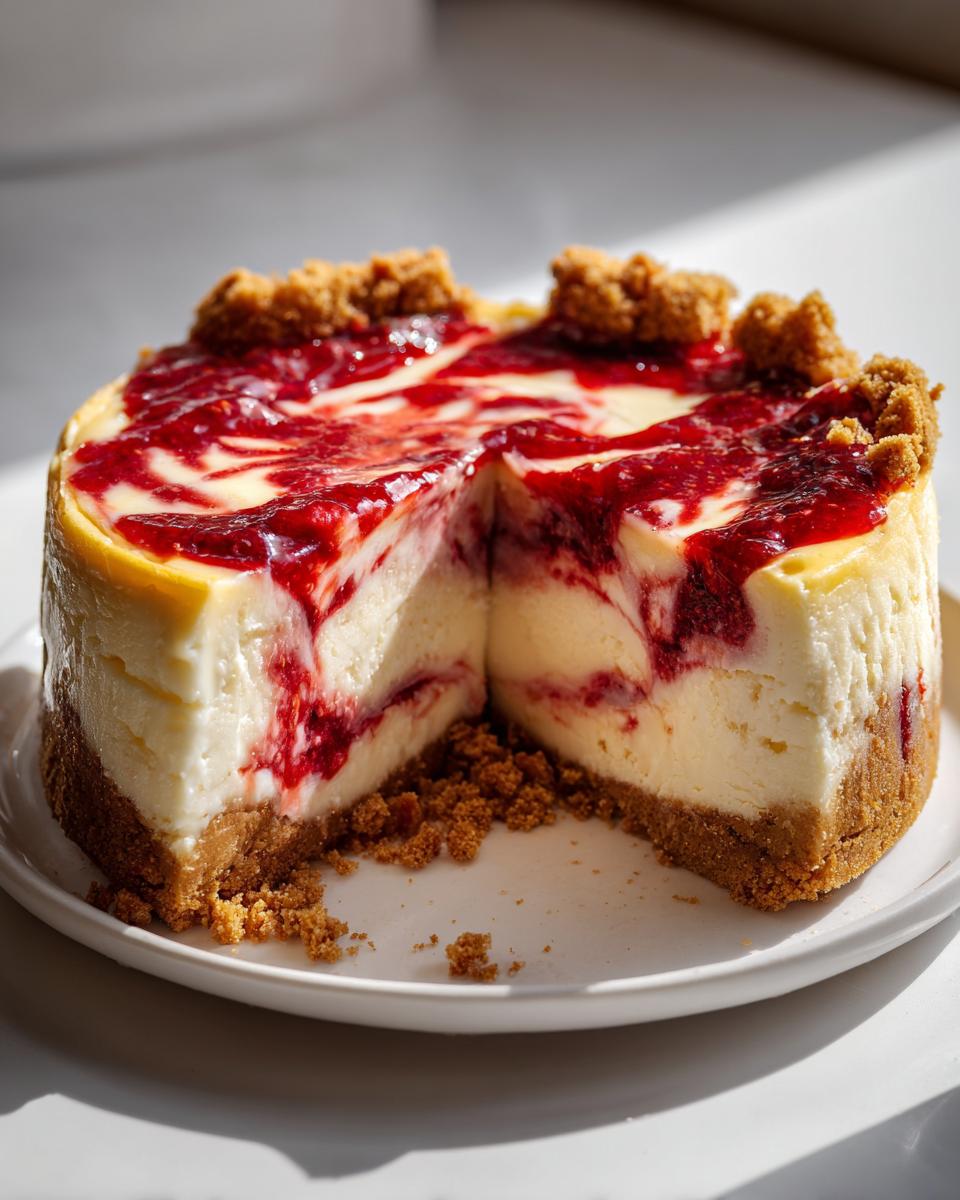
Oh, cheesecake! There’s just something incredibly comforting and celebratory about a lovely cheesecake, isn’t there? And when you add a burst of fresh strawberry magic, well, that’s just pure bliss. Honestly, I whipped up this easy strawberry swirl cheesecake recipe on a whim last week when I had unexpected guests pop round. I was worried I wouldn’t have time to make anything impressive, but this beauty came to the rescue! It’s a baked cheesecake, but don’t let that scare you – it’s simple, creamy, and that gorgeous pink swirl makes it look like you’ve slaved away for hours. Perfect for any occasion, really!
Why You’ll Love This Easy Strawberry Swirl Cheesecake
This easy strawberry swirl cheesecake is a total winner for so many reasons:
- Seriously simple preparation – you won’t believe how easy it is!
- The strawberry swirl adds a beautiful look and a lovely fruity tang.
- It bakes up beautifully creamy and tastes absolutely divine.
- Perfect for when you need a dessert that looks fancy but is totally foolproof.
- Always a hit with family and friends – it disappears fast!
Ingredients for Your Easy Strawberry Swirl Cheesecake
Right then, let’s get down to what you’ll need for this gorgeous, fuss-free treat. It’s all pretty standard stuff you probably have lurking in your pantry or fridge!
- 1 1/2 cups crushed digestive biscuits (I like to give mine a good whizz in the food processor, or pop them in a sturdy bag and bash them with a rolling pin!)
- 5 tablespoons unsalted butter, melted (Make sure it’s melted, not just soft!)
- 1 cup fresh strawberries, chopped (Hull ’em first, of course!)
- 2 tablespoons granulated sugar (This is for sweetening those lovely strawberries)
- 1 teaspoon lemon juice (Just a little bit to brighten up the strawberry flavour)
- 16 ounces cream cheese, softened (Honestly, this is the most important bit – make sure it’s properly softened so you don’t get lumps!)
- 3/4 cup granulated sugar (This is for the main cheesecake filling)
- 2 large eggs (Straight from the fridge is fine here)
- 1/2 cup sour cream (For that extra creamy texture and a hint of tang)
- 1 teaspoon vanilla flavoring (The classic cheesecake flavour enhancer!)
Step-by-Step Guide to Making Your Easy Strawberry Swirl Cheesecake
Right then, let’s get down to piecing this beauty together. I promise it’s simpler than it looks! Grab your apron, and let’s get started.
Step 1: First off, get your oven ticking over to 325°F (that’s 160°C for those of us not using Fahrenheit a lot!). You’ll need a 9-inch springform pan. Line the very bottom with a circle of parchment paper – this is a lifesaver for getting the cheesecake out in one piece. Trust me on this one!
Step 2: Time for the base! Mix your crushed digestive biscuits with the melted butter. You want it to look like damp sand. Press this mixture down really firmly into the bottom of your prepared pan. I usually use the flat bottom of a glass for this. Pop it in the fridge for about 10 minutes to firm up while we do the next bit.
Step 3: For our gorgeous swirl, put the chopped strawberries, 2 tablespoons of sugar, and the lemon juice into a small saucepan. Cook it over medium heat for about 5 to 7 minutes. The strawberries will soften and release their juices, making a lovely thick syrup. Give it a quick blitz with a hand blender or mash it well with a fork. Let this cool down completely.
Step 4: Now for the creamy filling! In a big bowl (honestly, as big as you can find!), beat your softened cream cheese until it’s super smooth and lovely. No lumps allowed!
Step 5: Add the 3/4 cup of granulated sugar and beat it in thoroughly until everything is well combined and creamy.
Step 6: Whisk in the eggs, one at a time, making sure each one is mixed in before you add the next. Then, stir in the sour cream and that lovely vanilla. Give it all a good mix until the batter is smooth and flowing nicely.
Step 7: Pour all that gorgeous creamy batter over your chilled biscuit base. Smooth the top with a spatula so it’s even all the way across.
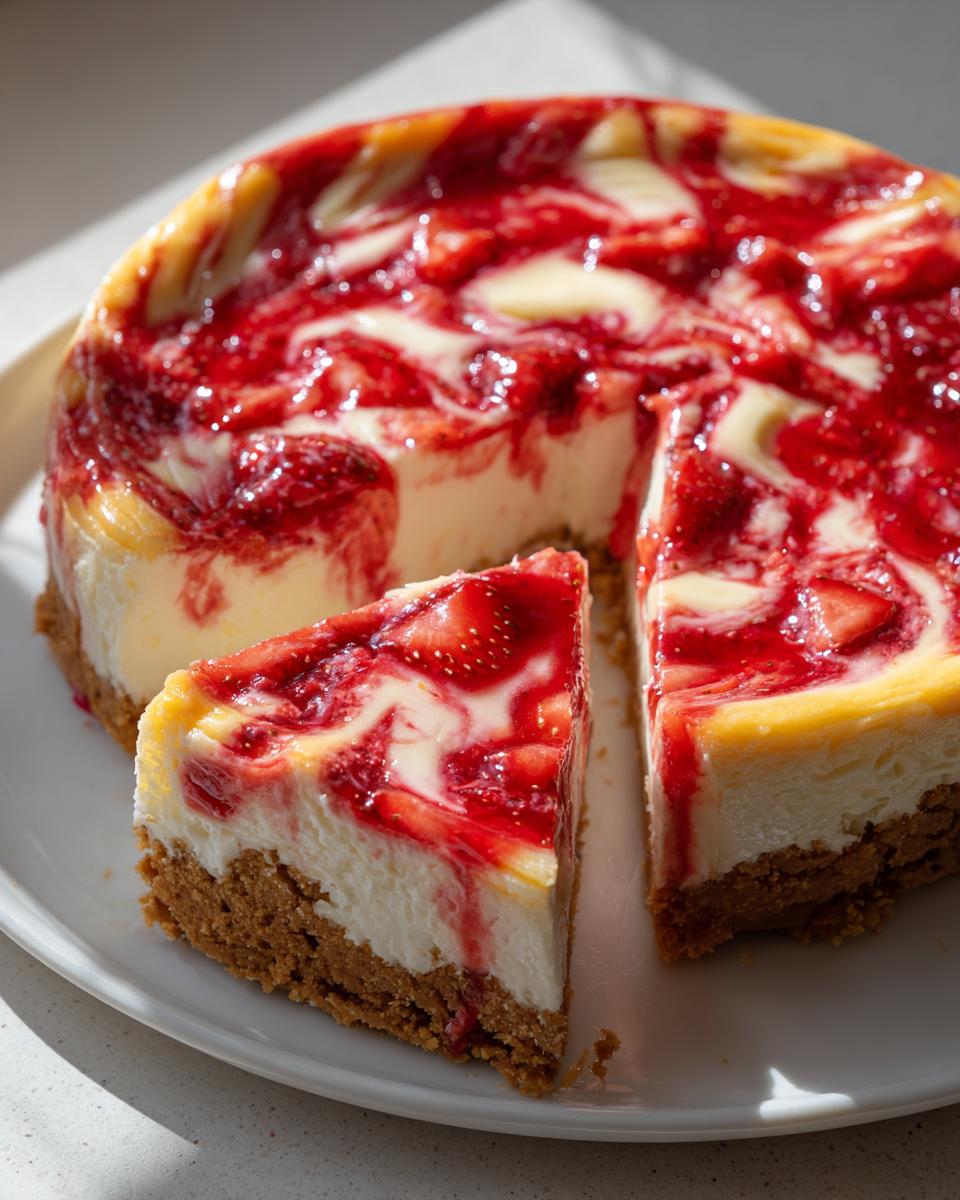
Step 8: Now for the fun part! Spoon little dollops of your cooled strawberry mixture all over the surface of the cheesecake batter. Then, take a knife and gently swirl it through. Don’t overdo it; you want lovely ribbons of pink, not a completely mixed-up mess. It reminds me a bit of swirling patterns on these flapjacks I sometimes make, just much more sophisticated!
Step 9: Bake for about 40 to 50 minutes. You’ll know it’s ready when the edges look set, but the very centre still has a slight wobble when you gently nudge the pan. It’s like a gentle shimmy!
Step 10: Turn the oven off, but leave the cheesecake inside with the door slightly ajar for half an hour. This gradual cooling is key to preventing cracks – a trick I learned from making my lovely scones and Victoria sponges. Once it’s had its oven nap, take it out and let it cool completely on a wire rack before covering and chilling it in the fridge for at least 4 hours, or ideally, overnight.
Serving Suggestions for Your Easy Strawberry Swirl Cheesecake
This lovely cheesecake is pretty perfect on its own, but if you fancy jazzing it up a bit, here are a few ideas:
Fresh Cream: A good dollop of lightly whipped cream just cuts through the richness and adds an extra layer of indulgence. So simple, so good.
Berry Coulis: Drizzle a bit more of that vibrant strawberry sauce or even a raspberry coulis over the top for an extra fruity kick.
A Tiny Sprinkle of Candied Pecans: For a bit of crunch and a lovely nutty flavour, a few candied pecans would be simply divine!
Caramel Drizzle: If you’re feeling a bit naughty, a little swirl of homemade caramel sauce adds a wonderful depth of flavour that pairs surprisingly well with the strawberry.
Storing and Reheating Your Easy Strawberry Swirl Cheesecake
Now then, if by some miracle you have any leftover easy strawberry swirl cheesecake (which is rare in my house!), storing it is a doddle. Just pop it into an airtight container or cover it well with cling film and pop it back in the fridge. It’ll be absolutely lovely for up to 3 days. Honestly, it tastes even better on the second day as the flavours have had a chance to meld together beautifully.
As for reheating, well, that’s not really something you need to do with cheesecake! It’s best served perfectly chilled straight from the fridge. Taking it out about 15 minutes before serving can take the edge off the chill, making it even creamier. No need to worry about microwaves or ovens here, just pure, cool deliciousness!
Frequently Asked Questions about Easy Strawberry Swirl Cheesecake
Got a question about my easy strawberry swirl cheesecake? Don’t you worry, I’ve got you covered!
Can I use frozen strawberries instead of fresh ones?
You absolutely can! If you’re using frozen strawberries for the swirl, just pop them in the saucepan with the sugar and lemon juice straight from the freezer. You might need to cook them for a minute or two longer to let them soften and release their juices. They work just as beautifully for that gorgeous swirl!
My cheesecake cracked! What did I do wrong?
Oh, don’t you fret about cracks! It happens sometimes, and it usually comes down to temperature. Over-beating the filling, baking it too hot, or cooling it down too quickly can all cause cracks. My best tip is to always let it cool gradually in the oven with the door ajar, just like I mentioned in the instructions. It really helps prevent those unsightly fissures! Even if it cracks, it will still taste absolutely delicious, and you can always hide it under some whipped cream or fresh berries. If you’re after a perfectly smooth finish every time, you might want to check out my guide to a Mary Berry best cheesecake recipe, which has a few more advanced tips for a flawless bake. Or, for something even simpler, these no-bake strawberry cheesecake bars are completely foolproof!
How do I get my cheesecake out of the pan cleanly?
The key here is that springform pan and the parchment paper! Make sure the base is really well pressed down. After it’s chilled thoroughly (ideally overnight!), run a thin knife around the edge *before* you unclip the side. Then, carefully lift the ring off. You can then slide the whole cheesecake, parchment and all, onto a serving plate. It makes serving a doddle! You can find more inspiration for making your desserts look amazing over on my Pinterest page.
Before You Go
I do hope you give this easy strawberry swirl cheesecake a try this week! It’s a real crowd-pleaser and honestly, so simple to make. Let me know in the comments how yours turns out, or better yet, give it a star rating if you loved it!
Print
Easy Strawberry Swirl Cheesecake
- Total Time: 70 minutes
- Yield: 8 slices
- Diet: Vegetarian
Description
A simple baked cheesecake with a creamy filling and a fresh strawberry ripple, perfect for any occasion.
Ingredients
- 1 1/2 cups crushed digestive biscuits
- 5 tablespoons unsalted butter, melted
- 1 cup fresh strawberries, chopped
- 2 tablespoons granulated sugar
- 1 teaspoon lemon juice
- 16 ounces cream cheese, softened
- 3/4 cup granulated sugar
- 2 large eggs
- 1/2 cup sour cream
- 1 teaspoon vanilla flavoring
Instructions
- Preheat your oven to 325°F (160°C). Line the bottom of a 9-inch springform pan with parchment paper.
- In a bowl, mix crushed digestive biscuits with melted butter until evenly combined. Press this mixture firmly into the base of the prepared pan and chill for 10 minutes.
- In a small saucepan, cook the chopped strawberries, 2 tablespoons of sugar, and lemon juice over medium heat for 5 to 7 minutes until the strawberries are softened and the mixture has slightly thickened. Blend this lightly and allow it to cool.
- In a large bowl, beat the cream cheese until it is smooth and creamy.
- Add the 3/4 cup of granulated sugar and mix until fully combined.
- Beat in the eggs one at a time. Then, mix in the sour cream and vanilla flavoring until the filling is smooth.
- Pour the cheesecake filling over the chilled biscuit base and smooth the top.
- Spoon small amounts of the strawberry mixture over the surface of the filling. Use a knife to gently swirl it through the batter.
- Bake for 40 to 50 minutes, or until the edges are set and the center has a slight wobble.
- Turn off the oven and let the cheesecake cool inside the oven for 30 minutes. Remove it from the oven and allow it to cool completely before chilling in the refrigerator for at least 4 hours.
Notes
- Chill overnight for the best texture and clean slices when serving.
- Prep Time: 20 minutes
- Cook Time: 50 minutes
- Category: Dessert
- Method: Baking
- Cuisine: British


