My love affair with baking, and frankly with British cake, started years ago with a slice of perfect Victoria sponge at a very proper afternoon tea. It was light as air, held a generous layer of cream and jam, and it completely changed my mind about what a simple cake could be. I’ve been chasing that texture ever since, and honestly, Mary Berry Victoria Sponge Cake is the recipe that finally got me there.
I stumbled across Mary Berry’s method during one of my many late-night recipe rabbit-hole searches, and it’s become my absolute go-to. After years of baking, I trust her techniques completely – they’re foolproof. This cake isn’t fussy or complicated; it’s about elegance in simplicity. You get a wonderfully light, fluffy sponge that’s just begging to be filled with jam and cream, and it’s perfect for everything from a quiet Sunday treat to a big celebration.
It’s the kind of recipe that feels like a gift, both to make and to share. So, if you’re ready for a classic that never fails to impress, let’s get baking.
Why You’ll Love This Mary Berry Victoria Sponge Cake
Honestly, this is the cake I make when I need something guaranteed to work and put a smile on everyone’s face. It’s my baking safety net.
There are so many reasons this recipe is a winner, but for me, it all comes down to reliability. You know you’re going to get a gorgeous cake every single time. Here’s exactly why it’s a favourite in my kitchen:
- It’s genuinely foolproof. Mary Berry’s all-in-one method is a dream – just beat everything together. No fancy techniques needed, so it’s perfect for beginners or a last-minute bake.
- The texture is beautifully light. You get that signature fluffy, tender crumb that just melts in your mouth. It’s the opposite of a dense, heavy cake.
- It tastes like a proper classic. That perfect balance of sweet sponge, sharp jam, and rich cream is just timeless. It’s the taste of a lovely afternoon tea.
- It’s surprisingly quick to make. From bowl to oven in about 10 minutes! For a stunning cake, that’s pretty hard to beat when you’re short on time.
- It’s perfect for any celebration. Birthdays, summer garden parties, or just because it’s Tuesday – it always feels special. It’s my go-to for a delightful dessert that everyone recognises and adores.
Essential Ingredients for Your Mary Berry Victoria Sponge Cake
If I could give you one golden rule for this cake, it’s this: get everything out of the fridge ahead of time. Room-temperature ingredients blend into a silky batter and give you that gorgeous, even rise you’re dreaming of.
Here’s everything you’ll need. I’ve split it into the cake itself and the simple filling, so it’s easy to grab what you need. Trust me, using good-quality baking spread and real double cream makes all the difference.
- For the Sponge:
- 1 cup plus 2 tablespoons caster sugar
- 1 cup plus 2 tablespoons baking spread, softened (or unsalted butter, but baking spread is easier!)
- 4 large eggs, at room temperature
- 1 3/4 cups self-raising flour, sifted
- 1 teaspoon baking powder
- For the Filling & Topping:
- 3/4 cup strawberry or raspberry jam (I always use a good quality one with real fruit)
- 1 cup double cream, for whipping
- 1 tablespoon caster sugar, for dusting the top
Now, I know not everyone has self-raising flour on hand. If you’re in a pinch, you can make your own, but for a truly foolproof classic sponge, it’s worth getting the proper stuff. It’s the secret behind that light texture, just like in my favourite gluten-free banana bread cookies.
How to Make Mary Berry Victoria Sponge Cake: Step-by-Step
Okay, don’t be nervous! This is the fun part. I promise it’s simple, but a couple of little tricks make a huge difference. Let’s walk through it.
Follow these steps, and you’ll have two perfect sponges ready for their jam and cream filling. It’s honestly one of the most satisfying baking processes because it just works.
Step 1: First, get your oven going. Preheat it to 180°C (or 160°C if you have a fan oven). Now, grab your two 20cm round tins. Grease them well – I use a bit of extra baking spread on my fingers – and line the bottoms with a circle of baking paper. This is my secret for cakes that never stick. It’s a step I never skip, even for my moist lemon yogurt cake.
Step 2: This is where Mary Berry’s genius ‘all-in-one’ method shines. Pop all your cake ingredients – the sugar, soft baking spread, room-temperature eggs, sifted flour, and baking powder – into a large mixing bowl. Use a hand mixer (or a stand mixer if you have one) and beat everything together until you have a smooth, creamy batter. The key here is to stop once it’s combined and creamy. Don’t overbeat it! A minute or two is plenty.
Step 3: Dividing the batter evenly is crucial for two identical sponges. I like to spoon the mixture into the tins, switching between them spoonful by spoonful. Once it’s all in, take a spatula and gently smooth the tops so they’re nice and level.
Step 4: Bake the cakes on the centre rack of your oven for 22 to 25 minutes. You’ll know they’re done when they’re a lovely golden colour, the top springs back lightly when you touch it, and the edges have just started to pull away from the sides of the tin. Don’t open the door too early!
Step 5: When they’re done, leave them in the tins for just 5 minutes to settle. Then, carefully turn them out onto a wire rack to cool completely. This is important – if you try to fill a warm cake, the cream will melt. Let them cool properly.
Step 6: While the cakes are cooling, whip your double cream. Pour it into a bowl and whip it with a hand mixer or whisk until it forms soft, billowy peaks. It should be thick but still smooth, not grainy.
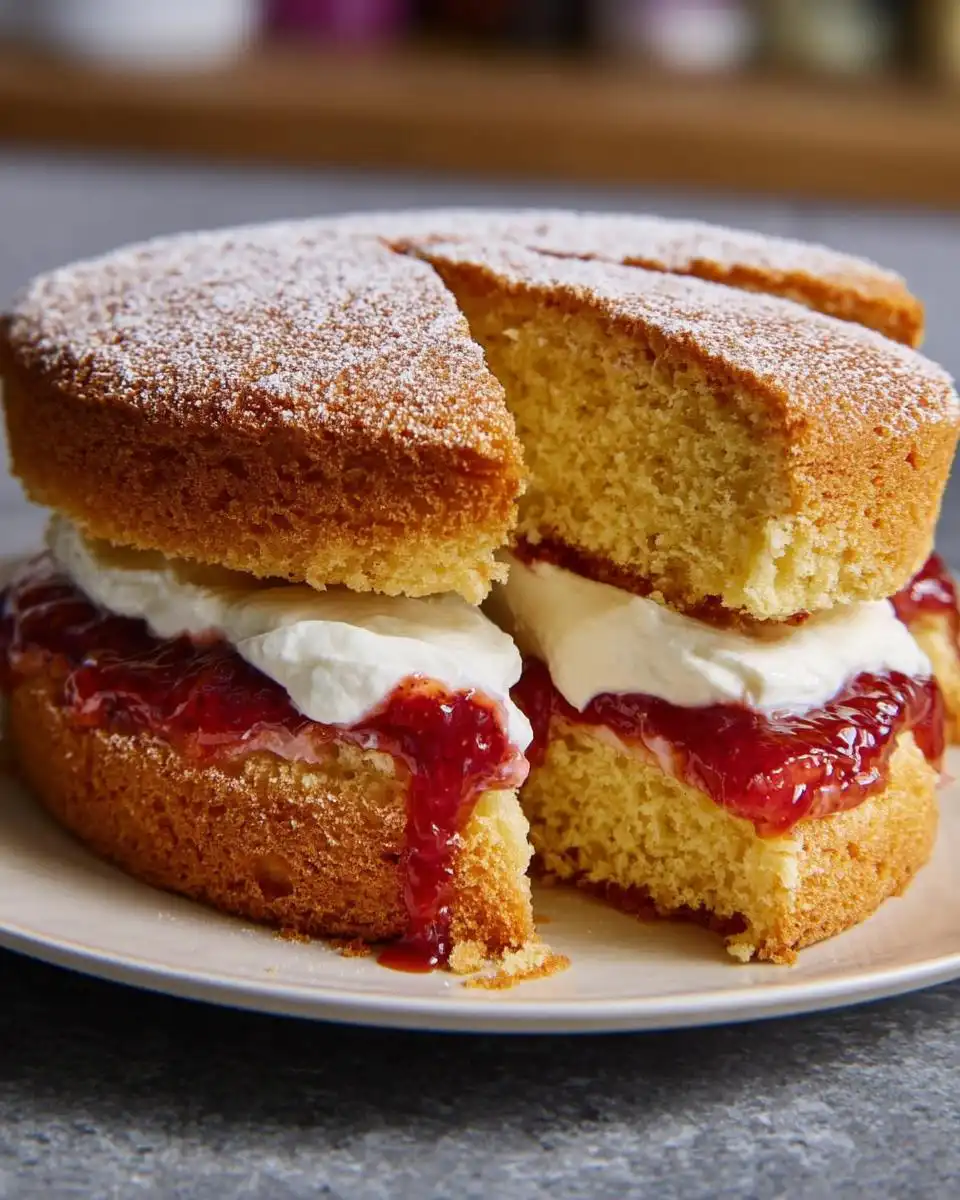
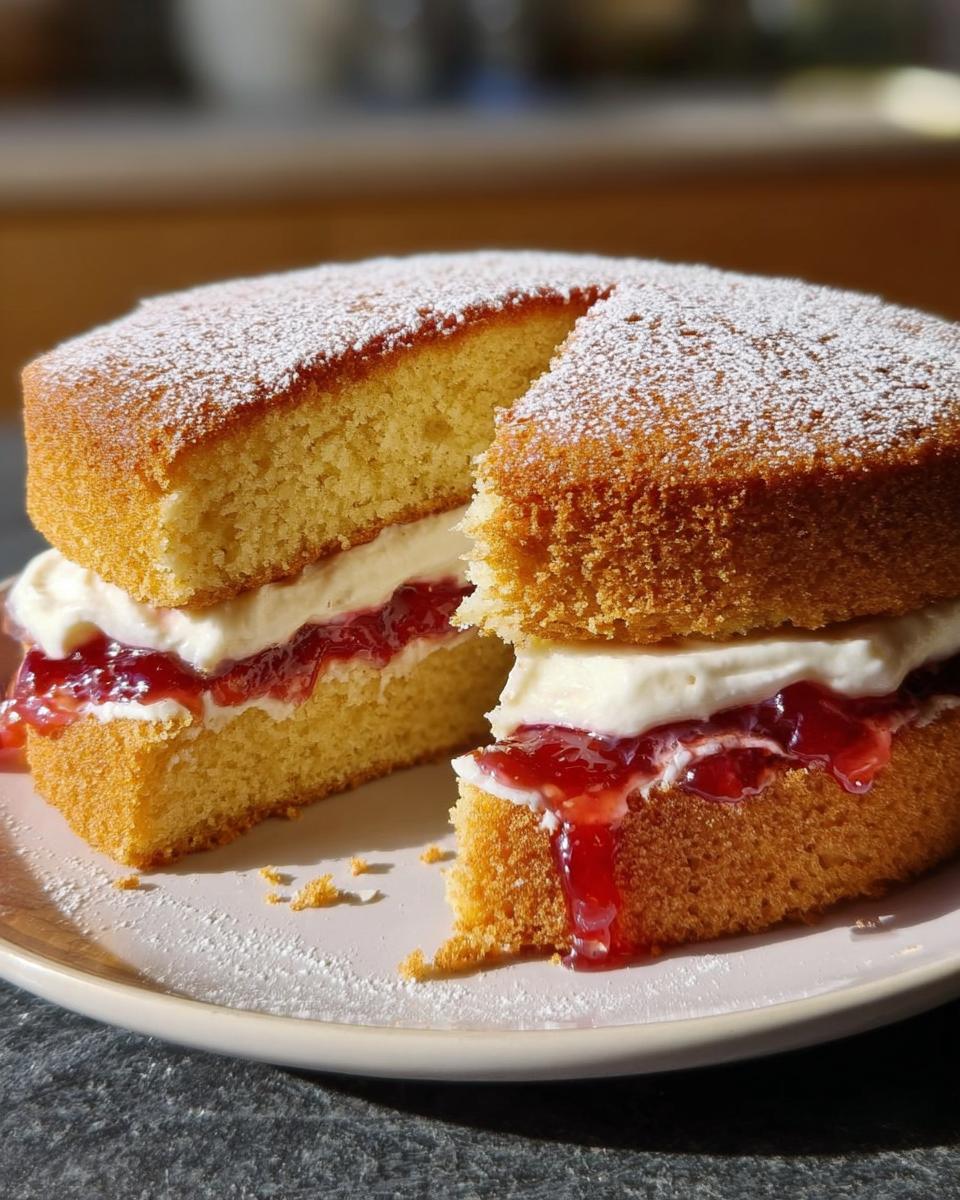
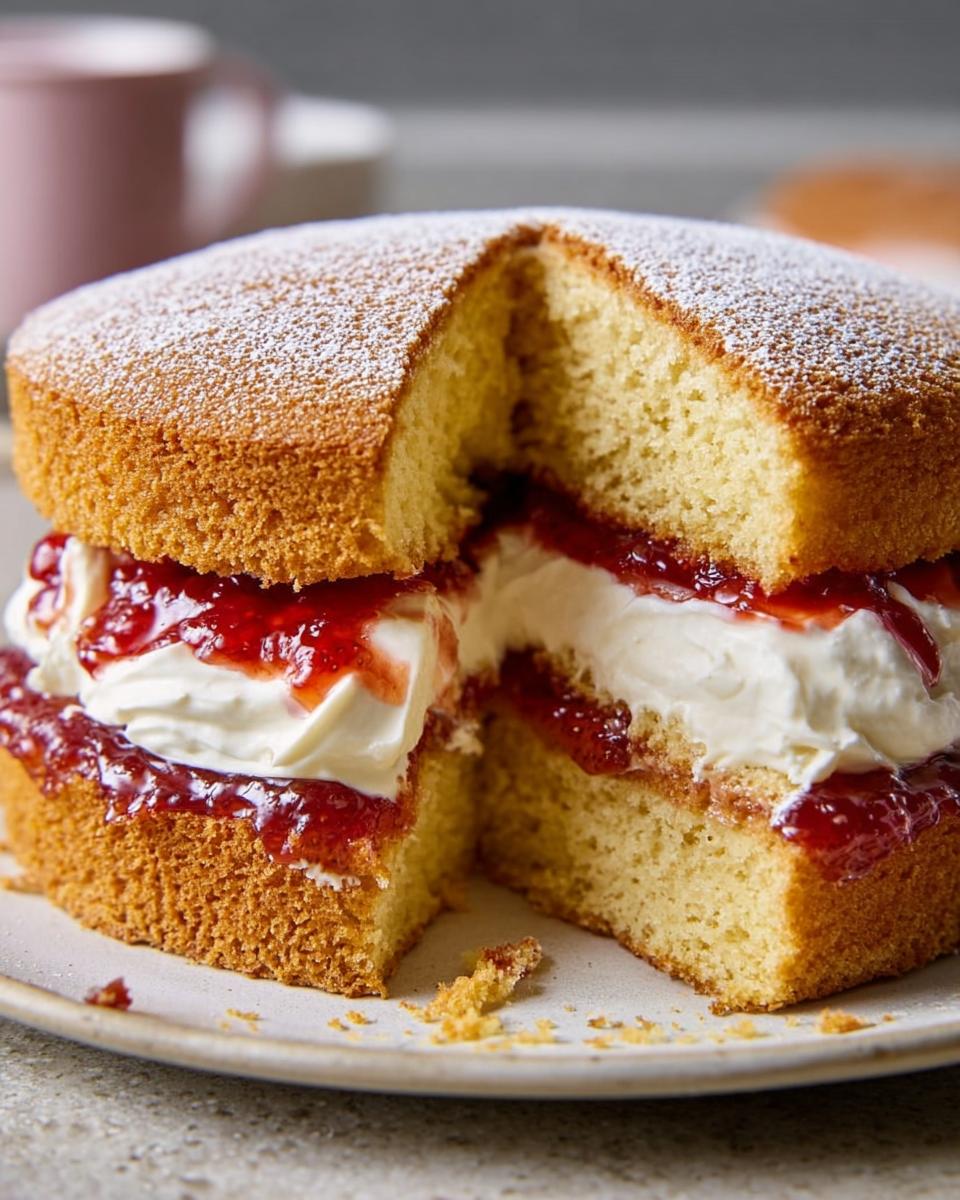
Step 7: Time to assemble! Place one sponge layer upside down on your serving plate (this gives you a lovely flat surface). Spread the jam evenly all over it. I use the back of a spoon and start from the centre.
Step 8: Now, gently spread the whipped cream over the jam layer. Try to keep it even, but don’t worry about being perfect.
Step 9: Carefully place the second sponge layer on top, with its top side facing up (the nicer, smoother side). Press down lightly just to secure it.
Step 10: Finally, the classic finish: dust the top lightly with a tablespoon of caster sugar. I use a small sieve to get a nice, even sprinkle. And there you have it – your beautiful, homemade Mary Berry Victoria Sponge Cake!
What to Serve with Your Victoria Sponge Cake
While the cake is a star all on its own, I love adding a little something extra to make it feel like a proper occasion. Here are my favourite pairings, from the utterly classic to a fun, fresh twist.
A Proper Pot of Tea: Honestly, it’s non-negotiable for me. A strong pot of English Breakfast or Earl Grey tea is the perfect partner. The slight bitterness cuts through the sweet cream and jam, making every single bite even more delightful.
Fresh Summer Berries: A bowl of strawberries, raspberries, or a mix of both is just beautiful. They add a burst of fresh flavour and a lovely colour contrast. It’s a light, healthy addition that makes the whole plate look spectacular.
Extra Clotted Cream: If you want to go full-on indulgent, serve a little pot of clotted cream on the side. A small dollop on your slice adds an extra layer of rich, velvety luxury. It’s a total treat.
A Bright, Fruity Drink: For something a bit different, especially in summer, I like to serve a refreshing non-alcoholic drink. A strawberry lime mocktail has that sweet-tart flavour that works so well. It feels festive and looks gorgeous next to the cake. For more pretty presentation ideas, I’m always saving inspiration over on Pinterest.
Storing and Freezing Your Mary Berry Victoria Sponge Cake
I bake this cake so often that I’ve become a bit of an expert on keeping it fresh! Here’s my no-fuss guide to storing it so you can enjoy it for days.
The filled cake is honestly at its absolute best eaten on the day it’s made, when the cream is lush and the sponge is super soft. But life happens, and sometimes you need to save some for later.
In the Fridge: If you have leftovers of the fully assembled cake, you can pop it in an airtight container and keep it in the fridge for up to 2 days. The sponge might firm up a little from the cold, but it will still taste lovely. My top tip? Store the sponges *unfilled* if you can. Wrap the plain, cooled cakes tightly in cling film and keep them at room temperature for a day, then fill them just before serving. This keeps the texture perfect.
Freezing for Later: This is my favourite meal prep trick for this recipe! You can freeze the unfilled sponge layers beautifully. Once they’re completely cool, wrap each one tightly in a layer of cling film, then again in foil. Pop them in a freezer bag, label it with the date, and freeze for up to 3 months. It’s such a relief to have a cake base ready in the freezer for unexpected guests.
Thawing & Serving: When you’re ready, just take the wrapped sponges out of the freezer and let them thaw at room temperature for a few hours. Don’t try to speed it up or the texture will suffer. Once they’re completely soft and cool to the touch, unwrap them, fill with your jam and freshly whipped cream, and dust with sugar. It’ll taste just-baked!
Mary Berry Victoria Sponge Cake FAQs
I’ve made this cake dozens of times, and I’ve definitely faced a few hiccups along the way. Here are the answers to the questions I get asked the most, based on everything I’ve learned.
Can I use all-purpose flour instead of self-raising flour?
You can, but you’ll need to make an adjustment. For every cup of plain all-purpose flour, add 1 ½ teaspoons of baking powder and a tiny pinch of salt. Mix it in thoroughly before adding it to your other ingredients. It’ll work, but I find using proper self-raising flour gives you that guaranteed, consistent light rise Mary Berry’s recipe is famous for.
My cake didn’t rise much, what went wrong?
Oh, I’ve had this happen! The most common culprits are old baking powder (check it’s fresh), overmixing the batter (stop once it’s smooth and creamy), or ingredients that weren’t at room temperature. Cold eggs and butter just don’t incorporate as well. Also, make sure your oven was properly preheated and you didn’t open the door too early during baking. It’s usually one of these simple things.
Can I make this Mary Berry Victoria Sponge cake dairy-free?
You can try, but it will change the classic texture and flavour. For the sponge, use a plant-based baking spread instead of butter. For the filling, swap the double cream for a thick, whipped coconut cream or a dairy-free whipping alternative. Just know it won’t be exactly the same as the traditional version. I’d recommend testing a small batch first to see if you like the result.
Nutritional Information for Mary Berry Victoria Sponge Cake
I’m all about enjoying a lovely slice of cake, but I know some folks like to keep an eye on things. Here’s my honest take on the nutrition side of it.
Please note, I don’t provide specific calorie counts for my Mary Berry Victoria Sponge Cake as nutritional values are only estimates. They can vary a lot depending on the exact brands of jam, cream, and baking spread you use. I’d encourage you to check your own ingredient labels if you need precise calculations for your diet.
Before You Go
I really hope you give this classic a whirl in your own kitchen. There’s nothing quite like the pride of serving a beautiful, homemade sponge. If you do make it, I’d be chuffed to bits to hear how it went—tag me in a photo or leave a comment below. Happy baking, everyone!
Print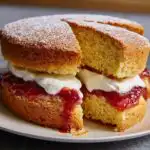
Mary Berry Victoria Sponge Cake
- Total Time: 45 min
- Yield: 12 servings
- Diet: Vegetarian
Description
A light and fluffy classic British sponge cake, filled with jam and cream.
Ingredients
- 1 cup plus 2 tablespoons caster sugar
- 1 cup plus 2 tablespoons baking spread, softened
- 4 large eggs
- 1 3/4 cups self-raising flour
- 1 teaspoon baking powder
- 3/4 cup strawberry or raspberry jam
- 1 cup double cream
- 1 tablespoon caster sugar, for dusting
Instructions
- Preheat your oven to 180°C (160°C fan). Grease two 20cm round cake tins and line the bottoms with baking paper.
- In a large bowl, combine the sugar, baking spread, eggs, flour, and baking powder. Beat with a hand mixer until smooth and creamy.
- Divide the batter evenly between the prepared tins and smooth the tops.
- Bake on the centre rack for 22 to 25 minutes until golden and springy. The edges should pull away from the tin slightly.
- Let the cakes cool in the tins for 5 minutes, then transfer to a wire rack to cool completely.
- Whip the double cream until it forms soft peaks.
- Place one cake layer upside down on a plate. Spread the jam evenly over the surface.
- Spread the whipped cream over the jam.
- Place the second cake layer on top, with the top side facing up.
- Dust the top lightly with caster sugar before serving.
Notes
- Use room temperature ingredients for a smoother batter and even rise.
- Prep Time: 20 min
- Cook Time: 25 min
- Category: Dessert
- Method: Baking
- Cuisine: British