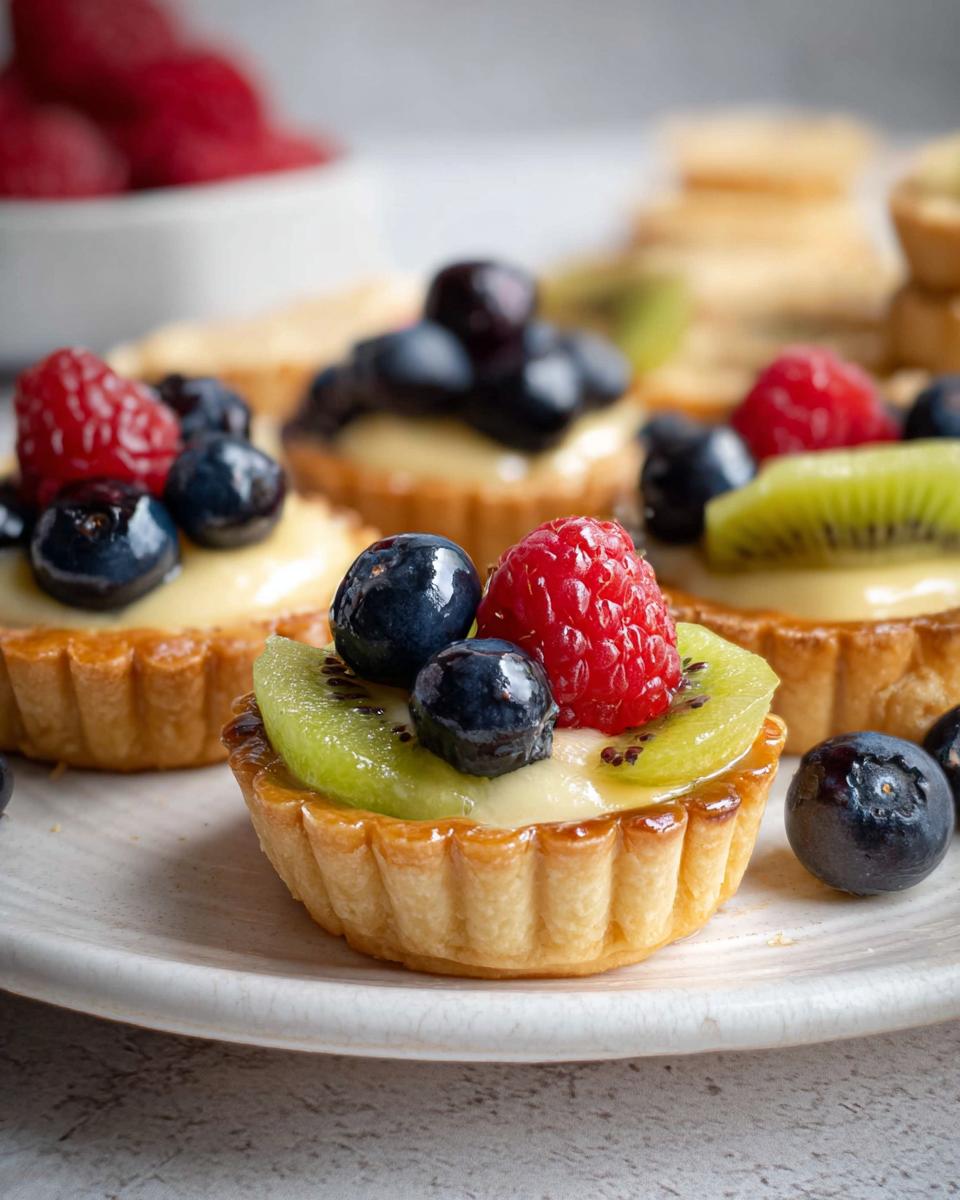
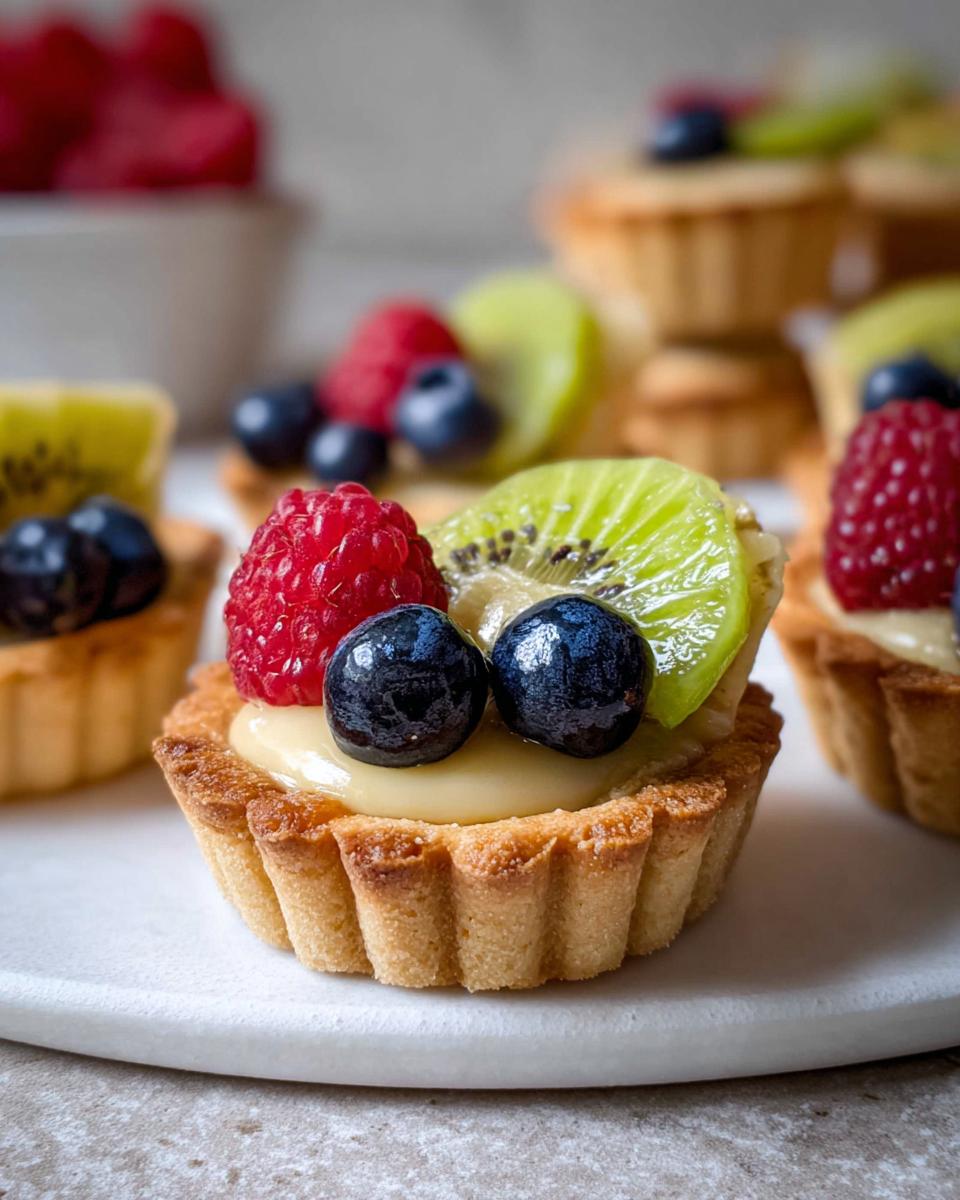
Oh, these Mini Fruit Tarts Inspired by Mary Berry! They’re just the loveliest little things, aren’t they? I’ve always adored Mary Berry’s baking – there’s something so comforting and classic about her recipes. These tarts are perfect for a spot of afternoon tea, or just when you fancy a bit of sunshine on a plate. My mum used to make something similar when I was a little girl, and the smell of the buttery pastry filling the kitchen was just pure magic. The beauty of these is that you get that gorgeous, crisp pastry shell, a silky smooth vanilla cream, and then all that vibrant, fresh fruit on top. It’s a taste of pure, simple joy, and honestly, they look ever so elegant!
Why You’ll Love These Mini Fruit Tarts Inspired by Mary Berry
- They’re surprisingly easy to make, even if you’re not a seasoned baker!
- That combination of buttery pastry, creamy vanilla filling, and fresh fruit is just divine.
- They look absolutely stunning on a dessert table or for afternoon tea.
- Perfect for using up seasonal fruits – you can pretty much use whatever takes your fancy that week.
Ingredients for Your Mini Fruit Tarts
Right then, for these gorgeous little tarts, you’ll need a few bits and bobs, but nothing too wild! I like to make my pastry cream ahead of time because it needs a good chill, and honestly, it just makes the whole process smoother. And for the pastry, make sure your butter is properly softened – it makes all the difference to getting a lovely, crumbly dough.
- For the Pastry Cream:
- 1 ½ cups whole milk
- A good strip of lemon peel (from about half a lemon)
- 3 egg yolks
- ⅓ cup caster sugar
- ¼ cup plain flour
- 1 teaspoon vanilla bean paste (this really is worth seeking out for the flavour!)
- For the Tartlet Pastry:
- 120 g unsalted butter, nice and soft
- ⅓ cup caster sugar
- 1 teaspoon finely grated lemon zest (get all those fragrant oils!)
- 1 large egg, free-range if you can!
- 2 cups plain flour
- A good pinch of sea salt
- For the Glaze:
- 1 tablespoon apricot jam – it gives such a lovely sheen
- 1 teaspoon water
- For the Fruit Topping:
- About 115 g fresh blueberries
- About 115 g fresh raspberries
- 2 kiwi fruits, peeled and sliced (they look so pretty!)
Crafting Perfect Mini Fruit Tarts Inspired by Mary Berry: Step-by-Step
Right then, let’s get our hands properly in the dough and make these little beauties! It might seem like a few steps, but trust me, it’s all straightforward. I always like to make the pastry cream first as it needs a good long chill – I usually do this the night before if I can, just to make the actual tart assembly a bit less frantic. Getting the pastry right is key, and a good, cold freeze before baking makes sure those edges stay crisp and neat. It’s a bit of a juggling act with the chilling, but oh so worth it!
Step 1: For the pastry cream, gently warm your milk in a saucepan with the strip of lemon peel. You just want it steaming, not boiling. While that’s happening, whisk your egg yolks, caster sugar, and plain flour together in a bowl until you have a nice, smooth paste. No lumps allowed!
Step 2: Carefully remove the lemon peel from the warm milk. Then, slowly pour the warm milk into the egg mixture, whisking constantly. This is called tempering, and it stops your eggs from scrambling!
Step 3: Pour the whole lot back into the saucepan and cook over a medium-low heat, whisking like mad. Keep going until the cream thickens up lovely and coats the back of a spoon. Give it a final minute of simmering, then take it off the heat and stir in that gorgeous vanilla bean paste.
Step 4: To stop a skin forming, put a piece of cling film right on the surface of the cream. Pop it in the fridge to chill thoroughly. It needs at least an hour, but honestly, a few hours or even overnight is even better.
Step 5: Now for the pastry! In a large bowl, beat your softened butter with the caster sugar and lemon zest until it’s really creamy and pale. You can use an electric mixer for this, or just a good strong whisk and some elbow grease!
Step 6: Beat in the egg until it’s all incorporated, then fold in the plain flour and salt. Just mix until it all comes together into a soft, pliable dough. Don’t overwork it!
Step 7: Shape the dough into a flat disc, wrap it in cling film, and pop it in the fridge for about 30 minutes to firm up. This makes it much easier to roll out.
Step 8: Preheat your oven to 180°C (160°C fan/350°F/Gas Mark 4). Lightly grease about 16 mini tart tins. My mum always swore by a light brush of butter, but a quick spray works too!
Step 9: Lightly flour your work surface and roll out the chilled pastry to about 5mm thick. Use a round cutter slightly larger than your tart tins to cut out circles. Gently press these circles into the tins, making sure they fit snugly into the corners. Trim off any excess pastry hanging over the edges – little cutters or a sharp knife are great for this.
Step 10: Prick the bottom of each pastry shell with a fork a few times. This stops them puffing up too much as they bake. Then, pop the whole tray of tins into the freezer for another 30 minutes. I know, more chilling! But this really helps keep their shape.
Step 11: Bake the pastry shells for 12-14 minutes, or until they’re looking beautifully golden brown and crisp. Keep an eye on them, as little ones can brown quickly! Once baked, let them cool in the tins for a few minutes before carefully turning them out onto a wire rack to cool completely. Patience is key here!
Step 12: To make the glaze, gently heat the apricot jam with the water in a small saucepan. Stir it until it’s smooth and runny. If it’s a bit chunky, you can pass it through a sieve.
Step 13: Once your tart shells are completely cool, spoon the chilled pastry cream into each one. Don’t overfill them; leave a little space for the fruit.
Step 14: Artfully arrange your fresh fruit on top of the cream. I like to start with kiwi slices and then add raspberries and blueberries. Make it look pretty! You could even try a neat pattern if you’re feeling fancy.
Step 15: Using a small pastry brush, gently brush the fruit with the warm apricot glaze. This gives them a lovely shine and stops them from drying out. You can find more lovely berry tart ideas over at Easy Detox Recipes if you fancy a peek!
Step 16: Pop your finished tarts back into the fridge for at least 30 minutes to let everything set nicely before serving. They are just delightful when they’re perfectly chilled.
Serving Suggestions for Your Mini Fruit Tarts
These little tartlets are already rather special on their own, but if you’re planning a bigger spread, here are a few things that go down a treat alongside them. They’re all about complementing the delicate flavours, not competing!
A Light Coffee Mousse: For a bit of grown-up indulgence, a spoonful of smooth coffee mousse is just divine. The subtle bitterness of the coffee cuts through the sweetness of the fruit and cream beautifully.
Rich Chocolate Mousse: If you’re a serious chocoholic, then a dollop of decadent chocolate mousse alongside the fruit tarts is a match made in heaven. The deep chocolate flavour is a lovely contrast to the fresh fruit.
A Small Pot of Berries and Cream: Sometimes, simplicity is best. A little extra bowl of fresh berries with a swirl of softly whipped cream is always welcome and just echoes the natural goodness of the tarts.
Storing and Reheating Your Mini Fruit Tarts
These little tartlets are best made pretty close to when you want to serve them, honestly. The pastry is at its absolute crunchiest then! But, if you’re planning ahead (which is always a good idea, if you ask me!), you can absolutely prep components in advance.
The best way to store these is to keep everything separate. The baked tartlet shells can be kept in an airtight container at room temperature for a good couple of days – they might lose a *tiny* bit of their crispness, but they’ll still be lovely. The pastry cream is happiest in the fridge, covered tightly with cling film right on the surface to stop it forming a skin. It’ll keep well in there for about 2-3 days. I usually assemble the tarts just a few hours before I plan to serve them, topping them with the fresh fruit and glaze then. If you try to store them fully assembled for too long, that wonderful crisp pastry can get a bit soggy from the cream and fruit, and nobody wants that!
Frequently Asked Questions about Mini Fruit Tarts Inspired by Mary Berry
Can I make the pastry cream the day before?
Absolutely! Making the pastry cream the day before is actually my preferred method. It gives it plenty of time to chill thoroughly, which is crucial for a good, firm filling. Just remember to press cling film directly onto the surface of the cream to stop it from forming a skin before popping it in the fridge. It makes assembly on the day so much easier! If you’re looking for other handy make-ahead bakes, my classic shortbread fingers are brilliant for that too.
My tart shells seem a bit soft after baking. What did I do wrong?
Ah, that can happen! A couple of things might be at play. Firstly, did you remember to chill the pastry shells in the freezer for about 30 minutes *before* baking? That super cold start really helps them keep their shape and crisp up beautifully. Also, make sure you’re not overcrowding the tart tins with pastry. Don’t worry though, even if they’re not perfectly crisp, they’ll still taste lovely! For future batches, you could try chilling them for even longer, or even blind-baking with baking beans for the first 10 minutes.
Can I use frozen fruit instead of fresh?
You can, but do be careful! If you use frozen fruit, make sure you thaw it completely and then, this is the really important bit, drain off *all* the excess liquid. Pat it dry with kitchen paper too. Any extra moisture will make your lovely crisp pastry go soggy, and that’s the last thing we want! Fresh fruit is definitely best for that vibrant flavour and texture.
Before You Go
I really hope you give these Mini Fruit Tarts Inspired by Mary Berry a go! They’re such a joy to make and even more delightful to eat. Don’t forget to let me know how you get on, or perhaps share a snap on Pinterest! I’d love to see your creations. You can find lots more baking inspiration over at my Pinterest page!
Print
Mini Fruit Tarts
- Total Time: 2 hours 30 minutes
- Yield: 16 tartlets
- Diet: Vegetarian
Description
Crisp pastry shells filled with vanilla cream and topped with fresh fruit.
Ingredients
- For the Pastry Cream: 1 ½ cups whole milk, Strip of lemon peel, 3 egg yolks, ⅓ cup caster sugar, ¼ cup plain flour, 1 teaspoon vanilla bean paste
- For the Tartlet Pastry: 120 g unsalted butter, softened, ⅓ cup caster sugar, 1 teaspoon finely grated lemon zest, 1 large egg, 2 cups plain flour, Pinch of sea salt
- For the Glaze: 1 tablespoon apricot jam, 1 teaspoon water
- For the Fruit Topping: 115 g blueberries, 115 g raspberries, 2 kiwi fruits, sliced
Instructions
- Warm milk with lemon peel until steaming.
- Whisk egg yolks, sugar, and flour until smooth.
- Temper egg mixture with warm milk.
- Cook mixture in saucepan, whisking, until thickened.
- Simmer for 1 minute, then stir in vanilla.
- Chill pastry cream, covered with cling film.
- Beat butter until creamy.
- Add sugar and lemon zest, mix.
- Beat in egg.
- Fold in flour and salt to form a soft dough.
- Shape dough into a disc, wrap, and chill for 30 minutes.
- Preheat oven to 180°C and grease 16 mini tart tins.
- Roll out pastry to 5 mm thick.
- Cut circles and press into tins, trim edges.
- Prick bases with a fork and freeze shells for 30 minutes.
- Bake shells for 12-14 minutes until golden. Cool on a wire rack.
- Heat jam with water for glaze.
- Spoon chilled pastry cream into cooled tart shells.
- Arrange fruit over the cream.
- Brush fruit with glaze.
- Chill until serving.
Notes
- Chilling the pastry before baking creates crisp tart shells with clean edges.
- Dry the fruit thoroughly before decorating to keep the pastry crisp.
- Prep Time: 1 hour
- Cook Time: 30 minutes
- Category: Dessert
- Method: Baking
- Cuisine: British