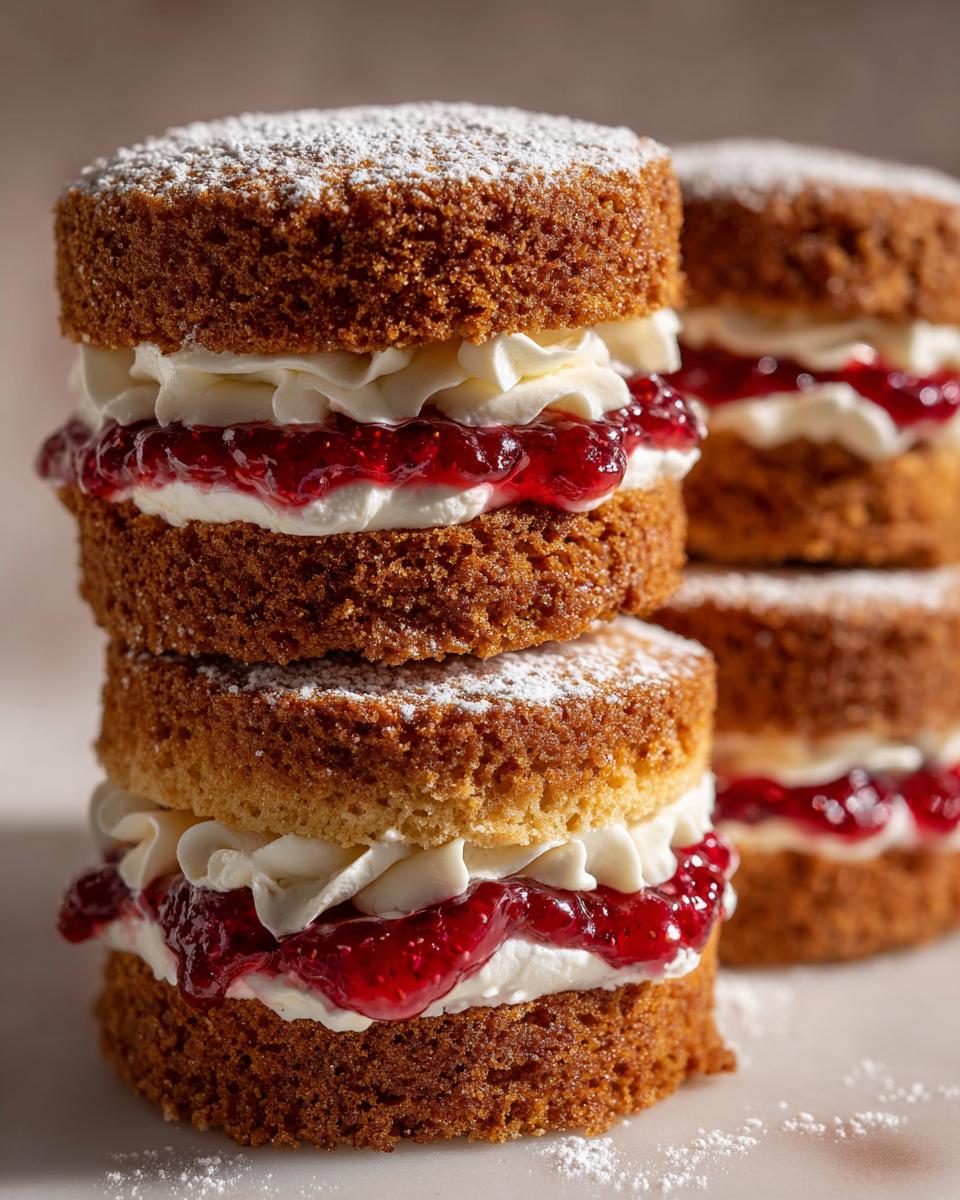
Oh, the joy of a perfectly baked mini cake! There’s just something so utterly charming about a dainty little Victoria sponge, isn’t there? It instantly transports me back to those blissful afternoon teas with my Nan, where the highlight was always a delicate slice of sponge dripping with jam and cream. Building on that memory, I’ve tinkered and tweaked to create what I think is the ultimate easy mini Victoria sponge recipe. These little beauties are so simple to whip up, you’ll be wondering why you ever bothered with fiddly layers before. They’re your go-to for a quick treat, a fancy coffee morning, or even just a Tuesday afternoon pick-me-up!
Why You’ll Love This Easy Mini Victoria Sponge Recipe
Trust me, you’re going to adore these little cakes:
- Super Simple: Honestly, they’re a doddle to make, perfect even if you’re just starting out with baking.
- Deliciously Fluffy: That light-as-a-feather sponge is just divine with classic jam and cream.
- Perfectly Portionable: No need to slice! Each mini cake is just the right size for one.
- Versatile Treat: Brilliant for afternoon tea, birthdays, or just because you fancy a bit of cake!
Ingredients for Your Easy Mini Victoria Sponge Cakes
I always use softened butter for these, it makes creaming it with the sugar so much easier. And make sure your eggs are at room temperature too, they’ll incorporate much better that way! You’ll find you don’t need much milk, just a splash to get that perfect batter consistency before baking. If you’re looking for other simple bakes, you might like these healthy low-sugar blueberry muffins too!
- 1 cup unsalted butter, softened
- 1 cup granulated sugar
- 4 large eggs
- 1 1/2 cups all-purpose flour
- 1 1/2 teaspoons baking powder
- 1/4 teaspoon salt
- 2 tablespoons milk
- 1 teaspoon vanilla flavouring
- 1/2 cup strawberry jam
- 1 cup heavy cream
- 2 tablespoons powdered sugar (for the cream)
- 2 tablespoons powdered sugar, for dusting
Step-by-Step Guide to Making Easy Mini Victoria Sponge
I always recommend getting your oven preheated and your muffin tin lined before you even start mixing. It just makes the whole process so much smoother, and you won’t be scrambling around when the batter is ready! And seriously, don’t skip the cooling step – warm cakes are delicious, but they’ll fall apart when you try to fill them, believe me!
Step 1: Get your oven fired up to 350°F (175°C). While it’s heating up, pop those paper liners into your 12-cup muffin tin. It’s always best to have everything prepped and ready to go!
Step 2: Grab a good-sized bowl and beat together your softened butter and granulated sugar. You’re looking for a lovely, pale, and fluffy mixture – this usually takes about 2 to 3 minutes with an electric mixer. This creaming stage is super important for a light sponge!
Step 3: Now, add your eggs, but do it one at a time. Mix thoroughly after each egg goes in. If you add them all at once, the batter can sometimes look a bit curdled, and we don’t want that!
Step 4: In a separate bowl, give your flour, baking powder, and salt a good whisk together. This just makes sure the baking powder and salt are evenly distributed through the flour, so no one gets a surprise salty bite!
Step 5: Gently fold the dry ingredients into your wet mixture. Don’t overmix here! Just until it’s *almost* combined. Then, stir in the milk and that lovely vanilla flavouring until you have a smooth, beautiful batter. It should be dropping consistency, not too stiff and not too runny.
Step 6: Spoon your batter evenly into the prepared muffin liners. Fill each one about two-thirds full. Overfilling will cause them to spill over, and underfilling will make them too flat, so try to be consistent!
Step 7: Bake for about 18 to 20 minutes. You’ll know they’re ready when the tops are a lovely golden brown and they spring back lightly when you gently touch them. Once out of the oven, let them cool in the tin for a few minutes before carefully transferring them to a wire rack to cool *completely*. This is crucial – I can’t stress enough how important it is they’re fully cool before filling!
Step 8: While your cakes are cooling, let’s get the filling ready. Whip up the heavy cream with the 2 tablespoons of powdered sugar until it forms soft peaks. Don’t go too stiff, or it’ll be hard to spread!
Step 9: Once your mini sponges are completely cool, gently slice each one in half horizontally. Spread a good dollop of strawberry jam onto the bottom half of each cake, then add a generous swirl of your whipped cream.
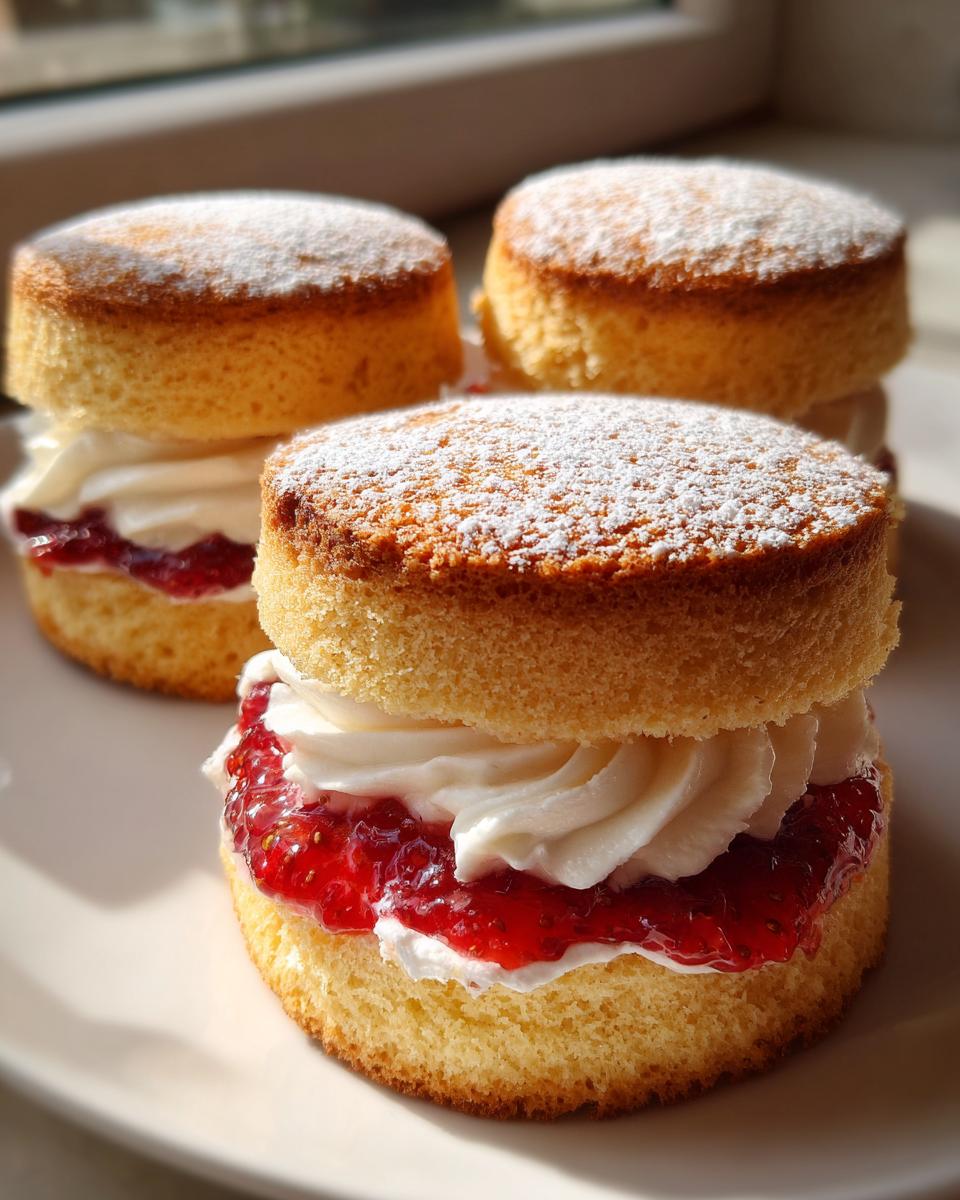
Step 10: Pop the top half of the sponge back on, and for that classic finishing touch, give them a light dusting of the remaining powdered sugar. Serve immediately and enjoy your delightful creations! If you’re looking for more Victoria sponge inspiration, check out these Victoria Sponge Cupcakes or the classic Victoria Sponge Cake.
Serving Suggestions for Your Easy Mini Victoria Sponge
These little cakes are pretty perfect on their own, but here are a few ideas to make them even more special:
Fresh Berries: A handful of fresh raspberries or strawberries tucked alongside or on top adds a lovely burst of freshness and gorgeous colour. It’s my favourite way to make them feel extra celebratory!
A Dusting of Icing Sugar: For a really classic, elegant finish that screams ‘afternoon tea’, a light sifting of powdered sugar just before serving is the way to go. It looks so pretty!
A Side of Scones: If you’re feeling ambitious and making a whole tea spread, why not add some perfectly fluffy classic scones? They all complement each other beautifully.
Storing and Reheating Your Easy Mini Victoria Sponge
These mini sponges really are best enjoyed fresh, as the sponge can get a little bit dense and the cream might weep if stored for too long. But, if you absolutely must, here’s how I’d do it to keep them as lovely as possible! Also, if you’re planning to make these for a party, think about prepping the sponge cakes a day ahead and doing the filling and decorating closer to serving time.
If you find yourself with any leftover mini Victoria sponges that aren’t filled yet, they’ll keep perfectly in an airtight container at room temperature for up to 2 days. Honestly though, they’re so quick to make, I usually just whip up a fresh batch when the craving strikes!
For the filled cakes, it’s a different story. I’d recommend storing them in the fridge in an airtight container. The cream needs to be kept cool, but be warned, the sponge might get a little bit soft from the moisture. They’ll be okay for about 24 hours, but I’d definitely aim to serve them within a few hours of filling for the best texture. Unfortunately, there’s no real reheating needed here – popping them in the oven would just melt the cream and make the sponge tough! Just let them sit on the counter for about 15-20 minutes to come up to room temperature before tucking in.
Frequently Asked Questions about Easy Mini Victoria Sponge
Can I make these ahead of time?
You absolutely can make the sponge cakes themselves a day in advance! Just make sure they’re completely cool and store them in an airtight container at room temperature. However, I really do recommend filling them with the jam and cream as close to serving time as possible. This keeps the sponge lovely and light, and the cream nice and fresh. Trying to make them entirely ahead might make the cakes a bit soggy.
What’s the best way to get a light sponge?
The secret to a super light sponge is all about the creaming of the butter and sugar – get that nice and fluffy! Also, be careful not to overmix your batter once you add the flour. Just mix until it’s combined. And remember to let them cool down completely before you even think about slicing and filling them. Warm cakes just don’t hold their shape or texture!
Can I use a different jam?
Oh, absolutely! Strawberry jam is a classic for a reason, but feel free to use whatever your favourite is. Raspberry jam is also divine in a Victoria sponge, or even a lovely apricot jam if you fancy something a little different. Just make sure whatever jam you choose is a good quality one – it really does make a difference to the flavour!
Before You Go
I really hope you give these easy mini Victoria sponges a whirl this week! They’re such a delightful little treat and honestly, they’re so simple to make. If you do try them, please let me know how you get on in the comments below – I’d absolutely love to hear about it! And feel free to share your pics over on Pinterest too!
Print
Easy Mini Victoria Sponge Cakes
- Total Time: 40 minutes
- Yield: 12 mini cakes
- Diet: Vegetarian
Description
Simple mini Victoria sponge cakes with jam and cream, perfect for afternoon tea.
Ingredients
- 1 cup unsalted butter, softened
- 1 cup granulated sugar
- 4 large eggs
- 1 1/2 cups all purpose flour
- 1 1/2 teaspoons baking powder
- 1/4 teaspoon salt
- 2 tablespoons milk
- 1 teaspoon vanilla flavoring
- 1/2 cup strawberry jam
- 1 cup heavy cream
- 2 tablespoons powdered sugar
- 2 tablespoons powdered sugar, for dusting
Instructions
- Preheat your oven to 350°F (175°C) and line a 12-cup muffin tin with paper liners.
- In a bowl, beat the butter and granulated sugar until light and fluffy, about 2 to 3 minutes.
- Add the eggs one at a time, mixing well after each addition.
- In another bowl, whisk together the flour, baking powder, and salt.
- Gradually fold the dry ingredients into the wet mixture. Stir in the milk and vanilla flavoring until smooth.
- Divide the batter evenly into the muffin liners, filling each about two-thirds full.
- Bake for 18 to 20 minutes, until the tops are golden and spring back lightly when touched. Cool completely.
- Whip the heavy cream with powdered sugar until soft peaks form.
- Slice each mini sponge in half. Spread a layer of strawberry jam on the bottom half, then add the whipped cream.
- Place the tops back on and dust lightly with powdered sugar before serving.
Notes
- Chill the cream slightly before whipping for a better texture and a more stable filling.
- Prep Time: 20 minutes
- Cook Time: 20 minutes
- Category: Dessert
- Method: Baking
- Cuisine: British