You know, I think every home baker has a moment with the classic Victoria sponge. It’s that perfect, soft, jam-filled cake that feels like a hug from your nan. But let’s be honest, sometimes you don’t want to slice a whole cake, especially if it’s just for a cuppa with a friend or you need a neat little treat for the school bake sale. That’s exactly why I started making these Mary Berry Victoria sponge cupcakes. They’ve got all the charm and deliciousness of the original, but in perfectly portioned, grab-and-go bites.
I first made a batch for my book club last summer. I wanted something that felt elegant but wasn’t fussy to serve. Watching everyone’s faces light up when they bit into that fluffy cake, sweet jam, and cloud of cream was just brilliant. It’s now my absolute go-to when I need a bake that feels special but is secretly straightforward. Honestly, if you can make a simple cupcake, you can absolutely master this classic. It’s all about that lovely, light texture and the happy combination of flavours.
Why You’ll Love These Mary Berry Victoria Sponge Cupcakes
Honestly, if I’m baking, it needs to hit that sweet spot of being impressive but not stress-inducing. That’s the magic of this recipe – it feels fancy and tastes incredible, but it’s genuinely simple enough for a Wednesday afternoon bake.
There’s a reason this style of cake is a British institution. Making them as cupcakes just makes life easier and, in my opinion, even more delightful. Here’s why I think you’ll adore them:
- They’re brilliantly easy to make. No fancy piping or complicated techniques. If you can whisk eggs and sugar and gently fold in flour, you’re 90% of the way there. It’s a wonderfully forgiving batter.
- Perfect, fuss-free portions. No more fighting over the biggest slice of cake! Everyone gets their own little masterpiece, which is perfect for parties, packed lunches, or just controlling your own treat intake (or not!).
- That dreamy, soft texture. The warm milk trick is a game-changer. It gives you a cupcake that’s unbelievably light and moist, just like you’d get from a proper bakery. Trust me, one bite and you’ll know.
- A timeless, crowd-pleasing flavour. You can’t go wrong with the classic combo of vanilla sponge, sweet jam, and fresh cream. It pleases absolutely everyone, from kids to grandparents.
- Ideal for any gathering. Whether it’s a fancy afternoon tea, a birthday, or just because, they always look lovely on a tiered stand. They’re a guaranteed hit, much like my blueberry banana protein muffins are for a healthier start.
Ingredients for Mary Berry Victoria Sponge Cupcakes
Gathering your ingredients is the first step to baking bliss. I find it’s worth using the best you can – a good-quality jam and real vanilla extract make all the difference in such a simple recipe. And don’t worry, it’s a very short, straightforward list!
Here’s everything you’ll need, broken down so it’s super easy to follow. I’ve listed them just as I measure them out on my counter. Precision matters with baking, so I use proper measuring spoons for things like that baking powder – it really affects the rise.
For the Cupcakes
- 1 cup (125g) all-purpose flour
- 1 ¼ teaspoons baking powder (yes, that quarter teaspoon counts!)
- ⅛ teaspoon salt
- 2 large eggs, best at room temperature
- ¾ cup (150g) caster sugar
- ¼ cup (55g) unsalted butter, softened, plus extra for greasing if needed
- ½ cup (120ml) whole milk
- 1 ½ teaspoons vegetable oil (or any neutral-tasting oil)
- 1 teaspoon vanilla extract (my secret addition for extra flavour)
For the Filling and Topping
- ½ cup strawberry or raspberry jam (I love a seedless raspberry for a smooth finish)
- ¾ cup (180ml) heavy whipping cream (it must be heavy/double cream to whip properly)
- 1 tablespoon caster sugar, for dusting
How to Make Mary Berry Victoria Sponge Cupcakes: Step-by-Step
Right, let’s get baking! The key here is not to rush. Giving your eggs and sugar a proper whip and being gentle when you fold everything together is what guarantees that beautifully light texture we’re after.
Step 1: First things first, get your oven preheating to 350°F (180°C) and pop paper cases into a 12-hole muffin tin. This little bit of prep means your batter isn’t sitting around waiting later. In a medium bowl, whisk together your flour, baking powder, and salt. Give it a good mix so the baking powder is evenly distributed – nobody wants a bite of just baking powder!
Step 2: Now for the magic bit. Crack your room-temperature eggs into a large mixing bowl. Using an electric hand whisk or a stand mixer, beat them for a good minute until they’re frothy. Then, with the mixer still running, gradually rain in the caster sugar. Keep beating for a solid 4 to 5 minutes. You’ll know it’s ready when the mixture is very pale, thick, and leaves a ribbon trail on the surface when you lift the beaters. This is your ticket to a light and airy sponge.
Step 3: While that’s whipping up, gently heat the milk and butter in a small saucepan (or the microwave for 30-second bursts) just until the butter melts. You don’t want it boiling, just warm to the touch. Take it off the heat and stir in the vegetable oil. This warm liquid is the secret to that wonderfully soft, bakery-style crumb.
Step 4: Time to bring it all together. Using a large metal spoon or a silicone spatula, gently fold about half of your flour mixture into the whipped eggs and sugar. Use a light, cutting and lifting motion – you’re not stirring cement! Once it’s mostly combined, fold in the rest of the flour. A few streaks are fine at this point.
Step 5: Now, slowly pour the warm milk mixture down the side of the bowl into the batter. Gently fold and mix until you have a smooth, silky batter. Please, please don’t overmix here – just fold until no streaks of liquid remain. Overmixing is the enemy of a tender cupcake!
Step 6: Divide the batter evenly between your 12 paper cases, filling each one about two-thirds full. I use an ice cream scoop for this to keep things neat and even. Bake for 20 to 22 minutes. They’re done when they’re a light golden colour and spring back when lightly pressed, or a skewer poked into the centre comes out clean.
Step 7: Let the cupcakes cool in the tin for 5 minutes – they’re too delicate to move straight away. Then, carefully transfer them to a wire rack to cool completely. This is crucial! If you try to fill them while they’re warm, the cream will melt into a puddle. Patience is a virtue here, I promise.
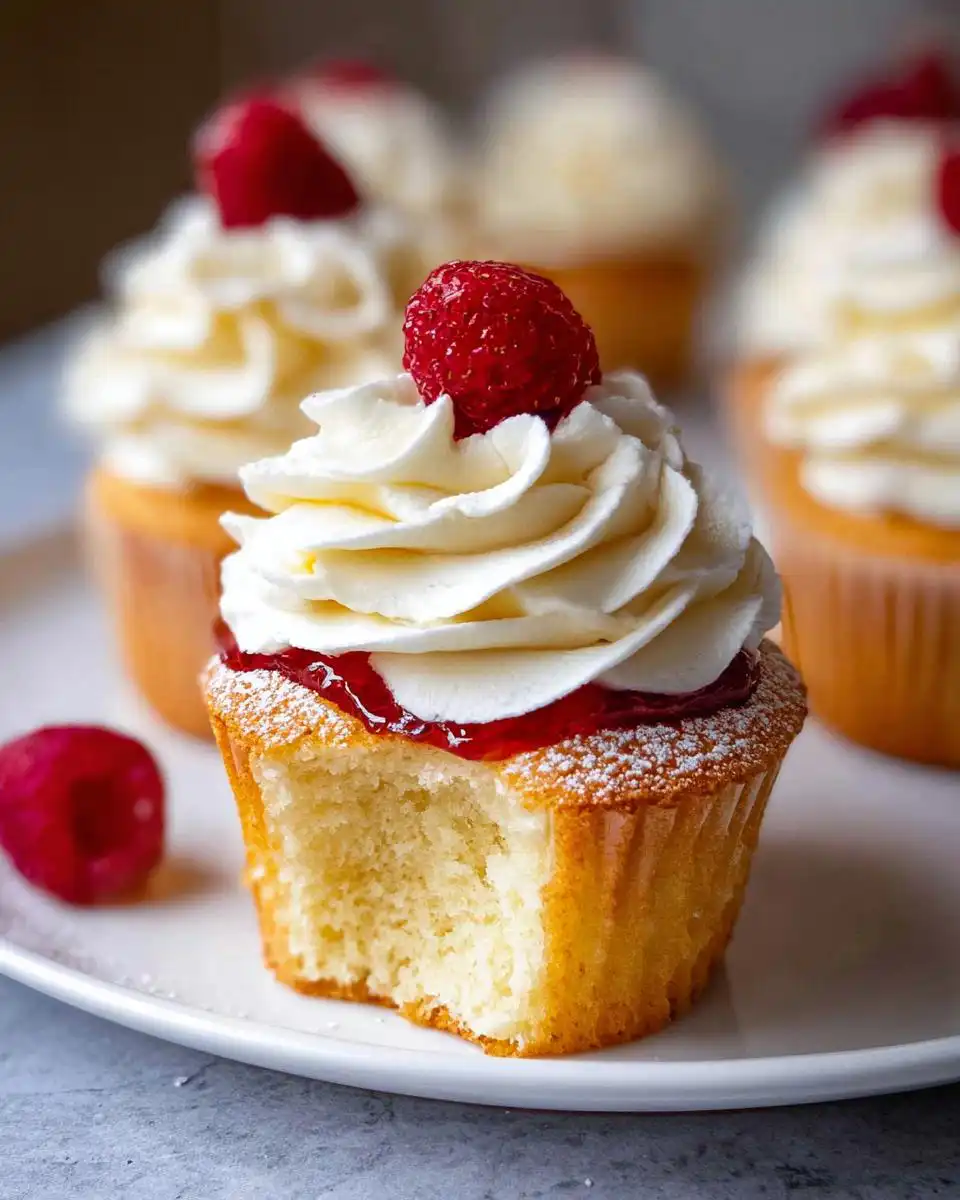
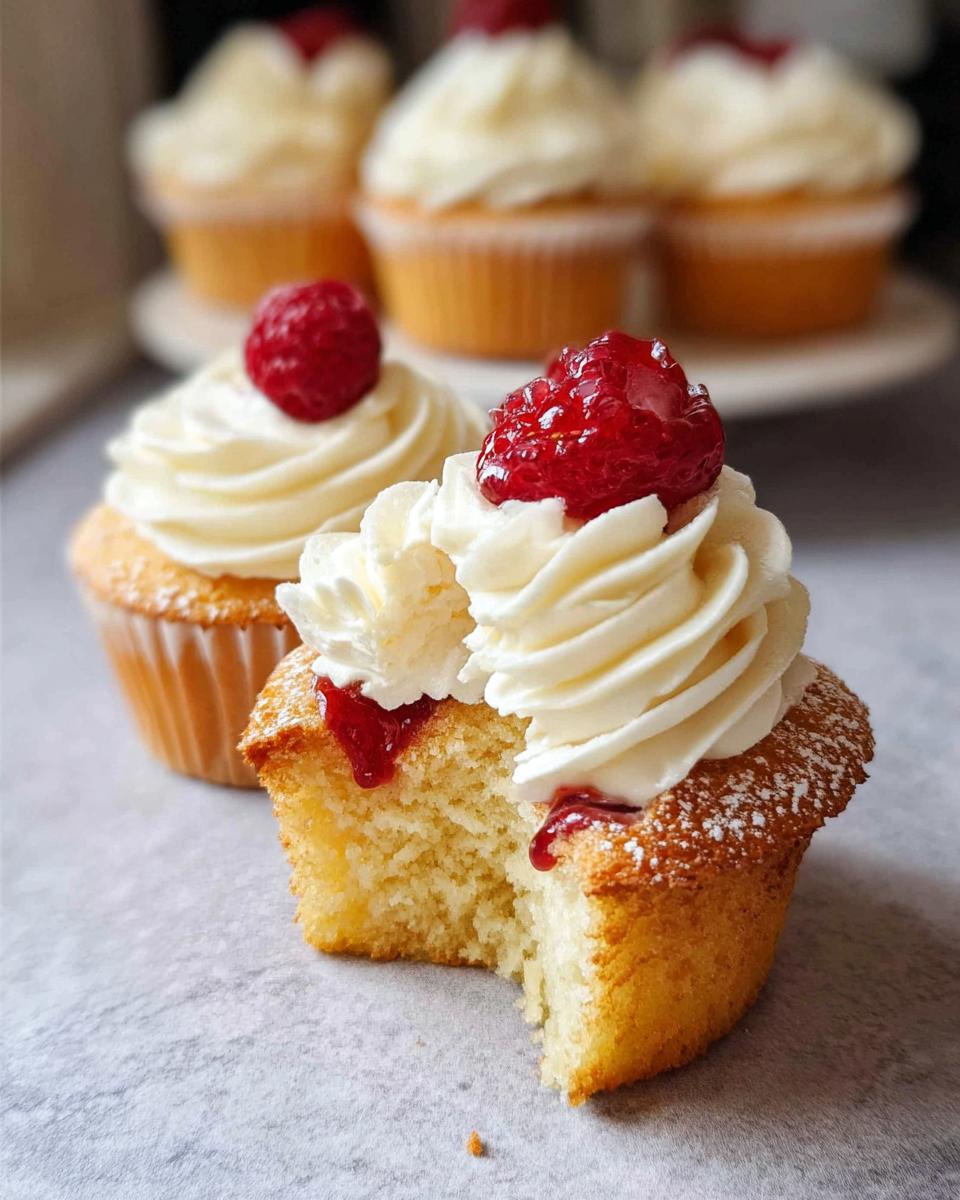
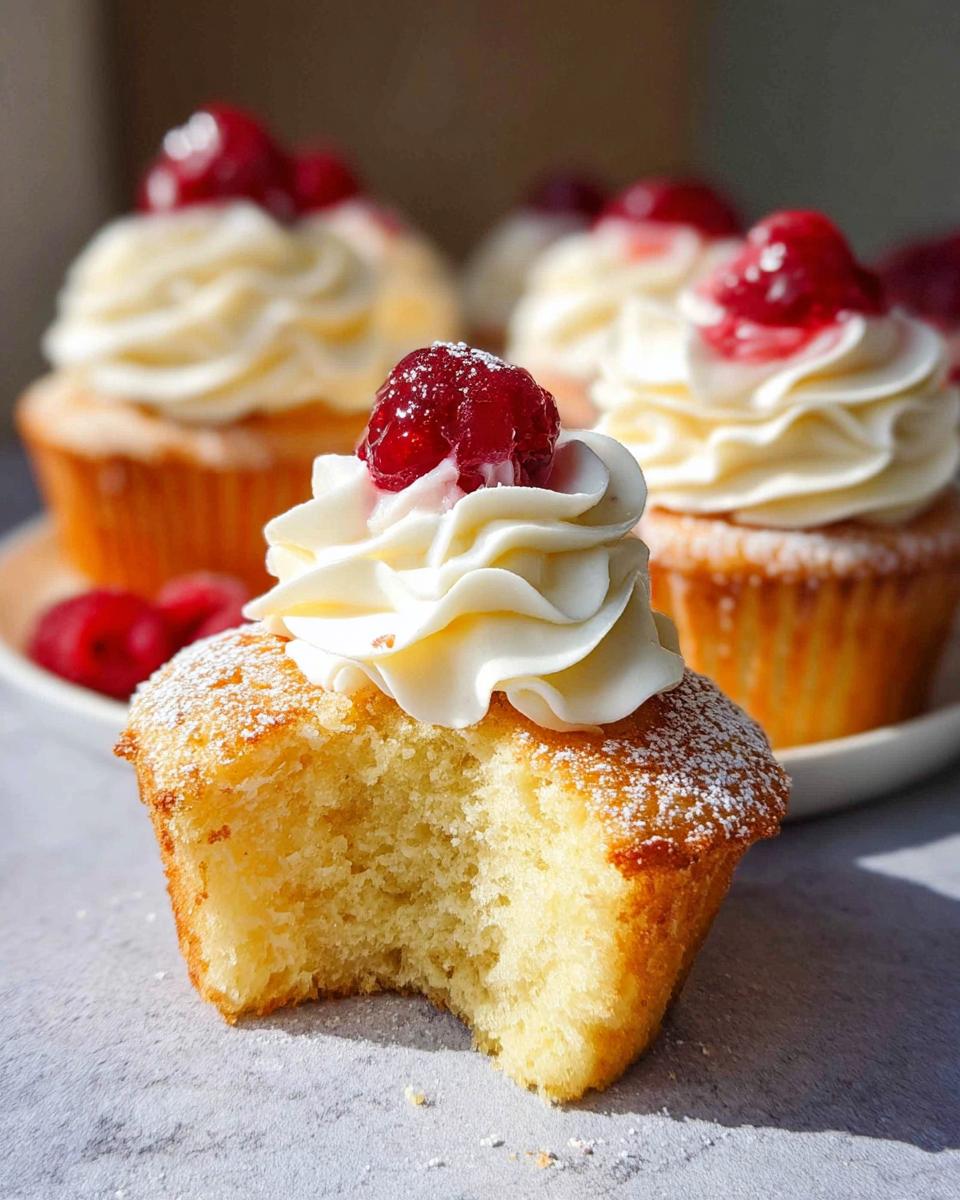
Step 8: For the assembly, whip your heavy cream in a chilled bowl until it forms soft, billowy peaks. Don’t go too far or it’ll be grainy. Now, take a small, sharp knife and cut a little cone-shaped section out of the top of each cooled cupcake. Slice this cone in half to make a little lid. Spoon about a teaspoon of jam into the hole, then a dollop of whipped cream. Pop the little lid back on top at a jaunty angle. Finally, dust the whole lot with a little caster sugar for that classic, elegant finish. And there you have it – your own perfect, portioned Victoria sponge cupcakes that are just as lovely as my vegan lemon cupcakes, but in a wonderfully traditional way.
Serving Suggestions for Your Mary Berry Victoria Sponge Cupcakes
For me, serving these is half the fun! They’re so versatile and just feel right with a few classic pairings that make any occasion feel a bit special.
A Proper Pot of Tea: You simply can’t beat it. A steaming pot of English breakfast or Earl Grey is the perfect partner, cutting through the sweetness and making the whole experience feel wonderfully traditional. It’s my non-negotiable for a proper afternoon tea spread.
A Side of Fresh Berries: A little bowl of extra strawberries or raspberries adds a gorgeous fresh, fruity pop that complements the jam inside. It also makes the whole plate look more colourful and inviting, plus it’s a great way to add a bit of vitamin C to your treat!
A Strawberry Lime Sparkler: For a non-alcoholic option that feels really festive, I love serving these with a strawberry lime mocktail. The zingy lime and fizzy water are so refreshing and light next to the rich sponge and cream.
An Extra Dollop of Clotted Cream: Why stop at the whipped cream inside? A little extra spoonful of clotted cream on the side is pure, unadulterated luxury. It’s the ultimate indulgent touch that takes these cupcakes straight to Devon cream tea territory. Go on, treat yourself!
Storing and Freezing Mary Berry Victoria Sponge Cupcakes
Honestly, the whipped cream filling means these are best fresh, but with a little planning, you can absolutely enjoy them later or even get ahead for a special occasion. Here’s my no-fuss guide to keeping them tasting brilliant.
For storing, keep any unfilled cupcakes in an airtight container at room temperature for up to 2 days – they stay beautifully soft. Once they’re filled with jam and cream, they’re definitely a ‘same day’ treat for the best texture. If you must keep them, pop them in the fridge for up to 24 hours, though the sponge can firm up a bit. Just let them sit out for 15 minutes before serving to take the chill off.
For freezing, only freeze the unfilled cupcakes. Let them cool completely, then wrap each one tightly in cling film and pop them all in a freezer bag. They’ll be perfect for up to 3 months. To use, just thaw them overnight in the container on your counter. My top meal prep tip? Bake a big batch of the plain cupcakes and freeze them. Then, you can whip up a fresh, impressive dessert in minutes whenever you need it – just thaw, fill, and serve!
Mary Berry Victoria Sponge Cupcakes FAQs
I get asked about these little bakes all the time! Here are the answers to the most common questions from my own kitchen mishaps and triumphs.
Can I use regular granulated sugar instead of caster sugar?
You can, but the texture won’t be *quite* as perfect. Caster sugar is finer, so it dissolves much more easily into the eggs when you’re whipping them, giving you that lovely light, airy sponge. Regular sugar can leave a slightly grainier texture. If it’s all you have, just give the eggs and sugar an extra minute of beating to help it along. For the dusting on top, though, caster sugar is a must – it looks so much prettier!
Why is the milk warmed?
It’s my favourite little trick in this recipe! Warming the milk and butter together before adding it to the batter helps create a beautifully soft, moist crumb. It relaxes the gluten in the flour just a bit, stopping the cupcakes from becoming tough. Think of it like the secret to a professional bakery-style texture – it really works. Just make sure it’s warm, not hot, so it doesn’t start cooking the eggs when you mix it in.
Can I make these dairy-free?
You can certainly try for a dairy-free Victoria sponge! Use a plant-based milk (soya or oat work well) and a dairy-free block butter alternative for the batter. For the filling, a thick coconut cream can be whipped, though it will add a coconut flavour. It’s a bit of an experiment, but the basic sponge method is adaptable. For more baking inspiration, you can always check out my Pinterest boards where I save all sorts of alternative bakes.
Nutritional Information
Just a quick, honest note about the numbers – I’m all about the joy of baking and eating, but I know some folks like to have an idea.
I don’t provide precise nutritional data for my recipes because it can vary so much depending on the exact brands of jam, butter, and cream you use, and how generously you fill your cupcakes! If you’re tracking, I’d recommend using your favourite online calculator with your specific ingredients for the most accurate count. For me, these are a wonderful, occasional treat to be enjoyed with a cup of tea and zero guilt.
Before You Go
These have become my happy little bake – they never fail to bring a smile and a bit of that classic British comfort to the table. I really hope you give them a go.
I’d love to know how your Mary Berry Victoria sponge cupcakes turn out! Pop a comment below to tell me, or share a picture if you made them for a special occasion. Happy baking!
Print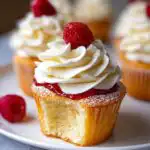
Mary Berry Victoria Sponge Cupcakes
- Total Time: 42 min
- Yield: 12 cupcakes
- Diet: Vegetarian
Description
Classic British Victoria sponge cupcakes with jam and cream, made in an easy, portioned style.
Ingredients
- 1 cup all-purpose flour
- 1 1/4 teaspoons baking powder
- 1/8 teaspoon salt
- 2 large eggs
- 3/4 cup caster sugar
- 1/4 cup unsalted butter
- 1/2 cup whole milk
- 1 1/2 teaspoons vegetable oil
- 1/2 cup strawberry or raspberry jam
- 3/4 cup heavy whipping cream
- 1 tablespoon caster sugar for dusting
Instructions
- Preheat your oven to 350°F (180°C). Line a 12-cup muffin tin with paper cases.
- Whisk the flour, baking powder, and salt together in a bowl.
- In a separate bowl, beat the eggs for 1 minute. Gradually add the sugar and beat for 4 to 5 minutes until pale and thick.
- Heat the milk and butter together until the butter melts and the mixture is warm. Stir in the oil.
- Gently fold the dry ingredients into the egg mixture in two additions until just combined.
- Slowly pour the warm milk mixture into the batter and mix until smooth.
- Divide the batter evenly among the paper cases, filling each about two-thirds full.
- Bake for 20 to 22 minutes until lightly golden and a skewer inserted comes out clean.
- Cool in the tin for 5 minutes, then transfer to a wire rack to cool completely.
- Whip the cream until it forms soft peaks.
- Cut a small section from the centre of each cupcake. Fill with jam, then top with whipped cream.
- Lightly dust with caster sugar before serving.
Notes
- Warm milk helps create a softer, bakery-style texture in the cupcakes.
- Prep Time: 20 min
- Cook Time: 22 min
- Category: Dessert
- Method: Baking
- Cuisine: British