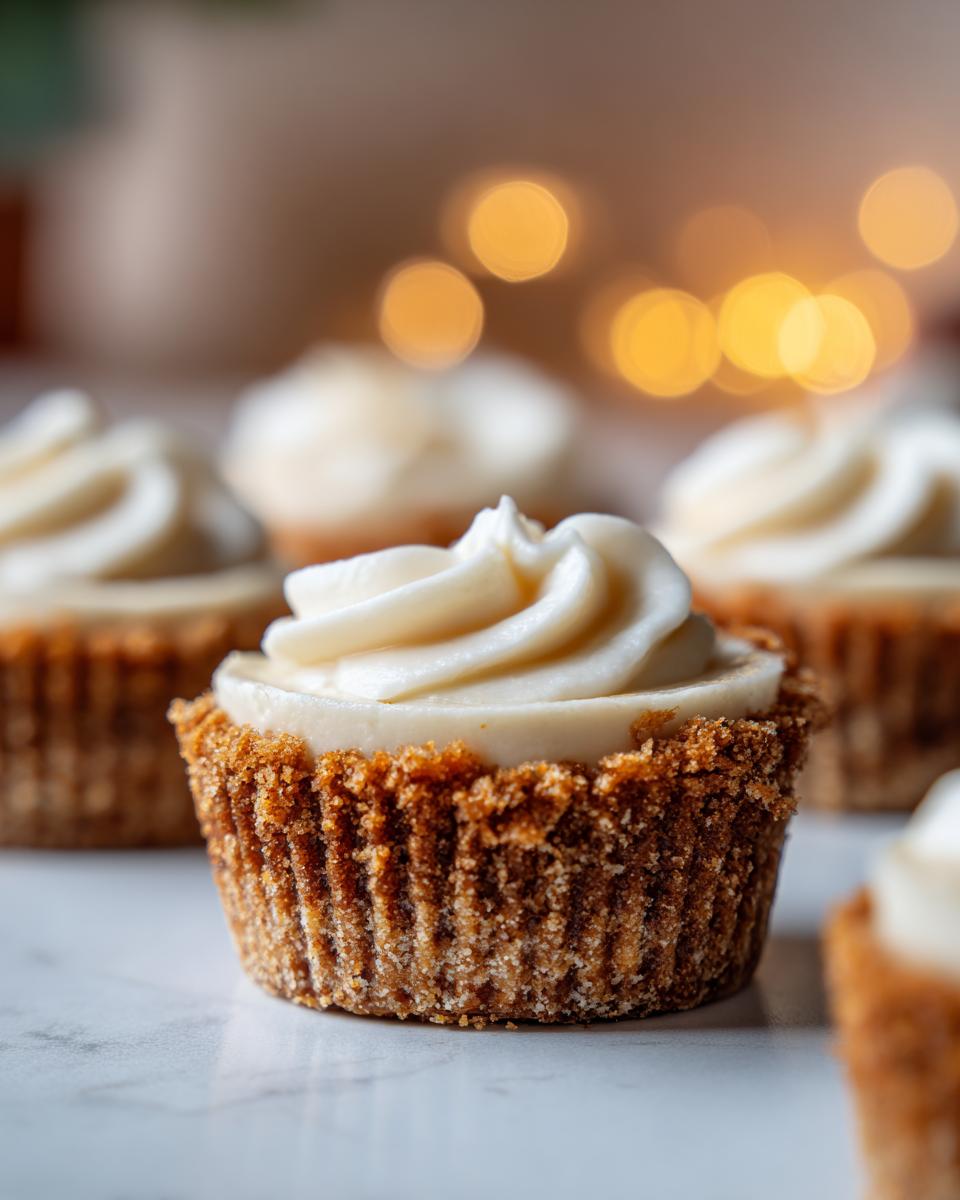
Honestly, who doesn’t absolutely adore a cheesecake? But let’s be real, sometimes the thought of making a whole one can feel a bit daunting, right? That’s exactly why I fell head over heels for this easy mini cheesecake recipe. They’re just the perfect little bites of creamy, dreamy goodness without all the fuss. I first whipped these up for a friend’s birthday picnic, and they were such a hit! Everyone was raving about how delicious they were and, more importantly, how easy they were to manage while juggling plates and conversation. Genius!
Why You’ll Love This Easy Mini Cheesecake Recipe
- Super Speedy: Seriously, these take next to no time to put together. You’ve got your prep done in about 15 minutes, which is quicker than my usual queue for a decent cuppa!
- Effortlessly Delicious: That classic creamy cheesecake filling with a buttery biscuit base? It’s just perfection in every single bite. You won’t believe how good they are for how simple they are.
- Perfect for Parties: Forget faffy slicing! These are already portioned, making them ideal for gatherings, bake sales, or just a weekend treat that won’t leave you with loads of washing up.
- Customisable Fun: While they’re divine just as they are, you can easily dress them up with fruit, chocolate drizzle, or a dollop of cream. They’re a blank canvas for your creativity!
Ingredients for Your Easy Mini Cheesecakes
Right then, let’s get our ingredients sorted! You’ll be surprised how few bits and bobs you actually need for these little stunners. I always make sure my cream cheese is properly softened – it makes all the difference to getting that super smooth filling, trust me. And for the bases, good old digestives are unbeatable!
- 1 cup crushed digestive biscuits
- 4 tablespoons unsalted butter, melted
- 8 ounces cream cheese, softened
- 1/2 cup granulated sugar
- 1 teaspoon vanilla flavoring
- 2 large eggs
- 1/2 cup sour cream
Step-by-Step Guide to Making Easy Mini Cheesecakes
Okay, this is where the magic happens! Don’t be intimidated, it’s a really straightforward process. My top tip? Get your oven preheated and your muffin tin lined *first*, that way you’re not scrambling when the mixture is ready. And a little peek at Mary Berry’s fantastic cheesecake always inspires me when I’m in the zone!
Step 1: First things first, get your oven ticking over to 160°C (that’s 140°C for a fan oven, or Gas Mark 3 for you gas users!). Then, line a standard 12-cup muffin tin with paper liners. This is key to stopping them from sticking and making them easy to pop out later.
Step 2: In a little bowl, tip in your crushed digestive biscuits. Pour over the melted butter and give it a good stir until all those biscuit crumbs are nicely coated. It should look a bit like wet sand – perfect!
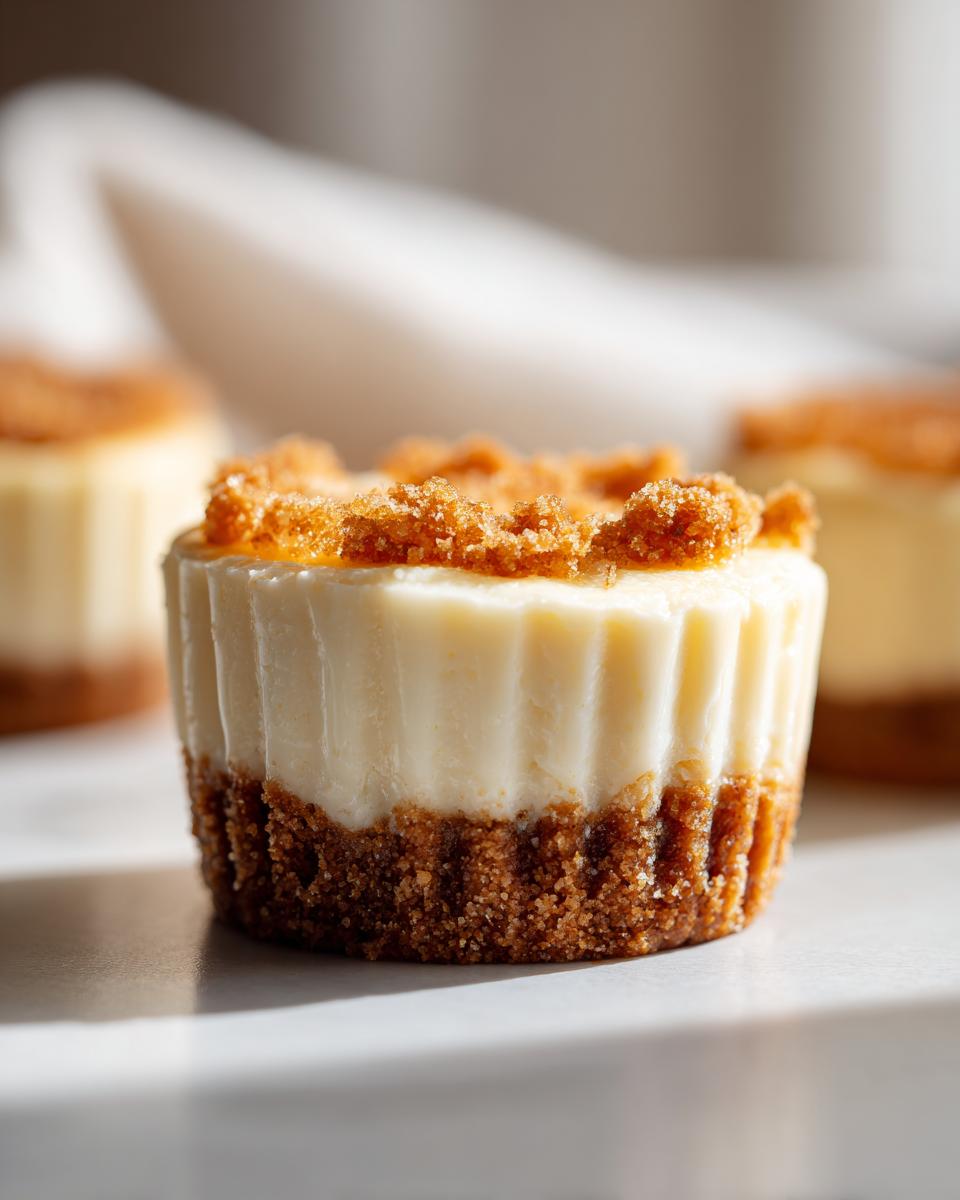
Step 3: Now, spoon this biscuit mixture into each of your paper liners. Use the back of your spoon (or the bottom of a small glass) to press it down firmly. You want a nice, even base, so give it a good firm press.
Step 4: Pop these bases into the preheated oven for just 5 minutes. We’re just setting them a little, not cooking them through. Once they’re done, take them out and let them cool slightly while you get on with the filling.
Step 5: Grab a clean bowl and beat your softened cream cheese until it’s lovely and smooth. No lumps allowed here, so give it a good whisk or beat it with an electric mixer if you have one.
Step 6: Add in the granulated sugar and that splash of vanilla flavouring. Mix it all up until it’s combined and smooth again.
Step 7: Beat in your eggs, one at a time. Make sure each egg is fully incorporated before you add the next. Then, stir in your sour cream until the mixture is silky smooth. It should look beautifully creamy now!
Step 8: Spoon this gorgeous cream cheese filling evenly over each of your biscuit bases in the muffin tin. Gently fill them up, leaving a tiny bit of space at the top, as they might puff up ever so slightly.
Step 9: Bake these little beauties for 15 to 18 minutes. You’re looking for the edges to be set, but the centre should still have a tiny wobble when you gently nudge the tin. Overbaking is the enemy of creamy cheesecake, so keep an eye on them!
Step 10: Once they’re done, turn off the oven completely and just leave the cheesecakes inside with the door ajar for about 10 minutes. This slow cooling stops them from cracking. Then, take them out and let them cool down completely on a wire rack before popping them into the fridge for at least 2 hours. Chilling is essential for that perfect texture!
Serving Suggestions for Your Easy Mini Cheesecakes
These little treasures are fab on their own, but who doesn’t love a little something extra? Here are a few ideas to really make them sing!
Fresh Berry Compote: A simple, slightly tart berry compote, maybe using raspberries or mixed berries, is just divine spooned over the top. It adds a lovely freshness that cuts through the richness beautifully. You can find a brilliant recipe for caramel apples that might inspire a fruity compote too, think of it as sister to that idea!
Whipped Cream and Mint: For a cloud-like topping, a generous swirl of lightly sweetened whipped cream with a fresh mint leaf on top looks so elegant and tastes heavenly. It’s simple decadence!
Salted Caramel Drizzle: A little drizzle of good quality salted caramel sauce over the top? Oh, you absolute *must*. It’s a game-changer, adding that perfect sweet and salty kick. We’ve got some ideas in our candied pecans posts that might help you find the perfect caramel inspiration too!
Chocolate Shavings: Fancy a bit of indulgence? A sprinkle of good dark chocolate shavings over the top offers a delightful contrast and a touch of sophisticated flavour.
Storing and Reheating Your Easy Mini Cheesecakes
Nobody wants a sad, soggy cheesecake! Luckily, these little beauties are super easy to store and keep their lovely texture really well. They’re brilliant for making ahead, which is a lifesaver when you’re planning a party or just want a sweet treat ready and waiting.
So, the absolute best way to store your easy mini cheesecakes is in the fridge. Pop them into an airtight container – stacking them carefully is fine, but if you’re worried about them sticking, a layer of baking parchment between tiers works wonders. They’ll stay absolutely delicious for up to 3-4 days. Honestly, they’re usually gone before then in my house!
Now, reheating isn’t really necessary for these little guys, as they are best served chilled. But if you fancy them *ever* so slightly warmer, you could give them a few seconds in a very low oven (like 100°C) – just watch them like a hawk, you don’t want them to cook further! For meal prepping, making them the day before or even two days before is perfect. Just keep them chilled and they’ll be ready to grab and go whenever that cheesecake craving hits!
Frequently Asked Questions About Easy Mini Cheesecakes
What’s the secret to avoiding cracked mini cheesecakes?
Ah, the dreaded crack! For mini cheesecakes, the best defence is not overbaking them and using the gentle cooling method. Baking them just until the centre has a slight wobble is key. Then, turning off the oven and letting them cool inside for a bit really helps prevent that sudden temperature change that causes cracks. It’s all about taking it slow once they’re out of the main bake!
Can I make these ahead of time for a party?
Absolutely! These easy mini cheesecakes are perfect for making ahead. In fact, they taste even better after a good chill! You can make them a day or two in advance and keep them in an airtight container in the fridge. They’re much better than a no-bake option for this reason, as they hold their structure beautifully. You can even prepare some fun toppings like a lovely fruit sauce or a drizzle inspired by key lime pie bars to add just before serving. They’re almost as simple to prep as no-bake strawberry cheesecake bars, but with that glorious baked texture!
Can I use a different biscuit base for these?
You certainly can! While digestive biscuits are my go-to for that lovely mild sweetness, feel free to experiment. Graham crackers would give you a slightly different flavour profile, or you could even try gingersnap biscuits for a warming kick. If you’re feeling adventurous, there are some great no-bake chocolate coconut energy bar ideas out there that could inspire a base, though you might need to adjust the butter ratio slightly – just aim for that perfect crumbly, slightly damp texture that holds together when pressed!
Before You Go
I really hope you give these easy mini cheesecakes a whirl! They’re such a simple joy to make and even more fun to eat. Let me know in the comments if you try them, or even better, share your creations with me over on Pinterest or check out more tips on Medium!
Print
Easy Mini Cheesecakes
- Total Time: 38 min
- Yield: 12 mini cheesecakes
- Diet: Vegetarian
Description
Bite-sized cheesecakes with a creamy filling and buttery biscuit base, ideal for parties.
Ingredients
- 1 cup crushed digestive biscuits
- 4 tablespoons unsalted butter, melted
- 8 ounces cream cheese, softened
- 1/2 cup granulated sugar
- 1 teaspoon vanilla flavoring
- 2 large eggs
- 1/2 cup sour cream
Instructions
- Preheat your oven to 160°C (140°C Fan/Gas Mark 3). Line a 12-cup muffin tin with paper liners.
- In a bowl, mix crushed digestive biscuits with melted butter until evenly combined.
- Divide the mixture between the liners and press firmly to form the base.
- Bake the bases for 5 minutes. Remove from the oven and let cool slightly.
- In a separate bowl, beat the cream cheese until smooth.
- Add the sugar and vanilla flavoring, mixing until fully combined.
- Beat in the eggs one at a time. Mix in the sour cream until smooth.
- Spoon the filling evenly over the prepared bases.
- Bake for 15 to 18 minutes until the centres are just set with a slight wobble.
- Turn off the oven and let the cheesecakes cool inside for 10 minutes. Remove and cool completely before chilling for at least 2 hours.
Notes
- Chill thoroughly before serving for the best texture and clean removal from the liners.
- Prep Time: 15 min
- Cook Time: 23 min
- Category: Dessert
- Method: Baking
- Cuisine: British