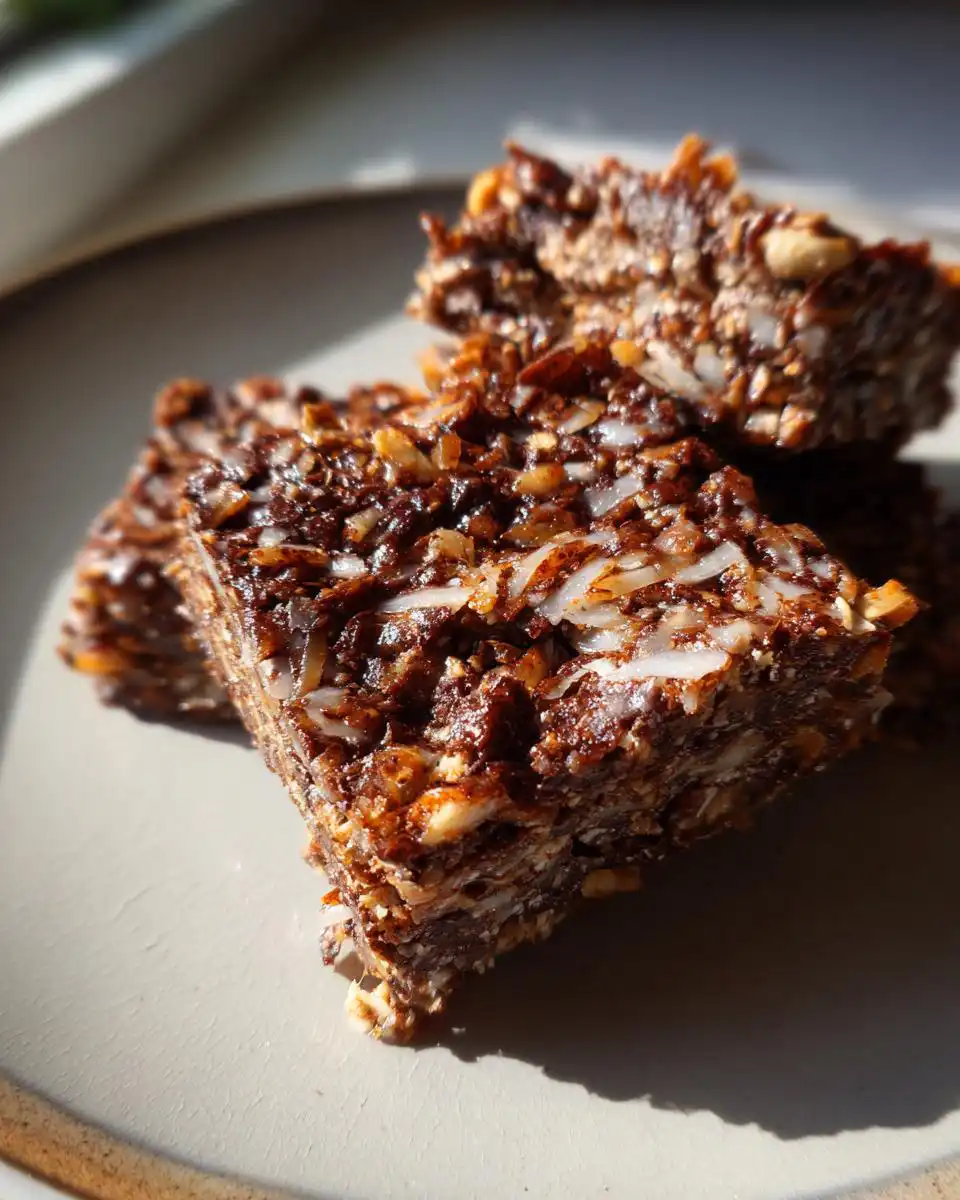
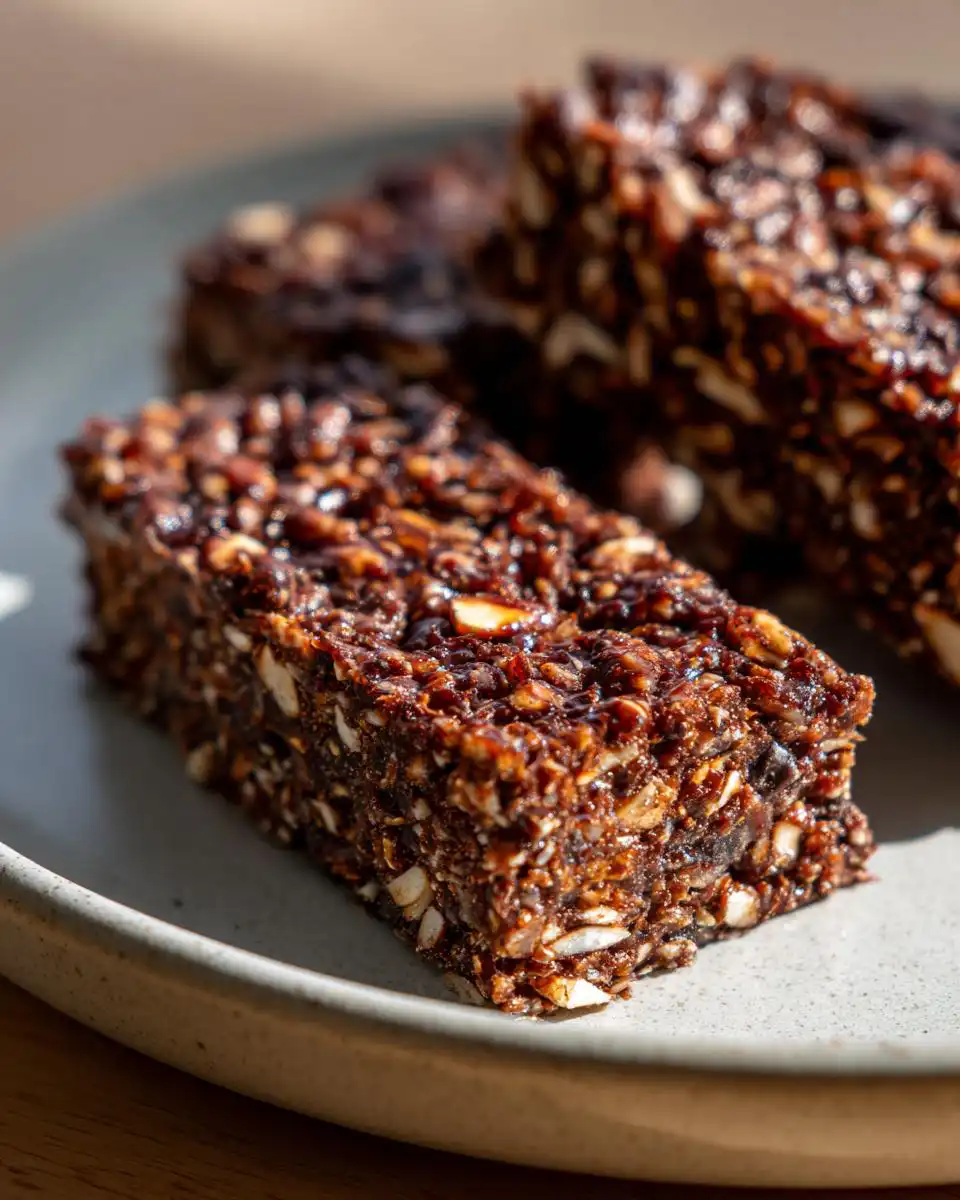
Okay, I’m confessing something here. I’m the person who, around 3 PM every single day, starts rummaging through the pantry looking for something chocolatey. I used to grab a candy bar and feel awful about it later, so I started making these No-Bake Chocolate Coconut Energy Bars Healthy years ago during my endless quest for snacks that actually make you feel good. They’re my absolute go-to because they’re seriously just 7 ingredients (I promise!), you don’t even need to turn on the oven, and they’re sweetened with just dates and a touch of maple syrup. After testing dozens of healthy snack recipes, this one’s the winner—it feels like a treat but fuels you up with real, whole-food energy. Trust me, they’re the chocolate fix you can feel great about.
Why You’ll Love These No-Bake Chocolate Coconut Energy Bars Healthy
Let me tell you, once you make a batch of these, you’ll understand the hype. They solve so many snack-time problems in one go!
First off, you don’t need your oven. Seriously, just a food processor and a fridge. On a hot day or when you’re just too busy, that’s a total game-changer.
They come together in about 15 minutes of hands-on time. I make them while my coffee is brewing in the morning—that’s how fast it is.
They’re packed with the good stuff: natural energy from the dates and nuts, a protein punch from the almond butter, and just enough dark chocolate flavor to satisfy that craving without the crash.
Plus, they’re naturally vegan and gluten-free (just use certified oats), and they’re perfect for meal prep. I stash them in the fridge and grab one whenever a hunger emergency strikes.
Ingredients for Your No-Bake Chocolate Coconut Energy Bars Healthy
Okay, let’s talk ingredients. I’ve found the brand and type really matters here for texture and flavor. I always use Medjool dates because they’re soft, sticky, and sweet—perfect for holding everything together. If your dates are a little dry, just soak them in warm water for 10 minutes and drain them well before using. It makes all the difference!
- 1 cup pitted Medjool dates (packed)
- 1 cup raw almonds
- 1/2 cup rolled oats (gluten-free if needed)
- 1/4 cup unsweetened cocoa powder
- 1/4 cup unsweetened shredded coconut
- 1/4 cup creamy almond butter
- 1 tablespoon pure maple syrup
- 1 teaspoon vanilla extract
- 1/4 teaspoon sea salt
That’s it! I love that you can probably find everything in your pantry right now. If you’re looking for more no-bake bar inspiration, I’ve got a killer No-Bake Peanut Butter Oatmeal Bars recipe and some super simple Healthy Granola Bars you should try next. They’re all perfect for that afternoon slump.
How to Make No-Bake Chocolate Coconut Energy Bars Healthy: Step-by-Step
Here’s my biggest tip: do not skip lining your pan! It seems small, but it’s the difference between your bars lifting out in one perfect slab and you having to chisel them out with a spatula. Trust me, I’ve learned this the hard way. Parchment paper is your best friend here.
Step 1: First, grab a small baking dish—I use an 8×8 inch pan—and line it with a sheet of parchment paper, letting the ends hang over the sides. This creates little handles so you can lift the whole thing out later. No greasing needed!
Step 2: Now, toss your pitted dates, raw almonds, and rolled oats into the bowl of a food processor. Pulse it about 10-15 times until the mixture looks crumbly and the almonds are broken down into small pieces. You don’t want a fine powder here, just a nice, chunky rubble.
Step 3: Add everything else to the processor: the cocoa powder, shredded coconut, almond butter, maple syrup, vanilla, and salt. Put the lid back on and process it for a good 45 seconds to a minute. Stop and scrape down the sides once halfway through. You’re done when you can pinch a bit between your fingers and it holds together firmly. If it’s too dry, add a teaspoon of water. If it’s too wet and sticky, sprinkle in another tablespoon of oats.
Step 4: Dump that delicious, crumbly chocolate mixture right into your lined pan. Now, get serious about pressing it down. I use the bottom of a flat measuring cup or a glass, and I press *really* hard all over to create a compact, even layer. This is what gives you bars that don’t fall apart when you bite into them.
Step 5: Pop the pan into the refrigerator for at least 1 hour to set. I know it’s tempting to cut them early, but this chill time is non-negotiable—it lets everything firm up perfectly.
Step 6: Time to slice! Use the parchment paper handles to lift the whole slab out of the pan onto a cutting board. With a sharp knife, cut it into 8 bars (or 12 squares if you prefer smaller snacks). Wipe your knife clean between cuts for the neatest edges. Then, dig in! For more bar-making inspiration, check out my full guide to a Healthy Snack Bar Recipe.
Expert Tips for the Best No-Bake Chocolate Coconut Energy Bars
After making these more times than I can count, I’ve picked up a few secrets that make them foolproof every single time. My biggest tip? Use soft, sticky Medjool dates. If yours are on the drier side, just soak them in warm water for 10 minutes and pat them dry before using. It makes the whole mixture bind together like a dream.
If your mixture feels a bit crumbly and won’t hold when you press it, don’t panic! Add a teaspoon of water and process it again. On the flip side, if it seems too wet and sticky, sprinkle in another tablespoon of oats until you get that perfect, moldable texture.
Need a nut-free version? You can totally make it happen. Swap the almonds for raw sunflower seeds and use sunflower seed butter instead of almond butter. The flavor is a little different, but you still get that amazing chewy, chocolatey bar everyone loves.
What to Serve with Your Energy Bars
Honestly, I usually just grab a bar and run out the door! But if you’re sitting down for a proper snack or turning it into a mini-meal, a few simple pairings make it feel really special.
A Protein-Packed Yogurt Bowl: My favorite is crumbling a bar over a bowl of Greek yogurt or skyr. The creamy, tangy yogurt with the chewy, chocolatey bar is absolute magic. It turns a simple snack into something that keeps you full for hours. For more ideas like this, I have a whole guide to building a High Protein Yogurt Bowl.
Fresh Berries on the Side: A handful of raspberries or strawberries adds a juicy, bright pop of flavor that cuts through the richness. Plus, the extra fiber and vitamins are a total win.
A Cold Glass of Milk: It’s a classic for a reason! I love dunking a bar in a glass of cold almond milk or oat milk. It’s the ultimate comforting, wholesome snack combo.
Storage and Reheating for Your No-Bake Chocolate Coconut Energy Bars Healthy
These bars are perfect for making ahead! I always store mine in an airtight container in the fridge, where they stay fresh and firm for up to a week. They’re honestly best served chilled straight from the fridge—that’s when the texture is just right, nice and chewy.
If you want to keep them longer, the freezer is your friend. Just wrap them individually in a little parchment paper and pop them in a freezer bag. They’ll keep beautifully for up to 3 months. Thaw one in the fridge for an hour or so whenever a snack craving hits.
My favorite meal prep trick? Make a double batch. It takes barely any extra time, and you’ll thank yourself all week when you have a healthy, chocolatey snack ready to grab and go. No reheating needed, ever!
Nutritional Information for No-Bake Chocolate Coconut Energy Bars Healthy
I want to be totally transparent with you about the nutrition for these bars. The numbers can vary quite a bit depending on the exact brands and types of ingredients you use—like how sticky your dates are or the specific almond butter you have in your pantry.
So, please take the info here as a friendly estimate. For one bar, you’re looking at roughly 180 calories, with about 5 grams of protein and 5 grams of fiber. It’s a fantastic guide to show you this is a wholesome, filling snack, but it’s not a precise calculation. The most important thing is that you’re fueling your body with real, simple ingredients!
Frequently Asked Questions
I get a lot of the same great questions about these bars, so I figured I’d put the answers right here! These are the things I wondered when I first started making them, too.
Can I make these nut-free?
Absolutely! Just swap the almonds for raw sunflower seeds and use sunflower seed butter instead of almond butter. The texture is still perfect, and you get a lovely, slightly different flavor. It’s a fantastic option for school lunches or allergies.
What if I don’t have maple syrup?
Honestly, maple syrup works best because it’s sticky and helps bind everything. If you’re in a pinch, you can try a tablespoon of honey (though it won’t be vegan) or even a little date syrup. I’d avoid runny sweeteners like agave, as they can make the bars too soft.
How long do they really last?
In an airtight container in the fridge, they’re perfect for about a week. For longer storage, freeze them! I wrap each bar individually and keep them in a freezer bag for up to 3 months. They thaw in your lunchbox by noon. For more snack inspiration, you can always find me pinning new ideas over on Pinterest.
Before You Go
Alright, that’s my secret weapon for beating the 3 PM slump. Give these bars a try this week—I promise they’re as easy and delicious as they sound. I’d love to hear how your batch turns out, so leave a comment below and tell me all about it. Happy snacking!
Print
No-Bake Chocolate Coconut Energy Bars
- Total Time: 1 hour 15 min
- Yield: 8 bars
- Diet: Vegan
Description
A simple, healthy snack bar made with dates, nuts, coconut, and cocoa powder. No baking required.
Ingredients
- 1 cup pitted dates
- 1 cup raw almonds
- 1/2 cup rolled oats
- 1/4 cup cocoa powder
- 1/4 cup unsweetened shredded coconut
- 1/4 cup almond butter
- 1 tablespoon maple syrup
- 1 teaspoon vanilla extract
- 1/4 teaspoon salt
Instructions
- Line a small baking dish with parchment paper.
- Add dates, almonds, and oats to a food processor. Pulse until the mixture is crumbly.
- Add cocoa powder, shredded coconut, almond butter, maple syrup, vanilla extract, and salt to the processor.
- Process until the mixture sticks together when pressed.
- Transfer the mixture to the prepared dish. Press it down firmly and evenly.
- Refrigerate for at least 1 hour to set.
- Remove from the dish and cut into bars.
Notes
- Store bars in an airtight container in the refrigerator for up to a week.
- For a nut-free version, use sunflower seeds instead of almonds and sunflower seed butter.
- If the mixture is too dry, add a teaspoon of water. If it’s too wet, add more oats.
- Prep Time: 15 min
- Cook Time: 0 min
- Category: Snack
- Method: No-Bake
- Cuisine: American