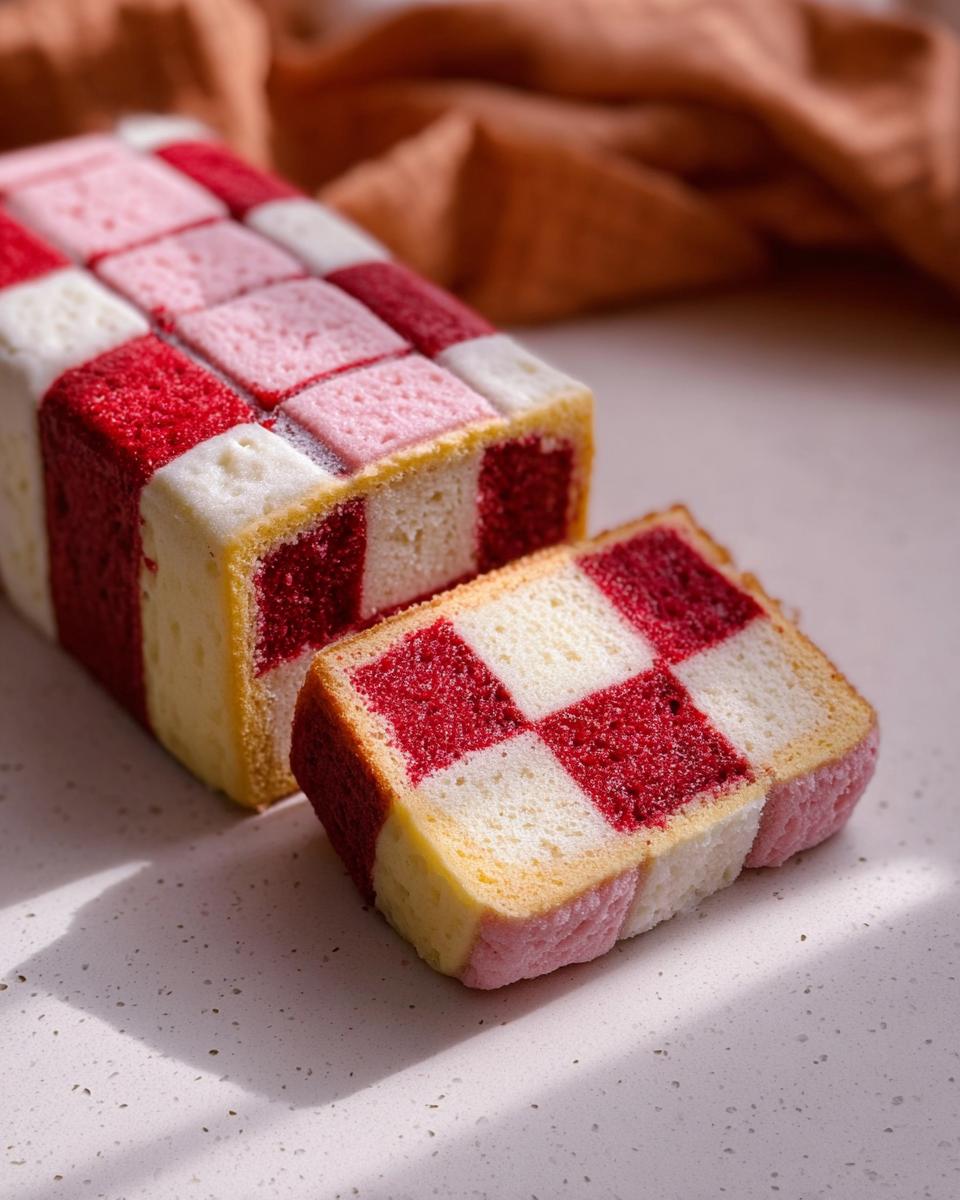
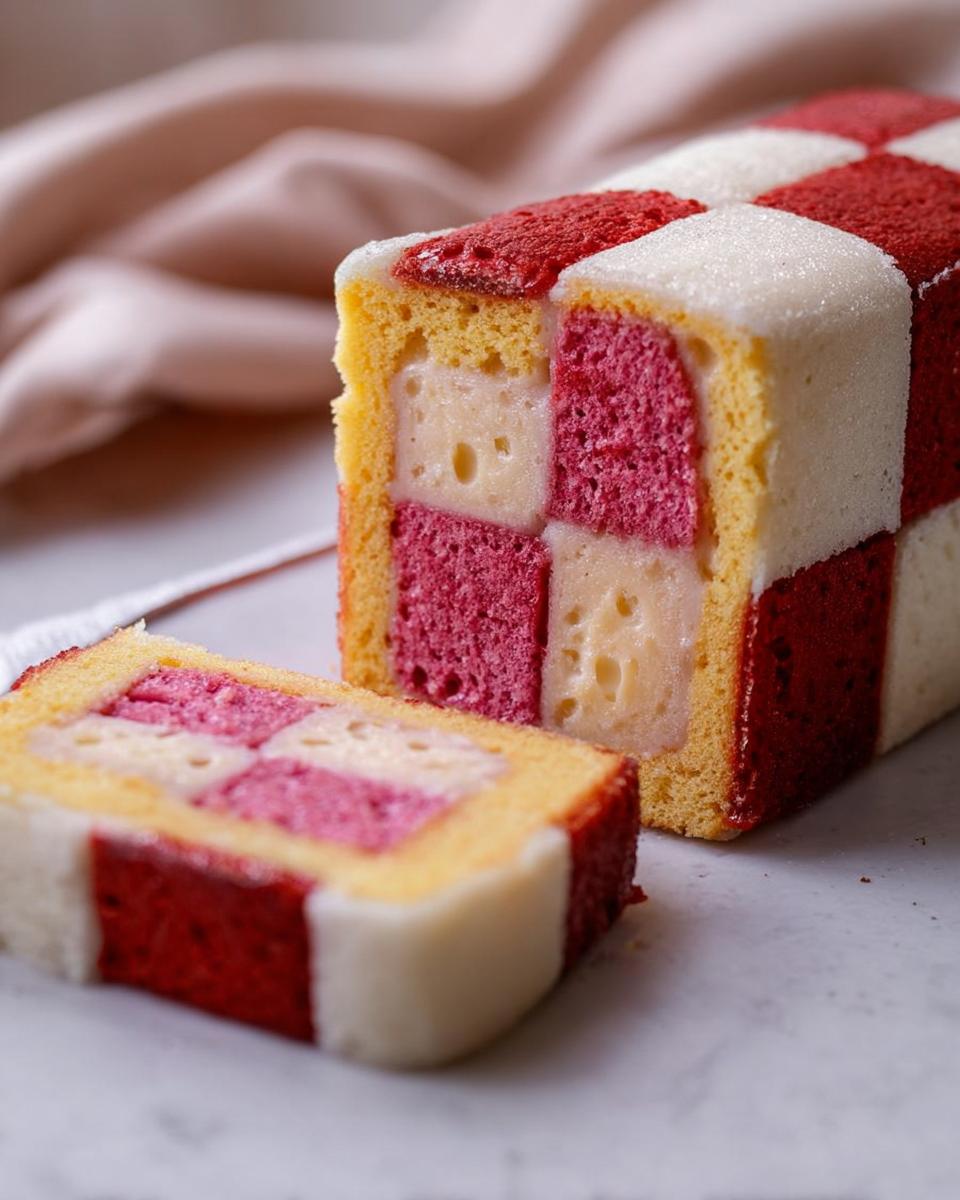
Oh, the Battenberg! It’s one of those cakes that just screams tradition and makes you feel all cosy inside, doesn’t it? Honestly, I still remember the first time I made this Mary Berry Inspired Battenberg Cake. My mum used to make them for special occasions, and seeing those neat little squares of pink and white, all wrapped up in marzipan, felt so grown-up and magical. It’s genuinely perfect for an afternoon cuppa with friends or when you just fancy a little bit of homemade elegance. It might look a bit fiddly, but trust me, it’s surprisingly straightforward, and the result is just pure joy.
Why You’ll Love This Mary Berry Inspired Battenberg Cake
- It’s surprisingly easy to make, even if it looks impressive!
- The classic vanilla and almond sponge flavour is just divine.
- That beautiful checkerboard pattern is a real showstopper.
- It’s the absolute perfect treat for afternoon tea or a special occasion.
- The lovely combination of soft sponge, sweet jam, and smooth marzipan is irresistible.
Ingredients for Your Mary Berry Inspired Battenberg Cake
Right then, here’s what you’ll need to make this classic Battenberg. Don’t worry if you don’t have ground almonds tucked away, you can just pop some blanched almonds into a food processor and blitz them until they’re fine. I always use unsalted butter for my cakes; it gives you a bit more control over the saltiness. And do try and get decent raspberry jam – it really does make a difference to the flavour!
- 225g unsalted butter, softened
- 225g caster sugar
- 4 medium eggs
- 175g self-raising flour
- 50g ground almonds
- 1 tsp baking powder
- 1 tsp vanilla extract
- 2 tbsp whole milk
- Red food colouring
- 4 tbsp raspberry jam
- 500g Marzipan
- Icing sugar for rolling
Step-by-Step Instructions for the Perfect Mary Berry Inspired Battenberg Cake
Alright, let’s get baking! Now, the secret to a really good Battenberg is taking your time with each step. Don’t rush it, and you’ll be rewarded with a cake that looks and tastes absolutely divine. I always double-check my oven temperature with a separate thermometer because they can be a bit temperamental in my kitchen!
Step 1: First things first, get that oven preheated to 170°C fan – that’s about 190°C or Gas Mark 5 if you’re using an older oven. Grab your 20cm square cake tin and give it a good grease. Then, line it with baking parchment. Now for a little trick Mary Berry herself uses: fold some foil and line it with parchment to create a divider right down the middle of your tin. This is crucial for getting those lovely neat halves!
Step 2: In a big mixing bowl, beat your softened butter and caster sugar together until it’s all pale and fluffy. This is where you get loads of lovely air into the cake mix. Then, add your eggs, one at a time, making sure you mix really well after each one. If it starts to look a bit like it’s curdling, don’t panic! Just add a tablespoon of your flour and give it a good whisk, it usually sorts itself right out.
Step 3: Now, gently fold in your self-raising flour, ground almonds, and baking powder. Stir in the vanilla extract and milk until you have a lovely smooth batter. It should be a nice thick consistency, not too runny.
Step 4: This is the fun bit! Divide the batter equally between two separate bowls. To one of the bowls, add a few drops of red food colouring. I usually start with about 3-4 drops and then add a tiny bit more if I want a deeper colour, mixing it through really well until it’s evenly pink. You want a nice vibrant colour!
Step 5: Spoon each batter into its designated side of the prepared tin, making sure you smooth the tops evenly. You can give the tin a gentle tap on the counter to settle it and get rid of any air bubbles.
Step 6: Pop it into the preheated oven and bake for about 25 to 30 minutes. You’ll know it’s ready when the cakes are springy to the touch, and a skewer poked into the centre comes out clean. If you’re baking other things at the same time, keep an eye on it as oven temperatures can vary!
Step 7: Let the cakes cool in the tin for about 10 minutes – this stops them from breaking as you take them out. Then, carefully turn them out onto a wire rack to cool completely. Patience here is key!
Step 8: Once they’re completely cool, trim the edges off both sponges so you’ve got nice straight sides. Then, cut each sponge lengthways into two equal strips. You should now have four long rectangles, two pink and two plain.
Step 9: Time to assemble! Spread raspberry jam on one long side of a pink sponge strip. Carefully place a plain strip right next to it, jam-side down. Spread more jam on the top of this plain strip, then place the remaining strips on top, alternating the colours. You should have a lovely checkerboard where you can see the colours peeking through!
Step 10: Lightly dust your work surface with icing sugar. Roll out your marzipan into a big rectangle, about 5mm thick. You want it large enough to wrap around the whole cake comfortably. Like making any classic cake, getting the marzipan smooth is important!
Step 11: Lightly brush the outside of your assembled cake with a little raspberry jam – this acts like glue! Carefully place the cake onto the marzipan rectangle and then wrap the marzipan neatly around the sponge. Try to get it as smooth as possible and seal the join underneath.
Step 12: Trim any excess marzipan from the ends for a neat finish. Pop the finished cake into the fridge for about 20 minutes to let the marzipan firm up slightly. This makes it much easier to slice and serve. And there you have it – your perfect Battenberg!
Serving Suggestions for Your Mary Berry Inspired Battenberg Cake
This classic Battenberg is lovely all on its own, but here are a few little extras that make it a real treat:
A Pot of Cream: A small dollop of lightly whipped double cream served alongside the cake just melts in the mouth and adds a touch of pure indulgence.
Fresh Berries: A small handful of fresh raspberries or strawberries on the side really brighten up the plate and echo the jam flavour beautifully.
A Proper Cuppa: Of course, no afternoon tea is complete without a lovely pot of Earl Grey or English Breakfast tea. It cuts through the sweetness perfectly and is just the most classic pairing imaginable.
Easy Wholemeal Scones: If you’re feeling ambitious and want to go full afternoon tea, serving it with some light wholemeal scones is just divine!
Storing and Reheating Your Mary Berry Inspired Battenberg Cake
Keeping your Battenberg perfect is pretty easy, honestly! My top tip is to wrap it really well. Once it’s cooled completely, I like to wrap it really snugly in baking parchment, and then I pop that into an airtight container. That double layer stops the marzipan from drying out, which is the worst!
You can keep your beautiful Mary Berry Inspired Battenberg Cake at room temperature for up to 3 days. Honestly, though, it never lasts that long in my house! If you happen to have leftovers (a miracle!), just make sure it’s well-wrapped to keep it lovely and moist. This cake is best served at room temperature, so no need to reheat it. Just take it out of its wrapping about 15 minutes before you fancy a slice. It’s perfect for popping in a packed lunch, too!
Frequently Asked Questions About Mary Berry Inspired Battenberg Cake
Got a question about making this lovely cake? I’ve tried to cover the bits people often ask about:
Can I make this Battenberg cake ahead of time?
Absolutely! You can bake the cakes and assemble them a day in advance. In fact, I think it’s even better the next day as the flavours have a chance to really meld together beautifully. Just make sure it’s wrapped up tightly!
What can I do if my marzipan cracks when I’m wrapping the cake?
Oh, this can happen! Don’t worry too much. The best thing to do is warm up a tiny bit of extra jam or even some apricot jam and ‘glue’ the cracks together. You can smooth it over with your finger, and then pop it in the fridge to set. No one will ever know!
Can I freeze Battenberg cake?
Honestly, I don’t recommend freezing this Battenberg cake, especially once it’s covered in marzipan. The marzipan can get a bit sticky and a strange texture when it thaws. It’s best enjoyed fresh. If you fancy a Battenberg variation that freezes well, you might like to try my easy chocolate Battenberg recipe, which tends to hold up a bit better!
Before You Go
I really hope you give this Mary Berry Inspired Battenberg Cake a go! It’s such a lovely bake to share. Please do let me know how yours turns out in the comments below – I absolutely love seeing your creations!
Print
Mary Berry Inspired Battenberg Cake
- Total Time: 65 min
- Yield: 10 servings
- Diet: Vegetarian
Description
A classic British Battenberg cake with pink and vanilla sponge, raspberry jam, and a marzipan coating. Ideal for afternoon tea.
Ingredients
- 225g unsalted butter, softened
- 225g caster sugar
- 4 medium eggs
- 175g self-raising flour
- 50g ground almonds
- 1 tsp baking powder
- 1 tsp vanilla extract
- 2 tbsp whole milk
- Red food colouring
- 4 tbsp raspberry jam
- 500g marzipan
- Icing sugar for rolling
Instructions
- Preheat your oven to 170C fan. Grease a 20cm square cake tin. Line the tin with baking parchment and create a divider across the centre using folded foil lined with parchment.
- In a large mixing bowl, beat the butter and caster sugar until pale and fluffy. Add the eggs one at a time, mixing well after each addition.
- Fold in the self-raising flour, ground almonds, and baking powder. Stir in the vanilla extract and milk until smooth.
- Divide the batter evenly between two bowls. Add a few drops of red food colouring to one bowl and mix until evenly coloured.
- Spoon each batter into one side of the prepared tin and smooth the tops evenly.
- Bake for 25 to 30 minutes until the cakes are springy to the touch and a skewer inserted into the centre comes out clean.
- Leave the cakes to cool in the tin for 10 minutes, then transfer to a wire rack to cool completely.
- Trim the edges from both cakes and cut each sponge lengthways into two equal strips to create four long rectangles.
- Spread raspberry jam on one long side of a pink sponge strip and attach a plain strip beside it. Spread more jam on top, then place the remaining strips on top in alternating colours to create a checkerboard pattern.
- Lightly dust your work surface with icing sugar and roll the marzipan into a large rectangle about 5mm thick.
- Brush the outside of the assembled cake lightly with raspberry jam. Place the cake on the marzipan and wrap it neatly around the sponge, sealing the join underneath.
- Trim the ends for a neat finish and chill for 20 minutes before slicing and serving.
Notes
- Keep the Battenberg wrapped tightly in baking parchment or an airtight container for up to 3 days at room temperature.
- Prep Time: 35 min
- Cook Time: 30 min
- Category: Cakes
- Method: Baking
- Cuisine: British