

Oh, hello there! Are you ready for a chocolatey dream? Because I’ve got a recipe that’s going to absolutely blow your socks off, inspired by none other than the queen of home cooking herself, Nigella Lawson. This Flourless Mocha Cake Inspired by Nigella Lawson is just… pure magic. When I first tried making it, it felt like I was channeling a bit of her effortless glamour right in my own kitchen. It’s surprisingly simple but tastes like it came from a fancy patisserie – rich, dense, and with that perfect hint of coffee that just makes the chocolate sing. Trust me, this is the kind of cake you make when you want to truly impress, or just treat yourself because, well, you deserve it!
Why You’ll Love This Flourless Mocha Cake
- It’s incredibly rich and intensely chocolatey – a true chocoholic’s paradise!
- The texture is divine: fudgy, dense, and melts in your mouth.
- Naturally gluten-free, so everyone can enjoy a slice.
- Easier to make than you might think, even with the special water bath.
- That hint of coffee just elevates the chocolate flavour beautifully.
Ingredients for Your Flourless Mocha Cake
Don’t be put off by the ingredient list, it all comes together beautifully! You’ll need some really good dark chocolate here; it makes all the difference.
- 340 g dark chocolate, chopped (use a good quality one, it’s worth it!)
- 1 teaspoon coffee extract
- 1 teaspoon vanilla bean paste
- 225 g unsalted butter, cubed
- 5 large eggs, at room temperature
- 1 ¼ cups caster sugar
- 2 cups light cream
- ⅓ cup caster sugar
- 5 large egg yolks
- 150 g fresh raspberries
- Icing sugar for dusting
Crafting Your Flourless Mocha Cake Inspired by Nigella Lawson
Right then, let’s get baking! This part is where the real magic happens. Don’t worry if a water bath sounds a bit fancy; it’s my secret weapon for that super fudgy texture, and it’s not as fiddly as you might think.
Step 1: First things first, get that oven preheated to 180°C (that’s 160°C fan/350°F). Then, take your 9-inch springform tin and wrap the outside tightly with foil. I usually do a couple of layers to make sure no water seeps in. This is crucial!
Step 2: Pop your chopped dark chocolate and cubed butter into a heatproof bowl. Set this bowl over a saucepan of simmering water – make sure the bottom of the bowl isn’t touching the water! – and stir gently until it’s all melted and gloriously smooth. Once it’s done, take it off the heat and stir in your coffee extract and vanilla bean paste. Oh, the smell already!
Step 3: In a separate, nice big mixing bowl, give your eggs and caster sugar a good whisk. You’re not looking for stiff peaks here, just whisk them until they’re smooth and look a little lighter in colour. Easy peasy.
Step 4: Now, slowly, and I mean *slowly*, pour that lovely melted chocolate mixture into your bowl with the eggs and sugar. Keep whisking continuously as you do this. It’s important to incorporate it gradually to get a beautifully even batter.
Step 5: Pour all that gorgeous batter into your foil-wrapped springform tin. Give the top a little smooth with your spatula so it’s nice and even.
Step 6: This is the water bath bit! Place your filled cake tin into a large roasting tray. Carefully pour hot water into the roasting tray until it comes about halfway up the sides of your cake tin. Be gentle so you don’t splash water into the cake itself!
Step 7: Loosely cover the whole thing with foil (you don’t want it to steam like a pudding) and carefully pop it into your preheated oven. Bake it for about 1 hour and 15 minutes. Trust me, the wait will be worth it!
Step 8: Once baked, carefully take the cake tin out of the water bath. Let the cake cool down completely in the tin before you even think about removing the tin. Patience is key here! Then, remove the springform side. Want a tip for a super-clean slice? Chill the cake in the fridge for a bit before you serve it – it makes slicing so much neater.
Making the Silky Vanilla Custard
Now, while that gorgeous cake is doing its thing (or chilling!), let’s whip up a quick vanilla custard to go with it. It’s honestly so simple and makes the whole dessert feel extra special.
Step 1: In your bowl, whisk together those lovely 5 egg yolks and the ⅓ cup of caster sugar until they’re nice and smooth. No lumps allowed!
Step 2: Get your light cream and the vanilla bean paste into a saucepan. Heat it up over medium heat. You’re just waiting for it to get hot enough that tiny bubbles start to form around the edge – don’t let it boil over!
Step 3: This bit is important: slowly pour just a little bit of the warm cream into your egg yolk mixture while whisking like mad. This is called tempering, and it stops your yolks from scrambling. Once that’s mixed in, you can gradually whisk in the rest of the cream. Easy!
Step 4: Pour the whole lot back into the saucepan. Now, keep stirring it over low heat constantly. You’ll feel it start to thicken up. You know it’s ready when it coats the back of a spoon. Don’t rush this bit, or you might get scrambled eggs!
Step 5: Pour your glorious custard through a fine sieve into a clean bowl. This catches any tiny bits that might have gone rogue and makes it super silky. Give it a little stir and let it cool slightly before serving. Perfect!
Serving Your Flourless Mocha Cake
Right, the moment of truth! This cake is already pretty spectacular on its own, but here’s how I love to serve it up for maximum deliciousness.
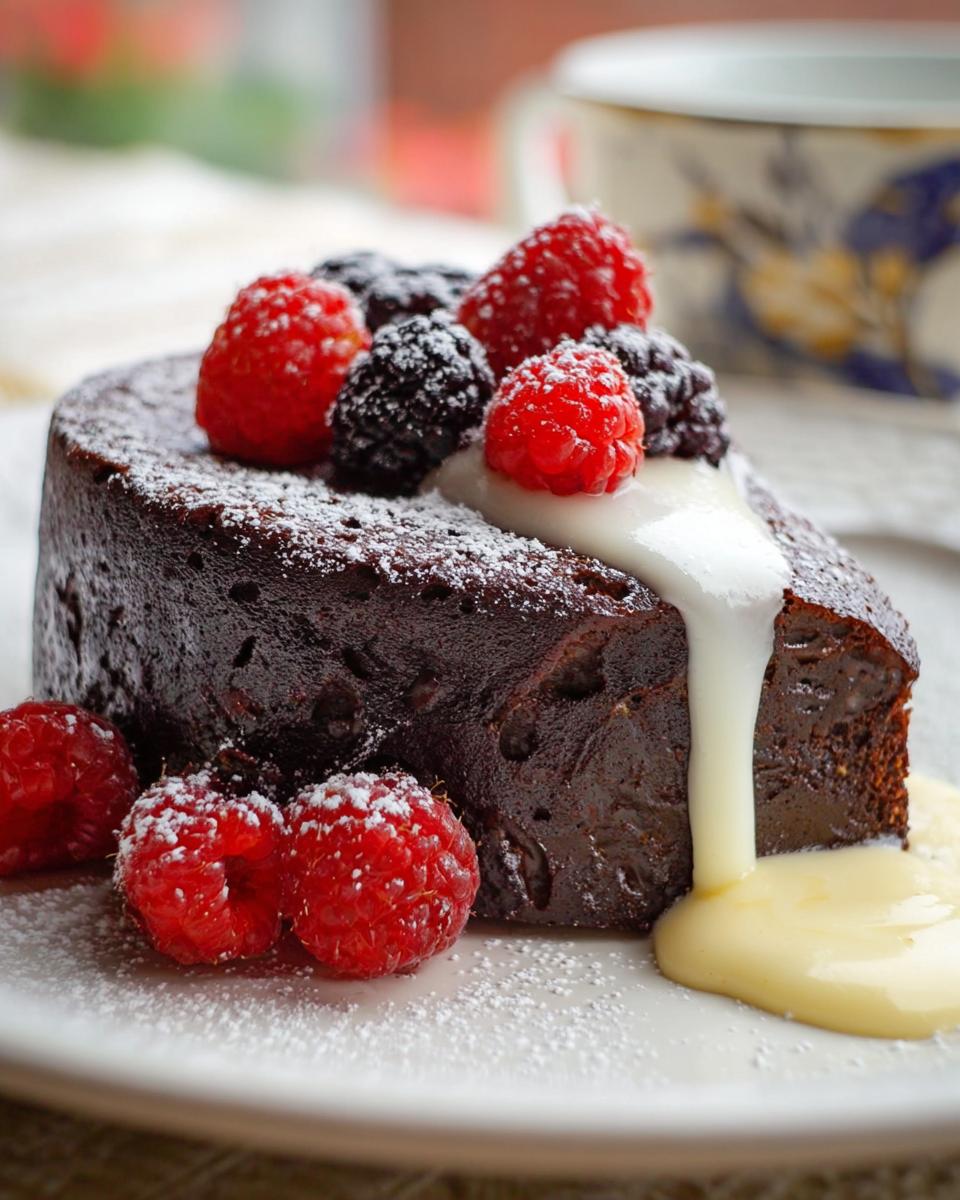
Warm Custard Drizzle: Honestly, the homemade vanilla custard is non-negotiable in my house. Ladle a generous spoonful over a slice of the warm cake. It’s pure comfort!
Fresh Berries & Dusting: A scattering of fresh raspberries adds a lovely tartness to cut through the richness. And of course, a light dusting of icing sugar over the top just finishes it off beautifully.
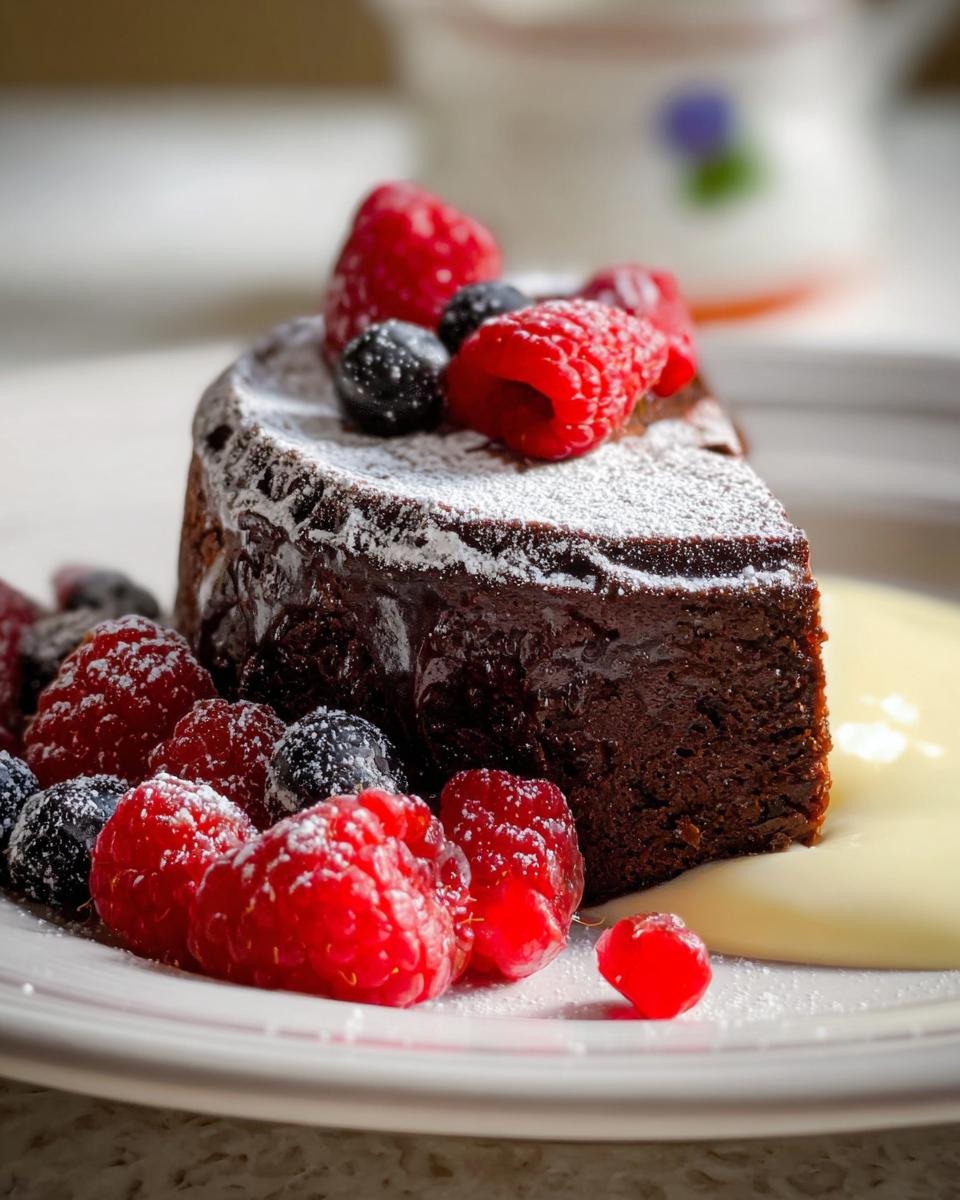
A Cuppa Coffee: For me, this cake is just begging for a good cup of coffee on the side – maybe an espresso or a flat white? It really makes those mocha flavours sing. You could also try serving it with some dark chocolate bites for extra decadence!
Storing and Reheating Your Flourless Mocha Cake
Don’t you worry about this gorgeous cake going to waste! It keeps beautifully, and I’ve got a few tricks for making sure it’s just as good the next day, or even a couple of days later.
This decadent Flourless Mocha Cake is surprisingly forgiving when it comes to storing. Once it’s completely cooled (and I mean absolutely cold!), pop it into an airtight container. If you’ve got the custard too, store that separately in another airtight container in the fridge. The cake should be good for a good 2-3 days, and the custard will last about the same.
Reheating is optional, but I sometimes like it just a smidge warm. Pop a slice on a microwave-safe plate and give it about 15-20 seconds on low power – just enough to take the chill off. Or, if you fancy it proper warm, you can do it in a low oven for a few minutes. Honestly though, it’s utterly divine cold with that lovely silky custard! For meal prep, I often make a double batch at the weekend, slice it up, and just grab a piece when the chocolate craving hits. Easy peasy!
Frequently Asked Questions About Flourless Mocha Cake
Got questions? I’ve got answers! This cake is pretty straightforward, but here are a few things people often ask.
Can I use a different type of chocolate?
You really do want to use dark chocolate for this, around 70% cocoa solids is perfect. Milk chocolate is too sweet and won’t give you that deep, rich flavour. Stick with dark for the best results! If you love chocolate, you might also enjoy my easy chocolate mousse recipe.
My cake sank a bit in the middle, what went wrong?
Oh, this can happen with flourless cakes! It might be that the oven wasn’t quite hot enough, or you opened the oven door too early. Don’t worry though, even if it sinks, it’ll still taste absolutely divine, especially with that custard. You can always cover any little imperfections with extra raspberries and a good dusting of icing sugar – no one will ever know!
Can I make this cake without the water bath?
You *can*, but I really wouldn’t recommend it if you’re after that signature fudgy, almost cheesecake-like texture. The water bath gently steams the cake, ensuring it cooks evenly and stays incredibly moist. Without it, you risk a drier cake that might be more prone to cracking. For best results, stick with the water bath – you won’t regret it!
Before You Go
Right then, my lovely bakers! I really hope you give this Flourless Mocha Cake a go. It’s one of those truly special bakes that feels like such a treat. Let me know in the comments if you try it, or even better, leave a little star rating!
Have you made this stunning cake? I’d absolutely love to hear all about it! Drop a comment below and tell me what you thought, or share your own tips. And if you’re feeling inspired, why not give it a rating? Don’t forget to check out my Pinterest page for even more delicious ideas!
Print
Flourless Mocha Cake with Vanilla Custard
- Total Time: 1 hour 45 minutes
- Yield: 12 servings
- Diet: Vegetarian
Description
A rich, fudgy, and deeply chocolatey flourless mocha cake served with smooth vanilla custard, fresh raspberries, and a dusting of icing sugar.
Ingredients
- 340 g dark chocolate, chopped
- 1 teaspoon coffee extract
- 1 teaspoon vanilla bean paste
- 225 g unsalted butter, cubed
- 5 large eggs, room temperature
- 1 ¼ cups caster sugar
- 2 cups light cream
- ⅓ cup caster sugar
- 5 large egg yolks
- 150 g fresh raspberries
- Icing sugar for dusting
Instructions
- Preheat your oven to 180°C. Wrap the outside of a 9 inch springform tin tightly with foil.
- Place the chopped dark chocolate and cubed butter into a heatproof bowl.
- Melt gently over a saucepan of simmering water, stirring until smooth. Remove from the heat and stir in the coffee extract and vanilla bean paste.
- In a large mixing bowl, whisk the eggs and caster sugar together until smooth and slightly lighter in colour.
- Slowly pour the melted chocolate mixture into the egg mixture while whisking continuously.
- Pour the batter into the prepared tin and smooth the top.
- Place the cake tin into a large roasting tray and carefully pour hot water into the tray until it reaches halfway up the sides of the tin.
- Cover the cake loosely with foil and bake for 1 hour 15 minutes.
- Remove the cake from the water bath and allow it to cool completely before removing from the tin.
- To make the vanilla custard, whisk the egg yolks and caster sugar together in a bowl until smooth.
- Heat the light cream and vanilla bean paste in a saucepan over medium heat until just beginning to simmer.
- Slowly pour a small amount of the warm cream into the egg mixture while whisking constantly.
- Gradually whisk in the remaining cream mixture until fully combined.
- Return the mixture to the saucepan and cook over low heat, stirring constantly, until the custard thickens enough to coat the back of a spoon.
- Strain the custard through a fine sieve into a clean bowl and cool slightly.
- Serve slices of the mocha cake with warm vanilla custard, fresh raspberries, and a light dusting of icing sugar.
Notes
- Baking the cake in a water bath helps create a smooth and fudgy texture.
- Chill the cake before slicing for the cleanest presentation.
- Prep Time: 30 minutes
- Cook Time: 1 hour 15 minutes
- Category: Dessert
- Method: Baking
- Cuisine: British


