

Oh, the sheer joy of a no-bake dessert, don’t you think? Especially when the sun’s blazing or you just can’t face the oven! This Chocolate Icebox Cake is genuinely one of those showstoppers that makes you look like a culinary genius with barely any effort. It’s my absolute go-to when I need something impressive but can’t spare the time. I remember making it for the first time thinking it was going to be a bit of a faff, but honestly, the assembly is so straightforward. The layers of chocolatey cream and crunchy biscuits just melt in your mouth. It’s a rich, decadent Chocolate Icebox Cake that’s become a firm favourite in my house!
Why You’ll Love This Chocolate Icebox Cake
- It’s a totally no-bake dessert – no oven required, hooray!
- Seriously, it couldn’t be easier to put together.
- Perfect for making ahead when you’re entertaining guests.
- It’s unbelievably rich, creamy, and utterly decadent.
- Uses simple ingredients you probably already have!
Ingredients for Your Chocolate Icebox Cake
Honestly, the beauty of this Chocolate Icebox Cake is how simple the ingredients are. You really don’t need anything fancy, which is brilliant when you fancy a treat but don’t want to make a special trip to the shops. Just make sure your cream cheese is nicely softened, that’s the most important bit for getting that lovely smooth texture!
- 300g dark chocolate chips (I like a good quality dark, around 70% cocoa)
- 180ml double cream, plus an extra 720ml (that’s three and a half cups total, roughly!)
- 450g full-fat cream cheese, make sure it’s properly softened
- 200g icing sugar, sifted to avoid lumps
- 1 tsp vanilla extract
- 50g mini chocolate chips (these are for texture, lovely little surprises!)
- 300g chocolate digestive biscuits (these form the base and layers, so get your favourite kind!)
Step-by-Step Guide to Making the Perfect Chocolate Icebox Cake
Right then, let’s get this glorious Chocolate Icebox Cake made! The best bit is that it’s all about layering and chilling, so you don’t need to be a master baker. Just follow these steps and watch the magic happen. You’ll want to get the ganache started first as it needs to cool a bit.
Step 1: First things first, grab a small saucepan and gently heat 180ml of double cream over a low flame. You just want it steaming, not boiling, darling. Take it off the heat and stir in your 300g of dark chocolate chips. Keep stirring until it’s all lusciously smooth and glossy. Let this gorgeous ganache sit and cool down for about 10 minutes. This bit is crucial, you don’t want to melt the cream cheese later!
Step 2: While that’s cooling, find your biggest mixing bowl! Pop in the softened cream cheese. Give it a good beat until it’s all smooth and creamy. No lumps allowed here!
Step 3: Now, gradually add about half of your remaining double cream (that’s 360ml) to the cream cheese. Mix it in slowly at first, then beat it until it’s nicely combined and looks like a lovely, smooth base.
Step 4: Add the rest of the double cream (another 360ml, so you’ve used a total of 720ml now, plus the initial 180ml for the ganache) and whisk away! Keep going until the whole mixture starts to thicken up nicely. You’re looking for it to hold its shape a bit.
Step 5: Time for the sweetness! Sift in your icing sugar and add the vanilla extract. Whisk it all up again until you’ve got lovely stiff peaks. Give it a little taste – if you like it a bit sweeter, you could always whisk in another tablespoon or two of icing sugar, but be careful not to make it too thin.
Step 6: Gently fold in the 50g of mini chocolate chips. These are just little pops of chocolatey goodness scattered throughout the cream layers. It just adds that extra something!
Step 7: Now for the fun part – assembly! Grab a rectangular baking dish. I usually use one that’s about 23cm x 33cm. Start by arranging a single layer of your chocolate digestive biscuits across the bottom. Don’t worry if there are little gaps, you can break biscuits to fill them in. This is your base!
Step 8: Spoon about one-third of your creamy filling over the biscuit layer. Spread it out evenly. Then, drizzle about one-third of your cooled chocolate ganache over the top of this cream layer. You can use a spoon or a piping bag for this.
Step 9: Repeat that process! Add another layer of biscuits, then another third of the cream filling, then another third of the ganache. And for the final time, one more layer of biscuits, the last of the cream, and then top it all off with the remaining ganache. Just swirl it around with a skewer or the back of a knife to make it look pretty, almost like those amazing chocolate brownies or a fancy chocolate mousse.
Step 10: Cover the whole thing up with cling film and pop it in the fridge. You need to let it chill for at least 4 hours, but honestly, overnight is even better. This is what allows the biscuits to soften beautifully and the flavours to meld. It’s the secret to getting those super clean slices. If you’re making these for a party, you could even think about making smaller versions, almost like chocolate chip cookies but in cake form!
Serving Suggestions for Your Chocolate Icebox Cake
This Chocolate Icebox Cake is pretty perfect on its own, but who doesn’t love a little extra flourish? Here are a couple of things I love to add to make it even more special.
A generous dollop of freshly whipped cream is always a winner – it adds a light, airy contrast to the rich chocolate. For a bit of brightness and colour, try scattering some fresh raspberries or strawberries over the top. They cut through the richness beautifully, much like they do in my strawberry mango cupcakes. And if you’re feeling fancy, a light dusting of cocoa powder or a few extra mini chocolate chips over the top just adds that final, professional touch!

Storing and Reheating Your Chocolate Icebox Cake
This Chocolate Icebox Cake is a dream for making ahead, and storing it is a breeze. Since it’s a no-bake wonder, you won’t actually be reheating it, but keeping it perfectly chilled is key!
To keep your glorious creation tasting its best, just pop it back into its baking dish and cover it tightly with cling film. Make sure it’s well-sealed to prevent any of those fridgey smells from getting in. It will happily stay delicious in the fridge for up to 4 days. Honestly, though, the first two days are usually the absolute best for texture, as the biscuits are still wonderfully soft but haven’t gone *too* mushy.
If you’re meal prepping, you can even slice it up into individual portions and store them in airtight containers. That way, you just grab and go when a chocolate craving strikes! I find that the biscuits continue to soften nicely even after it’s sliced, so it’s still amazing.
Frequently Asked Questions About Chocolate Icebox Cake
I get asked about this Chocolate Icebox Cake a fair bit, so here are some of the most common questions I get. Hopefully, this helps you make an absolutely perfect cake!
Can I use different biscuits?
That’s a great question! While chocolate digestives are my absolute go-to because they have that lovely chocolatey flavour and soak up the cream perfectly, you could try other plain biscuits. Hobnobs would give a nice crunch, or even a simple rich tea biscuit dyed slightly with cocoa powder mixed into the cream could work. Just avoid anything too crumbly or with a very strong flavour that might clash, like ginger snaps.
How do I get clean slices?
The absolute secret to those super clean slices, like you see in magazines, is chilling time! Make sure you give your Chocolate Icebox Cake at least 4 hours in the fridge, but honestly, overnight is your best friend. It allows the biscuits to soften and the cream to set properly. Also, use a really sharp knife and warm it up under hot water between each slice. Wipe it dry, then slice again. It makes all the difference!
Can I make this ahead of time?
Yes, absolutely! This is one of the best things about this Chocolate Icebox Cake. You can assemble the whole thing the day before you need it, or even leave it for up to 3-4 days in the fridge. The longer it sits, the softer the biscuits become, which I personally love. It’s the perfect dessert to have ready and waiting when unexpected guests pop by!
Before You Go
Honestly, I really hope you give this Chocolate Icebox Cake a go soon! It’s such a simple way to make a truly show-stopping dessert. Let me know in the comments how you get on, and if you can, give it a little star rating – it really helps me out! Don’t forget to share your creations with me over on Pinterest too!
Print
Chocolate Icebox Cake
- Total Time: 45 min
- Yield: 9 servings
- Diet: Vegetarian
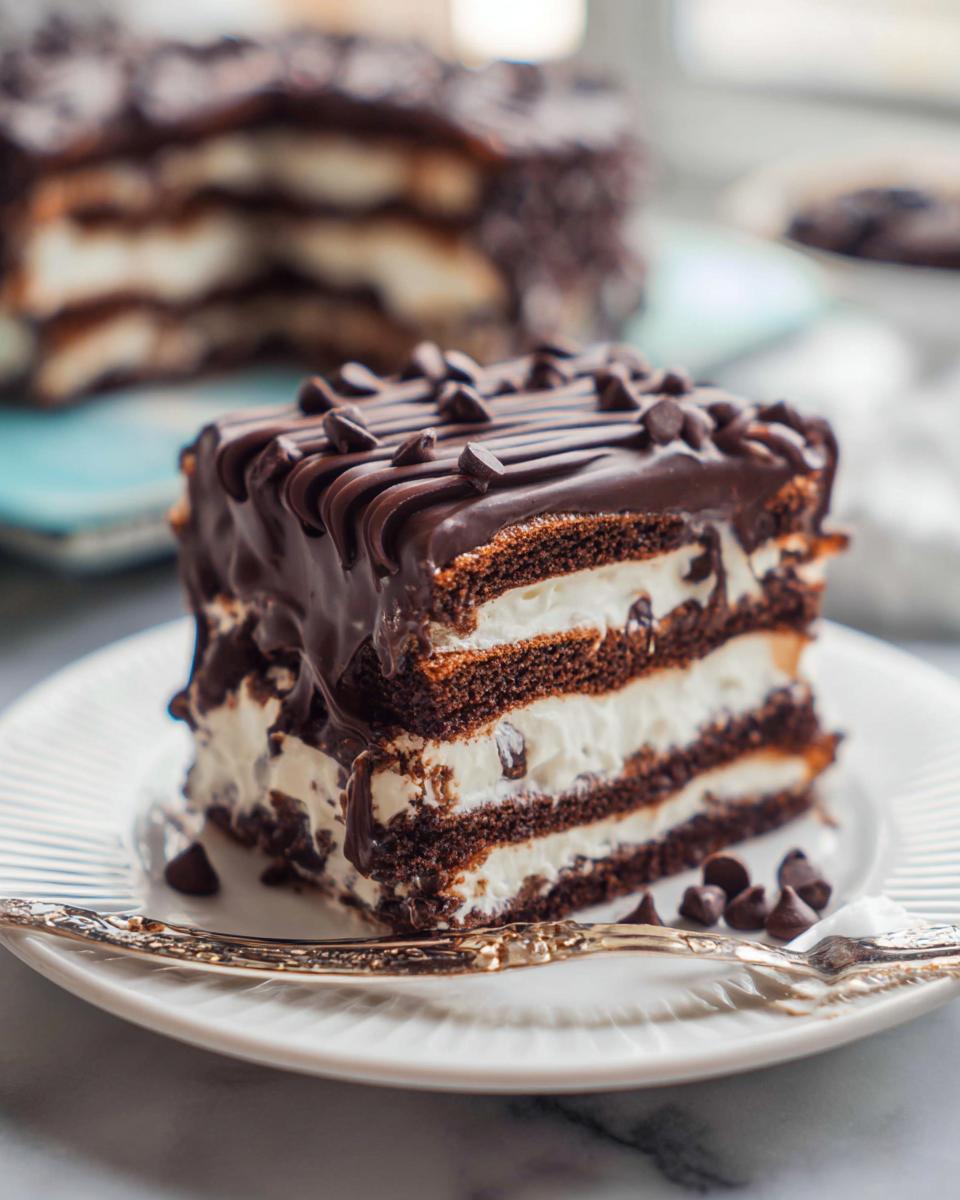
Description
A creamy chocolate icebox cake layered with rich chocolate ganache and crisp biscuits. An easy no-bake dessert perfect for make-ahead entertaining.
Ingredients
- 300g dark chocolate chips
- 180ml double cream
- 450g full-fat cream cheese, softened
- 720ml double cream
- 200g icing sugar
- 1 tsp vanilla extract
- 50g mini chocolate chips
- 300g chocolate digestive biscuits
Instructions
- Heat 180ml double cream in a small saucepan over low heat until steaming. Remove from heat and stir in 300g dark chocolate chips until smooth. Let cool for 10 minutes.
- Beat softened cream cheese in a large bowl until smooth.
- Gradually add 360ml double cream while mixing until combined and creamy.
- Add the remaining 360ml double cream and whisk until the mixture thickens.
- Add icing sugar and vanilla extract, then whisk until stiff peaks form.
- Fold mini chocolate chips into the cream mixture.
- Arrange a layer of chocolate digestive biscuits in a 23cm x 33cm baking dish, breaking biscuits to fill gaps.
- Spread one-third of the cream filling over the biscuits.
- Drizzle one-third of the cooled ganache over the cream layer.
- Repeat the layers twice more, finishing with ganache on top.
- Swirl the ganache with a skewer or knife for decoration if desired.
- Cover and chill in the fridge for at least 4 hours or overnight.
Notes
- Chill the cake overnight before serving for the cleanest slices.
- Store covered in the fridge for up to 4 days.
- Prep Time: 45 min
- Cook Time: 0 min
- Category: Dessert
- Method: No-bake
- Cuisine: British


