Oh, chocolate. It’s just one of those things that makes life a little bit better, isn’t it? And honestly, I’ve always adored Nigella Lawson’s approach to food – utterly decadent, completely unpretentious, and always delicious. That’s exactly where these Baked Chocolate Pots Inspired by Nigella Lawson come in. I remember making these for a dinner party once, and they were such a hit! They look so fancy, like you’ve spent hours slaving away, but honestly, they’re surprisingly simple to whip up. Just a few good ingredients and you’ve got a dessert that’s pure, velvety magic in a little pot.
Why You’ll Love These Baked Chocolate Pots
- So easy to make – seriously, even a beginner can do it!
- Incredibly rich and decadent chocolate flavour.
- They look so elegant, perfect for impressing guests.
- Uses just a handful of basic, good-quality ingredients.
- Brilliant for making ahead of time for stress-free entertaining.
Ingredients for Your Baked Chocolate Pots
- 300 ml single cream
- 125 g dark chocolate, finely chopped
- 1 large egg
- 2 large egg yolks
- 15 g caster sugar
- 100 ml double cream, whipped
- 25 g dark chocolate, grated
Crafting Your Baked Chocolate Pots Inspired by Nigella Lawson
Right then, let’s get down to making these gorgeous little pots of chocolatey heaven! It really is pretty straightforward, so don’t get intimidated by the fanciness. These Baked Chocolate Pots Inspired by Nigella Lawson are all about good ingredients and a bit of gentle heat. If you’re a fan of rich chocolate desserts, you might also love our easy chocolate mousse or our classic easy chocolate chip brownies.
Step 1: First things first, get your oven preheated to 150°C (that’s 130°C fan/Gas Mark 2). While it’s warming up, pop four little ramekins into a deep roasting tin. This tin is going to be our makeshift bain-marie, which is what gives these pots that lovely, creamy, steamed texture.
Step 2: Pour your single cream into a saucepan. You want to heat this *gently* over low heat. The key here is just to get it steaming, not boiling. If it boils, it can affect the final texture, making it a bit less silky, and honestly, we don’t want that!
Step 3: Once the cream is nicely steaming, take it off the heat and add your finely chopped dark chocolate. Give it a good stir until all that glorious chocolate has melted and you’ve got a smooth, glossy mixture. I always like to use a good quality dark chocolate here, it really makes a difference to the flavour, like Nigella would!
Step 4: In a separate bowl, crack in your large egg, the two egg yolks, and the caster sugar. Give it a whisk until everything is just combined. Don’t go mad with the whisking, you’re not trying to make meringue here, just get it all nicely mixed.
Step 5: Now, this is a crucial bit for those smooth pots: slowly, and I mean *slowly*, pour the warm chocolate mixture into the eggs while whisking continuously. You have to do this gradually to temper the eggs – basically, it stops them from scrambling and turning into tiny bits of omelette in your chocolate. We want velvety smooth, remember?
Step 6: For an extra-special, restaurant-worthy finish, strain the whole lot through a fine sieve into a jug. This catches any little bits of egg that might have escaped or any undissolved chocolate. It’s a small step that makes a big difference.
Step 7: Carefully divide your lovely, smooth chocolate mixture evenly between the four ramekins sitting in the roasting tin. Try to be neat!
Step 8: Now for the water bath! Carefully pour hot water into the roasting tin. You want the water to come about 1 cm up the sides of the ramekins. Be careful not to splash water into the chocolate mixture itself.
Step 9: Pop the whole tin into your preheated oven. Bake for about 30 minutes if you like a wonderfully soft, almost molten centre. If you prefer them a bit firmer, leave them in for up to 40 minutes. Just keep an eye on them. You’ll see the edges are set but the centre might still have a little wobble.
Step 10: Once they’re baked to your liking, carefully lift the ramekins out of the hot water bath. If you’re serving them warm, let them cool for about 15 minutes. They’ll continue to set as they cool.
Step 11: For chilled chocolate pots, which are equally divine, let them cool completely then pop them into the fridge for at least an hour. They’re even better if they have a few hours to really firm up properly.
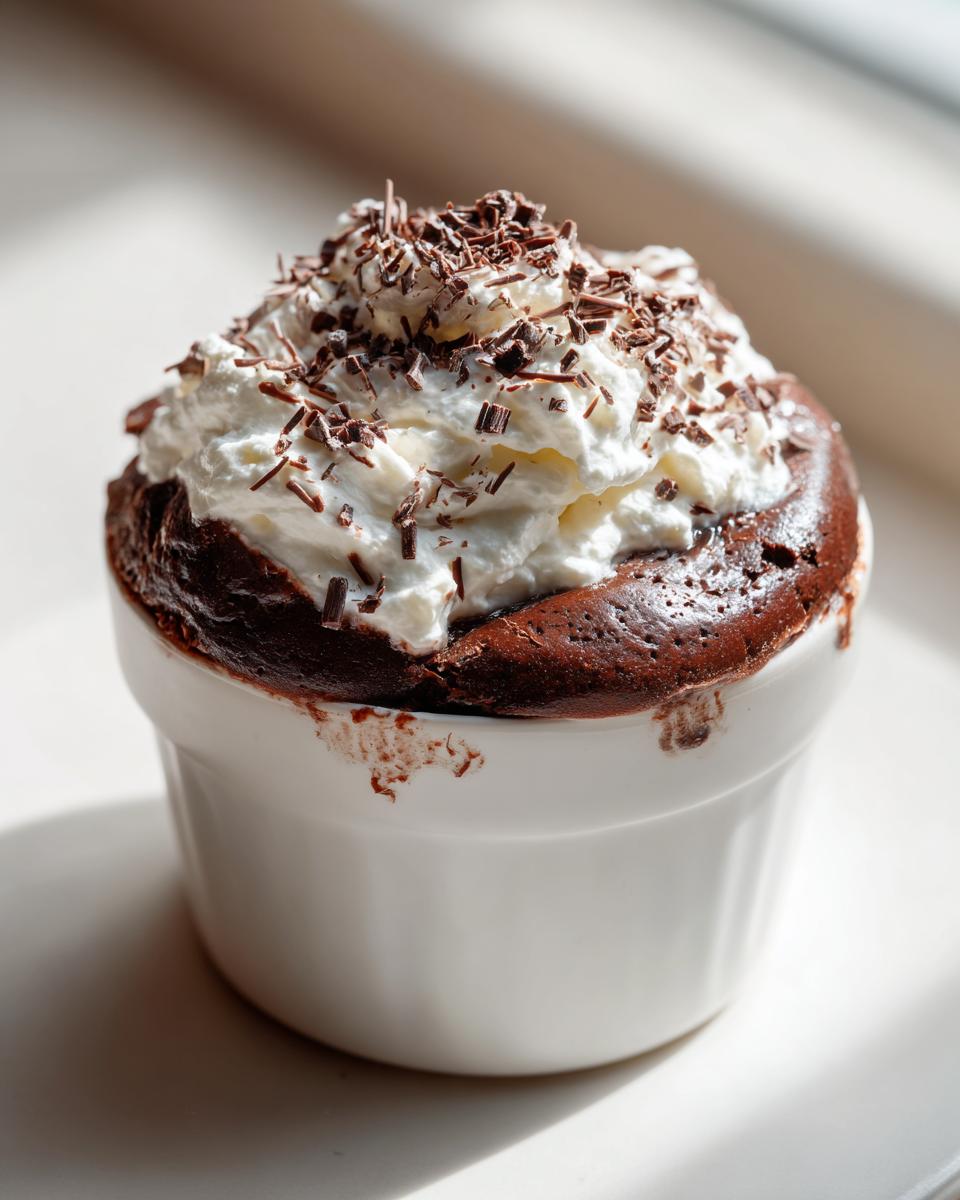
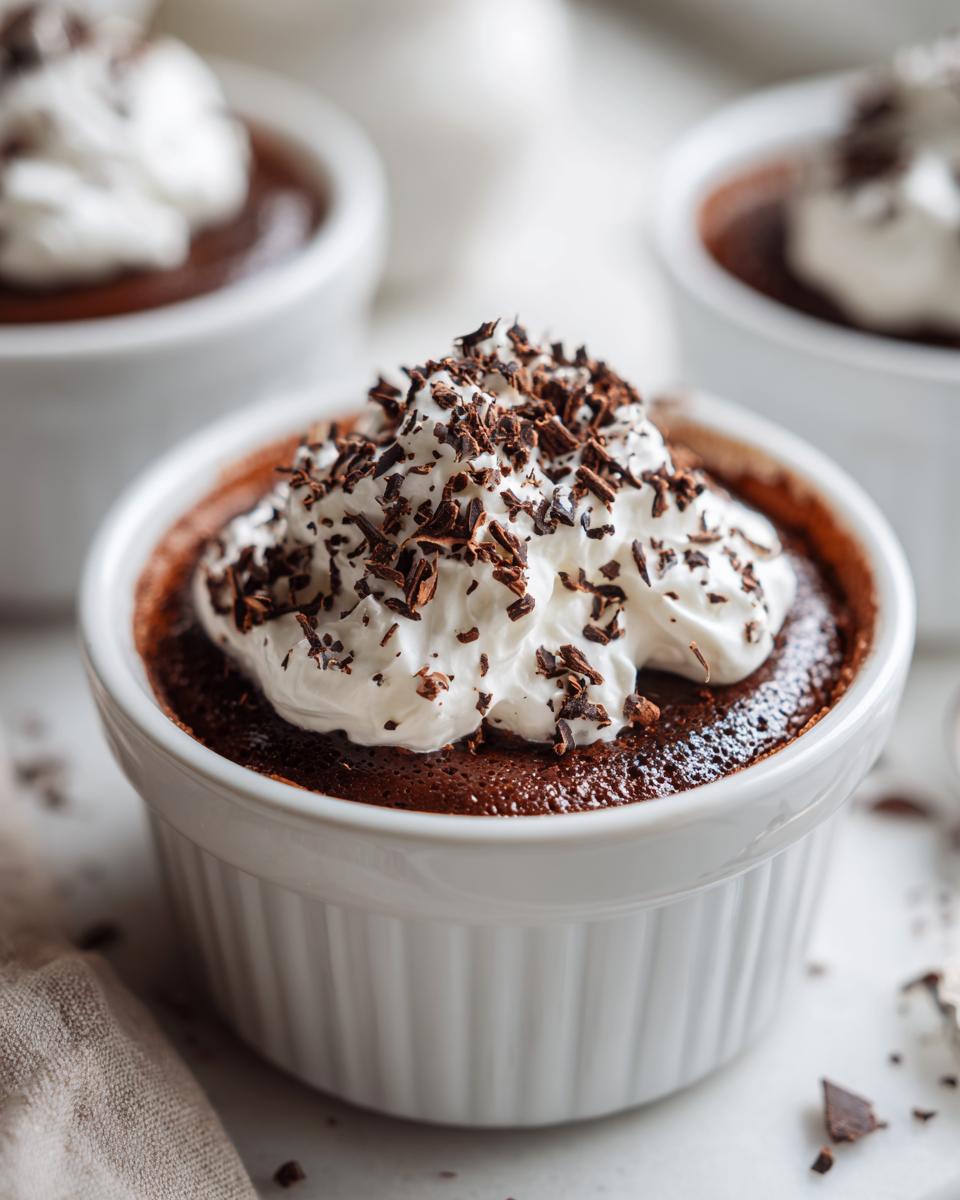
Step 12: Just before serving, top each pot with a generous dollop of whipped double cream – I like mine a bit loosely whipped so it’s still lovely and soft. Finish with a sprinkle of grated dark chocolate. Oh, pure indulgence!
Serving Suggestions for Your Baked Chocolate Pots
These beautiful Baked Chocolate Pots are pretty much perfect on their own, but sometimes a little something extra can elevate them even further. They’re so rich and decadent, so I like to keep accompaniments light and fresh.
Fresh Berries: A scattering of raspberries or some juicy blueberries really cuts through the richness of the chocolate. My chocolate blueberry energy bites are also a lovely textural contrast if you fancy something a bit more substantial, or if you’re after more chocolatey berry goodness, try these dark chocolate blueberry bites.
A Scent of Orange: A tiny grating of fresh orange zest over the top just before serving works wonders with dark chocolate. It adds a bright, zesty lift that’s simply divine.
Crispy Wafer: For a bit of crunch, a delicate wafer biscuit, maybe a thin chocolate tuile or even a simple chocolate-covered wafer, perched on the side of the pot, adds a lovely textural contrast.
Storing and Reheating Your Baked Chocolate Pots
These gorgeous chocolate pots are brilliant for making ahead, which is always a winner in my book! You can easily make them a day in advance. Just let them cool completely after baking, pop the lids (or cling film) on top of the ramekins, and pop them straight into the fridge. They’ll keep perfectly well for about two days like this. Honestly, I think they’re even better when they’ve had a good chill; the flavours really seem to meld together beautifully.
Now, the big question: reheating? Personally, I’m a fan of them served chilled, especially after a big meal. The cool, smooth texture is just heavenly. But, if you absolutely adore a warm, gooey chocolate centre, you can gently reheat them. Just pop the ramekins (carefully!) back into a very low oven, maybe around 120°C, for about 10-15 minutes until they’re warmed through. Be careful not to overheat them, or you’ll lose that lovely delicate texture. For meal prep, making them the day before and serving them chilled is honestly the easiest and most reliable way to go!
Frequently Asked Questions About Baked Chocolate Pots
Got a question about these little pots of joy? Don’t worry, I’ve got you covered! Here are a few things people often ask me about making these Baked Chocolate Pots.
Can I make these Baked Chocolate Pots ahead of time?
Absolutely! These are honestly one of my favourite desserts to make ahead of time. You can bake them, let them cool fully, then cover them and pop them in the fridge. They’re usually best after a few hours or even the next day. They’ll keep for a good couple of days, so they’re perfect for stress-free entertaining!
What kind of chocolate is best for these Baked Chocolate Pots?
For the richest flavour and the silkiest texture, I really do recommend using a good quality dark chocolate. Something with around 70% cocoa solids is perfect. Avoid anything too sweet, as you’re adding sugar elsewhere, and definitely avoid chocolate chips as they often contain stabilisers that might not melt as smoothly. Using good chocolate is key to those fabulous Baked Chocolate Pots!
How do I prevent cracks on top of my Baked Chocolate Pots?
Cracks can happen if the oven is too hot or if they’re overbaked. The water bath (bain-marie) is your best friend here – it creates a gentle, humid cooking environment that helps them bake evenly with less risk of cracking. Also, try not to overbake them; a slight wobble in the centre is a good sign they’re ready or nearly ready. If you want to see another gorgeous chocolate recipe that’s super smooth, check out this easy chocolate mousse!
Before You Go
I really hope you give these Baked Chocolate Pots a whirl! They’re such a simple pleasure, perfect for a treat or for impressing a crowd. Let me know in the comments how you get on, or tag me if you share your creations on socials! You can also find more inspiration on Pinterest!
Print
Baked Chocolate Pots
- Total Time: 45 minutes
- Yield: 4 servings
- Diet: Vegetarian
Description
Rich chocolate pots made with dark chocolate and cream, an elegant dessert for any occasion.
Ingredients
- 300 ml single cream
- 125 g dark chocolate, finely chopped
- 1 large egg
- 2 large egg yolks
- 15 g caster sugar
- 100 ml double cream, whipped
- 25 g dark chocolate, grated
Instructions
- Preheat your oven to 150C. Place four ramekins into a deep roasting tin.
- Pour the single cream into a saucepan and heat gently over low heat until steaming but not boiling.
- Add the chopped dark chocolate to the cream and stir until completely melted and smooth.
- In a separate bowl, whisk together the egg, egg yolks, and caster sugar until combined.
- Slowly pour the warm chocolate mixture into the eggs while whisking continuously to prevent scrambling.
- Strain the mixture through a fine sieve into a jug for an extra smooth texture.
- Divide the mixture evenly between the ramekins.
- Carefully pour hot water into the roasting tin until it reaches about 1 cm up the sides of the ramekins.
- Bake for 30 minutes for a soft creamy centre or up to 40 minutes for a firmer texture.
- Remove the ramekins from the water bath and cool for 15 minutes if serving warm.
- For chilled chocolate pots, refrigerate for at least 1 hour before serving.
- Top each chocolate pot with whipped double cream and grated dark chocolate before serving.
Notes
- Using good quality dark chocolate gives the dessert the richest flavour and smoothest finish.
- Avoid boiling the cream to keep the texture silky and delicate.
- Prep Time: 15 minutes
- Cook Time: 30 minutes
- Category: Dessert
- Method: Baking
- Cuisine: British