Crumbl Cookies recipe is what brings me here today! Listen, when I started my journey shedding 80 pounds, I thought I had to say goodbye to all the incredible, comforting food I grew up loving in Asheville, NC. My blog, Easy Detox Recipes, is all about proving that Southern comfort food can be clean and delicious. But sometimes, you just need that giant, soft, gooey indulgence, right? Well, I cracked the code on getting that signature thick, soft crumbly cookie texture right here in my own kitchen. Forget flat, boring cookies; this method guarantees you hit that perfect balance between chewy, thick, and delightfully crumbly every single time!
Gathering Everything Needed for Your Crumbl Cookies Recipe
Listen, you can’t rush perfection, especially when aiming for that famous thick, bakery-style cookie. To nail this Crumbl Cookies recipe, we need to be organized upfront. Think of this as setting the stage so the mixing process goes smoothly—no frantic searching for the baking powder mid-mix! I always lay everything out on the counter before I even think about turning on the mixer. It really helps guarantee we get that perfect crumbly cookie texture we’re aiming for.
Essential Ingredients for the Soft Crumbly Cookie Base
The dough relies on a few key players to stay thick and soft, not flat and crispy. We use both brown and white sugar here, which is important, and importantly, we use melted butter for the base, which is a little different from traditional creaming methods. Don’t worry about those details right now; just make sure you’ve got all your dry goods measured out precisely. I trust the measurements listed below completely, so just double-check them before we move on!
Preparing the Rich Cream Cheese Frosting Components
Now for the topping! The star here is the cream cheese icing, and it needs your attention before you even start the dough. For the smoothest, fluffiest cream cheese frosting possible, the butter and the cream cheese absolutely must be softened. I mean it—softened, not melted, or your frosting will end up looking soupy. Room temperature is the magic word here. Get those dairy items out about an hour before you plan to whip up the topping!
Ingredient Table for the Crumbl Cookies Recipe
Here is the exact breakdown of everything you’ll need for the cookies and that amazing topping. Keep this handy!
- 70 g Brown Sugar
- 70 g Sugar
- 115 g Butter melted
- 1 Egg
- 1 tsp Vanilla Extract
- 220 g Plain Flour
- 1 tbsp Cornflour
- ½ tsp Baking Soda
- ½ tsp Baking Powder
- ½ tsp Salt
- 90 g Butter softened (for frosting)
- 90 g Cream Cheese (for frosting)
- 250 g Icing Sugar (for frosting)
- Optional: Food colouring for frosting
- Optional: Sprinkles for topping
Mastering the Dough: Step-by-Step Instructions for Your Crumbl Cookies Recipe
Okay, this is where we build the foundation for that thick, bakery-style treat. Getting the mix right here is half the battle when you’re trying to achieve that signature crumbly cookie texture. Remember, we aren’t creaming butter here; we start with melted butter, which changes things slightly! Follow these steps carefully, and trust me, you’ll save yourself a lot of heartache later. These little baking tips are what separate a good cookie from a showstopper.
Combining Wet and Dry Elements
First things first, grab your bowl with the melted butter, brown sugar, and white sugar already whisked together. Pour in that egg and the vanilla extract, and give it a good, solid whisk until it’s all smooth and incorporated. Now, for the dry stuff: Make sure you’ve sifted the flour, cornflour, baking soda, baking powder, and salt together. This sifting step is non-negotiable; it keeps things airy! Gently fold the dry ingredients into the wet mixture. I mean gentle! As soon as you stop seeing streaks of flour, STOP mixing. Seriously, overmixing develops gluten, and that’s the enemy of a soft cookie.
Shaping and Chilling for the Perfect Crumbl Cookies Recipe Texture
Once that dough just comes together—it might look a little shaggy, which is fine—it’s time for the most important part of the whole process: the chill! Divide that dough up into nice, even 50-gram balls. If you have a kitchen scale, use it! Consistency matters here. Place those beautiful dough balls onto your lined baking sheet, making sure they have plenty of space between them. Then, cover the tray with plastic wrap and pop it into the fridge for a full 60 minutes. Don’t cheat this step! Chilling solidifies the fat, meaning the cookies spread less in the oven. This is the secret weapon for getting those super thick, high-domed cookies instead of flat pancakes.
Baking Perfection and Cooling for Your Crumbl Cookies Recipe
Alright, those dough balls have chilled out for an hour, and now it’s time to bake! Preheat your oven to 175\u00b0C. Use an oven thermometer if you have one because temperature consistency is one of the biggest baking tips I can give you—too hot and they spread too fast; too cool and they never set right. Place your chilled dough balls on that prepared, parchment-lined tray, giving them lots of room to breathe.
Bake them for about 12 minutes. This timing is crucial for that tender interior. You want the edges to look just set, but the centers should still look slightly underdone when you pull them out. Remember, these cookies continue to cook on the hot tray after they leave the oven. This carryover cooking is key to that luscious, soft crumbly cookie texture we love so much!
Let them cool completely right there on the baking sheet before you even think about moving them. If you try to move them too soon, they will absolutely break apart, and we want these substantial cookies to stay whole for frosting. Patience, friend, patience!
Crafting the Signature Cream Cheese Icing for Your Crumbl Cookies Recipe
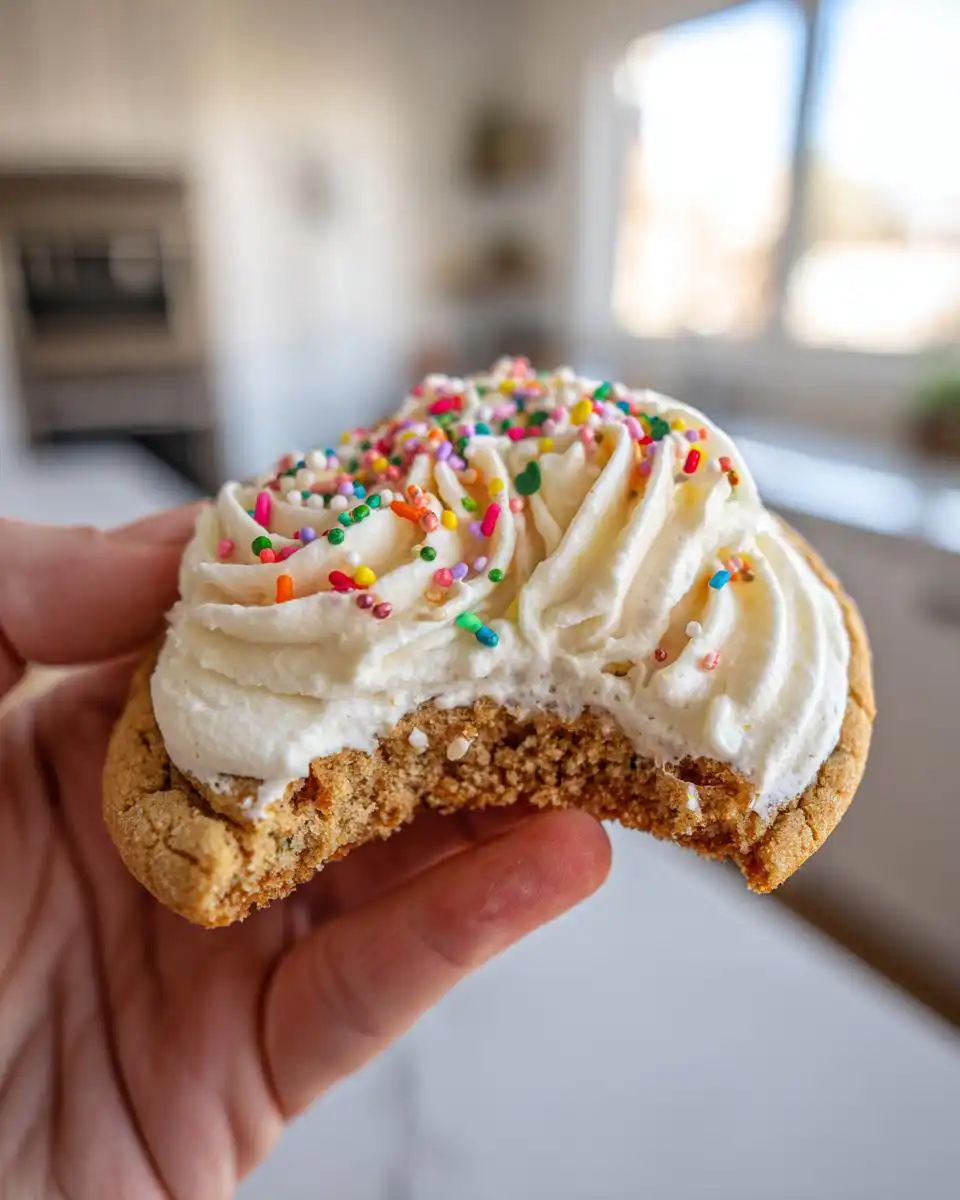
Once those giant cookies are totally cool—and I mean stone cold, or the frosting will melt into a puddle—it’s time for the best part: the topping! This isn’t just standard buttercream; we are making that signature tangy, rich cream cheese frosting that makes these cookies famous. The richness of this icing perfectly complements the slightly sweet, vanilla flavoured cookie base we just worked so hard on. You’ll need that softened butter and room-temperature cream cheese we talked about earlier. If they aren’t soft, this process is going to take forever, trust me!
Put the softened butter and the cream cheese into your mixer bowl. Start beating them together on medium speed until they are completely smooth and there are absolutely no lumps left. This smooth base is what guarantees a beautiful final product. Then, slowly start adding in your icing sugar, a cup at a time, mixing on low speed so you don’t create a sugar cloud that coats your entire kitchen! Once all the sugar is incorporated, crank that speed up to medium-high.
Achieving the Ideal Cream Cheese Frosting Consistency
This is where the magic happens! You need to beat this mixture for a solid five minutes, maybe even a little longer. We aren’t just mixing ingredients; we are whipping air into the fat and sugar to make it light and fluffy. After five minutes, taste it and add that teaspoon of vanilla extract. If you want that vibrant color, drop in a tiny bit of food colouring now and mix it in quickly. If, for some reason, your frosting seems a little too stiff after beating, don’t panic! Add literally half a teaspoon of milk at a time while the mixer is running until it loosens up just enough to pipe easily. If it’s too thin, just pop the whole bowl into the fridge for 15 minutes to firm up before you try applying it.
Assembling Your Customisable Cookies
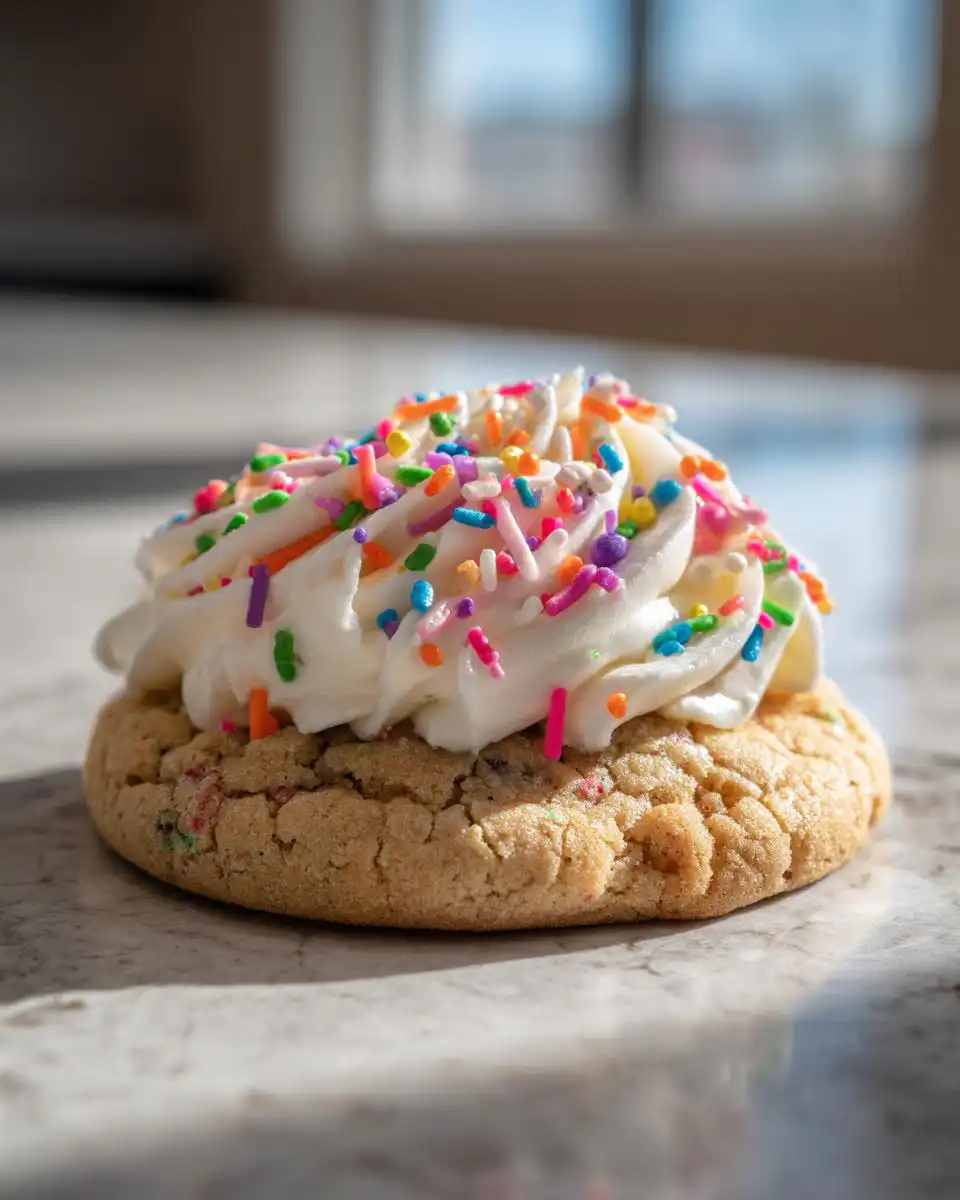
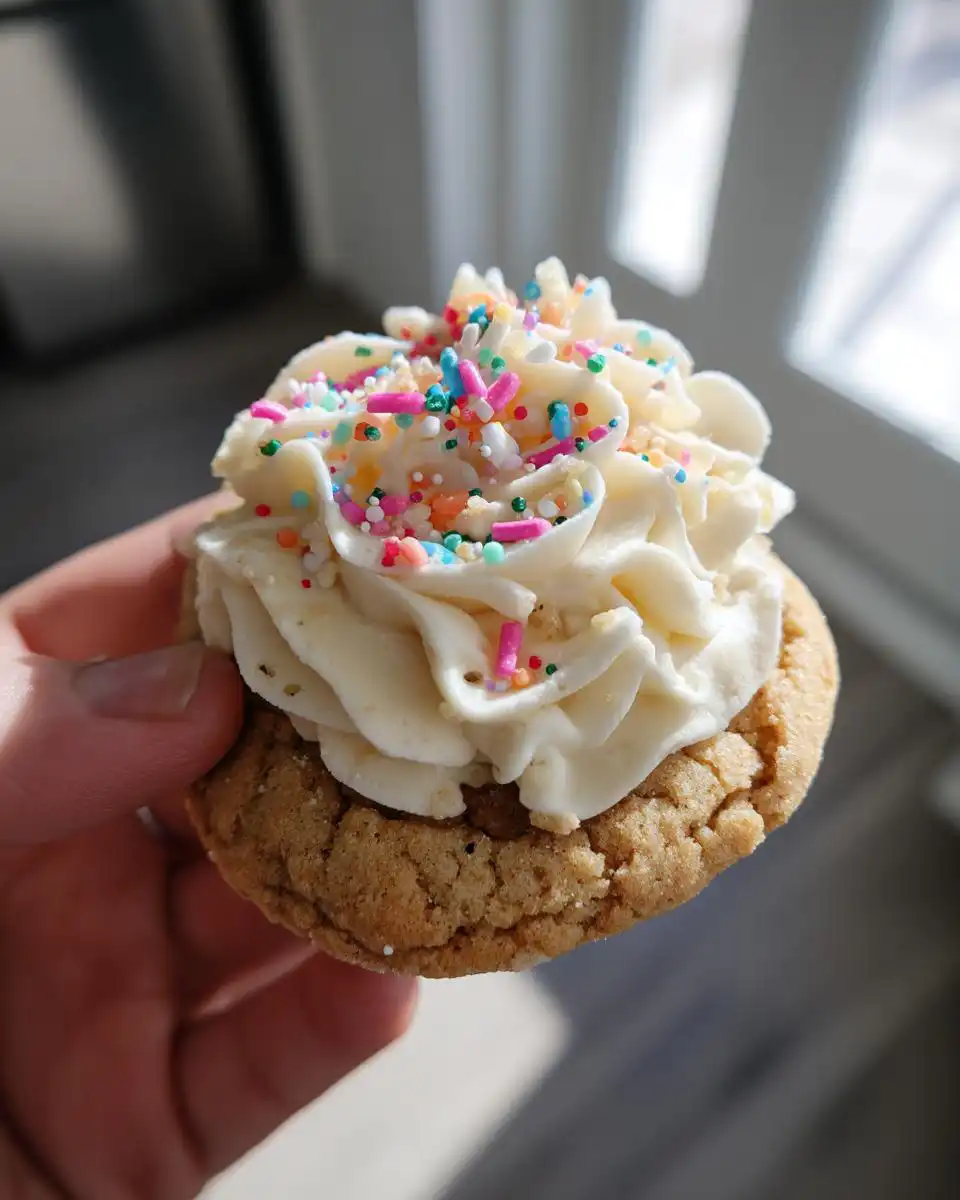
The moment of truth! Now that your cookies are completely cool and your cream cheese frosting is perfectly fluffy, it’s time to make these your own. This is where you turn a great recipe into your own signature treat. Since these are giant cookies, you can be generous with the topping. Use a piping bag fitted with a large round tip if you want that super professional look, or just use an offset spatula to swirl a beautiful mound of cream cheese icing right on top.
Don’t stop there, though! This is your chance to create truly customisable cookies. If you’re making them for a holiday, use red and green sprinkles. If it’s a birthday, go wild with rainbow jimmies! The frosting is still slightly tacky right after application, so the sprinkles stick perfectly. If you’re planning on packaging these up later, go easy on the frosting, or they might stick together in the container.
Quick Troubleshooting and Baking Tips for the Crumbl Cookies Recipe
Even with the best intentions, sometimes our cookies decide to rebel! If you pull your cookies out and they look suspiciously flat, I can almost guarantee one of two things happened. First, did you skip the chilling time? That one hour in the fridge is absolutely vital for these thick cookies. If the dough is too warm when it hits the oven, the butter melts too fast, and—poof—you get a pancake, not a thick disc. These are my top baking tips for that perfect structure. You can find more general baking tips on my blog.
Another common issue is overmixing after adding the flour. Remember how I stressed folding gently? If you beat the flour in too much, you develop gluten, which makes the cookie tough and chewy instead of tender and crumbly. We want that lovely, soft structure, not a dense hockey puck! If your cookies baked up hard, check your oven temperature; they might have baked too long or too hot. For the best crumbly cookie texture, pull them when the edges are set but the centers still look soft, letting them finish baking on that hot tray!
Storing Your Delicious Crumbl Cookies Recipe Leftovers
These cookies are so huge and decadent that you probably won’t finish them in one sitting—though I don’t blame you if you try! The good news is that this Crumbl Cookies recipe holds up really well, especially because of that rich cream cheese frosting. However, because of the dairy in the frosting, we need to be smart about where we keep them. Storing them incorrectly can make them either dry out or get soggy, and we want to protect that beautiful soft crumbly cookie texture we worked so hard to achieve.
For best results, you want an airtight container. If you stack them, put a small square of parchment paper between each cookie so the frosting doesn’t smoosh or stick to the next one. They are best eaten within two days, but they’ll last a bit longer in the fridge if you need them to. For more ideas on storing baked goods, check out my Pinterest boards.
Storage Table for Crumbl Cookies Recipe
| Storage Location | Duration | Reheating Advice |
|---|---|---|
| Countertop (Airtight) | Up to 2 days | Room temperature is great; no reheating needed. |
| Refrigerator (Airtight) | Up to 5 days | Let them sit on the counter for 30 minutes before eating to soften the cookie slightly. |
| Freezer (Wrapped tightly) | Up to 2 months | Thaw overnight in the fridge, then sit at room temp for 1 hour. |
Frequently Asked Questions About Your Crumbl Cookies Recipe
I know you might have a few lingering questions once you see how simple this all is! It’s always better to ask before you bake, so let’s clear up the last few things so your first batch of this Crumbl Cookies recipe is an absolute home run.
Can I make this Crumbl Cookies recipe ahead of time?
Yes, absolutely! I often prep the dough balls and keep them tightly covered in the fridge for up to 48 hours before baking. This is a fantastic trick for making things easier when company comes over. Just remember, the cookies are best eaten the day you bake them, especially with that fresh cream cheese icing. If you make the finished cookies ahead, keep them refrigerated, but try to let them warm up slightly before serving so they aren’t rock hard.
What is the secret to the soft crumbly cookie texture?
If I had to pick just one secret, it’s twofold: chilling and cornflour. Chilling the dough balls for that full hour prevents spreading, which keeps them thick. Secondly, don’t skip the 1 tablespoon of cornflour in the dry mix! That little bit of starch absorbs moisture just enough to give you that melt-in-your-mouth, soft crumbly cookie feel rather than a tough, chewy one. It’s the key to mimicking that bakery quality. If you are looking for other healthy cookie options, check out my healthy cookies recipe.
Are these suitable as a homemade gift idea?
Oh, they make the *best* homemade gift idea! Who wouldn’t want a giant, perfectly frosted cookie? Presentation is everything here. If you are gifting them, I suggest piping the cream cheese frosting on just before you hand them over, or placing parchment squares between them if they must be stacked. They look incredible packaged in clear cellophane bags tied with a nice ribbon. Everyone loves getting a giant, high-quality treat like this! For other great gift idea inspiration, see my Pinterest page.
Share Your Homemade Crumbl Cookies Recipe Experience
Seriously, I can’t wait to see your giant, frosted creations! Did you manage to get that perfect thick shape? Once you’ve tried this Crumbl Cookies recipe, drop by and let me know how it went. Tell me what colors you used for your sprinkles or if you tried a different extract in that glorious cream cheese frosting. Rate the recipe below and leave a comment—I read every single one! If you are interested in other recipes that are great for sharing, you might like my cinnamon rolls.
Print
Genuine Crumbl Cookies recipe: 1 superb trick
- Total Time: 1 hour 32 minutes
- Yield: Varies based on dough ball size
- Diet: Vegetarian
Description
Make your own soft, crumbly Crumbl Cookies at home with a rich cream cheese frosting. This recipe delivers the popular cookie texture you love.
Ingredients
- 70 g Brown Sugar
- 70 g Sugar
- 115 g Butter melted
- 1 Egg
- 1 tsp Vanilla Extract
- 220 g Plain Flour
- 1 tbsp Cornflour
- ½ tsp Baking Soda
- ½ tsp Baking Powder
- ½ tsp Salt
- 90 g Butter softened (for frosting)
- 90 g Cream Cheese (for frosting)
- 250 g Icing Sugar (for frosting)
- Optional: Food colouring for frosting
- Optional: Sprinkles for topping
Instructions
- Pre-heat your oven to 175°C. Line a baking tray with baking paper.
- Whisk together the brown sugar, white sugar, and melted butter until smooth.
- Add the egg and vanilla extract to the sugar mixture and whisk well.
- Sift the plain flour, cornflour, baking soda, baking powder, and salt into the wet ingredients. Fold the mixture gently until just combined; do not overmix.
- Roll the dough into 50g balls. Place them onto the prepared baking tray, spacing them apart.
- Refrigerate the dough balls for 1 hour. This helps maintain shape.
- Bake the cookies at 175°C for approximately 12 minutes. Allow them to cool completely on the tray before frosting.
- For the cream cheese frosting, whisk the softened butter, cream cheese, and icing sugar together for about 5 minutes until light and fluffy.
- Add vanilla extract (and food colouring, if using) to the frosting and whisk until fully combined and smooth.
- Pipe or spread the cream cheese frosting onto the cooled cookies. Top immediately with sprinkles.
Notes
- Refrigerating the dough is key to achieving the desired thick, crumbly cookie texture.
- For a classic look, use a large round cookie cutter to gently shape the cookies immediately after they come out of the oven, before they fully cool.
- You can customize the frosting flavor by adding different extracts instead of just vanilla.
- Prep Time: 20 minutes
- Cook Time: 12 minutes
- Category: Dessert
- Method: Baking
- Cuisine: American