You know what’s one of life’s simple, amazing pleasures? The smell of fresh bread filling your kitchen. But let’s be honest, with all the proving and kneading, sometimes you just can’t be bothered! That’s where this brilliant Mary Berry soda bread comes in. It’s my go-to when I want a gorgeous, rustic loaf on the table in under an hour, no yeast required. Inspired by Mary’s classic, no-fuss principles, it delivers a golden crust and the softest crumb every single time. Honestly, it feels like a bit of kitchen magic.
Why You’ll Love This Mary Berry Soda Bread
It honestly feels like you’re cheating at baking. From bowl to cooling rack in under an hour, with a result that looks like you spent all afternoon on it.
- No yeast, no waiting: Forget about proving times! This is instant gratification bread. You mix it, shape it, and bake it straight away.
- Incredibly quick and easy: It’s my emergency loaf. If unexpected guests are coming or I realise there’s no bread for breakfast, I can have a fresh loaf ready in about 50 minutes flat.
- Just a handful of ingredients: You likely have everything you need in your cupboard right now: flour, baking soda, salt, and buttermilk. Simple as that.
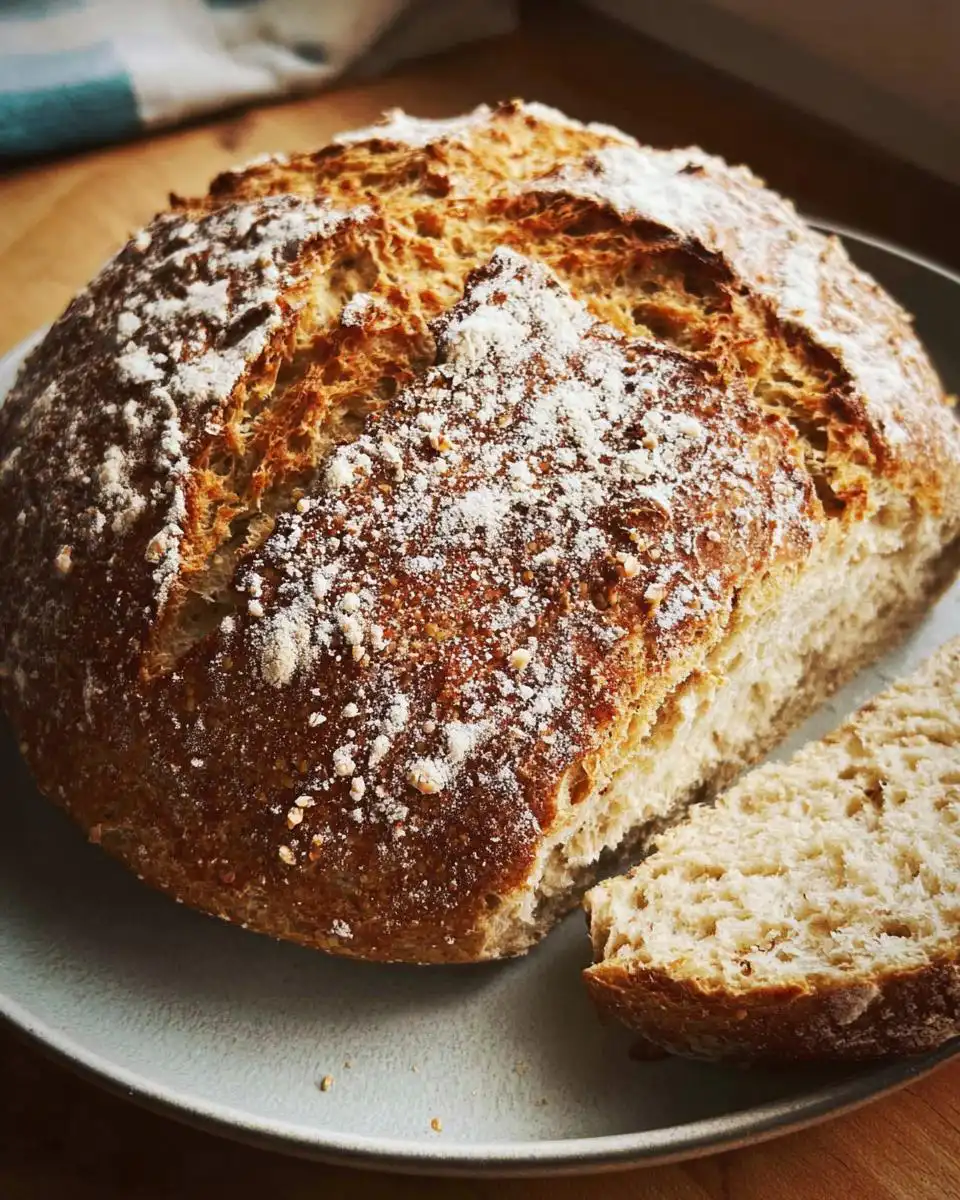
- That perfect texture: You get this gorgeous, crackly golden crust that gives way to the softest, most tender crumb inside. It’s rustic and comforting.
- Endlessly versatile: It’s brilliant with soup, fantastic toasted with butter and your favourite jam, and the perfect base for adding things like a handful of healthy oats or seeds. Honestly, it goes with everything.
Ingredients for Your Mary Berry Soda Bread
This is where the magic happens. There’s nothing complicated here, I promise. The key, I’ve learnt, is to treat the ingredients with a light touch and make sure your baking soda is fresh. It’s all about the chemical reaction for that perfect rise.
- 3 1/2 cups plain flour
- 1 teaspoon baking soda
- 1 teaspoon salt
- 1 1/4 cups buttermilk
- 2 tablespoons plain flour (just for dusting your surface)
My one non-negotiable tip? Please spoon your flour into the measuring cup and level it off with a knife. Don’t scoop straight from the bag – it packs the flour down and you’ll end up with a dry, dense loaf. Light and fluffy flour means light and fluffy bread. Trust me on this!
How to Make Mary Berry Soda Bread: Step-by-Step
Okay, deep breath – it’s easier than you think! The absolute golden rule here is: be quick, be gentle, and get it straight into a hot oven. That’s the secret to that glorious rise and texture.
Step 1: First things first, crank your oven up to 200°C (or 180°C for a fan oven). Lightly grease a baking tray with a dab of butter or oil, or line it with baking paper. Don’t skip warming up the tray too – a hot start is what helps give the bottom a great crust. While it heats, get your largest bowl out.
Step 2: In that big bowl, whisk together your 3 1/2 cups of plain flour, the teaspoon of baking soda, and the teaspoon of salt. You want the baking soda really well distributed, so give it a good 30-second whisk. This ensures your loaf rises evenly and you don’t get any bitter pockets.
Step 3: Make a decent-sized well in the centre of your dry ingredients. Pour in all of the 1 1/4 cups of buttermilk. The buttermilk is the magic liquid that reacts with the soda – it’s also what gives you that wonderfully soft crumb, just like in my favourite buttermilk biscuits recipe.
Step 4: Now, use a spoon or your hands to gently mix it all together. It’ll come together into a soft, rough, and quite sticky dough. This is perfect! Don’t be tempted to add more flour to the bowl. A sticky dough means a tender loaf. Once there are no dry floury patches, stop mixing. Overworking it is the enemy.
Step 5: Sprinkle your work surface with that extra 2 tablespoons of flour and tip the dough out onto it. With lightly floured hands, gently shape and fold it a few times, just enough to form a round loaf about 7 inches wide. This isn’t kneading; you’re just coaxing it into shape. Handle it lightly, like a cloud you don’t want to squish.
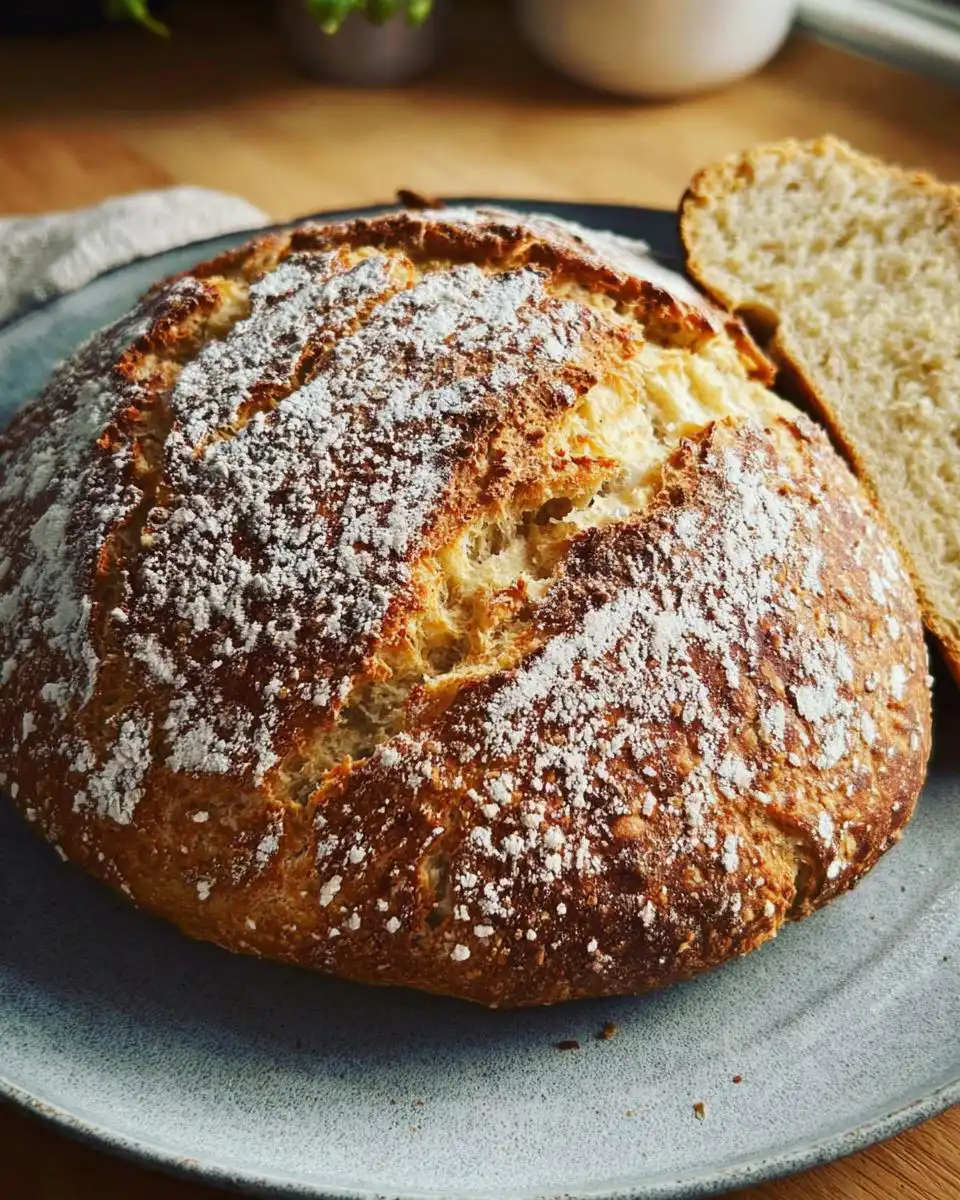
Step 6: Lift your shaped loaf onto the preheated baking tray. Now, take a sharp knife (a serrated bread knife is ideal) and score a deep cross on the top, almost all the way down to the bottom. This isn’t just for looks – it helps the heat penetrate the centre and ensures it bakes through properly. It also gives you those lovely ‘farls’ to tear apart later.
Step 7: Pop it straight into the hot oven. Bake for 30 minutes. You’ll see it puff up beautifully and turn a lovely golden colour. Here’s the Mary Berry trick: after 30 minutes, take the tray out (be careful, it’s hot!), flip the loaf upside down, and put it back in for another 10 minutes. This ensures the base gets just as crisp and cooked as the top.
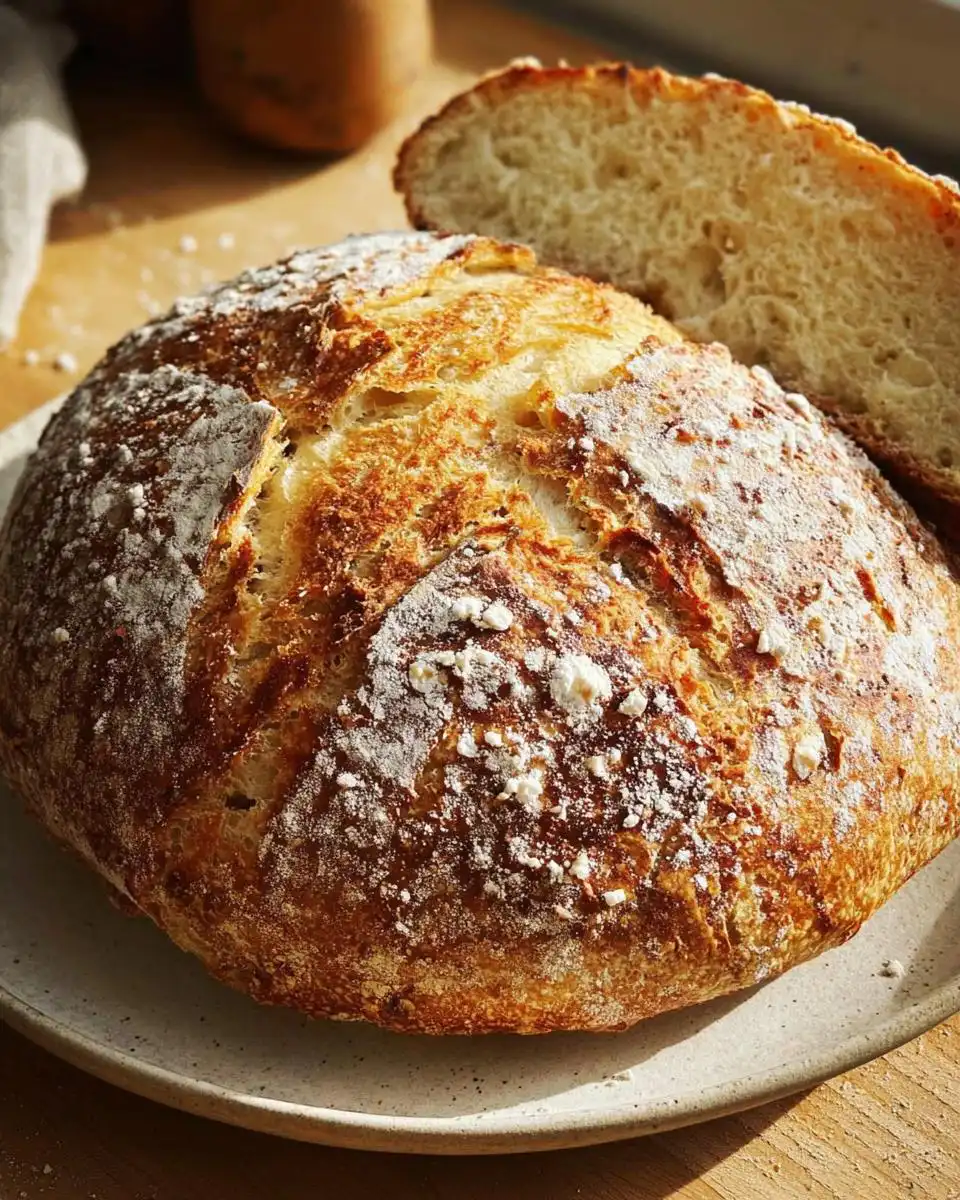
Step 8: To test if it’s done, take it out and carefully tap the bottom. You’re listening for a distinct hollow sound – that’s your sign of perfection. If it sounds a bit dull, give it another 3-5 minutes. Finally, transfer it to a wire rack to cool completely before you slice. I know it’s torture, but slicing it warm can make it gummy. It’s worth the wait, I promise! Once you’ve got the hang of it, share your beautiful loaf over on Pinterest and tag me – I’d love to see it!
What to Serve with Your Soda Bread
Honestly, it’s so good fresh from the oven you might just eat it plain, but it’s also the most accommodating loaf. Here are my favourite ways to enjoy it.
With a Hearty Soup or Stew: This is its natural habitat. A rustic loaf like this just cries out for dipping into something warming and savoury. It’s pure bliss with a creamy white chicken chili or a rich vegetable stew. The crust holds up beautifully, and the soft crumb soaks up all those delicious juices.
For a Simple Breakfast: Toasted with a thick layer of good salted butter is my absolute favourite. The toasting brings out a lovely nuttiness. If I’m feeling fancy, I’ll add a dollop of homemade jam or a drizzle of honey. It’s the best way to start a lazy weekend morning.
As Part of a Cheeseboard or Platter: Sliced thickly, it’s fantastic with a selection of cheeses, some tart apple slices, and a spoonful of onion chutney. It adds that homemade, comforting touch that shop-bought crackers just can’t beat. It’s my secret weapon for easy entertaining.
With Smoked Salmon & Cream Cheese: For a really special treat, try it lightly toasted and topped with a schmear of cream cheese, some silky smoked salmon, a squeeze of lemon, and a crack of black pepper. It feels incredibly decadent but is so simple to put together.
Storing and Reheating Your Mary Berry Soda Bread
The best bit? It’s fantastic for making ahead. A little know-how keeps it tasting just-baked.
First, let it cool completely on a wire rack. Any leftover warmth trapped inside will make it go soggy. Once cool, pop it into a bread bag or an airtight container. It’ll stay beautifully fresh at room temperature for 1-2 days.
To freeze it, wrap the whole loaf (or individual slices) tightly in cling film and then foil. It’ll keep for up to 3 months. Thaw it at room temperature still wrapped, so the condensation forms on the outside, not in the bread.
My favourite trick to bring it back to life? A quick 5-10 minute warm-up in a 180°C oven. This crisps the crust right back up and makes it smell like it just came out of the oven. For meal prep, I slice the whole loaf before freezing, so I can just grab a slice or two to toast straight from the freezer.
Mary Berry Soda Bread FAQs
I get asked these questions all the time. Don’t worry if you’re wondering the same thing – it means you’re paying attention, and that’s half the battle won!
Can I make this Mary Berry soda bread without buttermilk?
Absolutely! It’s a really common swap. For every cup of buttermilk, just mix 1 cup of regular milk with 1 tablespoon of lemon juice or white vinegar. Let it sit for 5 minutes until it looks a bit curdled. Then use it exactly as you would the buttermilk. It works like a charm for that essential tang and rise.
Why is my soda bread dense?
Ah, the classic culprit! There are usually two reasons. First, over-mixing. As soon as the dough comes together, stop – you’re not looking for smoothness. Second, old baking soda. It loses its power over time. Give it a test: sprinkle a bit in some vinegar. If it doesn’t fizz aggressively, it’s time for a new box. Fresh soda and a light touch are your best friends here.
Can I add extras like raisins or seeds?
Yes, please do! It’s a wonderful base for additions. My rule of thumb is about a heaped cup of extras. Toss things like raisins, chopped walnuts, or sunflower seeds with the dry flour before you add the buttermilk. This coats them lightly and stops them from sinking. Just remember, any wet additions (like grated cheese) might need a tiny splash more buttermilk.
Nutritional Information
I always think it’s good to be mindful, but remember that homemade is about joy first. The numbers can change depending on your exact ingredients.
Please note that any nutritional information for this Mary Berry soda bread is an estimate. The values can vary depending on the specific brand of flour, buttermilk, and other ingredients you use. It’s always best to consider this a guide for a wholesome, homemade loaf rather than a precise calculation.
Before You Go
Honestly, this soda bread is such a reliable joy to make. I really hope you give it a go this weekend.
There’s nothing quite like the pride of pulling your own golden loaf from the oven. I’d love to hear how yours turns out! Let me know in the comments, and if you snap a pic, share your baking wins with me over on Medium. Happy baking!
Print
Mary Berry Soda Bread
- Total Time: 50 min
- Yield: 8 servings
- Diet: Vegetarian
Description
A simple no-yeast loaf with a golden crust and soft crumb, ready in under an hour.
Ingredients
- 3 1/2 cups plain flour
- 1 teaspoon baking soda
- 1 teaspoon salt
- 1 1/4 cups buttermilk
- 2 tablespoons plain flour (for dusting)
Instructions
- Preheat your oven to 200°C (180°C fan). Lightly grease a baking tray.
- In a large bowl, whisk the flour, baking soda, and salt together.
- Make a well in the centre and pour in the buttermilk.
- Mix gently with a spoon or your hands until a soft, sticky dough forms.
- Turn the dough onto a floured surface. Shape it into a round loaf about 7 inches wide. Handle it lightly.
- Place the dough on the prepared tray.
- Use a sharp knife to score a deep cross on top of the loaf.
- Bake for 30 minutes until golden.
- Turn the loaf upside down and bake for another 10 minutes. It is done when the base sounds hollow when tapped.
- Transfer to a wire rack to cool before slicing.
Notes
- Handle the dough lightly and bake it immediately after mixing for the best texture and rise.
- Prep Time: 10 min
- Cook Time: 40 min
- Category: Baking
- Method: Baking
- Cuisine: British