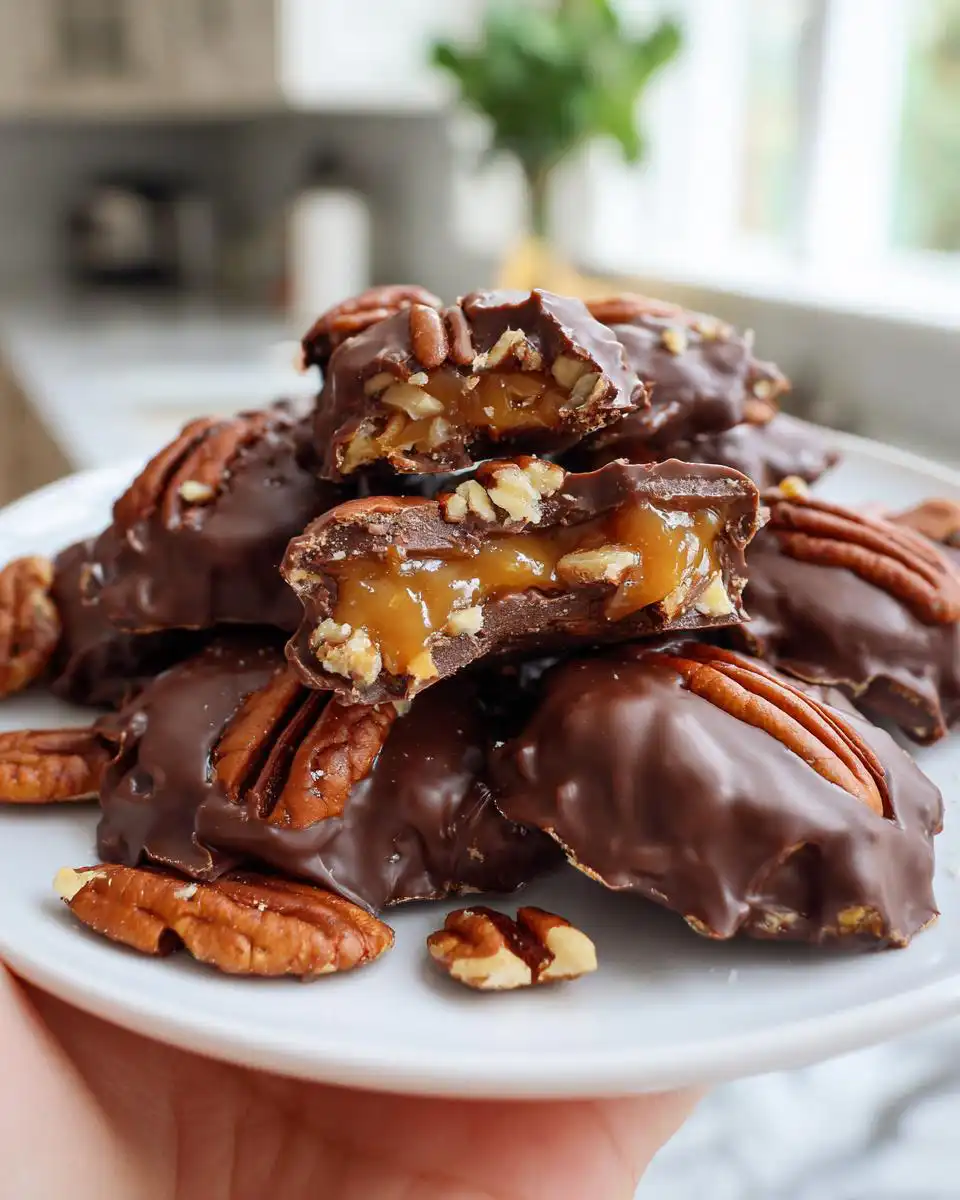
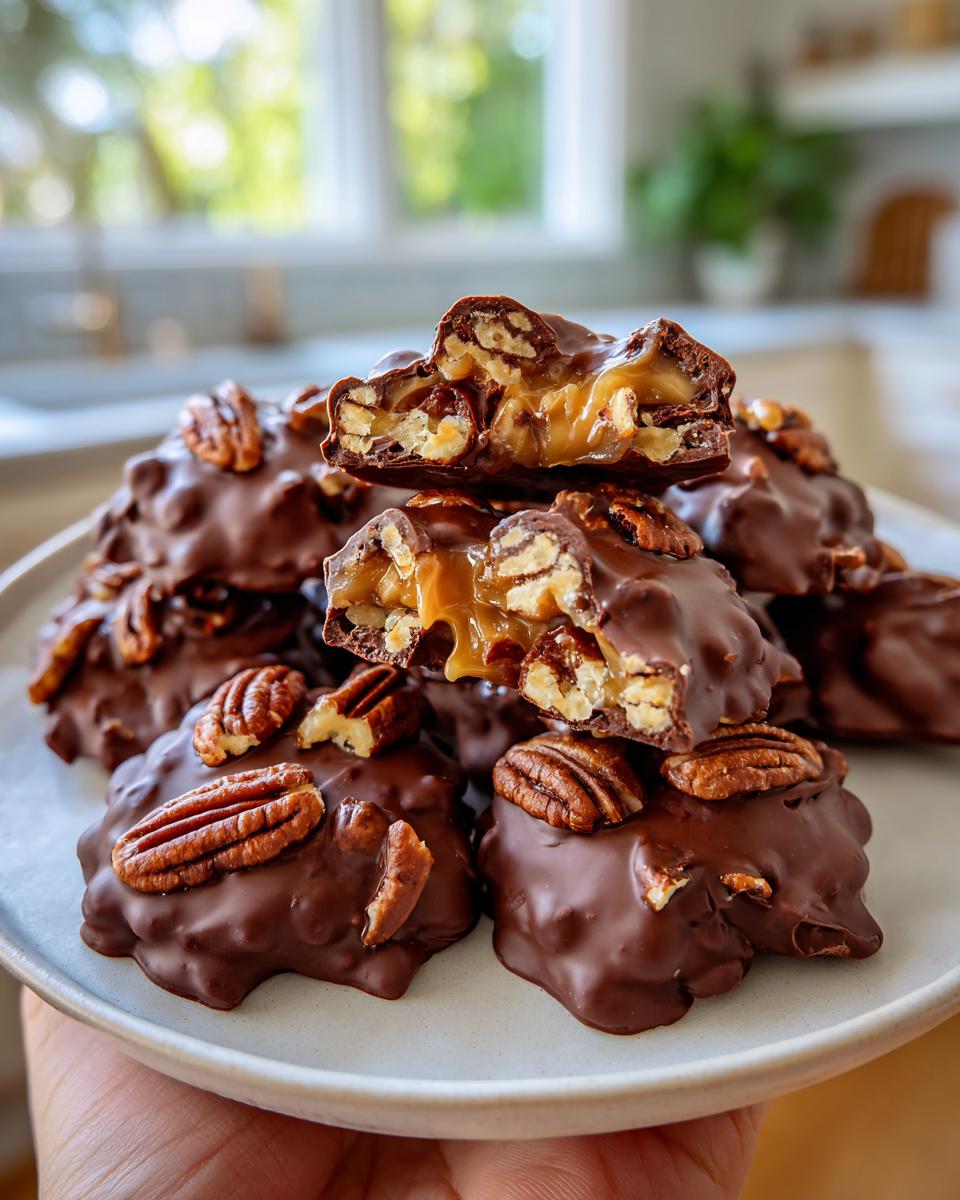
There’s something truly magical about homemade candy, isn’t there? The smell of caramel bubbling, the satisfying crunch of toasted nuts, and that perfect coat of smooth chocolate – it’s pure bliss! I know, I know, making candy from scratch can sound super intimidating, but trust me, these homemade chocolate turtles are a game-changer. I remember the first time I made them for a holiday cookie exchange; I was absolutely shocked at how easy they were and how much better they tasted than anything store-bought. My mom’s old recipe called for a million steps, but this simplified version? It’s a keeper, and I’m so excited to share it with you!
Why You’ll Love These Homemade Chocolate Turtles
- Seriously Easy: Whip these up in under an hour – no fancy equipment needed!
- Incredible Flavor: That perfect combo of toasty pecans, chewy caramel, and rich chocolate is divine.
- Amazing Texture: Crispy nuts, soft caramel, smooth chocolate – pure candy perfection!
- Perfect for Gifting: Box them up for a thoughtful, homemade treat anyone would adore.
- Impress Your Guests: These look and taste super gourmet, but they’re secretly simple.
Ingredients for Your Homemade Chocolate Turtles
You really don’t need a ton of fancy stuff for these, which is part of why I love them so much! Just good quality ingredients make all the difference. And yes, you’ll want to toast those pecans – it brings out their nutty flavor like magic. It’s a super simple extra step that makes these homemade chocolate turtles taste so much better.
- 6 tablespoons salted butter, cut into pieces
- 1/2 cup light brown sugar, packed nice and tight
- 1/2 cup granulated sugar
- 1/2 cup sweetened condensed milk (the full-fat kind works best!)
- 1/2 cup light corn syrup
- 1/2 teaspoon pure vanilla extract
- 2 cups pecan halves, toasted and roughly chopped (see step 1 in instructions!)
- 16 ounces high-quality chocolate, chopped (milk, dark, or semi-sweet – whatever you love!)
Crafting Perfect Homemade Chocolate Turtles: Step-by-Step
Okay, let’s get our hands sticky and make some magic! First things first, we need to get those pecans ready. Preheat your oven to 350°F and spread your pecan halves on a baking sheet. Imagine them toasting for about 5 to 8 minutes, just until they smell wonderfully fragrant – stir them once halfway through so they toast evenly. Once they’re done, let them cool a bit, then give them a rough chop. This step really brings out their amazing nutty flavor, and trust me, it’s worth it!
Next, grab a baking sheet and line it with parchment paper. This is where our little turtle clusters will chill out before their chocolate bath. For the caramel, I usually use a big microwave-safe bowl. Toss in your butter pieces, then stir in the brown sugar, granulated sugar, sweetened condensed milk, and corn syrup until it all looks nice and smooth.
Now for the caramel-making part! Pop that bowl into the microwave and heat it on high for about 6 to 8 minutes. But don’t just walk away! You need to stir it halfway through – this is super important for even cooking. You’re looking for it to reach 235°F on a candy thermometer, which is the soft ball stage. If you don’t have a thermometer, don’t panic! It should look bubbly and thickened.
Carefully remove the bowl from the microwave and stir in that pure vanilla extract. Right away, add your chopped toasted pecans and stir everything together until every single nutty piece is coated in that gorgeous caramel. It’s going to smell amazing right about now!
Time to form our turtle shapes! Spoon mounds of the sticky caramel-pecan mixture onto your prepared baking sheet. I like to make them sort of cluster-y, about the size of a tablespoon, to get those classic turtle vibes. Once they’re all spooned out, pop the whole sheet into the refrigerator for about 20 minutes. You want them to be nice and firm so they don’t fall apart when we dip them in chocolate.
While our caramel clusters are chilling, let’s get the chocolate ready. Place your chopped high-quality chocolate in a microwave-safe bowl. Heat it in 30-second intervals, giving it a good stir after each one, until it’s completely melted and wonderfully smooth. Be patient here – overheating chocolate can make it seize up, and that’s a sad situation, like trying to make energy bars without any binder!
Now for the fun part: dipping! Grab a chilled pecan cluster and a fork. Dip it into the melted chocolate, making sure to coat it completely. Let any excess chocolate drip back into the bowl – a gentle tap of the fork on the side can help. Carefully place the chocolate-dipped turtles back onto the parchment-lined baking sheet. Repeat with all your clusters until they’re all dressed up in their chocolatey best. These are almost as fun to make as our cheesecake bars!
Finally, let your beautiful homemade chocolate turtles set. You can leave them at room temperature if your kitchen isn’t too warm, or pop them back into the fridge for a bit until the chocolate is firm and glossy. And there you have it – delicious, homemade candy that will totally impress everyone, just like these other no-bake wonders!
Serving Suggestions for Your Homemade Chocolate Turtles
These decadent little treats are perfect on their own, but serving them up with a few thoughtful pairings really elevates the whole experience. Think of them like the star of the show, but with a fantastic supporting cast!
Hot Coffee or Tea: The warmth and slight bitterness of a good coffee or a fancy tea cuts through the sweetness of the caramel and chocolate beautifully, creating a perfect balance for your taste buds. It’s like a spa day for your mouth!
A Platter with Our Victoria Sponge Cupcakes: Hosting a party or just feeling fancy? Arrange these homemade chocolate turtles alongside a batch of our Victoria Sponge Cupcakes. The combination of textures and flavors is simply divine, making for a dessert spread that looks and tastes incredibly impressive.
Alongside Classic Chocolate Chip Cookies: Who can resist a good chocolate chip cookie? Serving these turtles next to them offers a delightful contrast in texture – the chewy cookie and the gooey caramel turtle create a dynamic duo that chocolate lovers will go wild for.
Storing and Reheating Your Homemade Chocolate Turtles
These little gems are pretty straightforward when it comes to storage. Since they’re made with caramel and chocolate, you’ll want to keep them happy and fresh!
The best way to keep your homemade chocolate turtles tasting just as wonderful as the day you made them is to store them in an airtight container. I usually pop them in the fridge, especially if it’s warm out, as it helps keep the chocolate from getting soft and melty. They’ll stay fantastic for a good week, maybe even a week and a half if you’re lucky! Honestly, they’re so good, they probably won’t last that long anyway! They’re perfect for making ahead for parties or just having a special treat ready, kind of like how our overnight oats are perfect for busy mornings.
Frequently Asked Questions About Homemade Chocolate Turtles
Can I use different nuts instead of pecans?
Oh, absolutely! While pecans are traditional and totally delicious, feel free to get creative. Walnuts would be amazing – they have a similar texture and a lovely earthy flavor. You could even try almonds, though you might want to chop them a bit finer. Just remember to toast whatever nuts you choose for the best taste!
What kind of chocolate is best for dipping these turtles?
This is where you can really play! I usually go for a good quality semi-sweet or dark chocolate because it balances the sweetness of the caramel so perfectly. But if you’re a milk chocolate fan, go for it! Just make sure it’s good quality – it makes a huge difference in how smoothly it melts and how it tastes. Candy melts can also work if you want a super easy coating that sets really hard, but for pure flavor, real chocolate is the way to go.
Why did my caramel turn out too hard or too soft?
Caramel temperature is key! If it gets too hot (above 235°F), it will firm up like hard candy. If it’s not hot enough, it stays too soft and gooey. An instant-read thermometer is your best friend here! Most importantly, don’t overcook it. If my caramel is slightly too soft, I just pop the clusters back in the fridge for a bit longer to firm up before dipping. If it’s too hard, well, that batch might become a caramel sauce for ice cream!
Before You Go
Seriously, you HAVE to try making these homemade chocolate turtles! They’re such a fun and rewarding treat to whip up. I’d absolutely love to hear how yours turn out. Let me know in the comments below, and if you enjoyed them, give them a star rating! You can also follow our adventures over on Medium!
Print
Homemade Chocolate Turtles
- Total Time: 45 min
- Yield: 20 pieces
- Diet: Vegetarian
Description
A sweet candy made with toasted pecans, soft caramel, and a chocolate coating.
Ingredients
- 6 tablespoons salted butter
- 1/2 cup light brown sugar, packed
- 1/2 cup granulated sugar
- 1/2 cup sweetened condensed milk
- 1/2 cup light corn syrup
- 1/2 teaspoon vanilla extract
- 2 cups pecan halves, toasted and roughly chopped
- 16 ounces high quality chocolate, chopped
Instructions
- Preheat your oven to 350°F. Spread pecans on a baking sheet and toast for 5 to 8 minutes until fragrant. Stir once halfway through. Let them cool, then roughly chop.
- Line a baking sheet with parchment paper.
- Melt the butter in a large microwave-safe bowl. Stir in brown sugar, granulated sugar, sweetened condensed milk, and corn syrup until smooth.
- Microwave the mixture on high for 6 to 8 minutes, stirring halfway through, until it reaches 235°F (soft ball stage).
- Remove from the microwave and stir in vanilla extract. Add the chopped pecans and stir until fully coated.
- Spoon mounds of the caramel pecan mixture onto the prepared baking sheet to form clusters. Chill in the refrigerator for about 20 minutes until firm.
- Place chopped chocolate in a microwave-safe bowl. Heat in 30-second intervals, stirring between each, until melted and smooth.
- Using a fork, dip each chilled pecan cluster into the melted chocolate to coat completely. Let excess chocolate drip off, then return to the parchment-lined sheet.
- Let the chocolate set at room temperature or refrigerate until firm. Serve or store in an airtight container.
Notes
- Control the caramel temperature to avoid overcooking, which makes the centers too firm instead of soft and chewy.
- Prep Time: 20 min
- Cook Time: 25 min
- Category: Dessert
- Method: No-Bake
- Cuisine: American