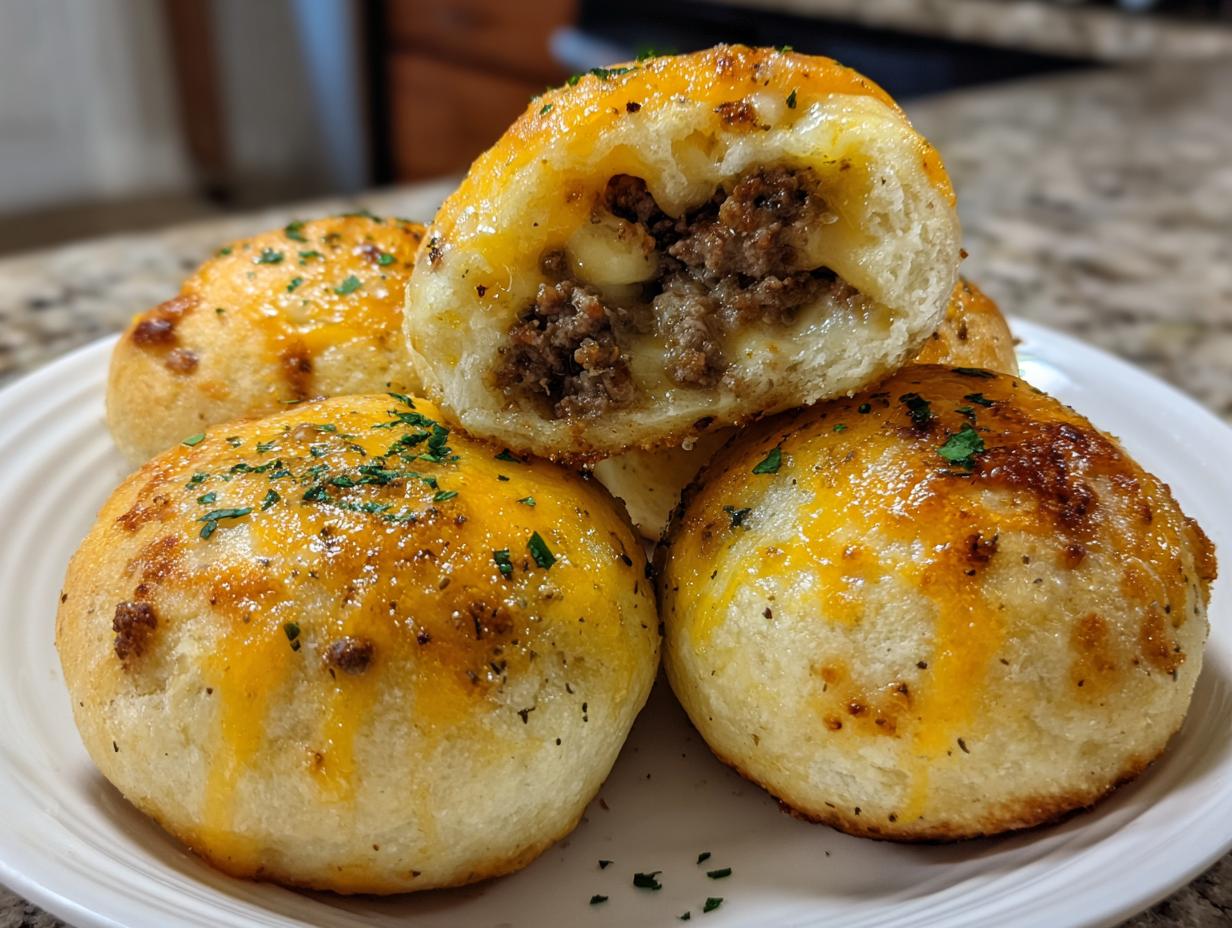
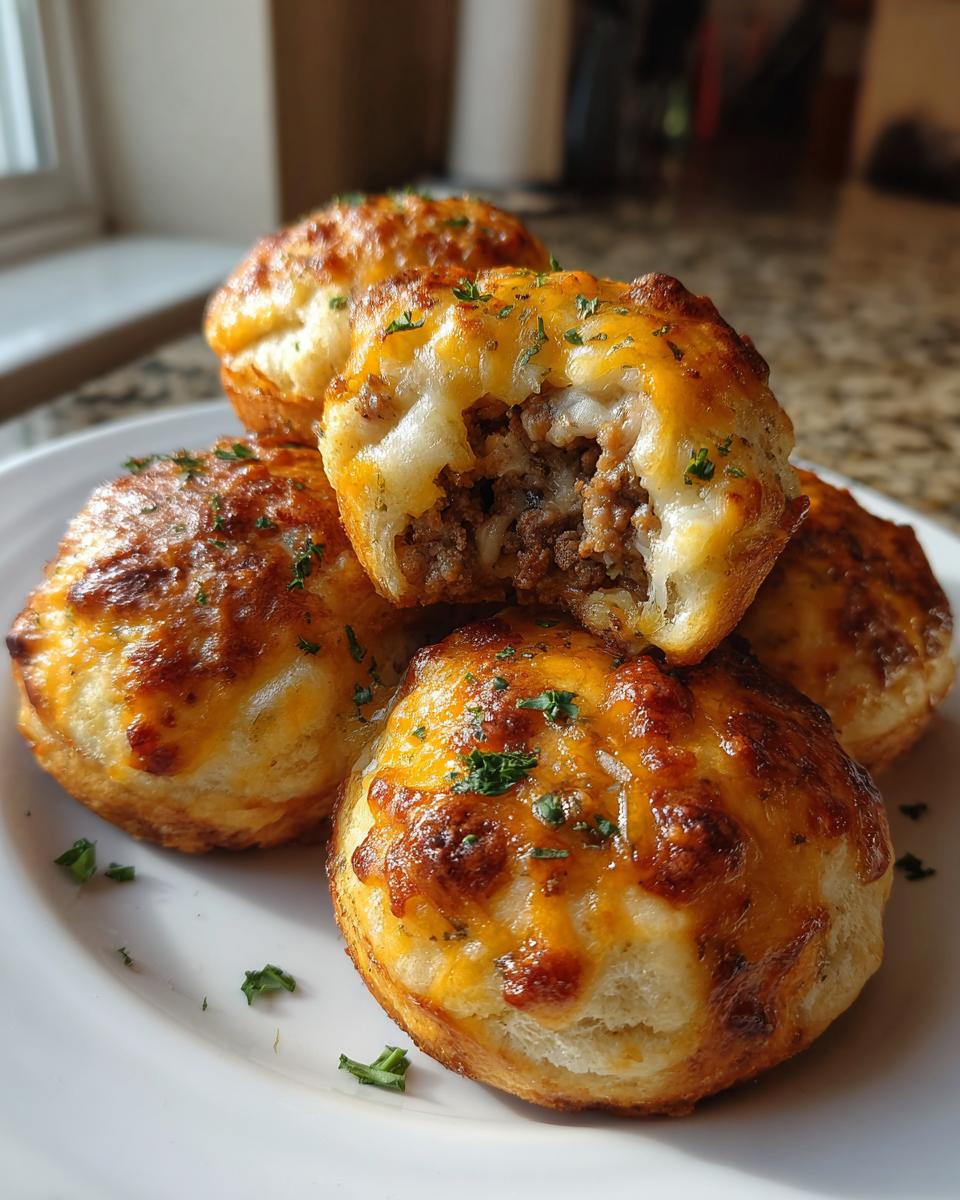
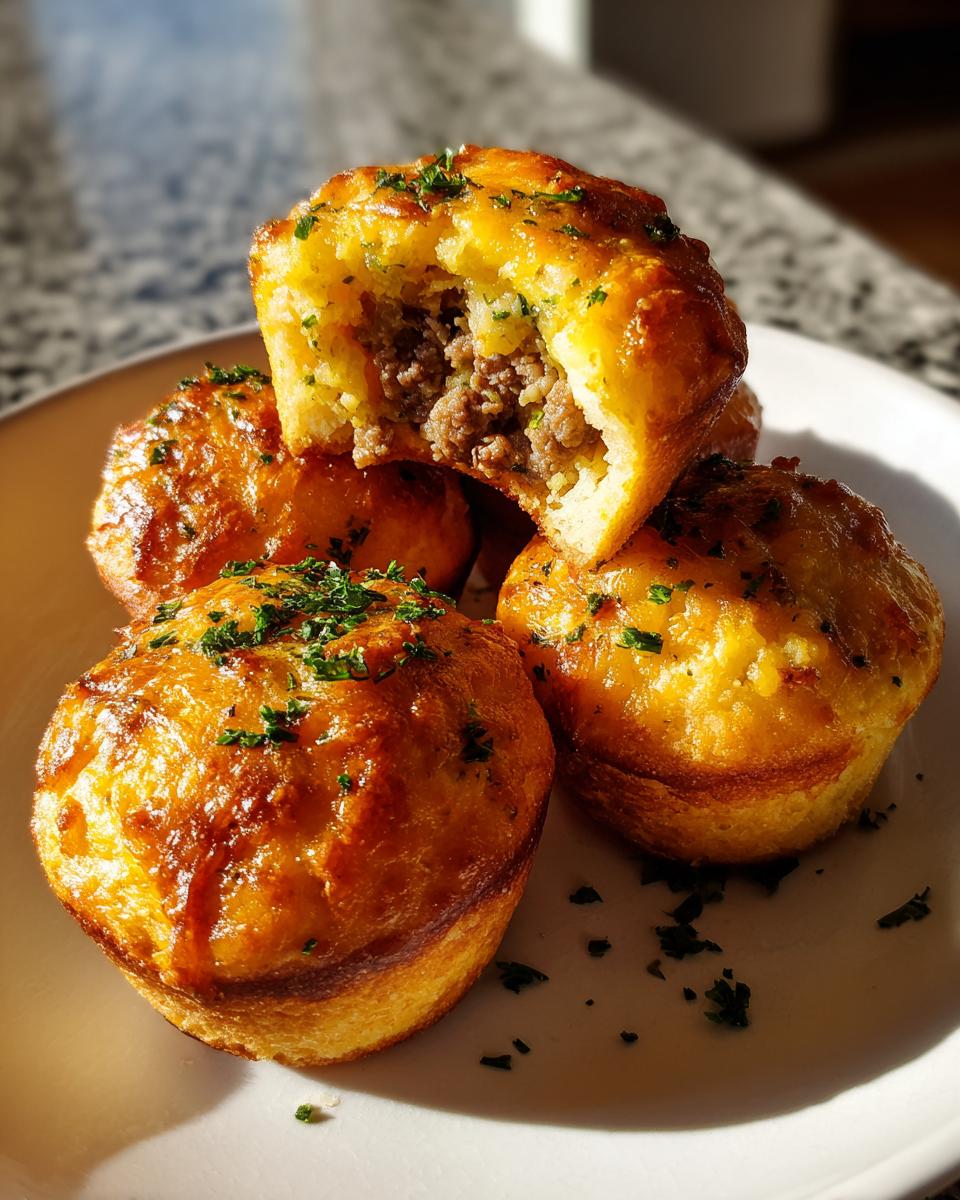
If you need a snack that tastes like pure, cheesy, beefy heaven but feels totally manageable to make, then you need to try my Irresistible Garlic Parmesan Cheeseburger Bombs right now. Seriously, these little dough pockets are everything good about a grilled burger wrapped up in flaky biscuit goodness, drowning in garlic butter!
I’m Jordan Bell, and while I focus on my Easy Detox Recipes blog now, I grew up deep in the South near Asheville, NC. I walked a long road losing 80 pounds, and you better believe I wasn’t giving up Southern comfort food. I just learned how to make it work for me! That’s why I take classic flavors—like the beef and cheddar combo here—and wrap them up in simple, satisfying ways. These bombs prove you don’t need complicated steps to get that amazing, deeply savory flavor profile. They’re quick, they’re satisfying, and they’re about to become your go-to party food.
Gathering What You Need for Irresistible Garlic Parmesan Cheeseburger Bombs
Okay, don’t panic when you see the list. It looks like a lot, but honestly, most of this is just seasoning and the glorious topping! We are building layers of flavor here, which is what takes a simple biscuit wrapper and turns it into something unforgettable. Trust me, having everything measured out before you start rolling the dough makes the assembly process fly by. You want everything ready to go because we move fast once the beef is cooked!
Component Checklist for Irresistible Garlic Parmesan Cheeseburger Bombs
Here is exactly what you need to pull these flavor bombs together. Pay close attention to the cheeses, because the cheddar melts inside and the Parmesan browns on top—both are crucial!
| Ingredient Category | Item | Amount |
|---|---|---|
| Meat & Base | Ground Beef | 1 lb |
| Seasoning | Salt, Pepper, Garlic Powder, Onion Powder | 1 tsp each (except onion powder, 1/2 tsp) |
| Flavor Enhancer | Worcestershire Sauce | 1 Tbsp |
| Filling Cheese | Shredded Cheddar Cheese | 1 cup |
| Dough | Refrigerated Biscuit Dough | 1 tube (about 8 biscuits) |
| Garlic Butter Topping | Butter, melted | 1/4 cup |
| Garlic Butter Topping | Finely Minced Garlic | 2 Tbsp |
| Finishing Touch | Grated Parmesan Cheese | 1/4 cup |
| Garnish | Fresh Parsley, chopped | 1 Tbsp |
Setting Up for Success: Equipment for Irresistible Garlic Parmesan Cheeseburger Bombs
You don’t need a full professional kitchen for these, which is why I love them for a quick weeknight snack! The most important thing is having a surface ready for assembly and a pan ready for baking. Since these bombs are juicy, we need to make sure cleanup is easy, too. Get these few items together, and we are ready to roll!
Tools Required for Perfect Cheeseburger Bombs
- A good skillet for browning the beef.
- A spatula for breaking up and stirring the meat.
- A small bowl just for mixing up that glorious garlic butter.
- A sturdy baking sheet.
- Parchment paper—don’t skip this; it saves your cleanup time!
- Measuring spoons and cups, especially for the seasonings and the 2 tablespoons of beef filling.
Step-by-Step Preparation of Irresistible Garlic Parmesan Cheeseburger Bombs
Alright, let’s get cooking! This is where the magic happens, and honestly, it moves faster than you think. The goal here is to get maximum flavor into the beef mixture before we wrap it up. Get your oven preheating to 375°F right now so it’s ready when the bombs are assembled. Line that baking sheet with parchment paper—I mean it, this stops any cheese blowouts from sticking!
Preparing the Savory Beef Filling
First things first, grab your skillet and get that ground beef cooking over medium heat. You need to brown it completely, and here’s my big tip: use your spatula to break it up into nice small crumbles as it cooks. Nobody wants giant chunks of beef inside their little dough balls!
Once it’s all cooked through, you absolutely must drain off every bit of excess fat. We want flavor, not grease pooling in the bottom of the dough. After draining, toss in your seasonings: one teaspoon each of salt, black pepper, and garlic powder, half a teaspoon of onion powder, and that tablespoon of Worcestershire sauce. Stir that around until everything smells amazing.
Now for the cheese! Dump in that cup of shredded cheddar. You want to keep stirring until that cheddar is completely melted and gooey, coating all the seasoned beef. Turn the heat down to low while you do this, just to help it melt nicely without burning the spices. Once it’s one big, cheesy, beefy mass, take it off the heat. That’s your filling, ready to go!
Assembling and Sealing Your Irresistible Garlic Parmesan Cheeseburger Bombs
Time to handle the biscuit dough. Take out your tube of refrigerated biscuits. You need to roll each one out flat until it’s about a quarter of an inch thick—not paper thin, but definitely wider than it started. This extra surface area is what lets you wrap it up completely.
Scoop about two tablespoons of that warm beef mixture right into the center of each flattened biscuit. Don’t overfill them, or they won’t seal! Now, this next part takes focus: carefully bring the edges of the dough up and over the filling. You have to pinch those seams together really tightly. I mean, really press them shut! If you leave any gaps, the cheese will escape during baking, and we want it trapped inside.
Once sealed, gently roll it in your hands to form a nice, neat ball. Place them seam-side down on your prepared baking sheet. They shouldn’t touch because they puff up a bit while baking.
The Flavor Finish: Brushing and Topping
This is the part that makes them famous! In a little bowl, whisk together your quarter cup of melted butter with those two tablespoons of finely minced fresh garlic. Wow, that smell alone is incredible. Use a pastry brush to generously coat the top of every single cheeseburger bomb with this garlic butter. Don’t be shy!
Right after the butter, sprinkle that quarter cup of grated Parmesan cheese evenly over the top of all of them. This Parmesan is what gives us that beautiful, salty, golden crust in the oven. It’s non-negotiable for that signature garlic Parmesan finish.
Baking and Resting Your Cheeseburger Bombs
Pop those beauties into your preheated 375°F oven. They bake for about 12 to 15 minutes. You are looking for them to be visibly golden brown all over and puffed up. Once they look perfect, pull them out. And here’s a hard rule from my kitchen: let them rest for five minutes! If you try to eat them straight out of the oven, you’ll burn your mouth on molten cheddar, and they are harder to handle. Five minutes lets them set up just enough.
Finally, give them a quick sprinkle of that fresh parsley just for color before you serve them up warm!
Tips for Making Truly Irresistible Garlic Parmesan Cheeseburger Bombs
Even though these are super easy, there are a couple of little tricks I learned the hard way when testing batches for the blog. When you’re trying to get that perfect, contained bite, the sealing and the topping application make all the difference. If you follow these small pointers, you skip the messy leaks and guarantee maximum flavor saturation.
Achieving a Flawless Seal
I know it seems tedious, but you have to press those seams like your life depends on it! When I first made these, I was rushing and just sort of crimped the edges. Big mistake. The cheese melts and pushes its way out of weak spots, leaving you with a greasy biscuit top instead of a cheesy bomb. Really pinch the dough together, maybe even give it a little twist where the edges meet. If you feel any doubt about a seal, just pinch it again.
Butter Application Timing
You might be tempted to brush the garlic butter on *after* they bake, right? Don’t do it! Brushing the butter and Parmesan on *before* they go into the oven is essential. When the butter melts, it seeps down into the biscuit dough slightly, keeping the surface soft and flavorful underneath that crispy Parmesan crust. If you wait until they cool, the butter just sits on top like a greasy afterthought rather than baking into the dough.
Frequently Asked Questions About Your Cheeseburger Bombs
I get so many questions about substitutions, especially when folks try to lighten up my favorite comfort foods! These are so versatile, but some steps are key to keeping that classic flavor profile. Here are the things I hear most often when readers try making these party food bites.
Can I use ground turkey instead of ground beef in these Cheeseburger Bombs?
You absolutely can use ground turkey, and it works great if you are looking for a slightly lighter option! However, ground beef has a higher fat content which really carries the flavor of the spices we use. If you switch to turkey, I highly recommend adding just a teaspoon of olive oil to the skillet when you brown it, or the mixture might end up a little dry inside the dough. Also, make sure you keep that Worcestershire sauce; it adds a lot of that necessary savory depth that turkey sometimes lacks compared to beef.
How far ahead can I assemble the Irresistible Garlic Parmesan Cheeseburger Bombs before baking?
This is a great question if you are hosting a gathering! You can assemble these cheeseburger bombs completely—filled, sealed, brushed with butter, and sprinkled with Parmesan—and then place them on the baking sheet, cover them tightly with plastic wrap, and pop them in the fridge for up to 12 hours. If you bake them straight from the fridge, just add about 3 to 5 extra minutes to your baking time. Don’t leave them out at room temperature for more than an hour before baking, though; we don’t want that raw dough sitting out forever.
What is the best way to serve these party food bites?
The very best way, hands down, is warm! Remember I told you they need that 5-minute rest after coming out of the oven? That’s the sweet spot. The cheddar is perfectly gooey but won’t instantly burn your tongue. They are fantastic served right out of the oven for a party. If they cool down too much, the biscuit dough can get a little dense, so if you make them way ahead, reheat them quickly! If you are looking for other great party appetizers, check out my ideas on Medium.
Storing and Reheating Leftover Garlic Parmesan Cheeseburger Bombs
It’s rare that we have leftovers because everyone devours these, but if you do manage to save a few of these delicious bites, you want to store them correctly so they don’t get sad and soggy overnight. The key to reheating is bringing back that golden, crispy exterior we worked so hard to achieve before baking!
Storage Guidelines
Once they are completely cool, place any leftover cheeseburger bombs into an airtight container. You can layer them with paper towels if you want to absorb any lingering moisture, but truly, getting them into a tightly sealed space is the most important thing. They are best eaten within three days when stored in the refrigerator. For more quick appetizer ideas, you can always browse my Pinterest boards.
Reheating for Best Taste
Please, please, please, skip the microwave for reheating if crispness matters to you! The microwave will just steam the biscuit dough and make it chewy. For the absolute best results, use your oven or, even better, your air fryer. Set the oven to about 325°F and heat them for about 8 to 10 minutes until they are warmed through. If you use the air fryer, 350°F for just 4 minutes works wonders to crisp everything back up! If you are looking for other savory baked goods, you might enjoy my recipe for savory holiday cranberry roll-ups.
Storage and Reheating Table
| Storage Method | Duration | Reheating Method (Recommended) | Reheating Time |
|---|---|---|---|
| Airtight Container (Fridge) | Up to 3 Days | Oven or Air Fryer | 4-10 minutes |
| Freezer (Airtight, Freezer Bag) | Up to 1 Month | Thaw slightly, then Oven/Air Fryer | 15 minutes (Oven) |
Sharing Your Experience with Irresistible Garlic Parmesan Cheeseburger Bombs
Now that you’ve made a batch of these amazing bombs, I truly want to hear all about it! Did they disappear instantly at your house? Are you already planning your next batch for the big game? Drop a comment below and let me know how they turned out for you. A quick rating helps other readers know these Irresistible Garlic Parmesan Cheeseburger Bombs are worth making! If you are looking for another great comfort food recipe, check out my cheesy beef and potato soup.
Print
5 Star Irresistible Garlic Parmesan Cheeseburger Bombs
- Total Time: 30 minutes
- Yield: 8 bombs 1x
- Diet: N/A
Description
Irresistible Garlic Parmesan Cheeseburger Bombs offer a comforting bite of savory ground beef, melted cheddar, all wrapped in flaky biscuit dough, topped with a rich garlic Parmesan butter. This recipe brings Southern comfort food flavor into an easy-to-make package. I’m Jordan Bell from Asheville, NC, and after my 80-pound weight loss journey, I focus on making Southern comfort food clean on my Easy Detox Recipes blog. You will love these flavor-packed bites.
Ingredients
- 1 lb ground beef
- 1 teaspoon salt
- 1 teaspoon black pepper
- 1 teaspoon garlic powder
- 1/2 teaspoon onion powder
- 1 tablespoon Worcestershire sauce
- 1 cup shredded cheddar cheese
- 1 tube refrigerated biscuit dough (about 8 biscuits)
- 1/4 cup butter, melted
- 2 tablespoons finely minced garlic
- 1/4 cup grated Parmesan cheese
- 1 tablespoon chopped fresh parsley
Instructions
- Preheat your oven to 375°F (190°C) and line a baking sheet with parchment paper.
- In a skillet over medium heat, brown the ground beef until fully cooked, breaking it apart with a spatula. Drain excess fat.
- Season the beef with salt, black pepper, garlic powder, onion powder, and Worcestershire sauce. Stir in the shredded cheddar cheese until melted and well combined.
- Roll out each biscuit until approximately 1/4 inch thick. Place about 2 tablespoons of the cheesy beef mixture in the center of each biscuit.
- Carefully fold the edges of the dough around the filling and pinch to seal, forming a ball. Place seam-side down on the prepared baking sheet.
- In a small bowl, combine melted butter and minced garlic. Brush the tops of each cheeseburger bomb with the garlic butter.
- Sprinkle grated Parmesan cheese evenly over each bomb.
- Bake in the preheated oven for 12-15 minutes or until golden brown and cooked through.
- Garnish with fresh parsley before serving.
Notes
- Best served warm; let them rest 5 minutes after baking for easier handling.
- Prep Time: 15 minutes
- Cook Time: 15 minutes
- Category: Appetizer/Snack
- Method: Baking
- Cuisine: American
Nutrition
- Serving Size: 1 bomb
- Calories: Approx. 300
- Sugar: Approx. 2g
- Sodium: Approx. 550mg
- Fat: Approx. 20g
- Saturated Fat: Approx. 10g
- Unsaturated Fat: Approx. 10g
- Trans Fat: 0g
- Carbohydrates: Approx. 15g
- Fiber: Approx. 1g
- Protein: Approx. 15g
- Cholesterol: Approx. 55mg