Oh, has the sun got you feeling a bit frazzled and craving something cool and utterly delicious? You know those days when you just want a dessert that’s sweet, creamy, and bursting with fresh flavour, but the thought of turning on the oven makes you sweat? Yep, me too! That’s exactly why I absolutely adore this easy strawberry icebox cake. It’s like a little slice of pure summer heaven without any of the fuss. I remember the first time I made it for a family picnic last year; everyone was raving, and the best part was, I’d barely spent 15 minutes in the kitchen. It’s just so wonderfully simple!
Why You’ll Love This Easy Strawberry Icebox Cake
- It’s unbelievably quick to whip up – I’m talking 15 minutes, max!
- Seriously, you only need a handful of simple ingredients you probably already have.
- Absolutely NO baking required, which is an absolute lifesaver on hot days.
- The creamy, dreamy layers with sweet strawberries? Pure heaven!
- It’s perfect for everything from spontaneous BBQs to a simple weeknight treat.
- Honestly, even the fussiest eaters in my house gobble this up.
Ingredients for Your Easy Strawberry Icebox Cake
- 2 cups cold heavy cream
- 1/2 cup powdered sugar, sifted
- 1 teaspoon vanilla extract
- 3 cups fresh strawberries, hulled and sliced
- 24 digestive biscuits
Crafting Your Easy Strawberry Icebox Cake: Step-by-Step
Step 1: First things first, let’s get that luscious cream ready. Pop your cold heavy cream into a large bowl, add the sifted powdered sugar and that lovely vanilla extract. Give it a good whisk – I usually use my electric mixer on medium-high speed. You’re looking for lovely soft peaks, like little snowy mountain tops, that just hold their shape. Don’t overdo it, or it’ll turn grainy! This step is key to a super creamy texture, much like in these no-bake strawberry cheesecake bars.
Step 2: Now, grab your 8-inch square dish. Spread a thin, even layer of your whipped cream right on the bottom. This acts like a little yummy base for our biscuit layers.
Step 3: Time for the biscuits! Arrange a single layer of digestive biscuits over the cream. Don’t worry if they aren’t perfect squares; just break them up a bit to fill any gaps. They’ll soften up beautifully, trust me.
Step 4: Spoon another generous layer of whipped cream over the biscuits. Gently spread it out so it’s nice and even right to the edges.
Step 5: Now for the star of the show – the strawberries! Scatter a lovely layer of your sliced strawberries evenly over the cream. Try to get them as flat as possible for a smoother finish.
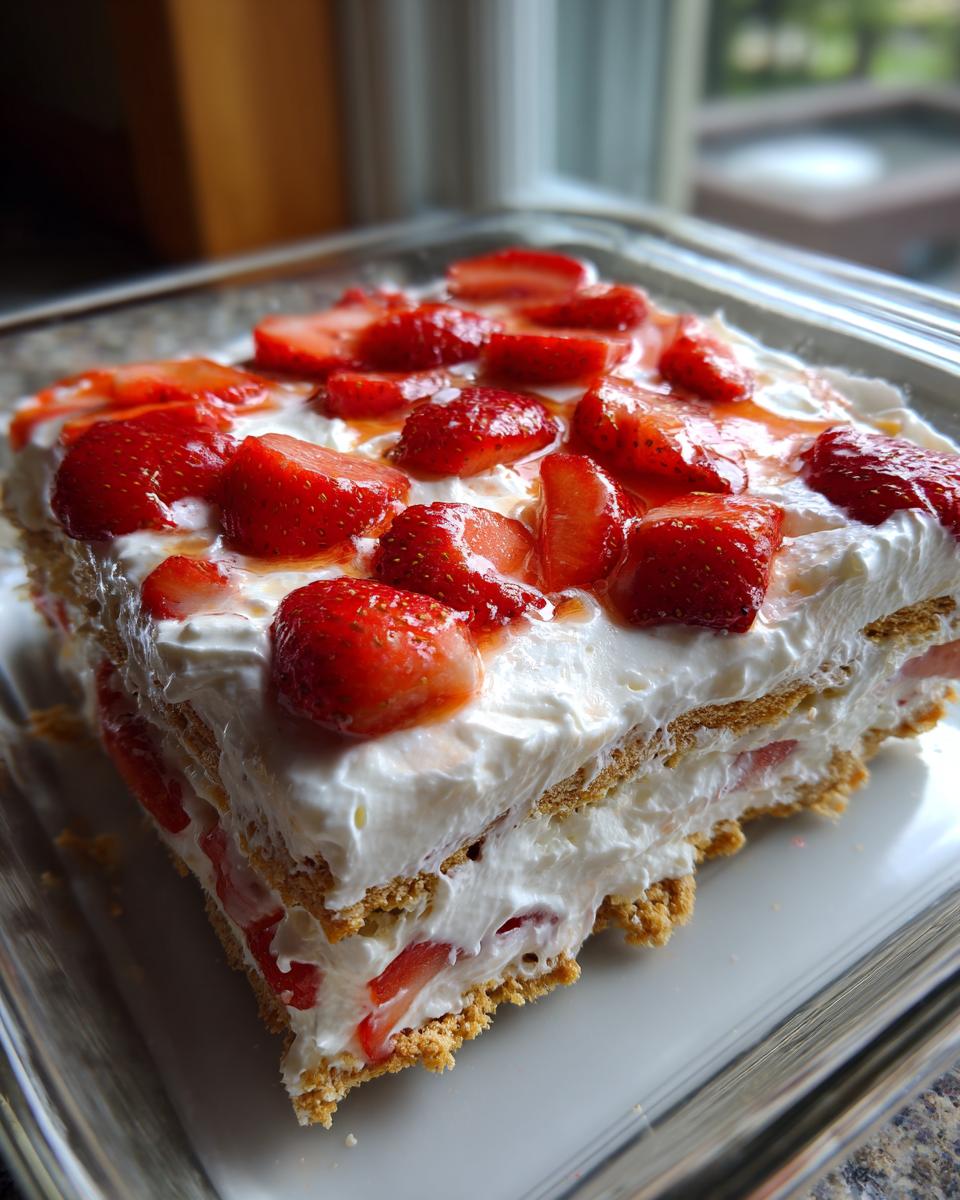
Step 6: We’re going to repeat those layers! Add another layer of biscuits, then cream, then strawberries. Keep going until you’ve used up all your ingredients, making sure to finish with a final glorious layer of whipped cream right on top. This is where you can really see your easy strawberry icebox cake taking shape!
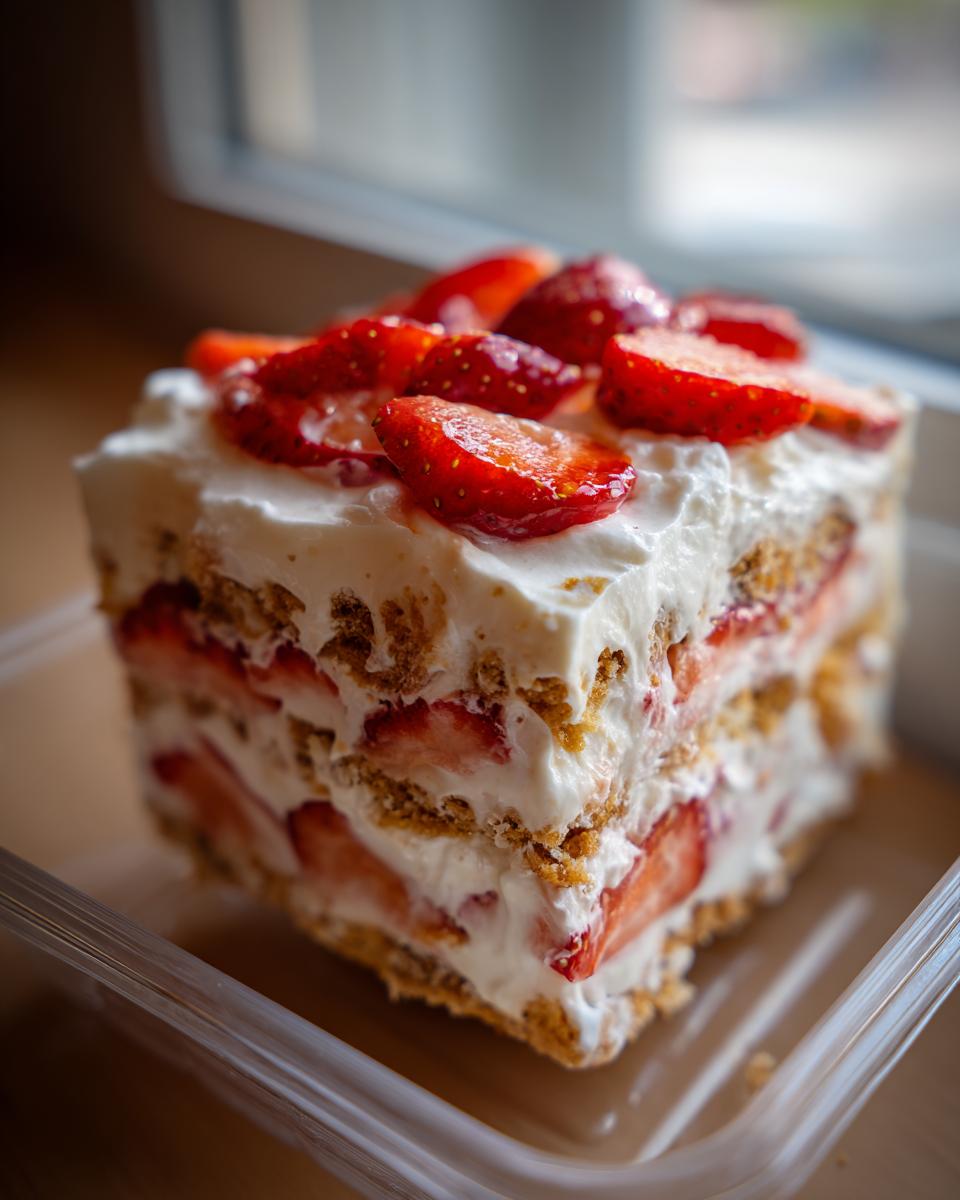
Step 7: Cover the dish tightly with cling film and pop it into the fridge. This is the most important part for getting that perfect texture: let it chill for at least 6 hours, but honestly, overnight is even better. This gives the biscuits time to totally soften and soak up all that creamy goodness, turning it into a cake-like dream.
Step 8: Just before you’re ready to serve, you can add a few extra strawberry slices on top for a bit of a flourish. It just adds a lovely pop of colour and freshness!
Step 9: Slice your chilled masterpiece into generous portions and serve immediately. Enjoy that cool, creamy, fruity goodness!
Serving Suggestions for Your Easy Strawberry Icebox Cake
- A Light Dusting of Icing Sugar: For a touch of sweetness and pretty presentation, a very fine sieve of icing sugar over the top before serving is just lovely. It’s a simple touch that makes your easy strawberry icebox cake look even more special.
- A Dollop of Extra Cream: Who can resist a little extra cream? A small spoonful of your leftover whipped cream or even a dollop of double cream on the side adds a touch more indulgence.
- Fresh Mint Sprigs: A few small sprigs of fresh mint aren’t just for decoration! They add a wonderfully refreshing aroma and a hint of cool flavour that cuts through the sweetness beautifully, just like in these strawberry cinnamon rolls.
Storing and Reheating Your Easy Strawberry Icebox Cake
Right then, about keeping this beauty fresh! This easy strawberry icebox cake is best stored, well, in the fridge! Once it’s all assembled and chilled, cover it really well with cling film or pop it into an airtight container. It’ll keep beautifully for about 3 to 4 days. My tip? If you can, try and get it into the container as soon as you’ve added the last layer of strawberries and cream, before you’ve added any fancy top decorations.
Because it’s a no-bake cake, there’s no reheating needed, thank goodness! We want to keep it lovely and chilled, right? That’s also why it’s brilliant for meal prep. You could literally make the whole thing the night before a get-together, and it’ll be even better the next day as the flavours have had more time to mingle and the biscuits have softened up just perfectly. Keep it covered, chilled, and ready to go!
Frequently Asked Questions About Easy Strawberry Icebox Cake
Can I use other fruits instead of strawberries?
Oh, absolutely! While strawberries are my personal favourite for this easy strawberry icebox cake because they’re just so summery, you can totally switch them up. Raspberries, blueberries, or even chopped peaches would be divine! Just make sure they’re not too watery, or you might end up with a soggy cake. You could even do a mix, perhaps inspired by these no-bake strawberry cheesecake bars.
How long does it take for the biscuits to soften properly?
This is the million-dollar question, isn’t it? For the best result, and to get that lovely cake-like texture where the biscuits are totally softened, you really want to give it at least 6 hours in the fridge. Honestly, overnight is even better. If you’re in a rush and only chill it for, say, 4 hours, you might still get a bit of a crunch, which some people don’t mind, but for that ultimate creamy dream, patience is key!
Can I make this easy strawberry icebox cake ahead of time?
Yes, you totally can! In fact, I often make mine the day before I need it for a party. It actually tastes even better because all those lovely flavours have more time to meld together, and the biscuits get perfectly soft. Just make sure you cover it really well with cling film when you pop it in the fridge. It’s a lifesaver when you’ve got lots of other things to do!
Before You Go
I really hope you give this easy strawberry icebox cake a go this week! It’s such a treat, and let me know in the comments how it turns out for you. A picture would be lovely too – I can’t wait to see your creations!
Print
Easy Strawberry Icebox Cake
- Total Time: 15 min
- Yield: 8 servings
- Diet: Vegetarian
Description
A simple no-bake dessert with creamy layers and fresh strawberries, perfect for summer.
Ingredients
- 2 cups heavy cream
- 1/2 cup powdered sugar
- 1 teaspoon vanilla flavoring
- 3 cups fresh strawberries, sliced
- 24 digestive biscuits
Instructions
- Whip the heavy cream with powdered sugar and vanilla flavoring in a large bowl until soft peaks form.
- Spread a thin layer of whipped cream on the bottom of an 8-inch square dish.
- Arrange a layer of digestive biscuits over the cream, breaking them to fit if necessary.
- Spread a layer of whipped cream over the biscuits.
- Add a layer of sliced strawberries evenly across the cream.
- Repeat the layers of biscuits, cream, and strawberries until all ingredients are used, finishing with a cream layer on top.
- Cover and refrigerate for at least 6 hours or overnight until the biscuits soften into a cake-like texture.
- Before serving, add a few extra strawberry slices on top for decoration if desired.
- Slice and serve chilled.
Notes
- Chilling overnight gives the best texture as the biscuits fully soften and the layers set neatly.
- Prep Time: 15 min
- Cook Time: 0 min
- Category: Dessert
- Method: No Bake
- Cuisine: British