Delicious crepes recipe—that’s what we’re diving into today, friends! If you’re anything like me, you grew up on big, fluffy, butter-soaked Southern breakfasts, and while I love that comfort food, it often didn’t love my waistline. I’m Jordan Bell, checking in from Asheville, NC. After losing 80 pounds, I realized I didn’t have to ditch flavor; I just had to clean up the recipes! That’s why I started my blog, Easy Detox Recipes, where we take those cozy Southern classics and make them lighter without losing any of the soul.
Now, crepes. They seem fancy, right? Like something you only order on vacation. But trust me, these are the easiest, lightest things you will ever make. They’re delicate, they’re fast, and they are the perfect canvas for whatever you’re craving—sweet berries, maybe a little lemon zest, or even savory ham and cheese if you skip the optional vanilla. I’ve tweaked this simple French technique until it fits perfectly into my low-fuss, high-flavor lifestyle. Forget the complicated techniques you might have seen elsewhere. This specific delicious crepes recipe is foolproof, even if you’ve never touched a skillet before. We’re keeping it simple, keeping it clean, and getting breakfast on the table in under thirty minutes!
Gathering Your Ingredients for Delicious Crepes Recipe
Okay, the beauty of this delicious crepes recipe is that you probably already have everything hanging out in your pantry right now. Seriously, no specialty shopping needed! Getting your ingredients measured and ready—what we call *mise en place*—is half the battle won. When you’re ready to mix, you want to move fast, so having your milk measured and your butter melted ahead of time saves you from rushing later.
Don’t stress if the batter needs to rest for a bit; that’s the only slow part, and it’s honestly hands-off time for you! But for the mixing part, let’s make sure we have the exact right components lined up. This ensures those crepes come out tender and thin, not tough and chewy!
Essential Components for Delicious Crepes Recipe
Here is exactly what you need for about ten lovely crepes. I always grab my ingredients and set them out on the counter before I even plug in the mixer:
| Ingredient | Quantity/Prep |
|---|---|
| Eggs | 3 large |
| Milk | 500 ml (room temperature is best!) |
| All-Purpose Flour | 250 grams |
| Butter | 100 grams, melted |
| Vanilla Sugar (Optional) | 1 packet (for a sweet breakfast crepe) |
Mastering the Batter: Steps for Your Delicious Crepes Recipe
This is where most people get nervous, but I promise you, once you see how easy this is, you’ll be making this delicious crepes recipe every weekend. The key to a truly delicate crepe is getting that batter silky smooth. If you’ve ever made pancakes and ended up with little lumps of flour, don’t worry! We’re going to beat those right out of existence.
The beauty of this recipe is that it’s forgiving, but the mixing method really shines when you use electricity. I know some folks like whisking everything by hand, and you certainly can, but an electric mixer—even a cheap hand mixer—will ensure you get that perfectly uniform liquid consistency needed for a thin crepe.
Combining and Blending the Batter
I like to start by putting the wet ingredients into the bowl first—the eggs and the milk. Give those a quick whisk just to break up the yolks. Then, add your flour and that optional vanilla sugar. Start your electric mixer on a low speed right away. You want to incorporate the dry ingredients slowly so they don’t puff up and make a cloud of flour dust all over your lovely clean kitchen! Keep mixing until you see it start to come together, maybe looking a bit thick.
Now for the melted butter. Pour that in slowly while the mixer is still running on low. Once all the butter is incorporated, crank that speed up to medium for about a minute. You are looking for a batter that flows like thin cream. If you see any little specks of dry flour hiding on the bottom or sides, stop the mixer, scrape down the bowl with a spatula—don’t skip this part!—and blend for just 15 more seconds.
The Crucial Rest Period for Your Delicious Crepes Recipe
Here’s the secret sauce that elevates this beyond just a quick breakfast batter: you have to let it rest. I know, I know, we’re busy! But trust me, this short break is essential for the best texture. You need to cover that bowl and let it sit on the counter for at least 20 minutes, or even up to an hour if you have time.
Why do we rest it? Well, the flour needs time to fully absorb all that liquid milk. When the flour hydrates properly, it stops the gluten strands from tightening up when they hit the hot pan. If you skip this rest, your crepes will be chewier and might tear easily. Letting it rest ensures that every single crepe made from this delicious crepes recipe is tender, light, and practically melts in your mouth. It’s worth the wait, I promise!
Equipment Needed for Perfect Crepes
You don’t need a fancy French crepe maker for this! Honestly, the less equipment, the better for quick clean-up, right? For this delicious crepes recipe, you just need a good, reliable non-stick frying pan—about 8 to 10 inches is perfect. Grab your electric mixer for the batter, a rubber spatula for scraping the sides, and a ladle to scoop the batter. That’s it! Simple tools make simple, amazing food.
Cooking Your Delicious Crepes Recipe Perfectly
Alright, the batter is rested, the pan is waiting, and now we get to the fun part! Cooking these crepes is all about temperature control. If the pan is too cold, the crepe will soak up all the fat and get thick and rubbery. If it’s too hot, it burns before the edges even set. We are aiming for that sweet spot that gives us beautiful, lacy gold edges. Once you get the hang of it, you’ll be whipping these out faster than you can make coffee!
Remember, the very first crepe sometimes acts as a sacrifice—it tells you what the pan temperature really is! Don’t sweat it if the first one looks a little wonky; just use it as a test run for the rest of the batch of your delicious crepes recipe.
Preparing the Pan for Your First Delicious Crepes Recipe
Get your non-stick pan heating up over medium heat. I mean it—medium! It needs a few minutes to come up to temp properly. You want the pan hot enough that a tiny drop of water sizzles and evaporates immediately, but not so hot that it smokes. Since we already added melted butter right into the batter, you usually don’t need to add much more fat to the pan, but I like to give it a quick wipe with a paper towel dipped in softened butter or oil right before the first crepe goes in.
This initial coating helps everything release beautifully. Once you think it’s ready, hold your hand an inch or two above the surface. If you feel a steady, gentle warmth, you’re good to go. If it feels scorching hot, pull it off the burner for 30 seconds to cool down just a touch before pouring.
Pouring and Swirling the Batter
Use a ladle—usually about a quarter cup, depending on your pan size—to pour the batter right into the center of the hot pan. The second the batter hits the metal, you need to move fast! Immediately grab the handle and tilt the pan in a circular motion. You want the batter to flow quickly outward and coat the entire bottom surface in a very thin, even layer. If you have a big hole in the middle, pour just a tiny extra drizzle right where the gap is, and swirl it quickly to fill it in.
Don’t overthink the swirling; it should take maybe three seconds total. If you take too long, the batter sets before it spreads thinly enough. If you end up with way too much batter, pour the excess back into the mixing bowl, scrape the pan, and try again with less next time. Thin is key!
Flipping and Finishing the Crepes
Now, just let it cook! You don’t need to touch it for about a minute or two. You’ll know it’s time to flip when the edges start looking dry and slightly lacy, and they’ll lift up just a tiny bit from the pan surface. If you gently slide your spatula underneath, you should see a gorgeous, even, light golden-brown color. That’s the sign!
Slide that spatula under the middle, lift quickly, and flip it over. Seriously, the second side cooks way faster—maybe only 20 to 30 seconds. You just want that side to lose its wet look and get a kiss of color. Once it’s done, slide that perfect crepe right onto a plate. Stack them up; they stay warm under a clean kitchen towel while you finish the rest of the delicious crepes recipe batch.

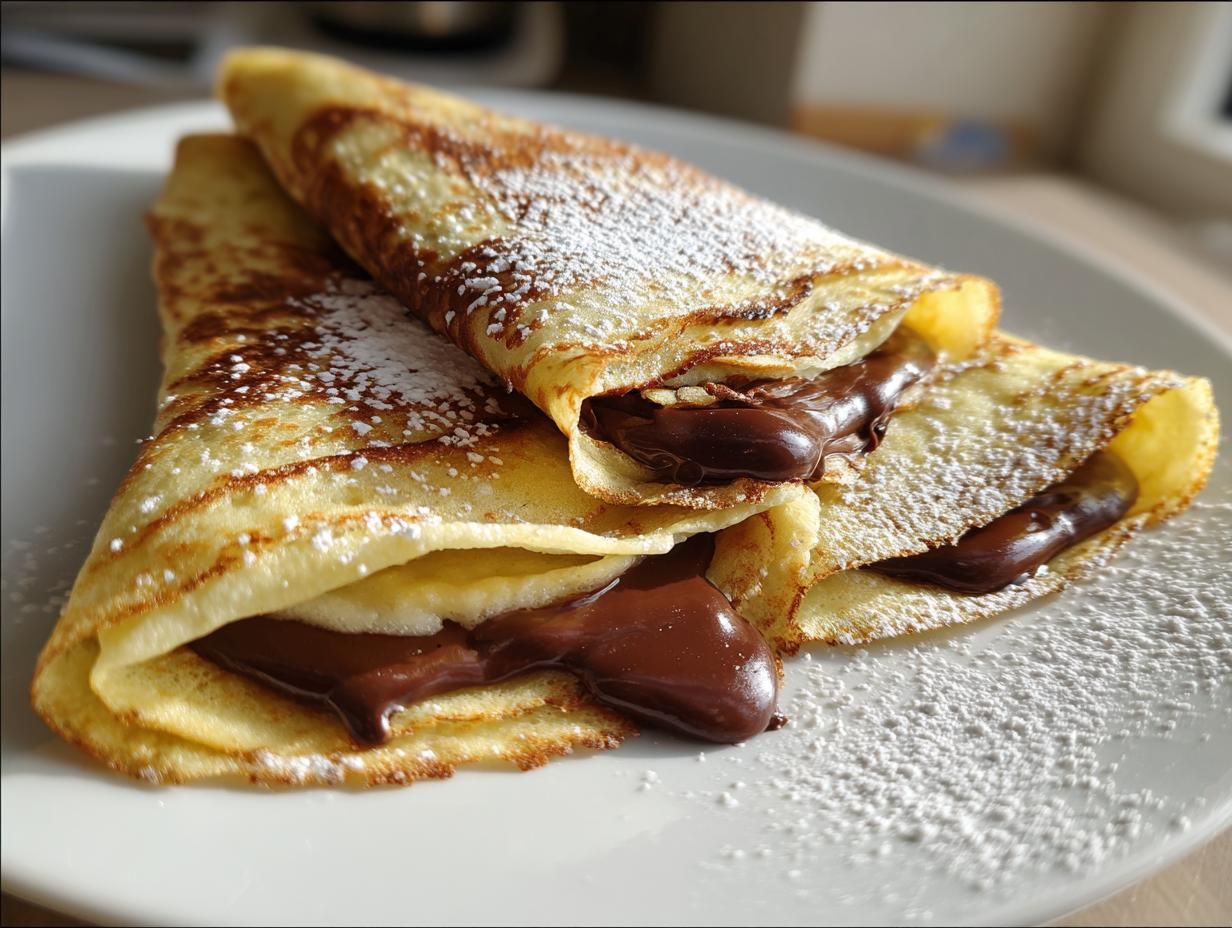
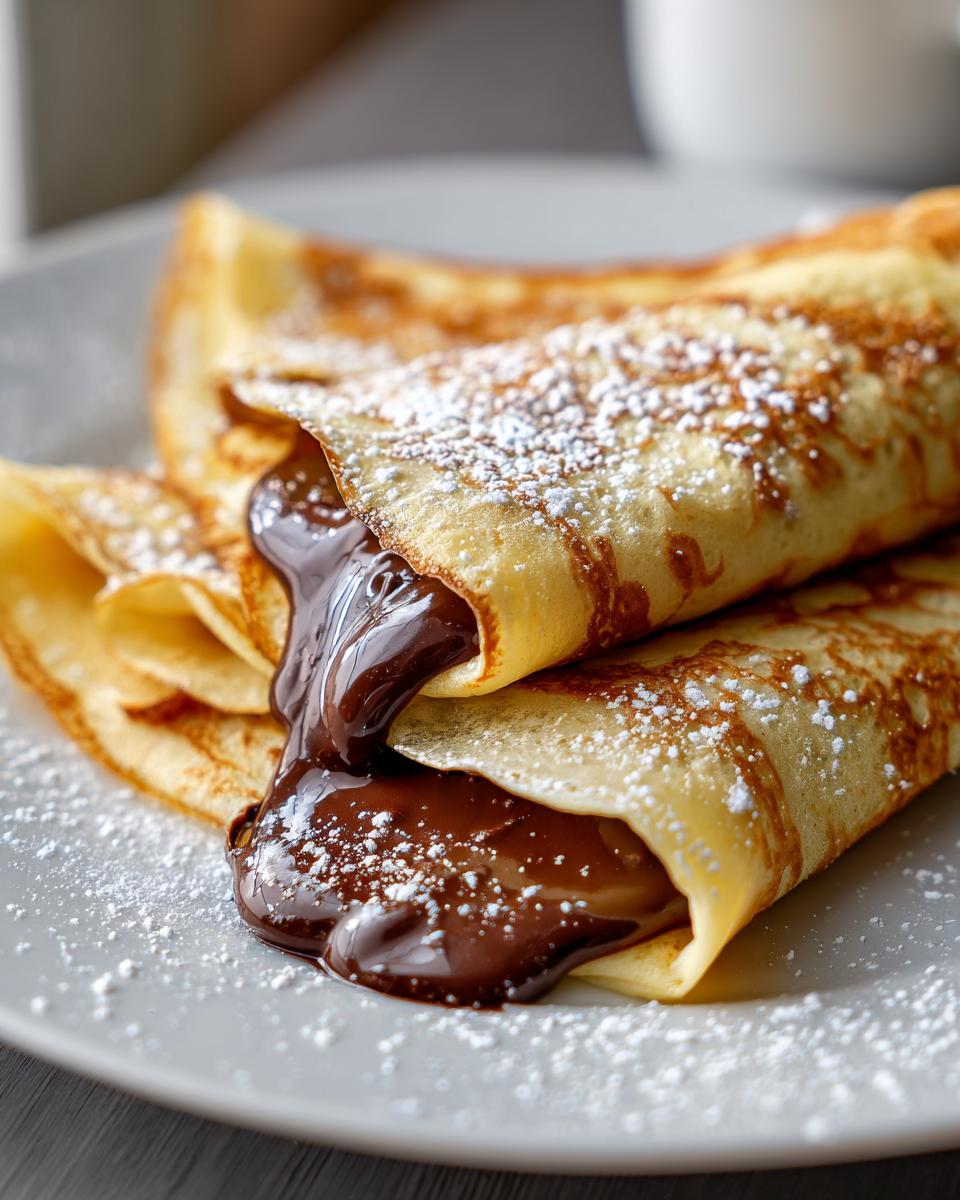
Serving Suggestions for Your Delicious Crepes Recipe
Now that you have these beautiful, light rounds from your delicious crepes recipe, the fun part begins! Since we’re focusing on clean eating over here at Easy Detox Recipes, I like to keep the fillings bright and naturally sweet. Skip the heavy, sugary sauces and let the crepe shine!
My absolute favorite simple topping is fresh berries—strawberries, blueberries, whatever looks best at the market. Just toss them with a tiny squeeze of fresh lemon juice and maybe a whisper of cinnamon. If you want something richer, try spreading a thin layer of plain Greek yogurt inside before rolling it up. It gives you that creamy texture without added sugars. For a quick, clean breakfast crepe, a few sliced bananas and a drizzle of pure maple syrup is always a winner. These thin wrappers handle light fillings so well!
Storing and Reheating Your Delicious Crepes Recipe
Even though these crepes are so fast to make that you might not have leftovers, sometimes you just can’t eat twelve crepes in one sitting! The good news is that this delicious crepes recipe holds up really well, provided you store them correctly. The main thing to remember is that you don’t want them sticking together in a big, sad clump in the fridge.
When I’m done cooking, I let them cool completely on a wire rack first. Trying to stack warm crepes traps steam, and that makes them gummy. Once they’re totally cool, you stack them up with a little bit of parchment paper or wax paper between each one. This keeps them separate and easy to grab later. They fit so neatly into a zip-top bag or an airtight container! For more tips on clean eating inspiration, check out my Medium profile.
| Storage Method | Duration | Reheating Tip |
|---|---|---|
| Refrigerator (Separated) | Up to 4 days | Microwave for 15-20 seconds, or heat in a dry, warm skillet. |
| Freezer (Separated) | Up to 2 months | Thaw overnight in the fridge, then reheat gently in a pan to restore texture. |
Reheating them in a dry, warm skillet over low heat is always my favorite way. It takes just a minute per side, and it brings back that beautiful tender texture without making them tough again. They taste almost as good as fresh!
Frequently Asked Questions About Delicious Crepes Recipe
I always get a flood of questions after people try this recipe for the first time because they are so surprised how easy it is! Here are a few things I hear most often about making this delicious crepes recipe perfectly every time.
Can I make the Delicious crepes recipe batter ahead of time?
Yes, absolutely! This is one of my favorite things about this recipe. You can mix the batter up to 24 hours in advance. Just pour it into an airtight container and pop it in the fridge. Remember what I said about resting the batter? Well, refrigeration does that job even better! When you pull it out, it might look a little thick because the flour has soaked up even more liquid. Don’t worry about that! Just give it a quick whisk or blend for 5 seconds to loosen it up before you start cooking.
What is the best non-stick pan size for crepes?
For the easiest time swirling and getting that classic thin shape, an 8-inch skillet is my go-to size. It gives you a nice, manageable surface area. If you use a larger 10-inch pan, you’ll need to increase your batter amount slightly, maybe by 25 percent, or your crepes will end up looking more like flat, oversized tortillas. Stick to 8 or 9 inches for the best results with this recipe! If you are looking for more simple, low-fuss recipes, check out my Pinterest board.
I keep getting lumps in my batter, what am I doing wrong?
Lumps happen! Don’t panic and don’t add more liquid right away. Usually, lumps mean you added the flour too fast, or you didn’t scrape the sides of the bowl before that final blend. If you see lumps, just cover the bowl and let it rest for 15 minutes. Seriously, the soaking time helps the lumps dissolve on their own! If that fails, give it a quick blitz with the immersion blender or hand mixer for 30 seconds. That usually obliterates any leftover lumps so you can get back to making those perfect chocolate crepes.
Do I really need that vanilla sugar?
Not at all, especially if you plan on using savory fillings! The vanilla sugar is just a little European touch I love for breakfast crepes because it adds a subtle sweetness without adding a ton of granulated sugar. If you skip it, your crepes will have a very neutral flavor, which is perfect for pairing with salty ham or cheese. If you want some sweetness without adding vanilla sugar, a tiny pinch of plain sugar works just fine!
Nutritional Estimates for This Delicious Crepes Recipe
Now, I know many of you follow my journey because you’re looking to clean up your diet, just like I did when I was working toward losing 80 pounds. While this delicious crepes recipe is naturally lighter than a stack of buttermilk pancakes, I always want to be upfront about nutrition.
Because we all use slightly different brands of milk, different types of butter, and whether or not you add that optional vanilla packet makes a difference, I don’t provide exact numbers here. Nutritional content can shift quite a bit based on those little choices! For accurate tracking, I highly recommend plugging your specific ingredients into your favorite tracking app. But here’s my general feeling: kept simple with just a little fruit, these crepes are a fantastic, light base for any meal!
Print
Amazing Delicious crepes recipe: 1 trick
- Total Time: 30 minutes
- Yield: About 10-12 crepes 1x
- Diet: N/A
Description
Delicious crepes recipe. This simple recipe yields light and tender crepes perfect for any filling.
Ingredients
- 3 eggs
- 500 ml milk
- 250 grams flour
- 100 grams melted butter
- 1 packet vanilla sugar (optional)
Instructions
- Combine all ingredients in a bowl.
- Blend with an electric mixer until the batter is smooth.
- Allow the batter to rest.
- Heat a non-stick pan over medium heat.
- Pour a small amount of batter into the hot pan, tilting to coat the bottom evenly.
- Cook until the edges are golden brown, then flip and cook the other side briefly until golden.
- Remove the crepe and repeat with the remaining batter.
- Fill with your favorite chocolate and serve immediately.
Notes
- Use a hot, non-stick pan.
- Cook until the crepe is golden before adding the filling.
- Prep Time: 10 minutes
- Cook Time: 20 minutes
- Category: Dessert
- Method: Stovetop
- Cuisine: French
Nutrition
- Serving Size: 1 crepe
- Calories: Approx. 180
- Sugar: Approx. 3g
- Sodium: Approx. 120mg
- Fat: Approx. 9g
- Saturated Fat: Approx. 5g
- Unsaturated Fat: N/A
- Trans Fat: 0g
- Carbohydrates: Approx. 18g
- Fiber: Approx. 0.5g
- Protein: Approx. 6g
- Cholesterol: Approx. 70mg