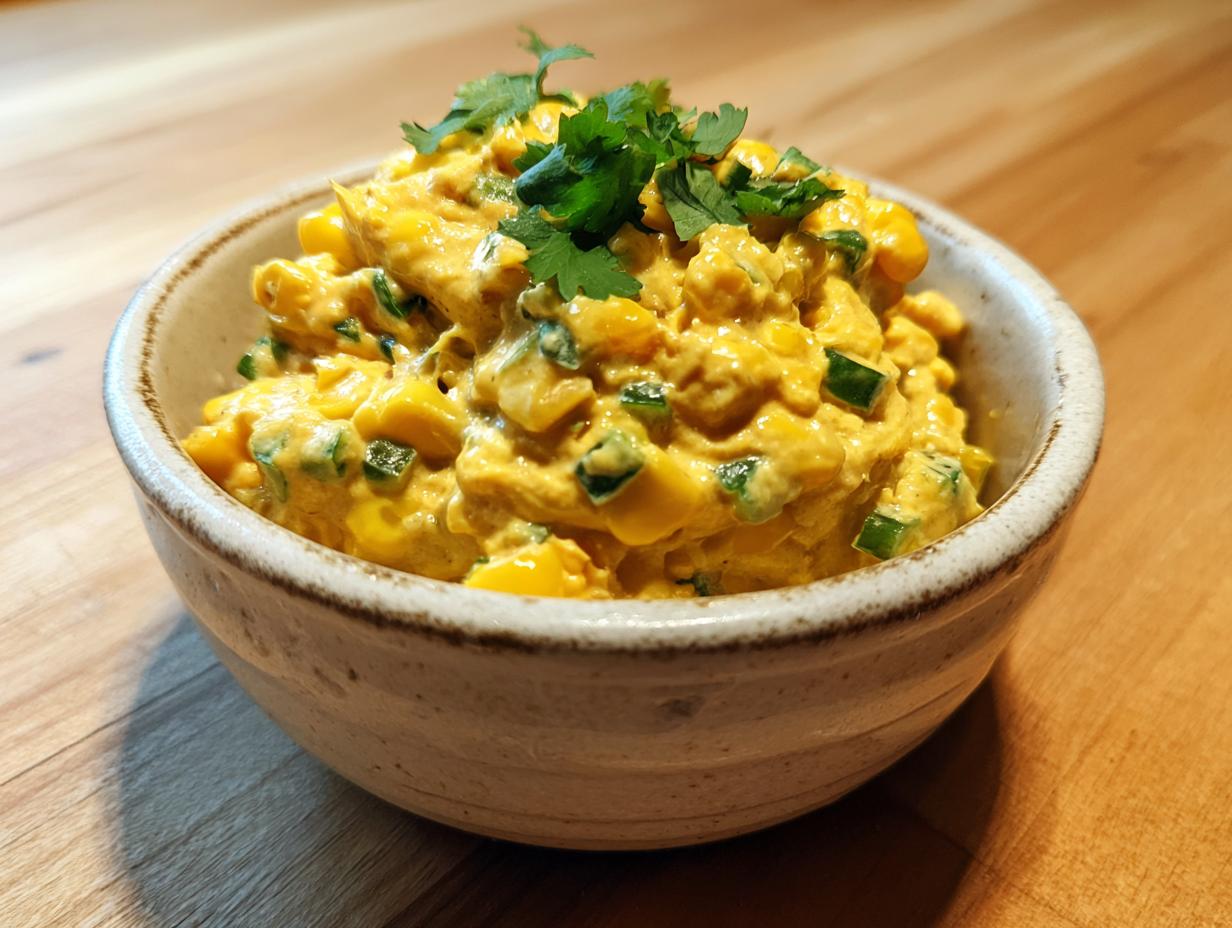
If you are looking for the absolute show-stopper for your next game day or family cookout, stop scrolling right now. This creamy jalapeño cheddar **corn dip** is the stuff of legend at our house. Seriously, people ask for the recipe before they even finish their first scoop! It hits every single note: it’s perfectly sweet from the corn, has that gentle kick from the jalapeño, and is loaded with sharp, melty cheese. It’s so easy, too—you just mix everything together, and boom, instant party appetizer.
I used to stress about appetizers, trying to find something unique that everyone would actually eat. This recipe changed everything. It’s robust enough for a crowd, and honestly, it tastes even better the next day, which is a huge win in my book. Forget those bland, watery dips. This **corn dip** has body, flavor, and that satisfying cheesy pull every single time. Trust me, you need this in your life!
Essential Ingredients for Your Perfect corn dip
When making this incredible **corn dip**, the quality of your ingredients really shines through because there’s so little cooking involved. It’s all about the fresh prep and getting those measurements exactly right. You aren’t hiding anything behind a long bake time, so choosing good sharp cheddar and fresh produce matters a lot. It’s a simple list, but every item plays a huge role in achieving that perfect creamy, spicy balance we’re aiming for.
I’ve learned that taking an extra minute to prep these items correctly is what transforms this from good to absolutely unforgettable. Let’s break down exactly what you need for the best batch of this cheesy appetizer.
Dairy and Base Components
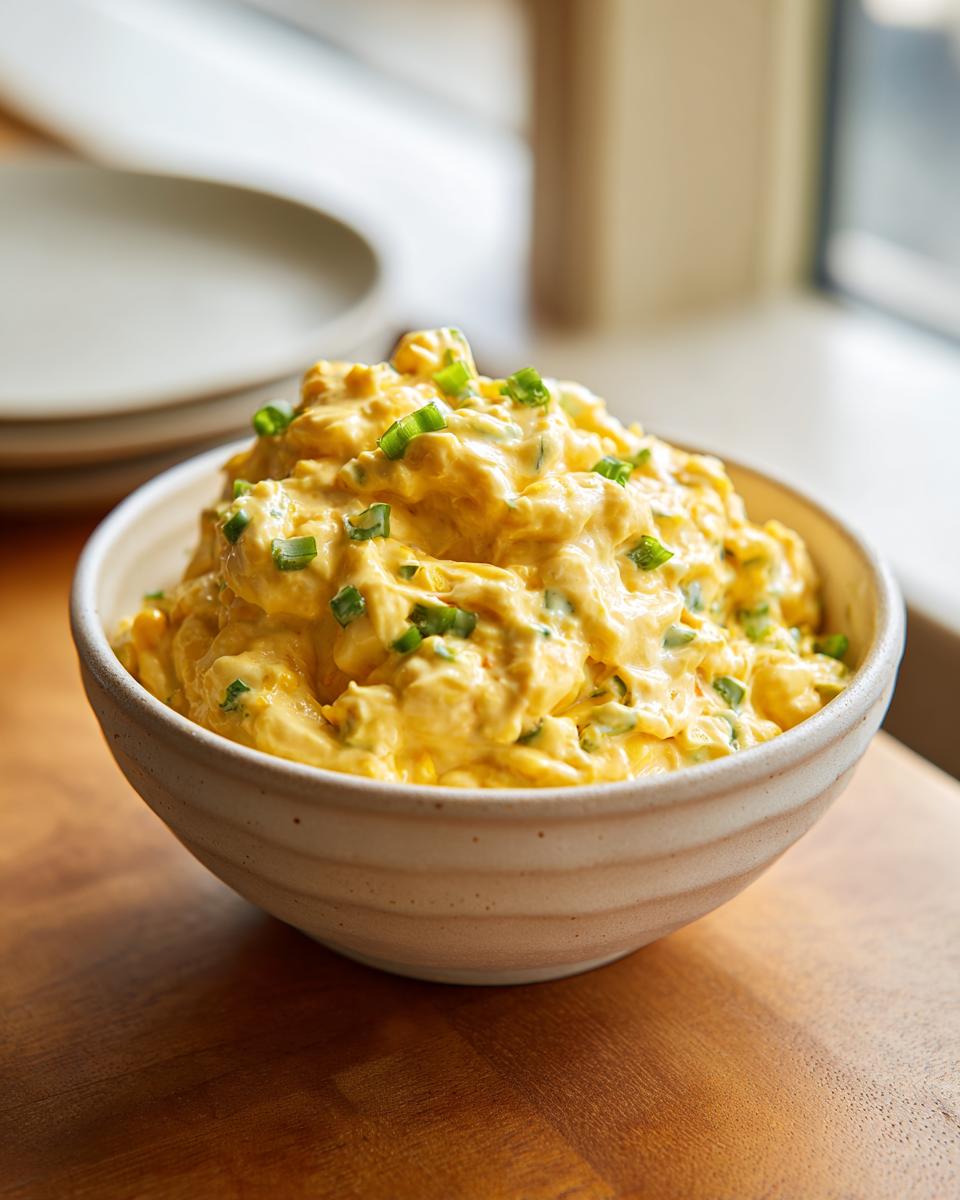
The richness comes straight from the dairy, so don’t skimp here! You need a full cup of sour cream and half a cup of good quality mayonnaise. The mayo helps keep everything smooth when it chills. For the cheese, make sure you grab 1 cup of sharp cheddar cheese. Please grate it yourself! Pre-shredded cheese has anti-caking agents that mess with the melt, and we want this dip ultra-creamy.
Flavor Builders and Heat
This is where we build the personality! Start with 3 cups of drained canned corn—or if you use frozen, make sure it’s fully thawed and patted dry. Next, the heat: take one small jalapeño and dice it very finely. I always tell people, if you’re nervous about the spice, scoop out those white seeds and ribs first; it cuts the fire way down. Mix in one 4-ounce can of green chiles, drained, and 3 green onions, sliced thin. Finally, just a teaspoon of garlic powder and pepper for seasoning, plus an optional tablespoon of fresh cilantro if you like that bright finish!
Equipment Needed for Making corn dip
Since this amazing **corn dip** is mostly a mix-and-chill situation, you don’t need a million fancy gadgets, which is another reason I love serving it! You’ll mostly need things you already have in your kitchen drawers. Having the right sized bowls makes the mixing so much easier, trust me.
Here is the short list of what you’ll want handy before you start combining everything:
- A large mixing bowl—you need plenty of room to stir without sloshing everything out!
- Measuring cups and spoons for accuracy, especially for the sour cream and spices.
- A sturdy spoon or spatula for folding everything together gently.
- A sharp knife and cutting board for prepping the jalapeño and green onions.
- Plastic wrap or a tight-fitting lid for covering the bowl during chilling.
- Your favorite serving dish or a nice small bowl for presentation.
Step-by-Step Instructions for Preparing Your corn dip
This is the fun part—watching all those separate ingredients turn into the best **corn dip** you’ve ever tasted! The key here is patience during the initial mixing stages so nothing gets overworked. Remember, we are building layers of flavor, not making bread batter, so gentle folding is your friend!
Combining the Main Ingredients
Grab that big bowl you set out. First, we combine all the chunky stuff. Toss in your drained corn, the drained green chiles, your finely diced jalapeño (seeds out if you’re being cautious!), and all those sliced green onions. Give this a quick preliminary stir just to make sure those solids are evenly distributed before we add the wet ingredients. This keeps the final mix uniform.
Creating the Creamy Binder
Now for the velvety base! In goes the sour cream and the mayonnaise. Don’t forget the seasonings: sprinkle in that teaspoon of garlic powder and the half-teaspoon of black pepper. Using your spatula, gently fold these wet ingredients into the corn mixture. You want everything coated evenly, but resist the urge to beat this mixture up. We’re just incorporating, not whipping air into it. Stop when you don’t see any big patches of dry corn left.
Final Mix and Flavor Development
Once everything is creamy, it’s time for the star: the sharp cheddar cheese. Fold that cup of shredded cheese right in until it disappears into the mix. Now, this next step is non-negotiable if you want maximum flavor payoff! Cover that bowl tightly with plastic wrap. It needs to chill in the refrigerator for a minimum of 2 hours, but honestly, overnight is when this **corn dip** really sings. The flavors meld together beautifully during that rest period.

Serving Options: Chilled or Baked corn dip
When you’re ready to serve, give it one last good stir—sometimes the moisture settles at the bottom. For the classic, refreshing version, serve it straight from the fridge, maybe garnished with some fresh cilantro. But if you need something warm and bubbly for a colder night, this dip handles heat like a champ! Simply transfer the mixture to an oven-safe dish and bake it at 350 degrees Fahrenheit for about 20 minutes, or until it’s hot all the way through and maybe just starting to brown on top. Easy!
Tips for Success with This Cheesy corn dip
Even though this recipe is super straightforward, a couple of little tricks elevate this **corn dip** from great to absolute perfection. Since we aren’t cooking the base ingredients, the resting time and the way you handle the heat are the most important factors. I’ve made this so many times for neighborhood potlucks, and the people who rave the most are the ones who followed these two small steps exactly.
Don’t rush the chill, and don’t be afraid of the pepper—just know how to tame it! These details make all the difference when you are serving up something this cheesy and addictive.
Deepening the Flavor Through Chilling
I know, I know, you want to eat this dip immediately! But please, for the love of cheese, let it rest for at least two hours in the fridge. This isn’t just about making it cold; it’s about flavor integration. The sour cream and mayo need time to absorb the spice from the jalapeño and the tang from the chiles. When you mix it all together and serve it right away, the flavors are still separate. After chilling, everything melds into that cohesive, addictive taste that makes this **corn dip** so famous.
Controlling the Heat Level
The jalapeño is key, but it can be unpredictable! If you want that lovely, fresh pepper flavor without overwhelming heat, you must remove the seeds and the white membrane inside the pepper. That white pith holds most of the capsaicin—the heat element. Slice the jalapeño open, use a small spoon to scrape out every bit of white stuff, and then dice only the green flesh. If you like it really mild, you can even use half a jalapeño. For a serious kick, leave a few seeds in, but I always advise starting mild for a crowd!
Storage and Reheating Instructions for Leftover corn dip
The best part about this dip? It keeps so well! If you happen to have any of this amazing **corn dip** left over—which is rare in my house, believe me—storing it correctly means you can enjoy it again later. Since it’s mostly dairy and fresh vegetables, we need to treat it right so it stays safe and delicious.
Storing Freshly Made corn dip
For leftovers, transfer any remaining dip into a container that seals up tight. An airtight container is crucial to keep it fresh. Honestly, this cheesy dip stays fantastic in the refrigerator for up to four days. Because it has so much moisture already, it doesn’t really dry out, which is a huge bonus!
Reheating the Baked Version
If you baked your batch and have leftovers, reheating requires a little more care so it doesn’t turn rubbery. The best way is to add just a splash of milk or maybe a teaspoon of sour cream before you reheat it. Cover the dish loosely with foil and warm it gently in the oven at 300 degrees Fahrenheit until it’s just heated through. Don’t microwave it too long, or the cheese can separate!
Frequently Asked Questions About This corn dip
I always get asked the same few things when people try this recipe for the first time. It’s such a reliable crowd-pleaser, so I figured I’d put the answers right here so everyone can make the best **corn dip** possible!
Can I make this corn dip ahead of time?
Absolutely! In fact, I highly recommend it. This **corn dip** needs at least two hours in the fridge for the flavors to really marry together. If you’re planning a party, you can mix the whole thing up the night before. Just cover it well and keep it cold. When you pull it out, give it a good stir before serving chilled, or proceed with the baking instructions.
What is the best way to serve this party appetizer?
We usually serve this alongside tortilla chips—the sturdy, salty kind that won’t break when you scoop up a big helping of that cheesy goodness. But if you’re trying to keep things lighter, it’s fantastic with sturdy veggie sticks like carrot rounds or celery. It’s also surprisingly great spread on crackers. It really works however you want to serve this amazing **party appetizer**!
How do I ensure my corn dip stays vegetarian?
That’s an easy one! This recipe is naturally vegetarian, which is one of the great things about it. All the main components—corn, sour cream, mayo, cheese, and spices—are meat-free. Just double-check your cheddar cheese to make sure it was made with vegetarian rennet if that’s important for your crowd, though most standard sharp cheddars you find today are fine for vegetarian diets.
Estimated Nutritional Information for corn dip
I always like to give a rough idea of what you’re looking at calorically, even though let’s be honest, nobody is tracking macros when they are devouring the best **corn dip** at a party! These numbers are based on the recipe yielding 10 servings, so if you have fewer hungry people (or more self-control than me!), the per-serving amount will change.
This dip is definitely on the richer side due to the cheese and mayo, but it’s worth every bite. Here’s a quick look at what’s in each serving. You can find more recipe ideas like this on our Medium page.
Nutritional Breakdown Table
| Nutrient | Amount Per Serving |
|---|---|
| Calories | 280 |
| Fat | 24g |
| Carbohydrates | 10g |
| Protein | 5g |
If you enjoy this recipe, check out our jalapeño cream cheese dip for another spicy favorite, or see more of our creations on Pinterest.
Print
Shocking 1 corn dip Secret Revealed
- Total Time: 10 minutes (or 30 minutes baked)
- Yield: 10 servings 1x
- Diet: Vegetarian
Description
Creamy corn dip with jalapeño and cheddar. This appetizer is sweet, spicy, and cheesy. It is simple to prepare and perfect for any gathering.
Ingredients
- 3 cups canned corn, drained (or thawed frozen corn)
- 1 (4-ounce) can chopped green chiles, drained
- 1 small jalapeño, finely diced (seeds removed for milder flavor)
- 3 green onions, sliced
- 1 cup sour cream
- 1/2 cup mayonnaise
- 1 teaspoon garlic powder
- 1/2 teaspoon black pepper
- 1 cup shredded sharp cheddar cheese
- 1 tablespoon chopped cilantro (optional)
Instructions
- In a large bowl, combine corn, green chiles, jalapeño, and green onions.
- Stir in sour cream, mayonnaise, garlic powder, and black pepper until evenly blended.
- Add cheddar cheese and mix well.
- Cover and refrigerate for at least 2 hours or overnight to let the flavors meld.
- Before serving, stir well and garnish with cilantro if desired.
- Serve chilled or bake at 350°F for 20 minutes for a warm version.
Notes
- Serve with corn chips, tortilla chips, or sliced vegetables.
- Removing jalapeño seeds makes the dip milder.
- Refrigerating allows flavors to deepen.
- Prep Time: 10 minutes
- Cook Time: 0 minutes (or 20 minutes if baked)
- Category: Appetizer
- Method: Mixing, Chilling (or Baking)
- Cuisine: American
Nutrition
- Serving Size: 1 serving
- Calories: 280
- Sugar: N/A
- Sodium: N/A
- Fat: 24g
- Saturated Fat: N/A
- Unsaturated Fat: N/A
- Trans Fat: N/A
- Carbohydrates: 10g
- Fiber: N/A
- Protein: 5g
- Cholesterol: N/A