If you want to make the absolute best Chocolate Heart Cookies that practically melt the minute they hit your tongue, you’ve come to the right place! Forget those hard, crumbly cut-out cookies you sometimes find; these are different. I spent years balancing the butter and cream cheese just right so they stay tender, even after they’re dipped in that snappy, rich chocolate glaze.
Seriously, the secret isn’t just the shape—it’s the texture. When you bite into one, you get that buttery softness first, followed by the snap of the dark chocolate, and then a little crunch from the sprinkles. They look fancy, but honestly, the dough is super straightforward. My biggest piece of advice? Don’t rush the chill time! That’s where the magic happens that keeps your hearts perfectly shaped.
I always make a double batch around Valentine’s Day, but frankly, they disappear before February even hits. Trust me, these are going to be your new go-to for showing someone you care, whether it’s a crush or just your neighbor who brought in your mail!

Essential Ingredients for Your Chocolate Heart Cookies
You can’t rush perfection, especially when it comes to the foundation of these beautiful Chocolate Heart Cookies. Having everything measured out before you start mixing is key to keeping that dough perfectly balanced. I learned the hard way that guessing measurements leads to cookies that spread everywhere! I shared some of my early baking fails on Medium.
We need simple pantry staples, but the ratios here are what make these cookies so tender and unique compared to a standard sugar cookie recipe.
Preparing the Cookie Dough Base
The base relies on a marriage between butter and cream cheese. You absolutely must use one cup of unsalted butter and three ounces of full-fat cream cheese, and they both need to be completely softened—I mean, press your finger in and it leaves a dent soft. This texture is crucial for successful creaming, which builds the air pockets. Don’t forget three-quarters of a cup of white sugar and a full teaspoon of vanilla bean paste, which gives you those lovely little black specks.
For the dry stuff, stick to three cups of all-purpose flour. We mix it in slowly, so don’t change that measurement! If you prefer a less rich base, you might look at a standard soft cut-out cookie recipe.
Creating the Rich Chocolate Glaze and Toppings
For the decadent coating, you’ll need two cups of semi-sweet chocolate chips, which provide that classic, deep flavor. Crucially, you need two tablespoons of vegetable shortening. I know, shortening sounds old-fashioned, but it keeps the chocolate glaze glossy and smooth so it doesn’t seize up when you dip the cookies. Finally, you need about a quarter cup of those tiny, colorful nonpareil sprinkles to finish them off.
Equipment Needed for Flawless Chocolate Heart Cookies
You don’t need a fancy bakery setup, but having the right tools makes cutting and glazing these Chocolate Heart Cookies so much easier. Trust me, using the right size cutter prevents frustration! See my Pinterest board for tool inspiration.
Make sure you have:
- A stand mixer or a good hand mixer for creaming the fats.
- Two large baking sheets lined with parchment paper—this is non-negotiable for easy cleanup.
- A 2.5-inch heart-shaped cookie cutter. Smaller or larger can mess with your baking time!
- A small, heavy-bottomed saucepan for melting that glossy chocolate topping.
Step-by-Step Instructions for Chocolate Heart Cookies
Okay, now for the fun part! Following these steps precisely is what separates a good cookie from one of these amazing, tender Chocolate Heart Cookies. Don’t skip the chilling step; I promise you will regret it if you try to cut warm dough!
Mixing and Chilling the Dough
First things first, grab your mixing bowl. You want to cream that softened butter, cream cheese, and sugar mixture on a medium speed until it looks light and fluffy—it should take a few minutes, and you can see the volume increase. Scrape down the sides halfway through! Next, mix in that vanilla bean paste until it’s totally blended in.
Now, add the flour gradually. This is important: use the lowest speed on your mixer. Add the flour just until you see the dough start to come together. If you mix it too long here, your cookies will be tough, so stop as soon as you don’t see any more dry flour streaks floating around. Divide that soft dough into two equal discs, wrap them up tightly in plastic wrap, and shove them in the fridge for a minimum of two hours. I usually leave mine overnight because I get busy, and honestly, colder dough cuts cleaner edges.
Baking and Cooling the Cut-Out Shapes
When you’re ready to bake, preheat your oven to 375 degrees Fahrenheit. Get those baking sheets lined with parchment paper—this makes transferring them later so much easier. Take one disc of dough out at a time; keep the other one cold! On a lightly floured surface, roll the dough out evenly to about a quarter-inch thickness. If it’s too thin, they bake too fast and get crispy; too thick, and they stay doughy in the middle.
Use your 2.5-inch heart cutter and press straight down firmly—no twisting! Place them about an inch apart on the prepared sheets. Bake these beauties for 8 to 10 minutes. You’re looking for the edges to just barely start showing a whisper of brown, and the centers should look set, not wet. Let them sit right there on the hot pan for two minutes—this lets them firm up a bit—then gently move them to a wire rack to cool completely. They must be totally cool before glazing, or the chocolate melts right off!
Glazing and Decorating Your Chocolate Heart Cookies
While the last batch cools, let’s make the dip! In a small saucepan over very low heat, melt your chocolate chips with the two tablespoons of shortening. You have to stir constantly—I mean, don’t walk away! If it gets too hot, the chocolate will seize up, and we won’t have that smooth, glossy finish we want for our Chocolate Heart Cookies.
Once it’s smooth and looks like liquid silk, take your first cooled cookie. Dip just one half of the heart into the warm glaze. Lift it out, let the excess drip off briefly, and then immediately, before the chocolate sets, sprinkle those nonpareils all over the wet chocolate. Set it back on the parchment paper or a clean rack to dry completely. Repeat until all your hearts are decorated!
Tips for Success with Chocolate Heart Cookies
I’ve learned a few things the hard way over the years, so let me save you some frustration when making these wonderful Chocolate Heart Cookies. The biggest thing people mess up is the dough temperature. If your dough is too warm when you cut them, they spread into sad, puffy blobs instead of crisp-edged hearts. When you roll it out, if the dough starts getting soft, just slide the whole thing onto the baking sheet and pop it back into the fridge for ten minutes!
Another common issue is the glaze splitting. Remember that shortening? It’s important because it keeps the chocolate stable. If your glaze looks grainy or thick when you’re dipping, take it off the heat immediately and stir in just a tiny splash—like half a teaspoon—of warm vegetable oil. That usually smooths it right out so you can get those clean chocolate dips.
Also, for the prettiest results, don’t twist your cookie cutter when you press down. Press straight down and pull straight up. This keeps the edges sharp, which is essential for a beautiful presentation on these Chocolate Heart Cookies.
Ingredient Notes and Substitutions for These Cookies
We stick closely to this recipe because the balance of fats is what keeps these cookies so tender, but I know sometimes you run short on something specific. If you don’t have vanilla bean paste, using a full teaspoon of high-quality vanilla extract works just fine for these Chocolate Heart Cookies, though you won’t get those little black specks.
Now, about the shortening in the glaze—it’s there for shine and smoothness. If you absolutely cannot use shortening, you can substitute it with an equal amount of refined coconut oil, but the final glaze might set up slightly softer. Do not substitute the butter or cream cheese in the cookie base, though! That combination is non-negotiable for the texture we’re aiming for.
One thing you can play with is the chocolate chips; if you prefer a darker cookie, swap half the semi-sweet for bittersweet chips! If you love dark chocolate, you might enjoy these bars too.
Storing and Reheating Your Chocolate Heart Cookies
These buttery Chocolate Heart Cookies are truly best enjoyed the day they are made, but lucky for us, the cream cheese in the dough helps them stay soft for longer than a standard sugar cookie. The chocolate glaze will harden nicely, which is great for stacking.
You need to store them in a single layer, or with wax paper between layers, in an airtight container at room temperature. If you stack them too tightly without paper, the chocolate glaze might stick to the cookie above it, and nobody wants a messy heartbreak!
I’ve put together a quick guide for how long they keep well, though I’ve never personally tested anything past a week because they vanish so fast in my house:
| Storage Method | Duration | Reheating Note |
|---|---|---|
| Room Temperature (Airtight) | Up to 5 days | None needed |
| Freezer (Unfrosted Dough) | Up to 3 months | Bake from frozen, add 3-4 mins |
If you need to soften the glaze slightly after they’ve been sitting on the counter for a few days, just let them sit on the counter for about 30 minutes before serving.
Frequently Asked Questions About Chocolate Heart Cookies
I get so many questions whenever I post pictures of these, so here are the answers to the most common things people ask about making these Chocolate Heart Cookies!
Q1. My cut-out cookies spread flat while baking. What went wrong?
That usually means your butter and cream cheese weren’t cold enough when you rolled the dough, or you didn’t chill the cut shapes before putting them in the oven. Remember, chilling the rolled-out dough on the sheet pan for 15 minutes before baking helps lock in that beautiful heart shape!
Q2. Can I skip the shortening in the chocolate glaze?
You can try, but I really don’t recommend it for these specific Valentine cookies. The shortening is what keeps the chocolate from looking dull and helps it set with a nice, glossy snap. If you skip it, the glaze might be softer or look duller once it hardens.
Q3. How do I get my cookies to taste exactly like yours?
It’s the vanilla bean paste! It adds a deeper, richer vanilla note than extract alone. Also, make sure you are using the right thickness—rolling the dough to exactly 1/4-inch is key for that perfect tender center in your cut-out cookies.
Q4. Can I decorate these cookies before baking them?
You definitely can decorate them before baking, but only use sanding sugar or coarse sugar right on the dough. If you want to use sprinkles like the nonpareils, you must wait until after they are dipped in the warm chocolate glaze, or they will burn and turn black in the oven!
Sharing Your Chocolate Heart Cookies Creations
I truly hope you loved making these buttery, chocolate-dipped treats! These Chocolate Heart Cookies are meant to be shared, so please let me know how they turned out for you. Did your family devour them in minutes like mine does? Head down to the comments section below and tell me what you thought, or snap a picture and tag me so I can see your beautiful heart shapes!
Print
Divine Chocolate Heart Cookies: 1 Secret Tip
- Total Time: 2 hours 25 minutes
- Yield: 36 servings 1x
- Diet: Vegetarian
Description
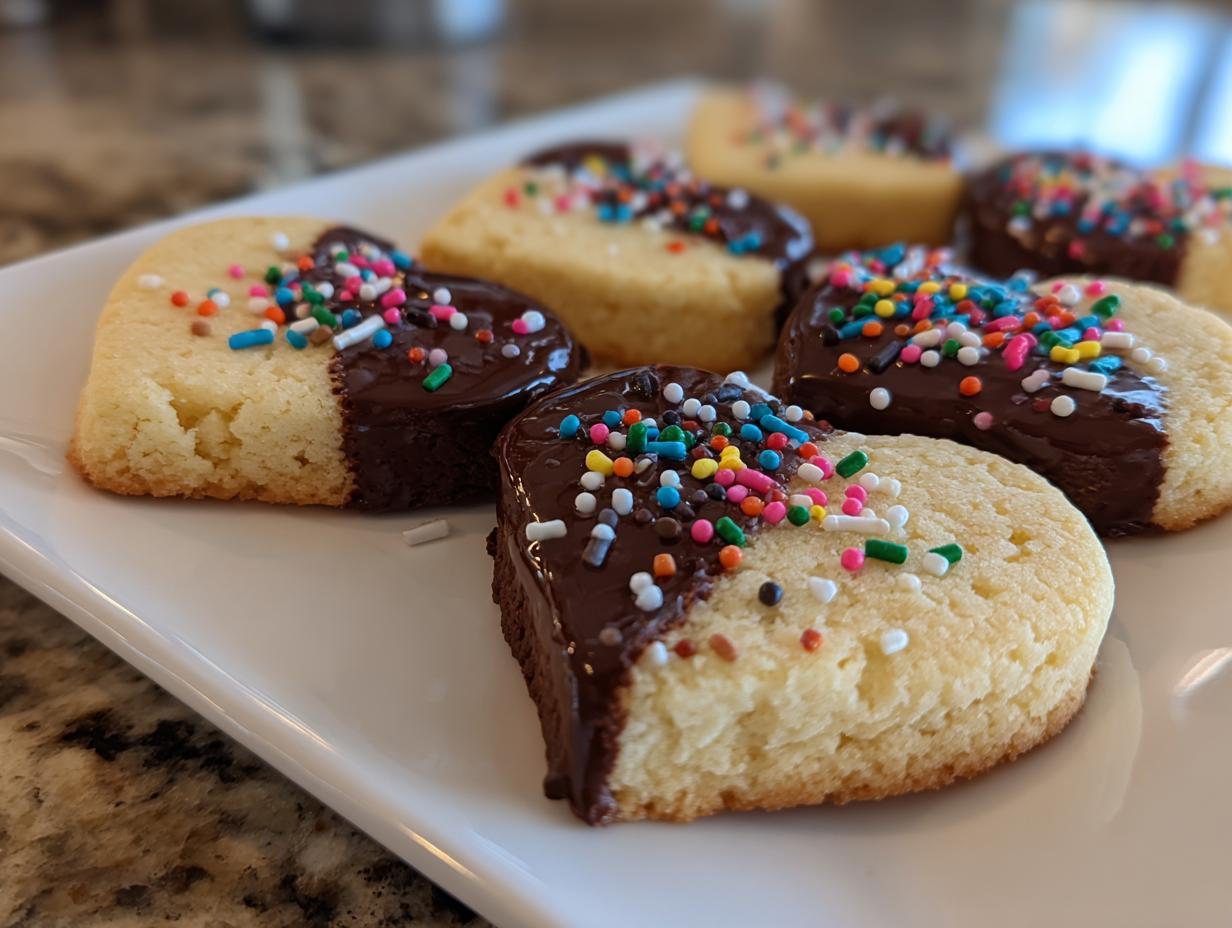
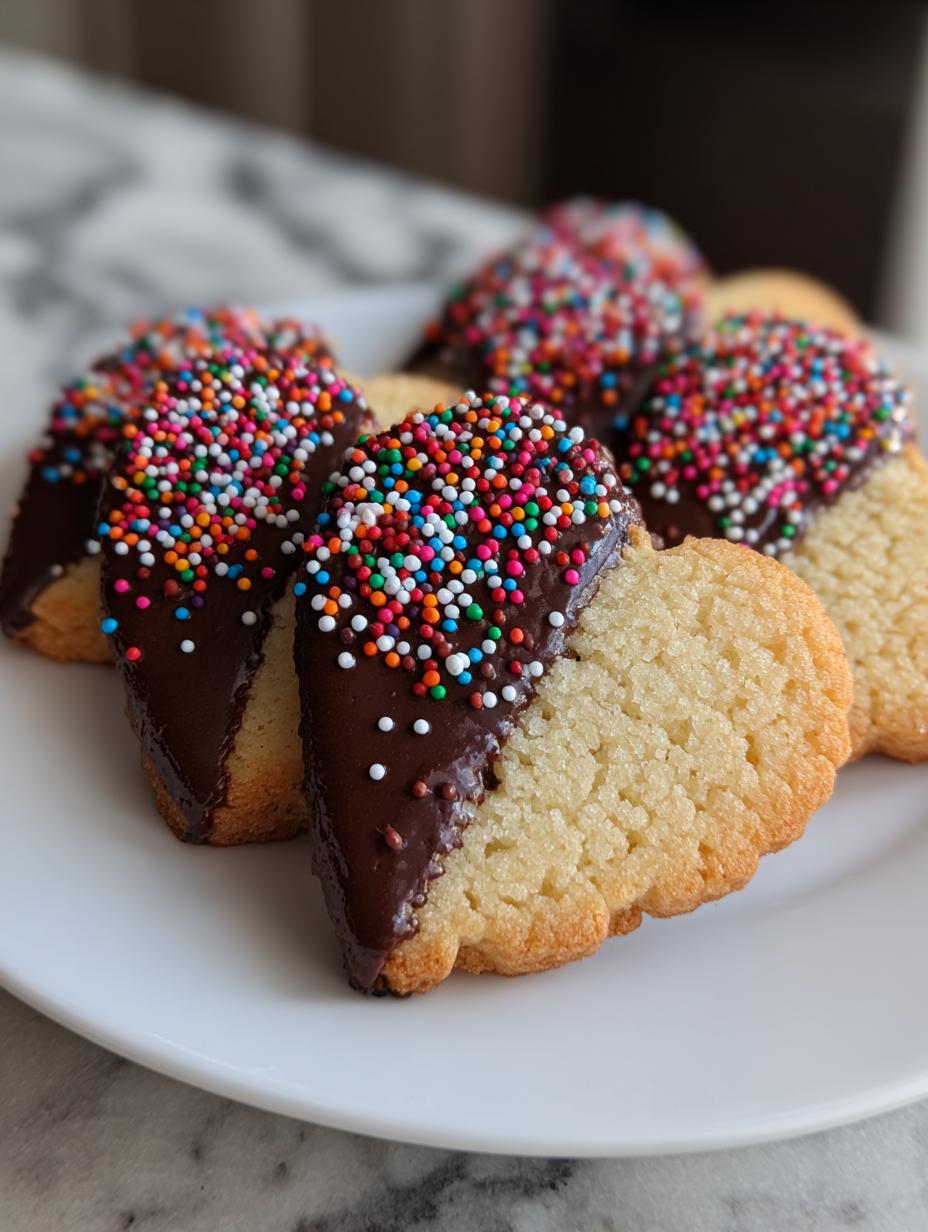
Buttery, tender, heart-shaped sugar cookies dipped in a rich chocolate glaze and topped with nonpareil sprinkles. A perfect seasonal treat to show someone you care.
Ingredients
- 1 cup unsalted butter, softened
- 3 ounces cream cheese, softened
- 3/4 cup granulated sugar
- 1 teaspoon vanilla bean paste
- 3 cups all-purpose flour
- 2 cups semi-sweet chocolate chips
- 2 tablespoons vegetable shortening
- 1/4 cup multi-colored nonpareil sprinkles
Instructions
- Cream the softened butter, cream cheese, and sugar in a large bowl at medium speed until the mixture is light and fluffy.
- Stir in the vanilla bean paste until fully incorporated into the creamed mixture.
- Add the all-purpose flour gradually at low speed, mixing just until the dough comes together without overworking it.
- Divide the dough into two equal portions, wrap each in plastic wrap, and refrigerate for at least 2 hours to ensure clean edges when cutting.
- Preheat your oven to 375°F and line two large baking sheets with parchment paper.
- Roll one portion of dough on a lightly floured surface to a 1/4-inch thickness.
- Cut out shapes using a 2.5-inch heart-shaped cutter and place them 1 inch apart on the prepared baking sheets.
- Bake for 8 to 10 minutes or until the edges are very lightly browned and the centers are set.
- Cool the cookies on the baking sheet for 2 minutes before moving them to a wire rack to cool completely.
- Melt the chocolate chips and shortening in a small saucepan over low heat, stirring constantly until the glaze is smooth and glossy.
- Dip one half of each cooled cookie into the warm chocolate glaze and immediately top with nonpareil sprinkles.
Notes
- Always bake cookies until the internal temperature of the dough reaches 165°F to ensure the flour is safe for consumption.
- Prep Time: 2 hours 15 minutes
- Cook Time: 10 minutes
- Category: Dessert
- Method: Baking and Dipping
- Cuisine: American
Nutrition
- Serving Size: 1 cookie
- Calories: 165
- Sugar: N/A
- Sodium: N/A
- Fat: 10g
- Saturated Fat: N/A
- Unsaturated Fat: N/A
- Trans Fat: N/A
- Carbohydrates: 18g
- Fiber: N/A
- Protein: 2g
- Cholesterol: N/A