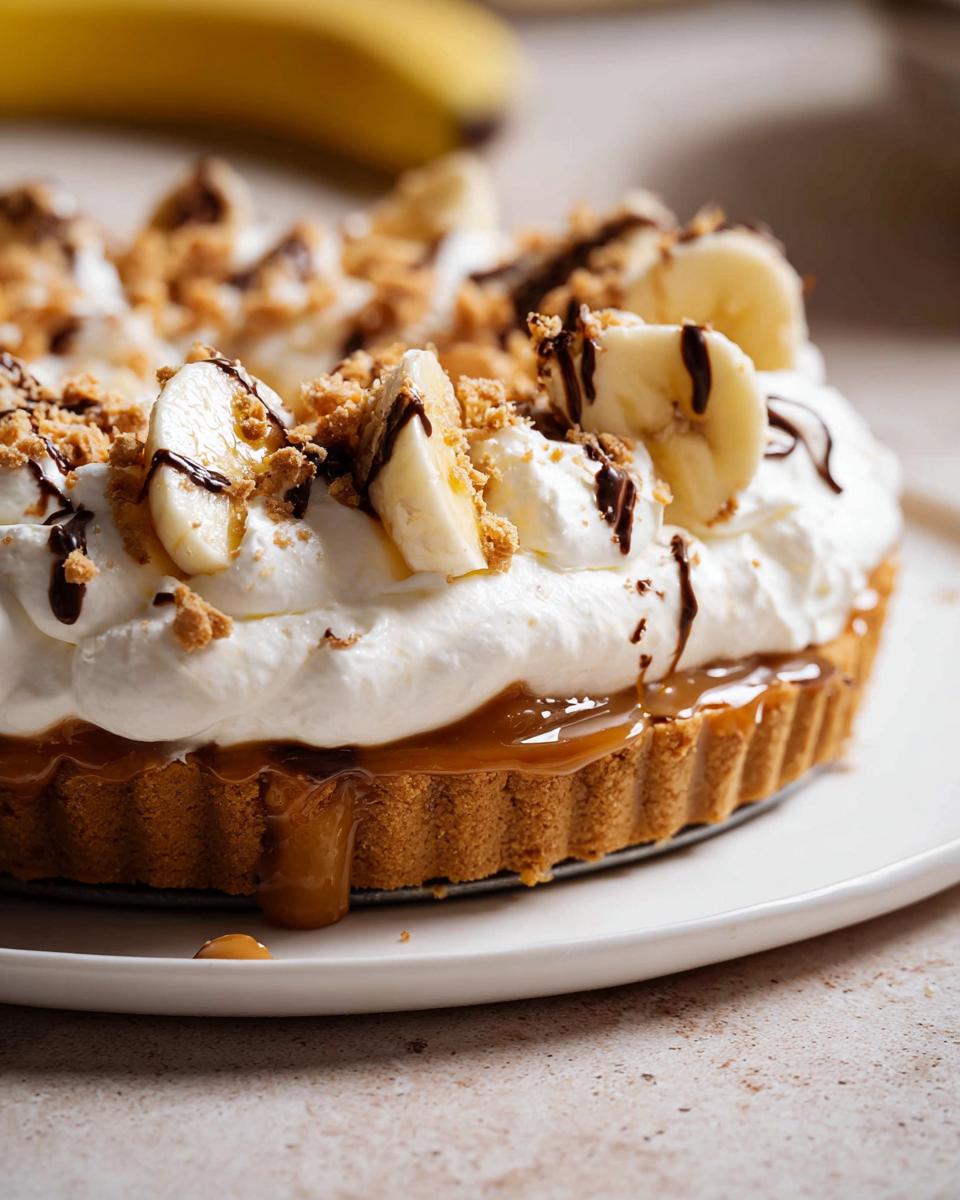
Oh, you are going to absolutely LOVE this Banoffee Tart Recipe Mary Berry Inspired! It’s one of those showstopper desserts that looks proper fancy, but honestly, it’s a doddle to put together. I first made this a few years back when I wanted to impress at a summer garden party, and everyone was raving about it! The buttery Biscoff base instead of a traditional pastry gives it a gorgeous spiced twist that Mary herself would undoubtedly approve of. It’s just the perfect symphony of crunchy biscuit, gooey caramel, sweet bananas, and dreamy cream. Yum!
Why You’ll Love This Banoffee Tart Recipe
- It’s ridiculously easy to make – no fancy baking skills required!
- The flavour combination of sweet caramel, fresh banana, and spiced Biscoff is just divine.
- It looks incredibly impressive, perfect for guests or a special treat.
- A brilliant Mary Berry inspired twist that’s a bit different from the classic pie.
- You can even prep some bits ahead of time.
Ingredients for Your Banoffee Tart Recipe
Right then, let’s get our ducks in a row with the ingredients! I always go for Biscoff biscuits for my base – they just add that little extra something, don’t they? You can use any digestive biscuits if you prefer, but trust me, the Biscoff is worth seeking out. For the caramel, proper thick dulce de leche is key; none of that watery stuff!
- 2 ½ cups Biscoff biscuit crumbs (about 20-25 biscuits)
- 5 tablespoons unsalted butter, melted
- 1 ¼ cups thick dulce de leche
- 4 large bananas, firm and ripe
- 1 ⅔ cups double cream, chilled
- 2 tablespoons icing sugar
- 1 teaspoon vanilla bean paste
- 2 tablespoons grated dark chocolate
- 2 tablespoons crushed Biscoff biscuits
- 2 tablespoons reserved dulce de leche for drizzling
Step-by-Step Instructions for the Banoffee Tart Recipe
Step 1: First things first, let’s get that gorgeous crust sorted! Preheat your oven to 175°C (that’s 160°C fan or Gas Mark 4). Get your 9-inch tart tin ready and give it a little grease, especially if it’s not non-stick. Now, tip your Biscoff crumbs into a bowl and pour over that melted butter. Give it a good stir until it all looks like lovely damp sand – every crumb should be coated. Tip it into your prepared tin and press it down really firmly. I like to use the bottom of a glass or a measuring cup to get it nice and even on the base and up the sides. Once that’s done, pop it in the oven for about 10 minutes until it’s lightly golden and smells absolutely divine. Let it cool completely before you even think about filling it – patience is a virtue, my dears! You can find more easy banoffee pie ideas if you fancy a variation.
Step 2: Right, while our crust is doing its cooling thing, let’s deal with the filling. Take about 2 tablespoons of that luscious dulce de leche and set it aside for drizzling later. Now, pour the rest of the dulce de leche over the cooled biscuit base. Spread it out so it’s nice and even right to the edges. This stuff is sticky and wonderful, so make sure you get a good layer!
Step 3: Next up, the bananas! You’ll need 3 of them for this layer. Slice them into nice, thick rounds – about half a centimetre or so. Arrange these sliced bananas in a neat, single layer right on top of that lovely caramel. Try to make them fit together snugly.
Step 4: Now for the cloud of cream! Get your chilled double cream into a large mixing bowl. Tip in the icing sugar and that gorgeous vanilla bean paste. Whisk it all up – I use an electric whisk, but you can certainly do it by hand if you fancy a bit of an arm workout! You’re looking for lovely medium peaks. It should hold its shape but still look soft and inviting, not stiff like meringue. Spoon this fluffy cream all over the banana layer. Gently spread it out so it’s smooth and even. I like to leave a tiny border around the edge just to make it look extra neat.
Step 5: Time for the final flourish! Take the last banana and slice it lengthways. Carefully arrange these banana halves on top of the whipped cream. See? It’s starting to look like a proper pro job now!
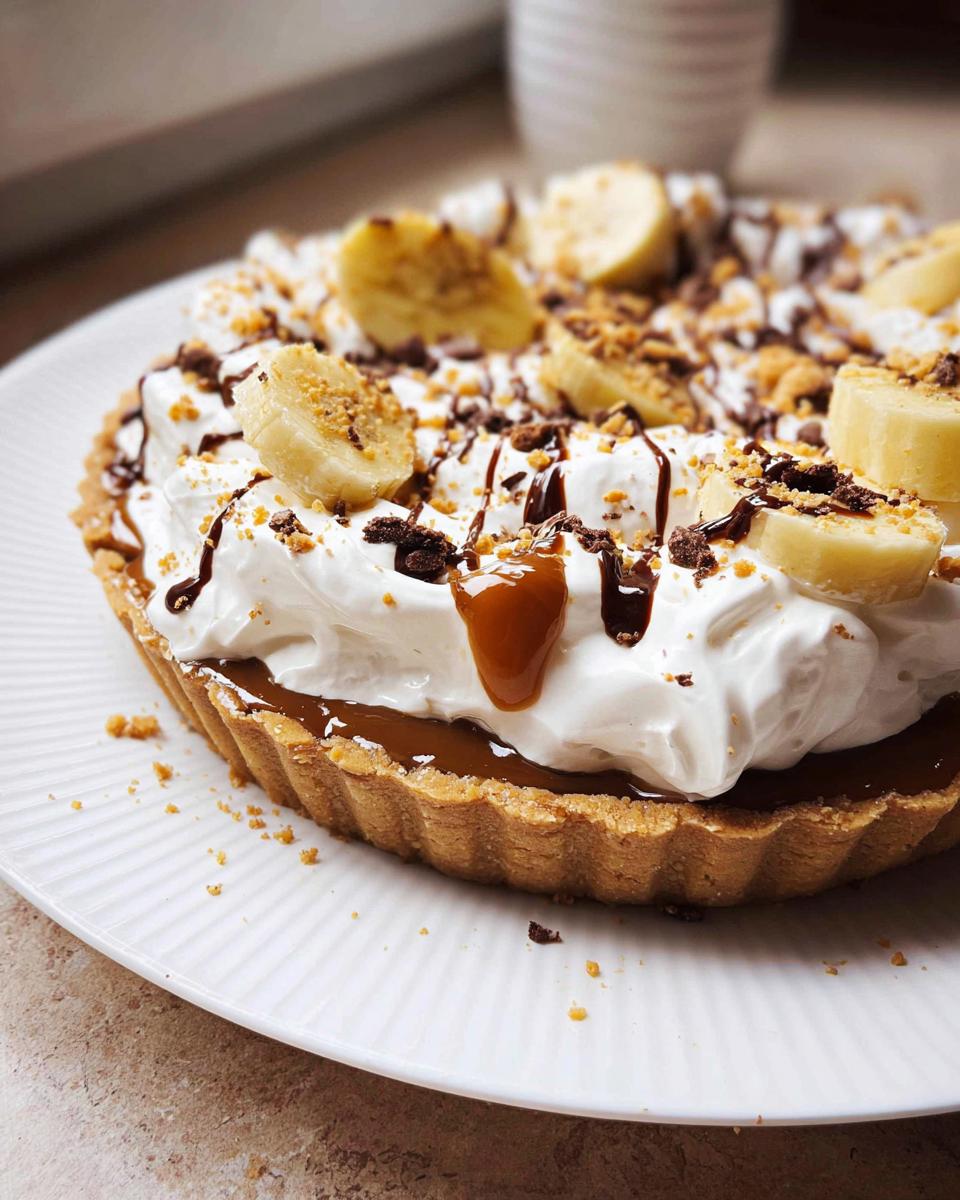
Step 6: Finally, warm up those reserved 2 tablespoons of dulce de leche just a tad – you just want it to be runny enough to drizzle. Drizzle it artistically over the whole tart. Then, sprinkle over your grated dark chocolate and crushed Biscoff biscuits. Pop it in the fridge to chill completely before serving. It’s best on the day it’s made, but leftovers are good too!
Serving Suggestions for Your Banoffee Tart
This Banoffee Tart is practically a meal in itself, but if you’re looking for a little something extra, here are my favourite pairings:
A Simple Brew: Honestly, a good cup of tea or coffee is all this really needs. It cuts through the sweetness beautifully.
Extra Cream: Never say no to a little extra jug of lightly whipped cream on the side. It’s just decadent!
Fresh Berries: A few raspberries or strawberries dotted around the plate add a lovely fresh, tart contrast to the rich caramel and banana.
Storing and Reheating Your Banoffee Tart Recipe
Now, about leftovers… this Banoffee Tart is honestly best enjoyed fresh, ideally on the day you make it, as the bananas can start to go a bit soft and the cream might lose its lovely fluffy texture. If you do have any (which is rare in my house!), pop it straight into the fridge in an airtight container. It should keep nicely for about 1-2 days. Reheating isn’t really recommended, as the cream and biscuit base won’t stand up to it well and will turn a bit soggy. For meal prep, I’d suggest making the crust and caramel base one day, then whipping the cream and assembling with the bananas and decorations just before you plan to serve it. That way, everything stays lovely and fresh!
Frequently Asked Questions about this Banoffee Tart Recipe
Got a few niggly questions about this glorious Banoffee Tart? I’ve got you covered!
Can I make this Banoffee Tart recipe ahead of time?
You absolutely can prep some bits! The biscuit base and caramel layer can be made a day in advance and kept in the fridge. However, for the best texture and presentation, I’d assemble the bananas and whipped cream just before serving. That way, your cream stays perfectly fluffy and the bananas stay fresh!
Can I use regular digestive biscuits instead of Biscoff?
Oh yes, you certainly can! If you can’t get your hands on Biscoff biscuits, standard digestive biscuits work a treat for the base. They’ll still give you a lovely crunchy foundation. Just mix them with the melted butter and bake as instructed. The Biscoff just adds a little extra spice, which is lovely, and it’s a nice nod to that sort of Mary Berry-esque flavour profile, don’t you think?
My dulce de leche is too thick, what should I do?
If your dulce de leche is a bit too firm to spread easily, give it a gentle warm-up. You can do this by popping the open tin in a shallow pan of warm water for a few minutes, or carefully heating it in a microwave-safe bowl in short bursts (stirring in between) until it’s a lovely, spreadable consistency. Just don’t make it too hot before you put it on the biscuit base!
Before You Go: Enjoy Your Banoffee Tart!
Now that you’ve got the lowdown, I really hope you’ll give this Banoffee Tart Recipe Mary Berry Inspired a whirl! It’s a true crowd-pleaser. Don’t forget to let me know how you get on in the comments or give it a star rating – I absolutely love hearing from you! You can also find more scrumptious ideas over on Pinterest!
Print
Banoffee Tart Recipe
- Total Time: 1 hour
- Yield: 10 servings
- Diet: Vegetarian
Description
A simple yet impressive banoffee tart with layers of biscuit crust, rich caramel, fresh bananas, and fluffy whipped cream.
Ingredients
- 2 ½ cups Biscoff biscuit crumbs
- 5 tablespoons unsalted butter, melted
- 1 ¼ cups thick dulce de leche
- 4 large bananas, firm and ripe
- 1 ⅔ cups double cream, chilled
- 2 tablespoons icing sugar
- 1 teaspoon vanilla bean paste
- 2 tablespoons grated dark chocolate
- 2 tablespoons crushed Biscoff biscuits
- 2 tablespoons reserved dulce de leche for drizzling
Instructions
- Preheat your oven to 350°F (175°C). Lightly grease a 9-inch tart tin with a removable base.
- Mix the Biscoff biscuit crumbs with melted butter until evenly coated. Press the mixture firmly into the base and sides of the tart tin.
- Bake the crust for 10 minutes until lightly golden and fragrant. Leave to cool completely before filling.
- Reserve 2 tablespoons of dulce de leche for drizzling. Spread the remaining dulce de leche evenly across the cooled crust.
- Slice 3 bananas into thick rounds and arrange them in a single layer over the caramel filling.
- In a large mixing bowl, whip the double cream, icing sugar, and vanilla bean paste until medium peaks form. The cream should hold its shape while still looking soft and smooth.
- Spoon the whipped cream over the banana layer and gently spread it evenly, leaving a small border around the edge for a neat finish.
- Slice the remaining banana lengthwise and place the pieces decoratively on top of the whipped cream.
- Warm the reserved dulce de leche slightly until pourable, then drizzle over the tart.
- Finish with grated dark chocolate and crushed Biscoff biscuits before serving chilled.
Notes
- Use firm bananas for the best texture and clean slices.
- Assemble the tart on the day of serving for the freshest presentation and flavour.
- Prep Time: 50 min
- Cook Time: 10 min
- Category: Dessert
- Method: Baking
- Cuisine: British