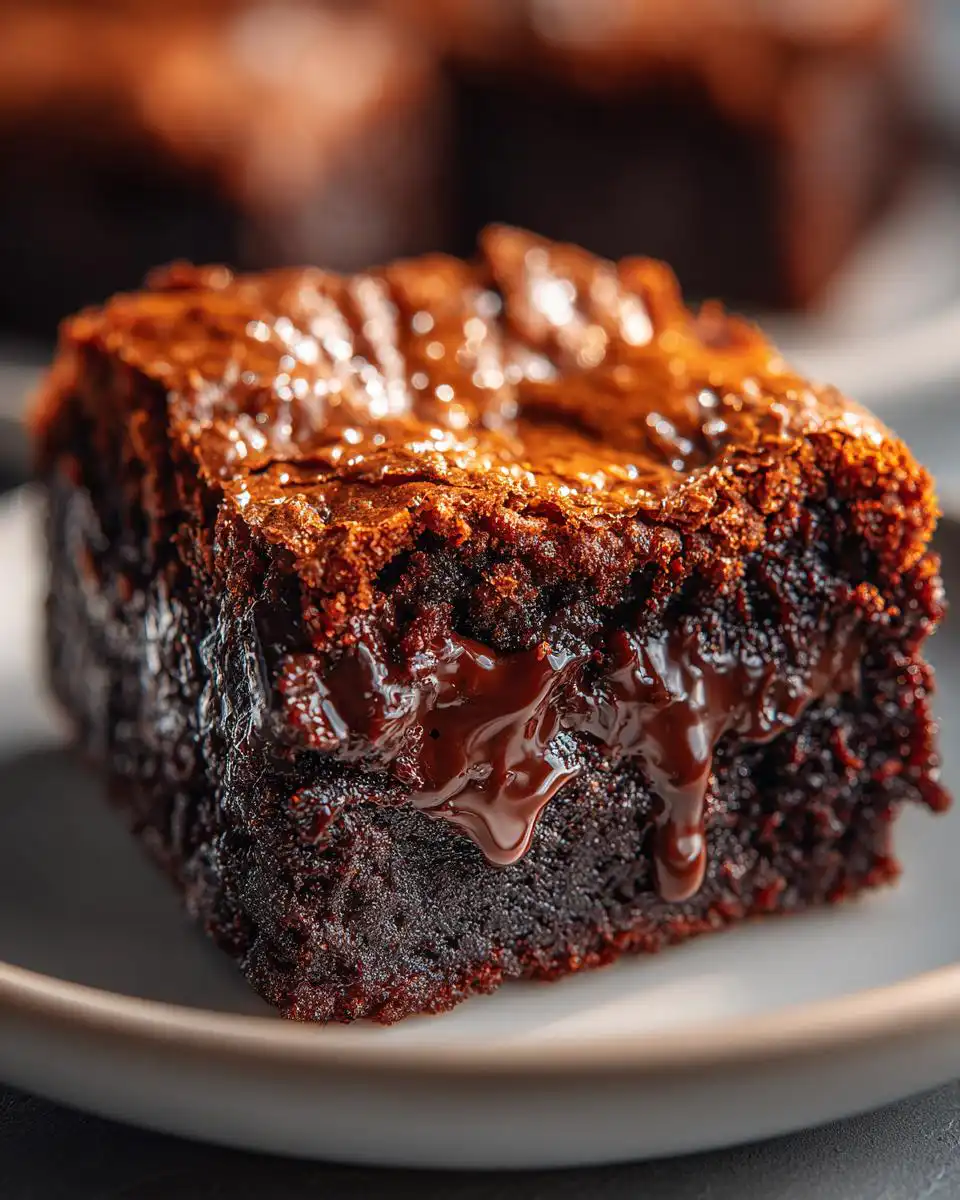
When I first started dabbling in vegan baking, I thought I had to give up on that glorious, crackly, paper-thin crust that makes a brownie perfect. I tried every oil substitution and every weird combination of powders, and honestly, most of them ended up tasting like sad, dense chocolate bricks. But don’t worry—you won’t have that problem here! We are going straight for the gold standard: Fudgy Vegan Brownies with Shiny Crust that will fool even the most dedicated dairy-lover. This recipe is all about using a little bit of heat magic right at the start to get that signature sheen.
I’ve tweaked this formula until my kitchen smelled like a chocolate factory, and I finally nailed the texture. It’s rich, it’s gooey in the center, and the top layer literally sparkles. Forget the dry vegan desserts you’ve had before; these are pure, decadent chocolate joy. Trust me, once you see that crust form, you’ll be hooked on this method forever.
Essential Ingredients for Fudgy Vegan Brownies with Shiny Crust
Getting those truly Fudgy Vegan Brownies with Shiny Crust means we can’t cheat on the core components. Since we aren’t using eggs or butter, every single ingredient has a very specific job to do! The oil keeps things moist, and the flaxseed mixture acts as our binder, holding all that chocolate goodness together without any animal products whatsoever. Pay close attention to the sugar step later, because that’s where the magic for the crust starts!
Ingredient List Breakdown
Here is exactly what you need for a perfect 8×8 pan batch. Measure everything out before you start heating anything up—it goes fast!
| Ingredient | Amount | Preparation Note |
|---|---|---|
| Granulated Sugar | 1 1/2 cups | Used for dissolving syrup |
| Water | 1/2 cup (for sugar) + 5 tablespoons (for flax) | Two separate uses! |
| Ground Flaxseed | 2 tablespoons | The egg replacer |
| Neutral Oil | 1/2 cup | Canola, vegetable, or melted coconut oil |
| Vanilla Extract | 1 tablespoon | Don’t skip this, it deepens the chocolate flavor |
| Cocoa Powder | 3/4 cup | Unsweetened, sift if clumpy |
| All-Purpose Flour | 1 1/2 cups | Use the spoon-and-level method |
| Salt | 1/2 teaspoon | Crucial for balancing sweetness |
| Chocolate Chips | 1/2 cup | Make sure they are dairy-free chips! |
Ingredient Notes and Substitutions
Let’s talk about that flax mixture first. You mix the flaxseed with 5 tablespoons of water and let it sit for about five minutes. It will turn into a thick, gelatinous blob, kind of like an egg white. That’s your flax egg, and it works beautifully here!
Now, for the big question: Can you swap the granulated sugar? Honestly, I wouldn’t recommend it if you truly want that shiny top. The way the sugar dissolves into a clear syrup and then cools on top of the batter is what guarantees that beautiful crackle. Brown sugar or coconut sugar just won’t dissolve the same way, and you’ll end up with a matte finish, even if the inside is fudgy.
Equipment Needed for Baking
You don’t need any fancy stand mixers for this recipe, which is part of why I love it so much! It’s really just about having the right vessels for mixing and getting that batter into the heat.
- 8 x 8 inch baking pan
- Parchment paper
- Small bowl for flax egg
- Medium saucepan
- Large mixing bowl
- Whisk and rubber spatula
Step-by-Step Instructions for Fudgy Vegan Brownies with Shiny Crust
This is where we bring everything together. Remember, the order matters here, especially with that hot sugar mixture. We are working quickly once we start combining the wet and dry components to ensure we get those perfect Fudgy Vegan Brownies with Shiny Crust.
Preparing the Wet Base and Dry Mix
First things first, get your oven warmed up to 350 degrees Fahrenheit. You’ll want to line that 8×8 pan with parchment paper, making sure you leave an overhang on two sides—this acts like a sling so you can easily lift the whole thing out later. Don’t skip the overhang, seriously. While that heats up, go ahead and mix your ground flaxseed with the 5 tablespoons of water in a small bowl and set it aside to thicken up; that’s your binder doing its thing!
Next, grab your medium saucepan. Add the granulated sugar and the 1/2 cup of water. Set this over medium-low heat. You need to stir this gently, but consistently, for about 5 to 7 minutes. The goal here is total clarity—keep stirring until every single sugar crystal has dissolved and the liquid looks perfectly clear. You’ll see it start to bubble slightly. Once it’s clear, take it right off the heat.
In your big mixing bowl, just whisk together the cocoa powder, flour, and salt. Make sure there are no big lumps of cocoa powder hiding in there. If your cocoa is clumpy, give it a quick sift first. We want this dry mix ready to go!
Creating the Fudgy Batter
Now comes the crucial part for the texture! Carefully pour that hot, clear sugar syrup right into your dry ingredients. Use your whisk or spatula and stir gently until everything is just barely incorporated. It will look thick and a little shaggy right now—that’s exactly right.
Next, pour in the thickened flax mixture, the neutral oil, and the vanilla extract. Mix this together. You only want to mix until you see a smooth, uniform batter. Stop stirring the second the streaks of flour disappear! Overmixing at this stage is what develops gluten and makes your brownies cakey instead of fudgy. We want fudgy, remember? If you are looking for other great baked goods, check out this recipe for healthy blueberry oatmeal muffins.
Finally, gently fold in those dairy-free chocolate chips. Use your spatula and just turn the batter over a few times until they are evenly distributed throughout. Pour that beautiful, thick batter into your prepared pan and use your spatula to smooth out the top surface. Try not to press down too hard.
Baking and Cooling for Perfection
Slide the pan into your preheated oven. You’re looking at 36 to 40 minutes. How do you know when they’re done? Don’t just rely on the clock! Stick a toothpick into the center. If it comes out coated in wet batter, they need more time. If it comes out completely clean, you’ve baked too long and they’ll be dry! You want to see moist crumbs clinging to the toothpick. That means they are perfectly set but still super fudgy inside.
This next part is non-negotiable if you want clean squares: You must let these cool completely. I try to let them sit on the counter for at least two hours, or even chill them in the fridge for an hour. If you try to cut them warm, they will just smear everywhere, and you’ll ruin that beautiful top layer you worked so hard to create!
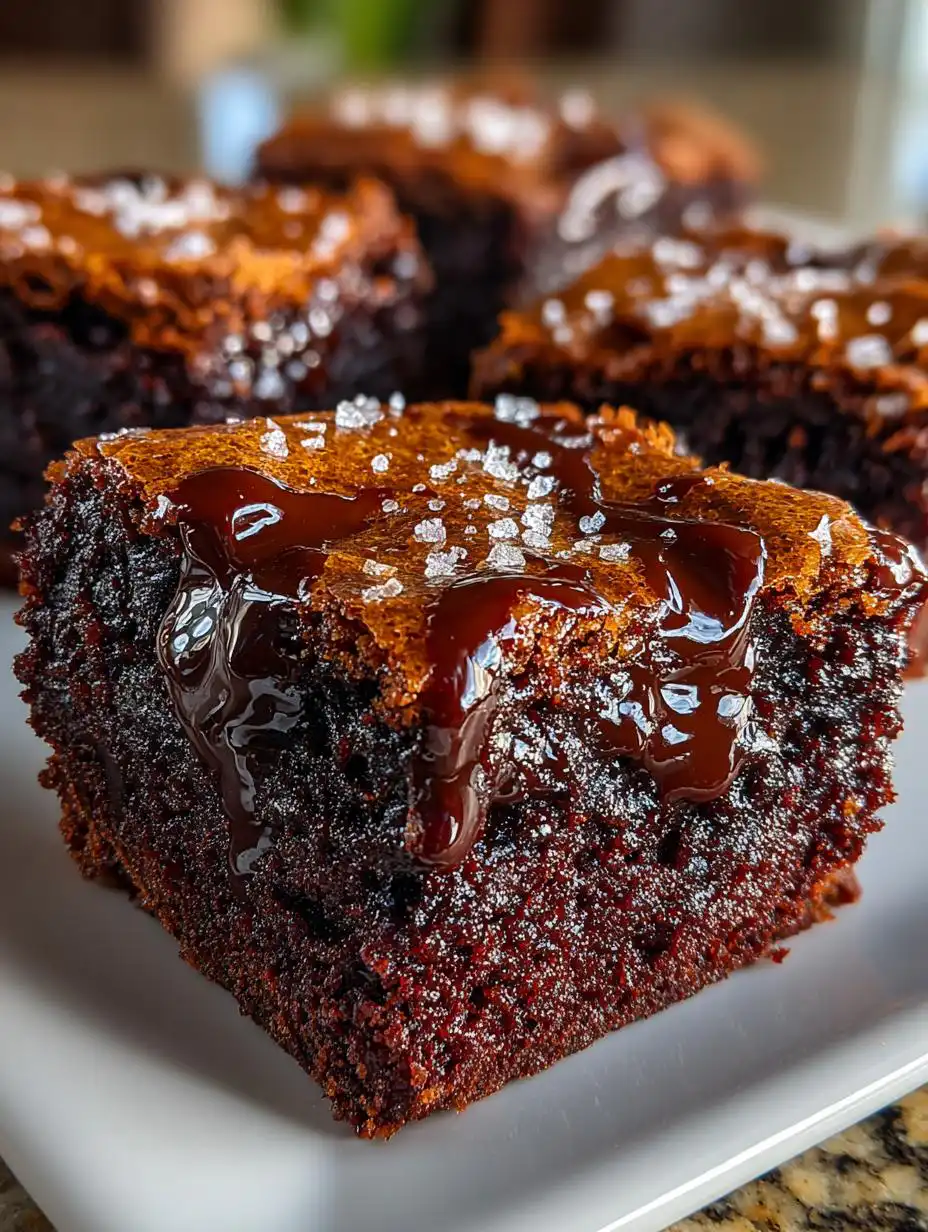
Tips for Achieving the Signature Shiny Crust on Fudgy Vegan Brownies with Shiny Crust
That shimmering, crackly top is the hallmark of a truly great brownie, and it’s often the hardest thing to achieve when you take out the eggs. But with this recipe, the secret lies entirely in how we treat the sugar! We are essentially creating a very thin, delicate syrup that bakes on top of the dense batter.
The key is dissolving the granulated sugar completely in that initial step—remember, 5 to 7 minutes over low heat until it’s totally clear? If you leave even a tiny bit of undissolved sugar in there, it won’t create a smooth surface; it’ll just bake into a dull, grainy patch. Also, don’t rush that heating process! Keep the temperature low and steady so the sugar dissolves rather than caramelizes too quickly. For more baking tips and inspiration, check out our Medium page.
Another trick for the shiniest top on your Fudgy Vegan Brownies with Shiny Crust is oven stability. Try not to open the oven door too early, especially in the first 25 minutes. Temperature fluctuations can cause the surface moisture to steam off unevenly, shattering that delicate crust formation. Once they are mostly set and you’re testing for doneness, you can briefly check, but keep that door shut otherwise!
Serving Suggestions for Your Dessert
These brownies are so rich on their own, but they always welcome a little something extra, especially if you are serving dessert to non-vegans! Since we are keeping things dairy-free, skip the traditional milk ice cream.
My favorite way to serve these is slightly warmed—just pop a square in the microwave for 15 seconds—alongside a scoop of good quality vanilla coconut milk ice cream. A little dusting of powdered sugar right before serving makes the shine pop even more! A small dollop of fresh raspberries or strawberries also cuts through that deep chocolate flavor perfectly.
Storing and Reheating Your Fudgy Vegan Brownies
Because we used oil instead of solid butter, these brownies stay wonderfully soft and fudgy for days, which is a huge win for vegan baking! The main thing is keeping the air away from that shiny crust so it doesn’t get soggy.
| Storage Method | Duration | Reheating Tip |
|---|---|---|
| Airtight Container (Room Temp) | Up to 4 days | None needed, they are great at room temp! |
| Airtight Container (Fridge) | Up to 1 week | Microwave for 10-15 seconds to soften |
| Freezer (Wrapped Individually) | Up to 3 months | Thaw on the counter for an hour |
Frequently Asked Questions About Fudgy Vegan Brownies with Shiny Crust
I get so many questions about how this recipe works without eggs, especially regarding that crust! Here are the answers to the ones I hear most often.
Q1. Why is the sugar dissolved in water separately?
That hot sugar syrup is the key to achieving the signature top layer. When you pour the hot liquid over the dry ingredients, it helps activate the cocoa and creates steam underneath the top layer of batter as it bakes. This steam pushes up and sets into that beautiful, thin, shiny layer. It’s what separates these Fudgy Vegan Brownies with Shiny Crust from just regular baked chocolate squares!
Q2. How can I make sure these dairy free chocolate brownies are extra rich?
Use high-quality, dark unsweetened cocoa powder—the better the cocoa, the deeper the flavor profile will be. Also, make sure the dairy free chocolate chips you fold in are ones you actually like eating plain. Since there are few ingredients, the quality really shines through. If you are interested in other rich desserts, you might enjoy our cottage cheese brownies.
Q3. How do I know when these vegan brownies are fully set?
The toothpick test is your best friend here. You are looking for moist crumbs, not wet batter. If the toothpick comes out dry, they are overdone. If you see wet, sticky chocolate goo, they need a few more minutes. That sweet spot where the toothpick has just a few tiny, moist flakes attached means they are done and will set up perfectly once cooled.
Can I use alternative sweeteners
If you try to use things like maple syrup or agave, you will absolutely lose that shiny crust. Those liquid sweeteners add too much moisture and don’t crystallize in the way that granulated sugar does when heated and cooled. Stick to the white sugar for the crust, even if we want the inside to be super fudgy!
How do I know when these vegan brownies are fully set
The toothpick test is your best friend here. You are looking for moist crumbs, not wet batter. If the toothpick comes out dry, they are overdone. If you see wet, sticky chocolate goo, they need a few more minutes. That sweet spot where the toothpick has just a few tiny, moist flakes attached means they are done and will set up perfectly once cooled.
Sharing Your Fudgy Vegan Brownies with Shiny Crust Experience
I truly hope you love making these as much as I love eating them! Seriously, the moment you pull them out and see that crackly top, you’ll know you nailed it. Please come back and leave me a rating and tell me what you thought. I love hearing how your batches of Fudgy Vegan Brownies with Shiny Crust turned out for your family! You can see more of our recipe ideas on Pinterest.
Tips for Achieving the Signature Shiny Crust on Fudgy Vegan Brownies with Shiny Crust
That shimmering, crackly top is the hallmark of a truly great brownie, and it’s often the hardest thing to achieve when you take out the eggs. But with this recipe, the secret lies entirely in how we treat the sugar! We are essentially creating a very thin, delicate syrup that bakes on top of the dense batter.
The key is dissolving the granulated sugar completely in that initial step—remember, 5 to 7 minutes over low heat until it’s totally clear? If you leave even a tiny bit of undissolved sugar in there, it won’t create a smooth surface; it’ll just bake into a dull, grainy patch. Also, don’t rush that heating process! Keep the temperature low and steady so the sugar dissolves rather than caramelizes too quickly.
Another trick for the shiniest top on your Fudgy Vegan Brownies with Shiny Crust is oven stability. Try not to open the oven door too early, especially in the first 25 minutes. Temperature fluctuations can cause the surface moisture to steam off unevenly, shattering that delicate crust formation. Once they are mostly set and you’re testing for doneness, you can briefly check, but keep that door shut otherwise!
Serving Suggestions for Your Dessert
These brownies are so rich on their own, but they always welcome a little something extra, especially if you are serving dessert to non-vegans! Since we are keeping things dairy-free, skip the traditional milk ice cream.
My favorite way to serve these is slightly warmed—just pop a square in the microwave for 15 seconds—alongside a scoop of good quality vanilla coconut milk ice cream. A little dusting of powdered sugar right before serving makes the shine pop even more! A small dollop of fresh raspberries or strawberries also cuts through that deep chocolate flavor perfectly.
Storing and Reheating Your Fudgy Vegan Brownies
Because we used oil instead of solid butter, these brownies stay wonderfully soft and fudgy for days, which is a huge win for vegan baking! The main thing is keeping the air away from that shiny crust so it doesn’t get soggy. I always make a double batch just so I have some left for a quick afternoon snack later in the week. For another easy dessert idea, try our no-bake peanut butter balls.
| Storage Method | Duration | Reheating Tip |
|---|---|---|
| Airtight Container (Room Temp) | Up to 4 days | None needed, they are great at room temp! |
| Airtight Container (Fridge) | Up to 1 week | Microwave for 10-15 seconds to soften |
| Freezer (Wrapped Individually) | Up to 3 months | Thaw on the counter for an hour |
Frequently Asked Questions About Fudgy Vegan Brownies with Shiny Crust
I get so many questions about how this recipe works without eggs, especially regarding that crust! Here are the answers to the ones I hear most often. I try to keep things simple so you can focus on enjoying your amazing Fudgy Vegan Brownies with Shiny Crust.
Q1. Can I use alternative sweeteners?
If you try to use things like maple syrup or agave, you will absolutely lose that shiny crust. Those liquid sweeteners add too much moisture and don’t crystallize in the way that granulated sugar does when heated and cooled. Stick to the white sugar for the crust, even if we want the inside to be super fudgy! The sugar syrup is non-negotiable for that signature look.
Q2. How do I know when these vegan brownies are fully set?
The toothpick test is your best friend here. You are looking for moist crumbs, not wet batter. If the toothpick comes out dry, they are overdone. If you see wet, sticky chocolate goo, they need a few more minutes. That sweet spot where the toothpick has just a few tiny, moist flakes attached means they are done and will set up perfectly once cooled. Patience during cooling is key for the final texture!
Q3. What if I can’t find dairy free chocolate chips?
Oh, that can be tricky! If you absolutely can’t find specifically labeled dairy-free chips, you can chop up a high-quality dark chocolate bar that lists no milk ingredients. Just check the label carefully. Sometimes European dark chocolate bars are accidentally vegan, but always double-check for butterfat or milk powder. Even better, you can skip the chips entirely and just trust the rich cocoa flavor in the batter! If you need a savory alternative, consider our simple healthy orzo weeknight meal.
Q4. Will these brownies really have a shiny crust?
Yes, they should! If you follow the steps exactly—especially dissolving the sugar completely until the mixture is clear, and then letting the brownies cool completely before cutting—you will get that beautiful, thin, crackly top that defines the best Fudgy Vegan Brownies with Shiny Crust. It’s science, but it tastes like magic!
Can I use alternative sweeteners
If you try to use things like maple syrup or agave, you will absolutely lose that shiny crust. Those liquid sweeteners add too much moisture and don’t crystallize in the way that granulated sugar does when heated and cooled. Stick to the white sugar for the crust, even if we want the inside to be super fudgy!
How do I know when these vegan brownies are fully set
The toothpick test is your best friend here. You are looking for moist crumbs, not wet batter. If the toothpick comes out dry, they are overdone. If you see wet, sticky chocolate goo, they need a few more minutes. That sweet spot where the toothpick has just a few tiny, moist flakes attached means they are done and will set up perfectly once cooled.
Sharing Your Fudgy Vegan Brownies with Shiny Crust Experience
I truly hope you love making these as much as I love eating them! Seriously, the moment you pull them out and see that crackly top, you’ll know you nailed it. Please come back and leave me a rating and tell me what you thought. I love hearing how your batches of Fudgy Vegan Brownies with Shiny Crust turned out for your family!
Tips for Achieving the Signature Shiny Crust on Fudgy Vegan Brownies with Shiny Crust
That shimmering, crackly top is the hallmark of a truly great brownie, and it’s often the hardest thing to achieve when you take out the eggs. But with this recipe, the secret lies entirely in how we treat the sugar! We are essentially creating a very thin, delicate syrup that bakes on top of the dense batter.
The key is dissolving the granulated sugar completely in that initial step—remember, 5 to 7 minutes over low heat until it’s totally clear? If you leave even a tiny bit of undissolved sugar in there, it won’t create a smooth surface; it’ll just bake into a dull, grainy patch. Also, don’t rush that heating process! Keep the temperature low and steady so the sugar dissolves rather than caramelizes too quickly.
Another trick for the shiniest top on your Fudgy Vegan Brownies with Shiny Crust is oven stability. Try not to open the oven door too early, especially in the first 25 minutes. Temperature fluctuations can cause the surface moisture to steam off unevenly, shattering that delicate crust formation. Once they are mostly set and you’re testing for doneness, you can briefly check, but keep that door shut otherwise!
Serving Suggestions for Your Dessert
These brownies are so rich on their own, but they always welcome a little something extra, especially if you are serving dessert to non-vegans! Since we are keeping things dairy-free, skip the traditional milk ice cream.
My favorite way to serve these is slightly warmed—just pop a square in the microwave for 15 seconds—alongside a scoop of good quality vanilla coconut milk ice cream. A little dusting of powdered sugar right before serving makes the shine pop even more! A small dollop of fresh raspberries or strawberries also cuts through that deep chocolate flavor perfectly.
Storing and Reheating Your Fudgy Vegan Brownies
Because we used oil instead of solid butter, these brownies stay wonderfully soft and fudgy for days, which is a huge win for vegan baking! The main thing is keeping the air away from that shiny crust so it doesn’t get soggy. I always make a double batch just so I have some left for a quick afternoon snack later in the week.
| Storage Method | Duration | Reheating Tip |
|---|---|---|
| Airtight Container (Room Temp) | Up to 4 days | None needed, they are great at room temp! |
| Airtight Container (Fridge) | Up to 1 week | Microwave for 10-15 seconds to soften |
| Freezer (Wrapped Individually) | Up to 3 months | Thaw on the counter for an hour |
Frequently Asked Questions About Fudgy Vegan Brownies with Shiny Crust
I get so many questions about how this recipe works without eggs, especially regarding that crust! Here are the answers to the ones I hear most often. I try to keep things simple so you can focus on enjoying your amazing Fudgy Vegan Brownies with Shiny Crust.
Q1. Can I use alternative sweeteners?
If you try to use things like maple syrup or agave, you will absolutely lose that shiny crust. Those liquid sweeteners add too much moisture and don’t crystallize in the way that granulated sugar does when heated and cooled. Stick to the white sugar for the crust, even if we want the inside to be super fudgy! The sugar syrup is non-negotiable for that signature look.
Q2. How do I know when these vegan brownies are fully set?
The toothpick test is your best friend here. You are looking for moist crumbs, not wet batter. If the toothpick comes out dry, they are overdone. If you see wet, sticky chocolate goo, they need a few more minutes. That sweet spot where the toothpick has just a few tiny, moist flakes attached means they are done and will set up perfectly once cooled. Patience during cooling is key for the final texture!
Q3. What if I can’t find dairy free chocolate chips?
Oh, that can be tricky! If you absolutely can’t find specifically labeled dairy-free chips, you can chop up a high-quality dark chocolate bar that lists no milk ingredients. Just check the label carefully. Sometimes European dark chocolate bars are accidentally vegan, but always double-check for butterfat or milk powder. Even better, you can skip the chips entirely and just trust the rich cocoa flavor in the batter!
Q4. Will these brownies really have a shiny crust?
Yes, they should! If you follow the steps exactly—especially dissolving the sugar completely until the mixture is clear, and then letting the brownies cool completely before cutting—you will get that beautiful, thin, crackly top that defines the best Fudgy Vegan Brownies with Shiny Crust. It’s science, but it tastes like magic!
Can I use alternative sweeteners
If you try to use things like maple syrup or agave, you will absolutely lose that shiny crust. Those liquid sweeteners add too much moisture and don’t crystallize in the way that granulated sugar does when heated and cooled. Stick to the white sugar for the crust, even if we want the inside to be super fudgy!
How do I know when these vegan brownies are fully set
The toothpick test is your best friend here. You are looking for moist crumbs, not wet batter. If the toothpick comes out dry, they are overdone. If you see wet, sticky chocolate goo, they need a few more minutes. That sweet spot where the toothpick has just a few tiny, moist flakes attached means they are done and will set up perfectly once cooled.
Sharing Your Fudgy Vegan Brownies with Shiny Crust Experience
I truly hope you love making these as much as I love eating them! Seriously, the moment you pull them out and see that crackly top, you’ll know you nailed it. Please come back and leave me a rating and tell me what you thought. I love hearing how your batches of Fudgy Vegan Brownies with Shiny Crust turned out for your family!
Print
Achieve 1 Fudgy Vegan Brownies with Shiny Crust
- Total Time: 48 minutes
- Yield: 16 brownies
Description
These fudgy vegan brownies are rich, chocolatey, and easy to make with pantry ingredients. They are a crowd pleasing dairy free dessert.
Ingredients
- 1 1/2 cups granulated sugar
- 1/2 cup water
- 2 tablespoons ground flaxseed
- 5 tablespoons water
- 1/2 cup neutral oil
- 1 tablespoon vanilla
- 3/4 cup cocoa powder
- 1 1/2 cups all purpose flour
- 1/2 teaspoon salt
- 1/2 cup chocolate chips
Instructions
- Preheat oven to 350°F and line an 8 x 8 baking pan with parchment paper.
- In a small bowl, mix ground flaxseed with 5 tablespoons water and set aside to thicken.
- Add granulated sugar and 1/2 cup water to a saucepan over medium low heat. Stir occasionally for 5 to 7 minutes until the sugar is fully dissolved and the liquid looks clear.
- In a large bowl, whisk cocoa powder, flour, and salt until combined.
- Pour the hot sugar mixture into the dry ingredients and stir gently.
- Add flax mixture, oil, and vanilla and mix just until a smooth batter forms.
- Fold in chocolate chips evenly.
- Spread batter into the prepared pan and smooth the top.
- Bake for 36 to 40 minutes until a toothpick comes out with moist crumbs.
- Cool completely before slicing into squares.
Notes
- For the cleanest slices, allow brownies to cool fully before cutting.
- Prep Time: 10 minutes
- Cook Time: 38 minutes