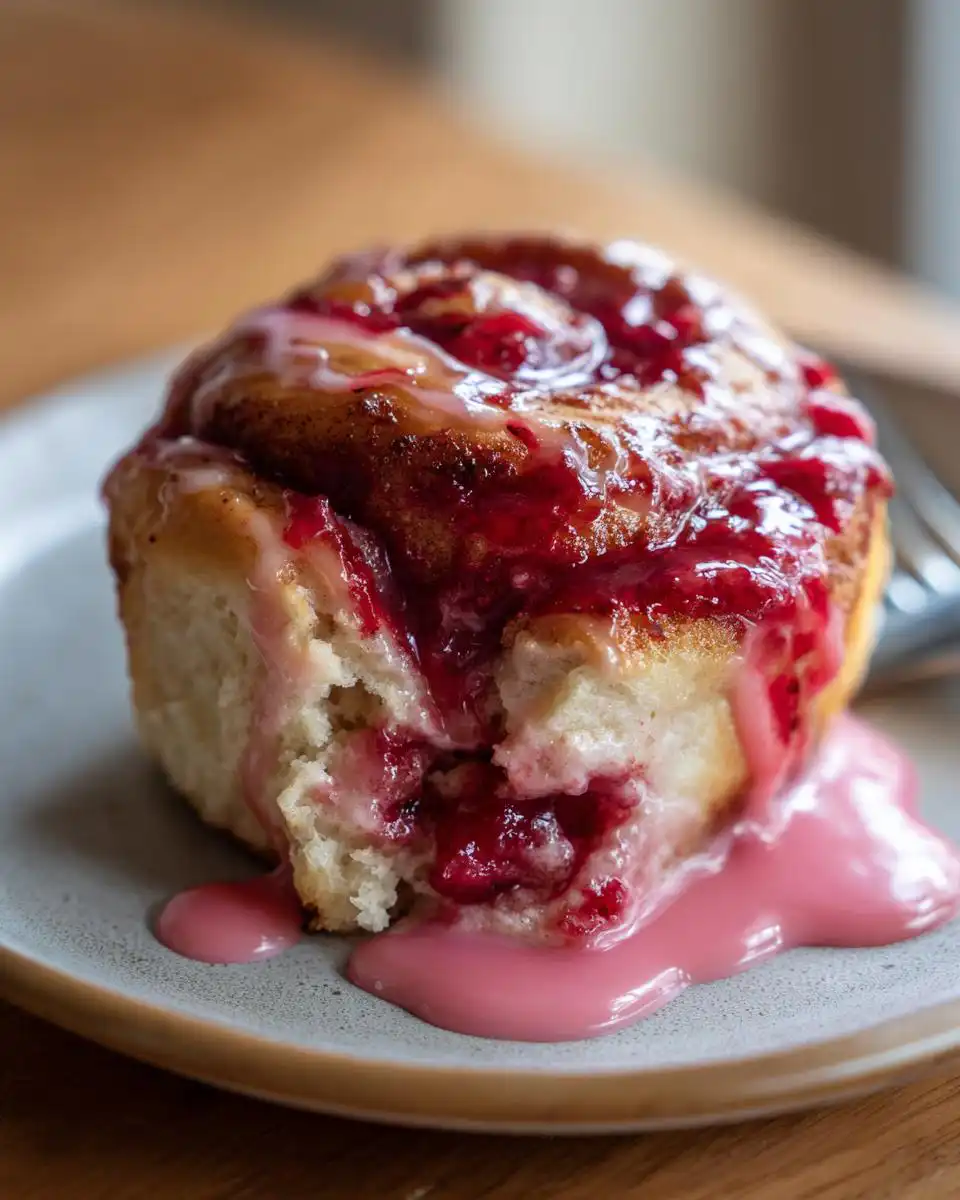
Oh my goodness, you are going to *love* this recipe! I’ve spent years wrestling with tricky laminated doughs and enriched breads, and I finally cracked the code for making what I genuinely think is the best cream cheese king cake you’ll ever taste—no fancy bakery required. Forget those dry, tough versions you sometimes find; this one is pure magic.
The goal here is that incredibly soft, buttery texture, almost like a brioche but easier to handle. That’s what makes this cream cheese king cake a showstopper, especially when you slice into that gooey, slightly tangy filling. It’s perfect for sharing, though I won’t judge if you hide the whole thing for yourself! Trust me, once you get the hang of this simple yeast dough, you’ll want to make this sweet bread all year long.
Essential Components for Your Cream Cheese King Cake
Okay, let’s talk ingredients because that’s half the battle won! Getting the right components ready before you start mixing makes the whole process so much smoother. We need three different sets of things: the dough builders, the creamy filling that makes this cream cheese king cake so irresistible, and the sweet topping to finish it off.
Don’t stress about hunting down fancy items. Most of this is pantry staples, but paying attention to the temperature of a couple of things really makes a difference in how the yeast behaves. Have everything measured out before you turn the mixer on!
Dough Ingredients for the Cream Cheese King Cake
For the actual sweet bread base, we need the usual suspects, but pay close attention to the buttermilk and eggs. The buttermilk needs to be warmed up just right—think lukewarm bathwater, not hot tub! And those two large eggs? They absolutely must be at room temperature so they incorporate smoothly into the warm liquid without shocking the yeast. Having your butter melted but slightly cooled is important too, so it mixes in nicely without weighing down the dough.
- 3\u00bd cups all-purpose flour, plus extra for kneading
- \u00bc cup granulated sugar
- 2\u00bc teaspoons instant yeast (1 packet)
- \u00bd teaspoon salt
- 2 large eggs, room temperature
- \u00bd cup buttermilk, warmed to 110\u00b0F
- 4 tablespoons unsalted butter, melted and cooled slightly
- 1 large egg and 1 teaspoon water (for the egg wash later)
Filling and Glaze Requirements
This is where the decadence comes in! The filling is super simple—just cream cheese, powdered sugar, a touch of acid from the lemon juice, and a hint of nutmeg to warm up that tangy flavor. You want that cream cheese completely soft so it spreads like butter. For the glaze, we are keeping it classic: powdered sugar, milk, and vanilla. Nothing too complicated, because the dough and filling are the stars here.
- 8 ounces cream cheese, softened
- \u00bd cup powdered sugar
- 1 tablespoon all-purpose flour
- 1 tablespoon lemon juice
- 1 teaspoon vanilla extract
- \u215b teaspoon ground nutmeg
- 1 cup powdered sugar (for glaze)
- 2 tablespoons milk (for glaze)
- \u00bd teaspoon vanilla extract (for glaze)
Equipment Needed for Making This Cream Cheese King Cake
You don’t need a whole professional bakery setup to nail this cream cheese king cake, but a few key tools make the job way easier. If you have a stand mixer with a dough hook, use it! It saves your arms during the kneading process. Seriously, kneading this rich dough by hand is a workout.
You’ll also need a rolling pin for getting that perfect rectangle shape for spreading the filling. Make sure you have a good, sturdy baking sheet lined with parchment paper—we don’t want any sticky surprises when this beauty comes out of the oven. A couple of mixing bowls and a whisk will handle the rest of the prep work!
Step-by-Step Instructions for a Perfect Cream Cheese King Cake
Alright, this is where the magic happens! Making this cream cheese king cake is a multi-part adventure, but if you take it one step at a time, you’ll be amazed at how easy it is to get that bakery-quality result right in your own kitchen. We’re starting with the dough, which needs a little patience, but trust me, the texture you get is worth every minute.
Preparing and Proofing the Dough
First things first: get your dry ingredients mixed up in your stand mixer bowl—flour, sugar, yeast, and salt. Give them a quick whisk just to ensure everything is evenly distributed. Now for the wet side. You absolutely must get that buttermilk warmed up to about 110\u00b0F. If it’s too cold, the yeast won’t wake up, and if it’s too hot, you’ll kill it! Whisk your eggs lightly in a separate bowl, then slowly drizzle in that warm buttermilk mixture while you keep whisking constantly. This slow incorporation helps keep everything happy.
Pour all those lovely wet ingredients into your dry mix. Attach that dough hook and let the mixer go! You need to knead this dough on medium speed for a good 8 to 10 minutes. It’s going to look sticky at first, but resist the urge to dump in tons of extra flour right away. Keep kneading until it pulls away from the sides and looks smooth and elastic. Once it’s ready, pop it into an oiled bowl, turn it over once to coat, cover it up, and find a warm spot for it to rise until it’s doubled. This usually takes about an hour and a half to two hours, depending on how warm your kitchen is.
Creating and Applying the Cream Cheese Filling
While that beautiful dough is puffing up, let’s whip up the filling. Grab a medium bowl and beat that softened cream cheese until it’s smooth—no lumps allowed! Then, mix in your powdered sugar, that tiny bit of flour, the lemon juice for tang, vanilla, and that essential pinch of nutmeg. Beat it until it’s creamy and easily spreadable. Set this aside.
Once the dough has doubled, gently punch it down—it’s so satisfying! Turn it out onto a lightly floured surface. Use your rolling pin to roll it out into a long rectangle, roughly 10 inches by 28 inches. Now, take your cream cheese filling and spread it evenly all over the dough. This is important: leave about an inch border clear along one of the long edges. That border is going to seal everything up later!
Forming, Baking, and Finishing the Cream Cheese King Cake
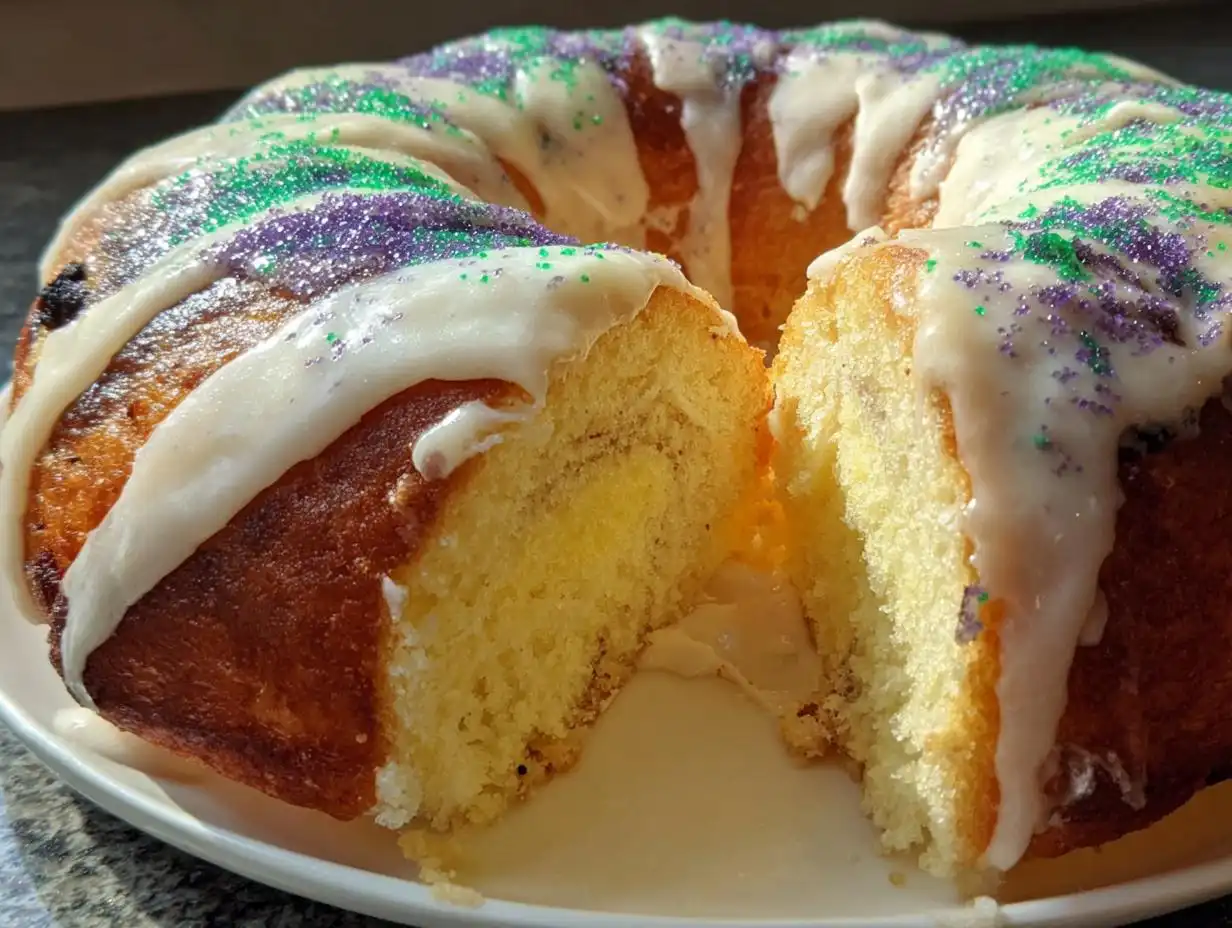
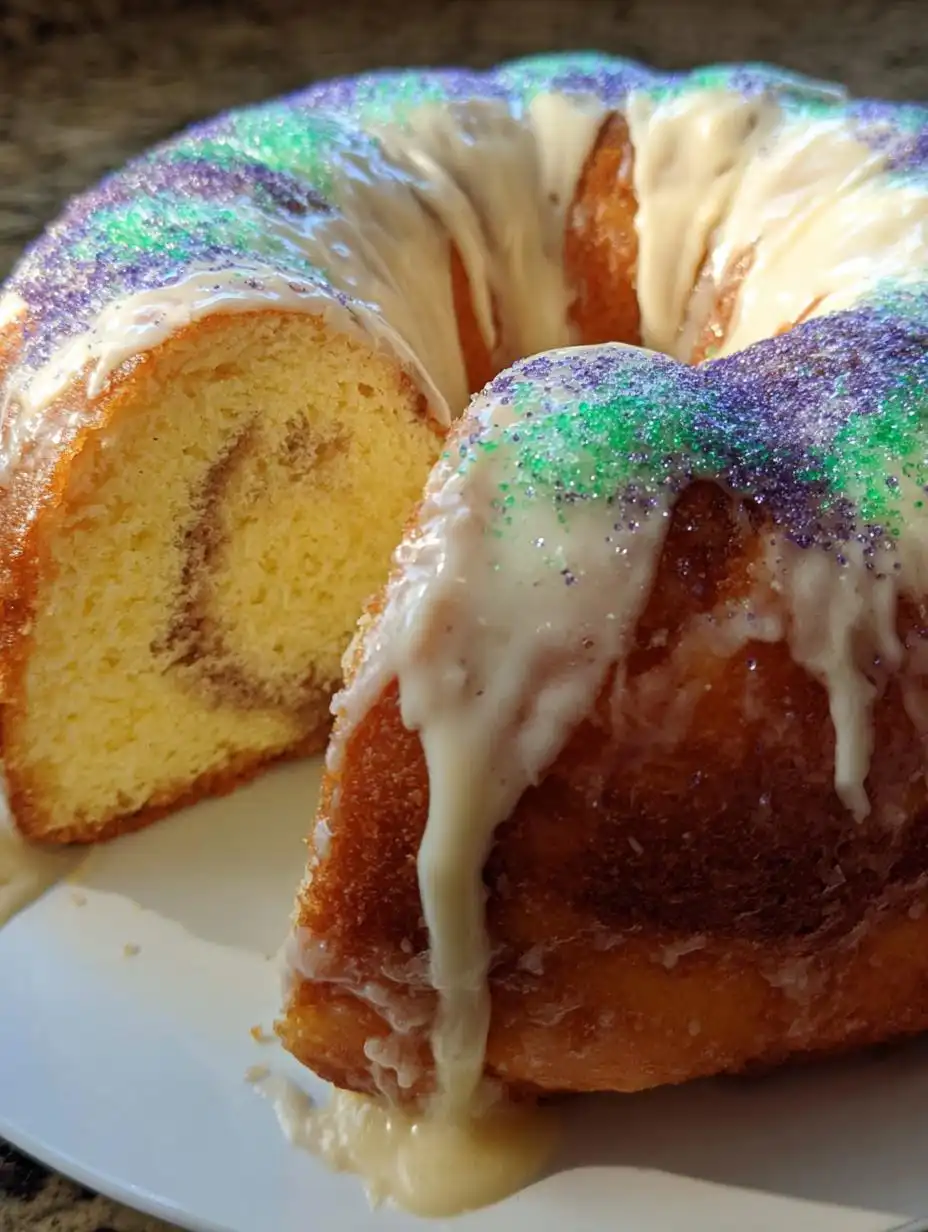
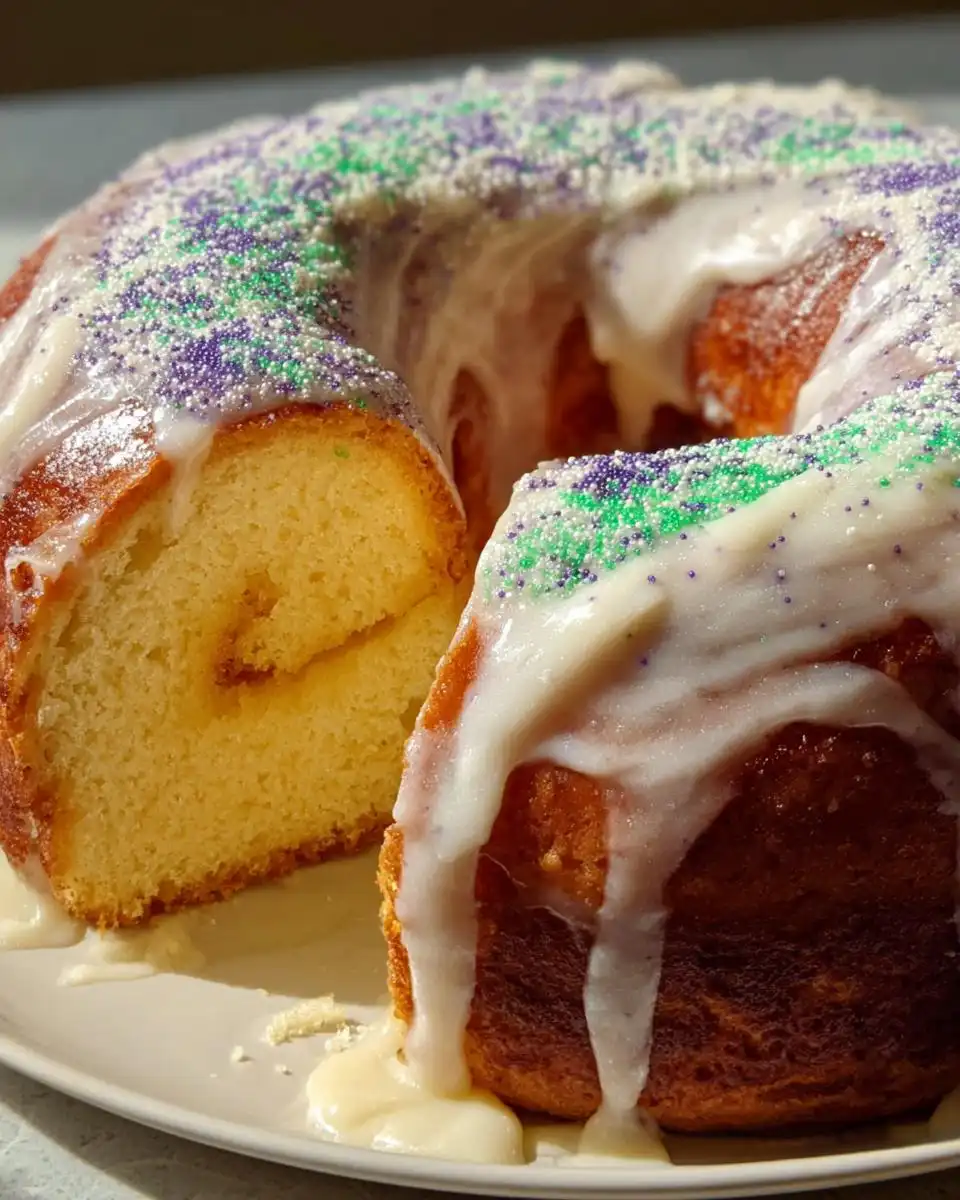
Starting from the long edge *opposite* the clear border, roll that dough up tightly, just like you would a jelly roll. Once you have your log, pinch those seams together really well—we don’t want any filling leaks during baking! Now, gently coax the dough into a ring shape right on your parchment-lined baking sheet, making sure to pinch the two ends together securely to form a continuous circle.
Whisk together that last egg and teaspoon of water for the egg wash. Brush this mixture generously all over the dough. This is what gives our cream cheese king cake that gorgeous, deep golden color! Bake it at 350°F for about 35 to 40 minutes. Keep an eye on it; if the top starts getting too dark before the center is done, you can loosely tent it with foil.
Once it’s baked, you *must* let it cool completely on a wire rack—at least 30 minutes. If you try to glaze a warm cake, you’ll just have a melted, runny mess, and we want that beautiful, thick vanilla drizzle! When it’s totally cool, whisk your glaze ingredients (sugar, milk, vanilla) until smooth, and drizzle it all over. Then, stand back and admire your incredible work!
Expert Tips for Success with Your Cream Cheese King Cake
I know that rolling up a filled dough can feel a little intimidating, but I have a couple of tricks to make sure your cream cheese king cake holds its shape perfectly. When you roll that log, keep your hands light but firm, and try to roll it as tightly as you can without squishing the filling out the sides. That 1-inch border you leave at the end is your safety net!
When you pinch the ends together to form the ring, really work that seam closed. You can even overlap the ends slightly before pinching to give it extra grip. This prevents that dreaded unrolling halfway through baking!
For that beautiful golden crust we talked about, make sure your egg wash is applied evenly—don’t miss any spots! Also, if you notice the cake browning too quickly around the 25-minute mark, just grab a piece of aluminum foil and loosely lay it over the top. This shields the crust while letting the center finish cooking through. Following these little steps ensures every single cream cheese king cake you bake is picture-perfect!
Storing and Reheating Your Cream Cheese King Cake
This sweet bread is best enjoyed the day it’s made, but let’s be real, sometimes there are leftovers! The good news is that the richness of the filling and the glaze helps keep this cake moist for a few days. You have a couple of options depending on how quickly you plan to eat the rest of it.
If you think you’ll finish it within two days, just keep it covered tightly at room temperature. The glaze can get a little soft, but the texture stays lovely. If you need it to last longer, the fridge is the way to go, but you’ll definitely want to warm it up a touch before serving.
Here’s a quick guide for keeping your leftover deliciousness:
| Storage Location | Maximum Duration | Reheating Note |
|---|---|---|
| Room Temperature (Covered) | Up to 2 days | Serve as is. |
| Refrigerated | Up to 5 days | Warm slightly before eating. |
Common Questions About This Cream Cheese King Cake
I get so many questions about this recipe because everyone wants that perfect, soft texture! It’s easy to get nervous about yeast breads, but once you see how forgiving this dough is, you’ll be baking them all the time. Don’t worry if your first attempt isn’t magazine-perfect; it will still taste amazing!
The most common question I get is definitely about substitutions. While I stand by the buttermilk for that signature tang in the dough, you can sometimes get away with regular milk if you add a teaspoon of vinegar or lemon juice and let it sit for five minutes before warming. But honestly, for the absolute best cream cheese king cake, stick to the buttermilk!
Here are a few other things people always ask me about:
Q. Can I use store-bought cinnamon filling instead?
You certainly can, but you’d miss out on that bright flavor the lemon juice gives the cream cheese! The real joy of this cream cheese king cake is that tangy contrast to the sweet bread. If you want to see more of my baking adventures, check out my writing on Medium.
Q. My dough didn’t double! What happened?
Nine times out of ten, it’s the temperature of your liquid. If your buttermilk wasn’t warm enough (around 110\u00b0F), the yeast just sleeps. Next time, use a thermometer, or just stick your finger in—it should feel warm, not hot!
Can I make the dough ahead of time?
Yes, you absolutely can! This is a lifesaver when you have company coming. Once the dough has finished its first rise and you’ve punched it down, instead of rolling it out immediately, just lightly oil the bowl again, place the dough inside, cover it tightly with plastic wrap, and pop it in the fridge overnight. It will rise slowly, developing even more flavor! Just let it sit on the counter for about 30 minutes to an hour before proceeding with rolling and filling.
What is the best way to ensure the cream cheese filling stays inside?
This is critical for a clean-looking ring! When you roll up your dough log, you need to be firm and consistent. After you roll it, you must pinch the long seam closed very tightly along the entire length. Then, when you join the ends to make the circle, overlap them by about an inch and really pinch that final junction together. If you seal it well, the filling stays put during the final proof and the bake! For more visual inspiration on recipes like this, follow my Pinterest boards.
Nutritional Data Disclaimer
Now, listen, I’m a baker, not a nutritionist! I focused on making this the most delicious cream cheese king cake possible, not calculating every little macro. The exact nutritional breakdown can change a lot depending on the brand of butter or the type of powdered sugar you use. If you are interested in other recipes, you might enjoy this yogurt cake recipe.
So, for the most accurate data, you might need to plug in your specific ingredients. But honestly, when something tastes this good, who’s really counting calories?
Print
Best cream cheese king cake: 1 magical loaf
- Total Time: 2 hours 45 minutes
- Yield: 10 servings
- Diet: Vegetarian
Description
This soft, buttery king cake is filled with sweet cream cheese and topped with vanilla icing. A tender, bakery-style treat perfect for sharing.
Ingredients
- 3½ cups all-purpose flour, plus extra for kneading
- ¼ cup granulated sugar
- 2¼ teaspoons instant yeast (1 packet)
- ½ teaspoon salt
- 2 large eggs, room temperature
- ½ cup buttermilk, warmed to 110°F
- 4 tablespoons unsalted butter, melted and cooled slightly
- 8 ounces cream cheese, softened
- ½ cup powdered sugar
- 1 tablespoon all-purpose flour
- 1 tablespoon lemon juice
- 1 teaspoon vanilla extract
- ⅛ teaspoon ground nutmeg
- 1 large egg (for egg wash)
- 1 teaspoon water (for egg wash)
- 1 cup powdered sugar (for glaze)
- 2 tablespoons milk (for glaze)
- ½ teaspoon vanilla extract (for glaze)
Instructions
- In the bowl of a stand mixer, combine flour, sugar, yeast, and salt. Whisk to blend.
- In a small saucepan, warm buttermilk and melted butter to 110°F. In a separate bowl, lightly whisk eggs, then slowly add the warm buttermilk mixture while whisking constantly.
- Pour wet ingredients into the flour mixture. Using a dough hook, knead on medium speed for 8 to 10 minutes, adding a bit more flour if the dough is sticky, until smooth and elastic.
- Place the dough in a lightly oiled bowl, turning to coat. Cover and let rise in a warm spot until doubled in size, about 1½ to 2 hours.
- In a medium bowl, mix cream cheese, powdered sugar, flour, lemon juice, vanilla, and nutmeg until smooth. Set aside.
- Punch down the dough and turn it onto a floured surface. Roll into a 10×28-inch rectangle. Spread the cream cheese filling evenly over the dough, leaving a 1-inch border.
- Starting from a long edge, roll the dough tightly into a log and pinch seams to seal. Shape into a ring and place on a parchment-lined baking sheet. Pinch the ends together to form a complete circle.
- Whisk egg and water for the egg wash, then brush evenly over the dough.
- Bake at 350°F for 35 to 40 minutes or until golden brown. Let cool completely on a wire rack, about 30 minutes.
- For the glaze, whisk powdered sugar, milk, and vanilla until smooth. Drizzle over the cooled cake before serving.
Notes
- For extra flair, sprinkle the glazed cake with colored sugar or citrus zest.
- Store covered at room temperature for up to 2 days or refrigerate for up to 5 days.
- Prep Time: 25 minutes
- Cook Time: 40 minutes
- Category: Dessert
- Method: Baking
- Cuisine: American