I’m Jordan Bell, and if you’re looking for the biggest game-changer in weeknight dinner plans, let me introduce you to the magic of the Spatchcocked Roast Chicken. Seriously, ditch the whole bird sitting awkwardly in the oven forever! Coming to you from Asheville, NC, I’ve spent years perfecting Southern comfort food to fit my clean eating journey—I’ve lost 80 pounds by focusing on flavor without the fuss.
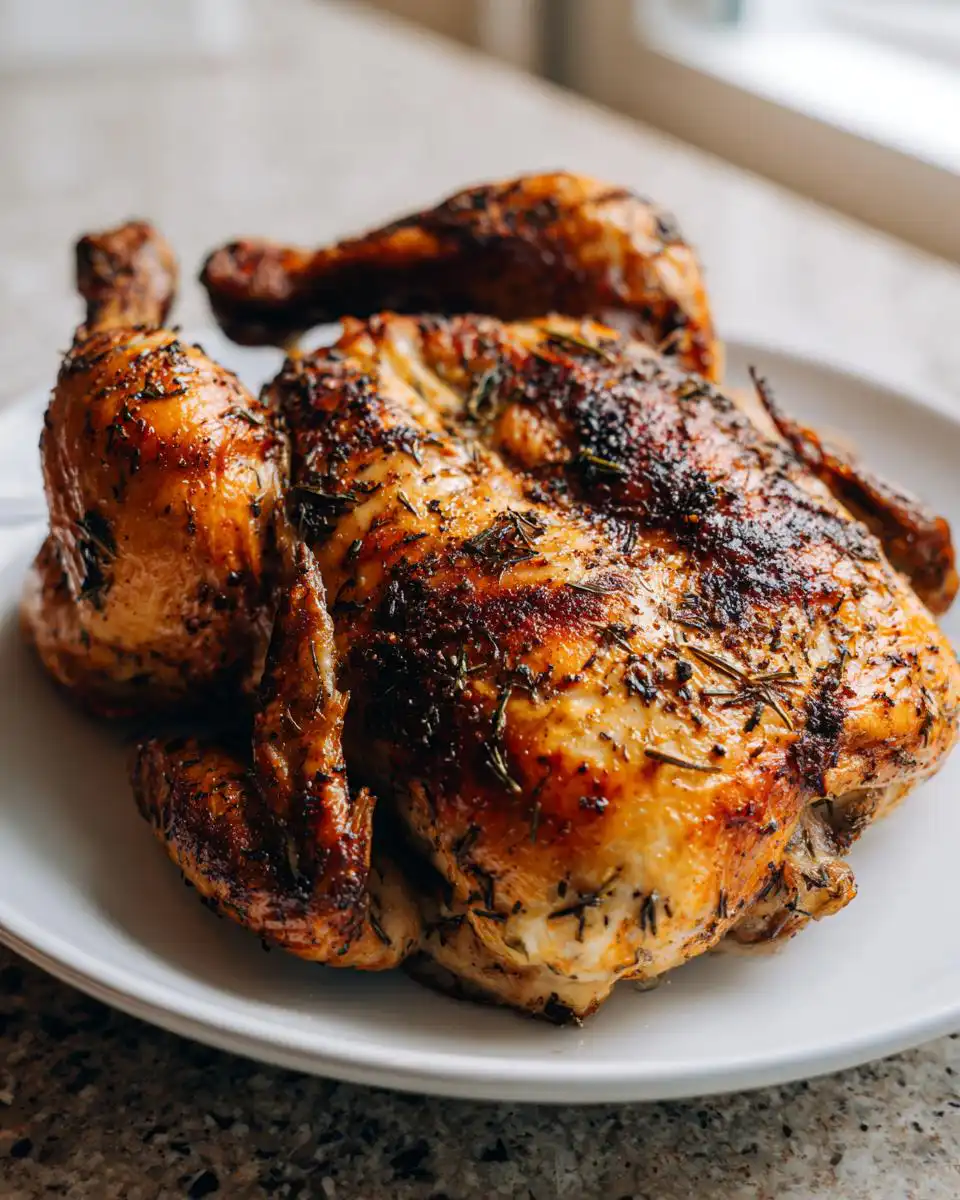
This method, sometimes called butterflying, is my secret weapon for getting incredibly crispy skin and perfectly cooked meat in under an hour. That’s right, fast *and* reliable! For my readers who value honest, tested results (that’s why we build trust and expertise here on the blog!), this technique guarantees even cooking, especially in the tricky breast and thigh areas.
We aren’t just roasting a chicken; we’re building flavor from the ground up, using the backbone to create a little pan jus right alongside it. You’ll use simple fresh ingredients like onion, carrot, celery, and herbs like parsley, thyme, and rosemary to make this the juiciest, crispiest bird you’ve ever pulled from your oven. Trust me, once you spatchcock, you never go back!
Gathering Your Ingredients for Spatchcocked Roast Chicken
Getting ready for this Spatchcocked Roast Chicken is half the fun! It’s amazing how these simple pantry staples—some fresh herbs, a little onion, carrot, and celery—turn into the richest sauce you’ve ever tasted. We need the chicken ready to go, and we need our supporting cast of aromatics lined up. Don’t skip the baking powder if you want skin that shatters when you touch it; it’s my little secret weapon for crispness!
Ingredient Checklist for Your Spatchcocked Roast Chicken
| Ingredient | Amount | Preparation Note |
|---|---|---|
| Large Chicken (4–5 lbs) | 1 | Whole bird |
| Fresh Herbs (Parsley, Thyme, Rosemary, etc.) | 2 teaspoons | Chopped, or a mix |
| Olive Oil | 2 tablespoons | Divided |
| Kosher Salt & Pepper | To taste | Use plenty of salt! |
| Baking Powder (Optional) | 1 teaspoon | For extra crispy skin |
| Onion | 1 medium | Roughly chopped |
| Carrot | 1 medium | Peeled and roughly chopped |
| Celery | 1 rib | Roughly chopped |
| Bay Leaf | 1 | Whole |
| Water | 1 cup | |
| Soy Sauce | 1 teaspoon | |
| Unsalted Butter | 3 tablespoons | |
| Lemon Juice | 2 teaspoons | From about 1 lemon |
Equipment Needed for the Spatchcocked Roast Chicken Method
You can’t spatchcock without the right tools, folks! Make sure you have a really good pair of sharp kitchen shears—don’t try this with weak scissors, trust me. You’ll also need a foil-lined rimmed baking sheet topped with a wire rack. This setup allows that beautiful, salty air to circulate all around the chicken for that even roast we’re aiming for.
Mastering the Spatchcocked Roast Chicken Technique
Okay, let’s talk about the actual *spatchcocking*. When I first tried this, I felt like I was wrestling a giant undercooked bird! It’s intimidating, but once you do it, you realize it’s just a bit of scissor work and some elbow grease. The payoff is huge—a flat chicken roasts faster and more evenly, meaning no dry breast meat while you wait for the thighs to finish. This technique is all about precision here, so take your time and be safe! This technique is all about precision here, so take your time and be safe!
Preparing the Chicken for Spatchcocked Roast Chicken
First things first: get those sharp kitchen shears out. If your shears are dull, you’re going to shred the skin and struggle. Place the chicken breast-side down on a sturdy cutting board. You need to locate the backbone running right down the center. Starting at the tail end, use those powerful shears to cut right along one side of the backbone all the way up to the neck cavity. Repeat that cut on the other side. Snip through the small ribs if you need to get leverage.
Once the backbone is removed (save that for our flavorful jus later!), flip that chicken over so it’s skin-side up. Now comes the flattening part. You need to press down hard right on the center of the breastbone. Use the heel of your hand, and push firmly until you hear a satisfying crack. The chicken should lay perfectly flat now, almost like a butterfly! Transfer it immediately to your wire rack set over that foil-lined baking sheet.
Seasoning for Maximum Flavor and Crispy Skin
This is where we layer in the flavor and guarantee that shatteringly crisp skin. If you’re using fresh herbs like parsley, thyme, or rosemary, you need to create little pockets. Gently slide your fingers between the skin and the breast meat, being careful not to tear the skin itself. Push those chopped herbs right into those pockets so they flavor the meat directly.
Next up is the secret handshake for crispy skin: salt mixed with baking powder. Mix your kosher salt, pepper, and that teaspoon of baking powder together. Sprinkle this mixture generously all over the skin and even a little bit inside the cavity. The baking powder raises the pH of the skin, which helps it dry out beautifully in the high heat. If you have time—and I highly recommend you do this—let the chicken sit uncovered in the fridge for several hours or overnight. That dry brine process is non-negotiable for the best texture! That dry brine process is non-negotiable for the best texture!
Step-by-Step Instructions for Roasting Your Spatchcocked Roast Chicken
Now that our beautiful chicken is prepped, seasoned, oiled, and perhaps rested in the fridge, it’s time for the oven! Remember, we are roasting this guy hot and fast because it’s flat. Preheat your oven to 450°F (230°C) and make sure that rack is set in the upper-middle position. The high heat hits the skin right away, which is exactly what we want!
Initial Roasting of the Spatchcocked Roast Chicken
Drizzle that remaining tablespoon of olive oil all over the skin and rub it in gently. Then, pop the whole sheet pan setup into that hot oven. You’re looking at about 45 minutes of roasting time, but you absolutely must cook by temperature, not just by the clock. We need two different readings for success here. Use a reliable meat thermometer inserted into the thickest part of the breast, close to the bone, aiming for 150°F (66°C). Simultaneously, check the thigh joint where it meets the body—that needs to register at least 175°F (80°C). This dual temperature check is how we guarantee juicy dark meat and perfectly cooked white meat!
Creating the Flavorful Pan Jus While Roasting
While that chicken is getting golden, we make our bonus sauce! Grab a small saucepan and heat the remaining tablespoon of oil over high heat until it’s shimmering—we want it hot. Toss in that reserved chicken backbone and stir it constantly until it gets really nicely browned; this should only take about three minutes. Don’t be shy about those brown bits sticking to the bottom!
Toss in your roughly chopped onion, carrot, and celery, along with that single bay leaf. Cook those veggies for another three minutes until they start to brown up a bit too. Now, pour in one cup of water and use your wooden spoon to scrape up every single browned bit stuck to the pan bottom—that’s pure flavor, folks! Bring it down to a simmer, let it bubble away gently for 20 minutes, then strain out all those solids, returning just the liquid to the pan. Turn the heat up high and boil that liquid down until you only have about 1/3 cup left. This concentrates all that richness! This concentrates all that richness!
Finishing and Resting the Spatchcocked Roast Chicken
Once your chicken hits those target temperatures, pull it out of the oven immediately. Transfer the chicken to a cutting board, tent it loosely with foil, and let it rest for a solid five minutes. Resting is crucial; it lets those juices redistribute. While it rests, finish the jus! Take the pan off the heat and whisk in your butter and the fresh lemon juice. Taste it and adjust with a little salt and pepper if you need to. After resting, carve your chicken and serve those amazing slices right alongside that bright, flavorful jus!
Tips for Perfect Spatchcocked Roast Chicken Every Time
We’ve covered the method, but let’s nail down those final details that separate a good roast chicken from the *best* Spatchcocked Roast Chicken. The biggest pitfall I see people make is skipping the chill time. If you can, dry brine your chicken—that means tossing it with the kosher salt, pepper, and baking powder mix, leaving it uncovered in the fridge overnight. It’s the single best thing you can do for unbelievably crisp skin that seals in moisture.
Also, don’t trust your oven dial alone! Temperature accuracy is everything here. Make sure your thermometer is calibrated correctly, and check both the breast and thigh joints as instructed. If you skip the dry brine, the skin might look a little pale, but the high heat should still crisp it up nicely. With the right temperature checks, this method is foolproof! If you are looking for other great dinner ideas, check out this recipe for Marry Me Chicken Orzo.
Storing and Reheating Your Leftover Spatchcocked Roast Chicken
If you somehow manage to have leftover Spatchcocked Roast Chicken—which is rare in my house—you need to treat it right so you don’t lose that beautiful crispy skin we worked so hard for. Storing it properly is key to enjoying that amazing flavor again the next day. Don’t just toss it in a container and forget it!
The best way to store leftover chicken is to let it cool slightly, then wrap the pieces tightly in plastic wrap before placing them in an airtight container. This prevents the skin from getting soggy in the fridge. I usually separate the breast meat from the thigh meat because they reheat at slightly different rates.
Leftover Chicken Storage Guide
| Item | Storage Method | Max Time |
|---|---|---|
| Chicken Pieces | Airtight container, tightly wrapped | 3 to 4 days |
| Pan Jus (Sauce) | Small sealed container | Up to 5 days |
When it comes time to reheat, the microwave is your enemy if you want that skin crisp. For the best texture, I always recommend reheating in a moderate oven or an air fryer. Set your oven to about 350°F (175°C). Place the chicken pieces skin-side up on a small baking sheet. If the skin is already soggy, you can give it a quick spritz of water or broth to prevent drying out, but honestly? It’s best reheated quickly just to warm through.
If you warmed up that incredible pan jus with the onion and carrot flavors, reheat that gently on the stovetop. A little splash of soy sauce or fresh lemon juice can brighten it up if it seems dull after refrigeration. Enjoy those leftovers! For another comforting meal idea, consider this Creamy Chicken and Rice Soup.
Answering Common Questions About Your Spatchcocked Roast Chicken
When you’re working with a new technique like spatchcocking, you always have questions! It’s totally normal. I get asked constantly about temperatures and those little additions like baking powder. Don’t worry, we’re going to clear up any confusion so your next chicken is perfect, juicy, and has that amazing, shatteringly crisp skin.
What internal temperature should I look for when cooking Spatchcocked Roast Chicken?
This is the most important question for safety and texture! You need two readings. The thickest part of the breast, right near the bone, should register 150°F (66°C). But crucially, the thigh joint, where the leg meets the body, needs to hit at least 175°F (80°C). This difference ensures the dark meat is tender while the white meat stays juicy.
Can I skip the baking powder for my Spatchcocked Roast Chicken?
You certainly can skip the baking powder if you absolutely must, but I wouldn’t advise it if crispy skin is your goal! That tiny bit of baking powder mixed with the kosher salt helps dry out the surface of the chicken skin during the roast. If you skip it, your skin will still brown, but it might not achieve that incredible, crackly texture we love.
How do I ensure my Spatchcocked Roast Chicken cooks evenly?
That’s the whole point of the spatchcocking method itself! By removing the backbone and flattening the bird, you eliminate the dome shape that causes the breast to overcook while waiting for the thighs. The flat surface means the bone structure cooks uniformly, ensuring everything finishes around the same time. It’s a brilliant trick!
Nutritional Estimates for Spatchcocked Roast Chicken
Look, I’m all about eating delicious, wholesome food, and that’s why this Spatchcocked Roast Chicken is a staple in my clean eating plan. You get great protein, and we load it up with fresh vegetables like onion, carrot, and celery for nutrients! If you are interested in learning more about my journey, check out my About Me page.
However, I always want to be straight with you guys—I’m a cook, not a certified nutritionist! The exact calorie count, fat content, or sodium level can swing wildly based on the size of your particular chicken, how much olive oil you decide to rub on, and exactly how much butter you whisk into that beautiful pan jus. So, please take these numbers as a general guideline only.
Nutritional data for this Spatchcocked Roast Chicken recipe is not precisely calculated here. The actual values vary based on the specific brands of ingredients you use (especially the soy sauce and butter), the exact weight of your chicken, and how much of the pan jus you drizzle over your portion. Always adjust based on your personal dietary needs!
Print
Juicy Spatchcocked Roast Chicken in 45 min
- Total Time: 1 hour 15 minutes
- Yield: 4 servings
Description
Make a Spatchcocked Roast Chicken for crispy skin and even cooking. This method, also called butterflying, speeds up roasting time. You will create a simple pan sauce using the chicken backbone and vegetables for added flavor.
Ingredients
- 1 large chicken, about 4 to 5 pounds (1.8 to 2.3 kg)
- 2 teaspoons (10 g) chopped fresh parsley, thyme, rosemary, oregano, marjoram, savory, or a mix (optional)
- 2 tablespoons (30 ml) light olive oil or other neutral-flavored oil, divided
- Kosher salt and freshly ground black pepper
- 1 teaspoon (5 g) baking powder (optional)
- 1 medium onion, roughly chopped (about 1 cup)
- 1 medium carrot, peeled and roughly chopped (about 1/2 cup)
- 1 medium rib celery, roughly chopped (about 1/2 cup)
- 1 bay leaf
- 1 cup (240 ml) water
- 1 teaspoon (5 ml) soy sauce
- 3 tablespoons (45 g) unsalted butter
- 2 teaspoons (10 ml) juice from 1 lemon
Instructions
- Place oven rack in upper-middle position and preheat oven to 450°F (230°C).
- Using sharp kitchen shears, remove backbone from chicken and cut spine into 5 to 6 one-inch-long pieces. Set backbone aside.
- Flatten chicken by placing skin side up on a cutting board and applying firm pressure to breastbone.
- Transfer to a wire rack set in a foil-lined rimmed baking sheet. Position chicken so that breasts are aligned with center of baking sheet and legs are close to edge.
- If using herbs: gently separate chicken skin from the breast and thigh meat from the neck end down. Carefully push the herbs under the skin, distributing them evenly.
- Combine 1 tablespoon (15g) kosher salt, 1/2 teaspoon ground black pepper, and 1 teaspoon (5g) baking powder (if using) in a small bowl. Sprinkle all over chicken skin and cavity sides, then return to skin-up position.
- If dry brining, transfer chicken to refrigerator and let sit, uncovered, for at least 3 and up to 24 hours; otherwise proceed with cooking.
- Drizzle chicken skin with 1 tablespoon (15ml) oil, rubbing to distribute evenly.
- Roast chicken until thickest part of breast close to bone registers 150°F (66°C) and joint between thighs and body registers at least 175°F (80°C), about 45 minutes.
- Meanwhile, heat remaining 1 tablespoon (15ml) oil in a small saucepan over high heat until shimmering. Add chicken backbone and cook, stirring frequently, until well browned, about 3 minutes.
- Add onion, carrot, and celery and cook, stirring frequently, until beginning to brown, about 3 minutes.
- Add bay leaf and 1 cup (240ml) water, using a wooden spoon to scrape up any browned bits from bottom of pan. Reduce heat to maintain simmer and cook for 20 minutes.
- Strain out solids and return liquid to pan. Boil over medium-high heat until approximately 1/3 cup (80ml) remains, about 7 minutes.
- Whisk in soy sauce, butter, and lemon juice off heat. Season to taste with salt and pepper.
- Remove chicken from oven, transfer to cutting board, tent loosely with foil, and allow to rest 5 minutes before carving. Serve with hot jus.
Notes
- For extra crispy skin, use baking powder mixed with salt and pepper. Do not skip the dry brine if you have time.
- The internal temperature for the breast should reach 150°F (66°C) and the thigh joint should reach 175°F (80°C) for safe and juicy results.
- If you skip the dry brine, the skin might not be as crisp.
- Prep Time: 20 minutes
- Cook Time: 55 minutes