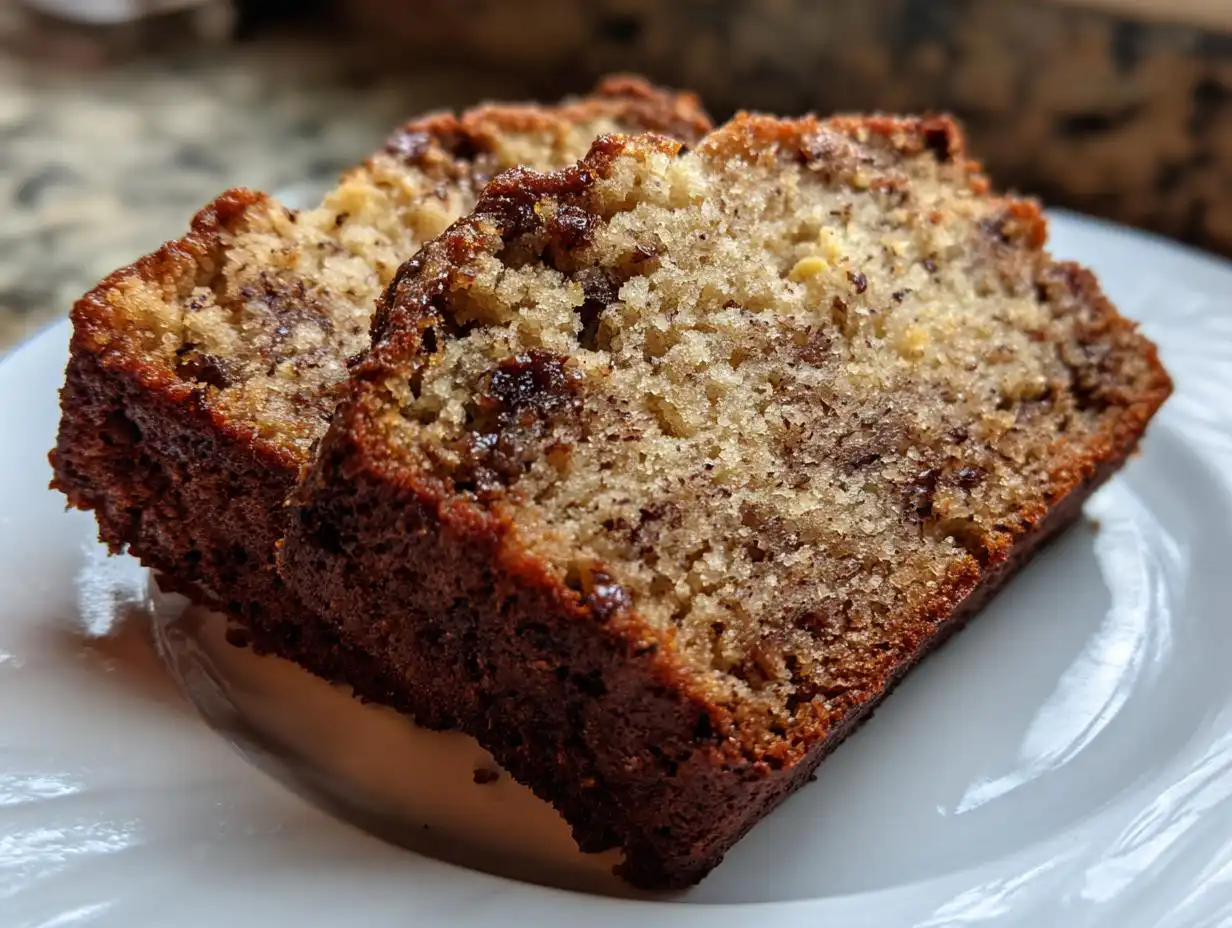
When I started my journey toward healthier eating, especially after losing about 80 pounds, I missed the comfort foods from my Southern roots. Down here in Asheville, NC, we live for things like rich, sweet quick breads, but those classic recipes were usually packed with ingredients I was trying to ditch. That’s why I started the Easy Detox Recipes blog—to prove you don’t have to sacrifice flavor when you clean up your diet. It took a lot of testing, but I finally cracked the code on making the absolute best Zucchini Bread. This isn’t the dry, bland stuff you might be thinking of; oh no. This version is incredibly moist, perfectly spiced with cinnamon, and tastes like pure Southern comfort, all while aligning with the clean eating principles I live by now. Trust me, once you try this, you’ll be looking forward to summer squash season every year!
Gathering What You Need for the Best Zucchini Bread
Okay, now that you’re excited about making this amazing bread, let’s talk about getting everything ready. Baking success really starts right here, before the oven even turns on. Don’t rush this part! Having all your ingredients measured out and your tools ready makes the mixing process fly by. Since we are aiming for that signature moist texture, pay close attention to the zucchini prepping in a minute.
We’re keeping this recipe wonderfully simple, focusing on classic pantry staples that let that fresh zucchini shine through. You won’t need fancy equipment, just the basics that every home baker keeps handy.
Essential Ingredients for Moist Zucchini Bread
You’ll need three cups of all-purpose flour, which is the backbone of our quick bread structure. For sweetness, grab two and a quarter cups of granulated sugar, and for that lovely richness, one cup of vegetable or canola oil. We are using three eggs and three teaspoons of vanilla extract to bind everything beautifully. The spice star here is three teaspoons of ground cinnamon—don’t skimp on it! Then, make sure you have one teaspoon each of salt, baking soda, and baking powder. And of course, the star: two cups of grated zucchini. Remember, no squeezing that moisture out!
Equipment List for Your Zucchini Bread
For this recipe, you’ll need two 8×4 inch loaf pans. Make sure they are ready to go before you start mixing! A stand mixer works great here, but honestly, a sturdy bowl and a good whisk will get the job done just as well. You’ll also want measuring cups and spoons, naturally, and a rubber spatula for folding in that last bit of zucchini. Finally, don’t forget your cooling racks—they are essential for letting the loaves set up properly after they come out of the heat.
Step-by-Step: How to Prepare Perfect Zucchini Bread
Alright, let’s get baking! This is where the magic happens, but remember what I always say: quick breads are fast, but they aren’t speed-of-light baking. Patience during the mixing stages is what keeps them wonderfully moist. We are aiming for a gentle blend, not a heavy churn, which is key to avoiding dense, tough bread.
Initial Setup and Mixing Wet Ingredients for Zucchini Bread
First things first: get that oven preheating to 325 degrees F. It needs time to come up to temperature while you mix. Next, grab your two 8×4 inch loaf pans. You want to coat these really well with cooking spray—I usually give them a good, thick layer. Set those pans aside and let’s tackle the wet stuff.
In your mixing bowl, dump in the granulated sugar, the oil, the three eggs, and all that lovely vanilla extract. Now, you want to mix these vigorously until they look creamy. If you’re using a stand mixer, give it a good three or four minutes on medium speed. You’re looking for that light yellow color and a slightly smoother texture. This step is important because we’re incorporating some air right from the start, which helps with the final rise.
Combining Dry Components and Final Batter Assembly
Now for the dry ingredients—the flour, cinnamon, salt, baking soda, and baking powder. Add these directly into your wet mixture. And here is my biggest warning: mix only until the dry streaks *almost* disappear. Seriously, stop the mixer when you still see a few little flour bits. If you overmix flour in any quick bread, you’re developing gluten, and that equals tough bread. We want tender loaves!
Once you pause the mixer, grab your spatula. It’s time for the zucchini. Gently fold in those two cups of shredded squash until it’s just distributed evenly throughout that thick batter. Resist the urge to press down on the zucchini or squeeze out any liquid—that moisture is what makes this Zucchini Bread so famous!
Finally, divide that batter evenly between your two prepared pans. Remember, don’t fill them more than two-thirds full, or you risk a huge mushroom top that might spill over the sides. Give the pans a gentle tap on the counter to release any huge air pockets.
Baking and Cooling Your Zucchini Bread Loaves
Pop those pans into the preheated 325-degree oven. They will need anywhere from 45 to 55 minutes. I always start checking around the 45-minute mark because ovens vary wildly, and over-baking is the enemy of moist bread. You’ll know they are ready when a toothpick inserted right into the center comes out clean or just has a few moist crumbs clinging to it. If it’s wet batter, give it five more minutes!
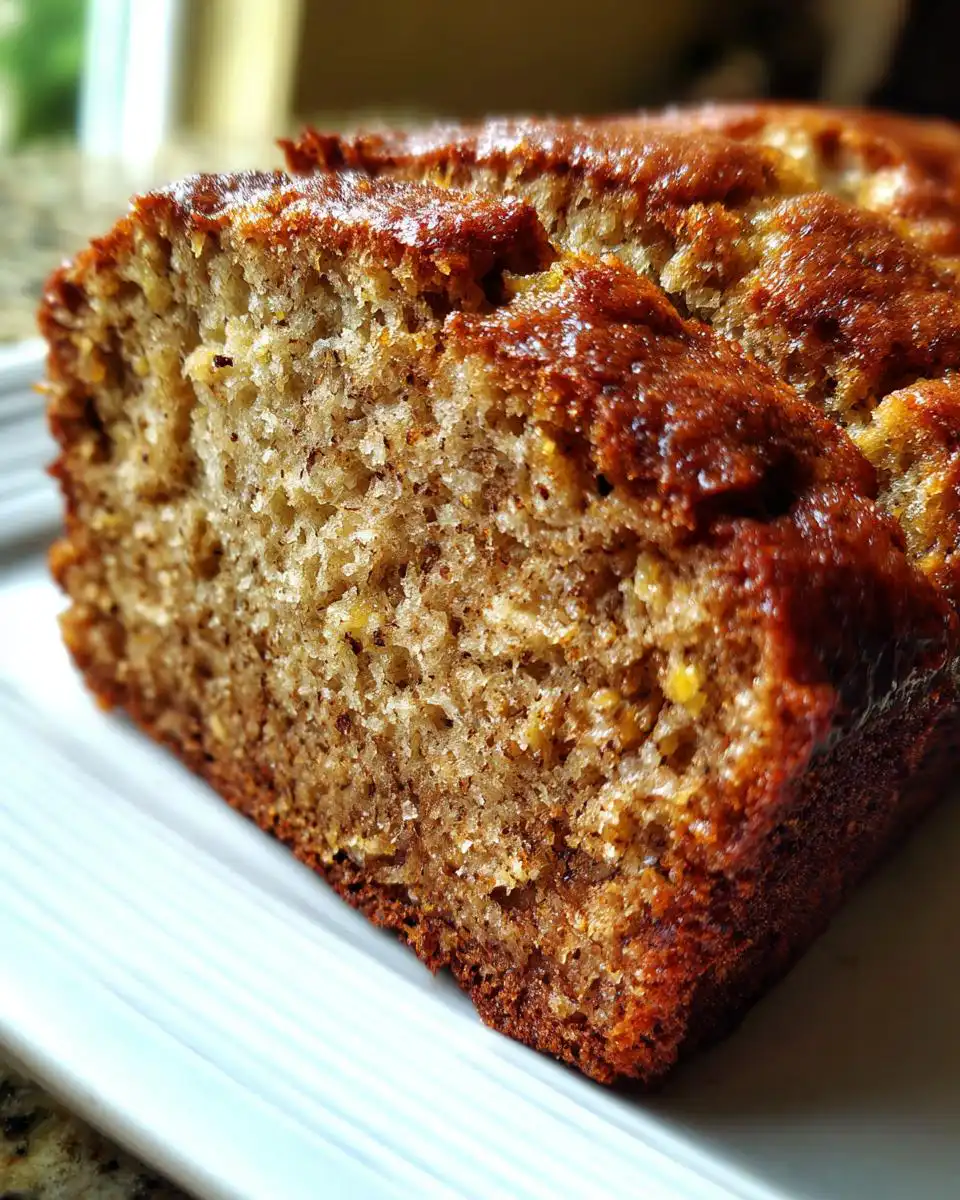
Once they look perfect, pull them out and let them cool right in the pans on a wire rack for about ten minutes. This lets the structure set up before you try to unmold them. After that brief rest, carefully turn the loaves out onto the racks to cool completely before you even think about slicing them. Seriously, let them cool all the way; it makes for cleaner slices!
Tips for Success Making Zucchini Bread
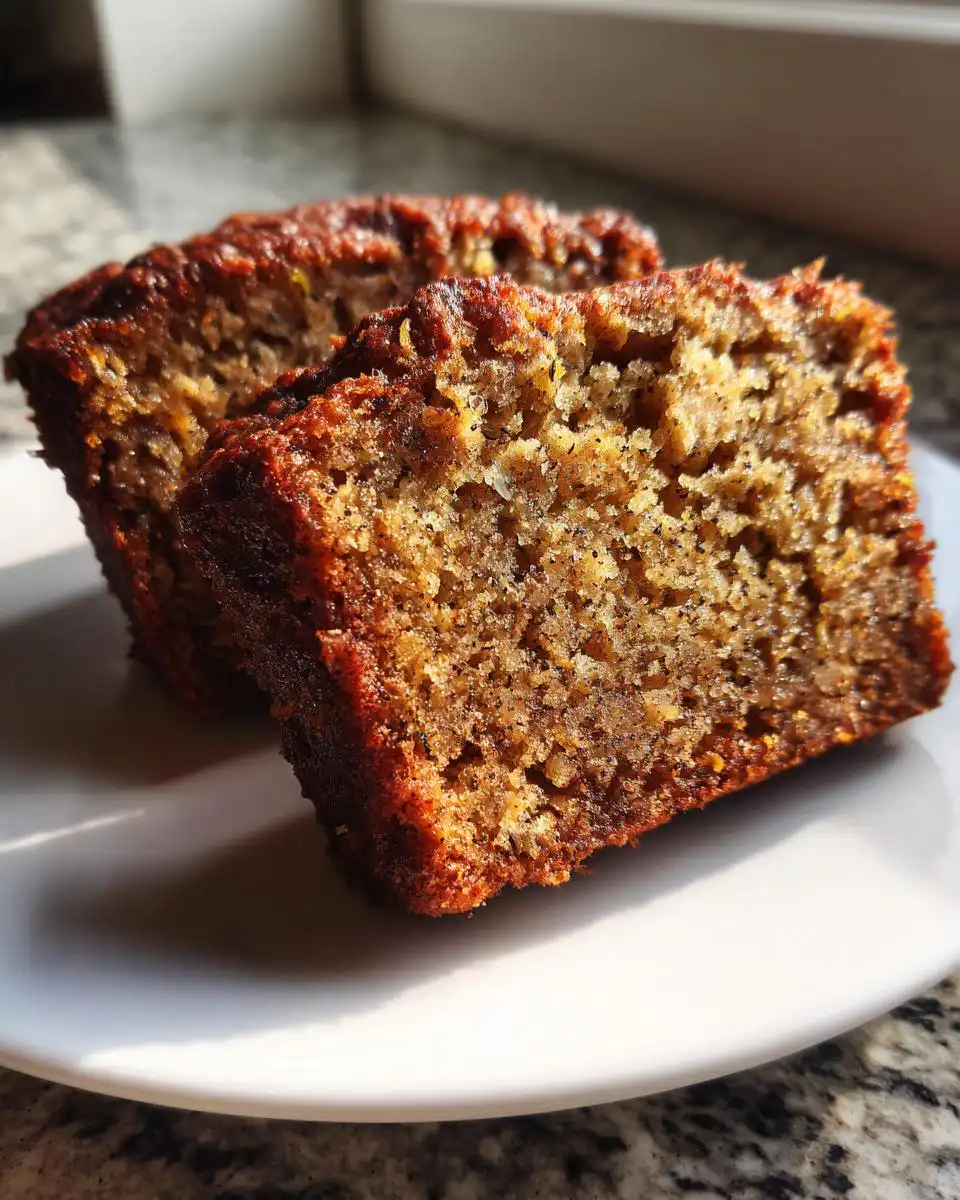
I want your Zucchini Bread to be the best you’ve ever made, so let’s talk details that really matter. The absolute biggest rule, which I stress every time, is to leave the moisture in your grated zucchini. Don’t squeeze it, don’t press it—that liquid is pure gold for keeping this quick bread from drying out! Also, remember that toothpick test: moist crumbs are perfect, but wet batter means you need more time.
Here’s my extra tip from my own kitchen: Because this bread has a good amount of oil, I always let my loaves cool completely before wrapping them tightly in plastic wrap, and then again in foil. This traps that residual steam and makes the crumb even softer the next day. It’s a game-changer for a truly tender loaf! You can see more of my baking tips on my blog.
Variations on Your Favorite Zucchini Bread
This base recipe is fantastic, but sometimes you need a little something extra, right? I love keeping things clean, so I’ve got three simple ways to jazz up this Zucchini Bread without messing up that perfect moisture level. First, for a warmer spice profile, try boosting that cinnamon and adding half a teaspoon of ground cloves—it smells incredible while baking! If you enjoy spiced baked goods, you might also like my recipe for Pumpkin Banana Bread with Cinnamon.
Second, if you want a bit of crunch, stir in about half a cup of chopped, raw walnuts right at the very end with the zucchini. They add a nice texture contrast. My third favorite trick is a simple sugar topping. Before it goes into the oven, sprinkle the top generously with coarse turbinado sugar. It gives you a wonderful, slightly crunchy crust that breaks beautifully when you slice it. All three of these options keep the bread tasting homemade and delicious!
Serving Suggestions for Fresh Zucchini Bread
This Zucchini Bread is fantastic all on its own, warm from the oven, but it really shines when you pair it with something simple. Since this is a clean-eating recipe, I try to keep the toppings light and fresh, too. It makes such a perfect grab-and-go breakfast when you’re rushing out the door in Asheville!
For a morning treat, I love slicing a thick piece and spreading just a thin layer of high-quality, all-fruit apricot jam on top. The brightness of the apricot plays so nicely against the warm cinnamon in the bread.
If you serve it as an afternoon snack, a little smear of plain Greek yogurt mixed with a tiny drizzle of pure maple syrup is wonderful. It adds a bit of protein without weighing down that light texture. Sometimes, if I’m feeling a little indulgent, I’ll toast a slice lightly and serve it with a cup of hot green tea. It’s simple comfort food, made the right way! Feel free to check out my Pinterest for more serving inspiration.
Storing Your Homemade Zucchini Bread
One of the best parts about making two loaves is knowing you have some Zucchini Bread ready for later! Since this bread has a good amount of oil, it stays moist for quite a while if you store it correctly. I always make sure to let the loaves cool completely—and I mean completely—before wrapping them up. Slicing it while warm traps steam, which can sometimes lead to a gummy texture later on.
For short-term storage, an airtight container on the counter at room temperature is perfect for up to three days. If you need it to last longer, freezing is your best friend. Wrap each loaf tightly in plastic wrap first, and then slip it into a heavy-duty freezer bag. It keeps beautifully for a couple of months!
Storage and Reheating Instructions for Zucchini Bread
Getting the storage right ensures that every slice tastes as good as the first. Here’s a quick guide for keeping your hard work fresh:
- Room Temperature: Store tightly wrapped in an airtight container for up to 3 days.
- Refrigeration: Not usually necessary unless your kitchen is very warm. It can last up to a week, but sometimes the texture firms up slightly.
- Freezing: Wrap tightly and freeze for up to 2 months.
To reheat a frozen slice, just pop it in the toaster oven for a few minutes until warmed through, or microwave it for about 10 to 15 seconds. It comes right back to life!
Frequently Asked Questions About Zucchini Bread
I get so many questions about this recipe, which just shows how popular this clean-eating quick bread is! Most people are worried about keeping it moist or making sure it bakes up light instead of heavy. Don’t worry; we can troubleshoot those common baking bumps right here so you get perfect results every time.
Can I substitute the oil in this Zucchini Bread recipe?
That’s a common question when trying to make things cleaner! While the oil provides essential moisture, you can certainly try substituting it with unsweetened applesauce. If you swap one-for-one, you’ll get a slightly less rich texture, but it works well. If you want to keep some fat but prefer a different source, you could try using an equal amount of melted coconut oil. Just make sure whatever you use is melted or liquid when you add it to the wet ingredients!
How do I know when my Zucchini Bread is fully baked?
You must rely on the toothpick test for this moist bread. Insert a clean wooden toothpick or a thin skewer right into the center of the loaf. If it comes out with wet batter clinging to it, it needs more time—probably five to ten more minutes at 325 degrees F. If it comes out completely dry, you’ve gone too far and it might be a little dry! The absolute perfect sign is when the toothpick comes out with just a few moist crumbs attached. That means it’s done but still tender.
Why is my Zucchini Bread dense?
Density usually comes down to one of two things when making quick bread. First, you likely overmixed the batter after adding the flour. Remember, stop mixing when you *just* see the last streaks of flour disappear. Second, make sure your baking soda and baking powder are fresh! If those leaveners aren’t active, they won’t create the lift needed to keep the bread light. Don’t pack the batter into the pan either; keep it light!
Understanding the Nutrition in Your Zucchini Bread
Even though this is my cleaner take on a Southern classic, it’s still a treat, so we have to keep an eye on what’s inside! Since I use oil instead of butter, and we skip heavy frostings, the numbers look much better than traditional recipes. Keep in mind that these figures are just estimates based on standard ingredient calculations. When I look at this data, I’m happy knowing I’m getting real vegetables and good flavor without all the processed junk!
Estimated Nutritional Data for Zucchini Bread
Here is a breakdown of the typical estimates for one slice of this amazing bread. Remember, these values can shift based on the exact brands you use:
| Nutrient | Estimated Value (Per Slice) |
|---|---|
| Serving Size | 1 slice |
| Calories | Estimate needed |
| Fat | Estimate needed |
| Carbohydrates | Estimate needed |
| Protein | Estimate needed |

Amazing 3-Step Moist Zucchini Bread
- Total Time: 1 hour 5 minutes
- Yield: 2 loaves
- Diet: N/A
Description
This is the BEST Zucchini Bread recipe, offering a moist and flavorful treat perfect for using up extra summer squash. Jordan Bell from Easy Detox Recipes shares this clean take on a Southern comfort classic.
Ingredients
- 2¼ cup granulated sugar
- 1 cup canola or vegetable oil
- 3 eggs
- 3 tsp vanilla extract
- 2 cups grated zucchini
- 3 cups all-purpose flour
- 3 tsp ground cinnamon
- 1 tsp salt
- 1 tsp baking soda
- 1 tsp baking powder
Instructions
- Preheat your oven to 325 degrees F.
- Prepare two 8×4 inch loaf pans by coating them with cooking spray. Set the pans aside.
- In a mixer or using a whisk, combine the sugar, oil, eggs, and vanilla. Mix these wet ingredients until the mixture becomes creamy.
- Add the flour, cinnamon, salt, baking powder, and baking soda to the wet ingredients. Mix until the dry ingredients are almost incorporated. Do not overmix.
- Stir in the shredded zucchini until it is just combined throughout the batter.
- Pour the batter evenly into the prepared loaf pans. Make sure you fill the pans no higher than ⅓ full.
- Bake at 325 degrees F for 45 to 55 minutes. Watch closely to avoid over-baking.
- Remove the loaves from the oven and let them cool on cooling racks. Check the FAQ section for guidance on when to remove the bread from the pans.
- Once the zucchini bread is completely cool, store it in a Ziploc bag or an airtight container.
Notes
- For best results, do not squeeze the moisture out of the grated zucchini.
- Check for doneness by inserting a toothpick into the center; it should come out clean or with moist crumbs attached.
- This bread freezes well for later enjoyment.
- Prep Time: 15 minutes
- Cook Time: 50 minutes
- Category: Baking
- Method: Bake
- Cuisine: American