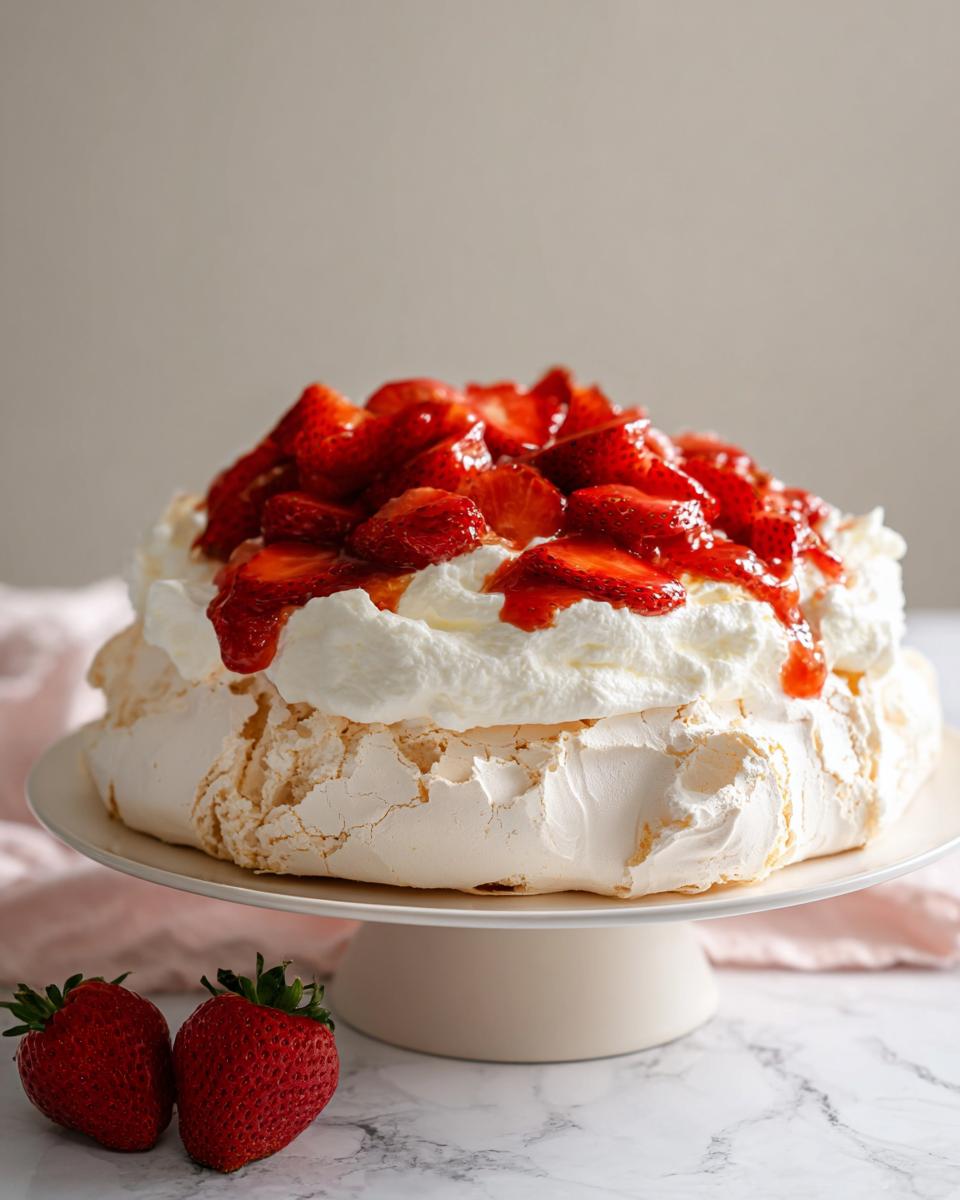
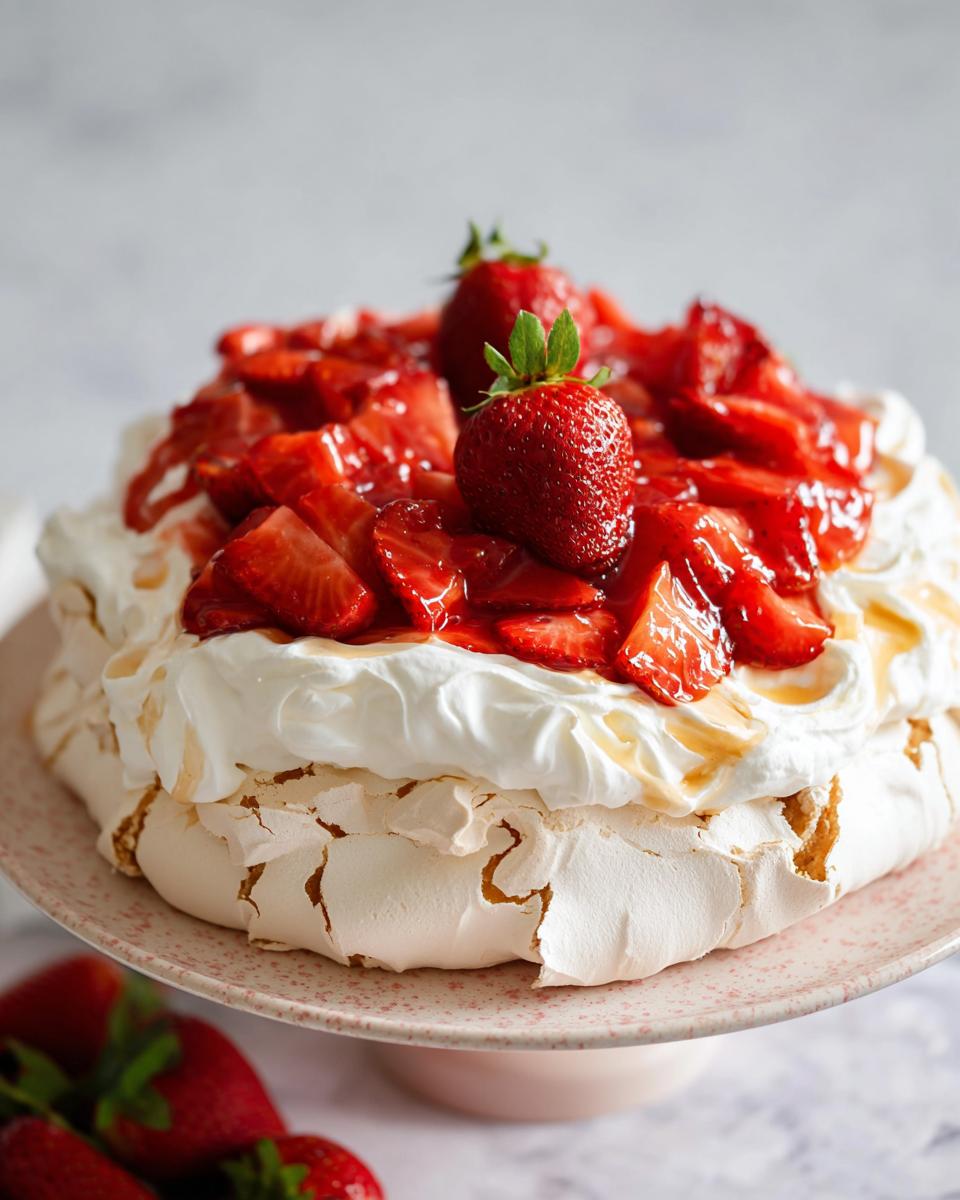
Oh, the sheer joy of a perfect pavlova! That moment when you slice into that crisp, snowy meringue shell to find a delightfully soft, marshmallowy centre… it’s pure magic. And when it’s piled high with plump, juicy strawberries and lashings of cream? Well, that’s just heavenly. I’ve been wanting to share this Mary Berry Inspired Classic Strawberry Pavlova with you for ages. It’s one of those showstopper desserts that looks incredibly fancy, but honestly, it’s quite straightforward to make. I remember the first time I successfully made one for a summer garden party; everyone raved about it, and I felt like a proper domestic goddess! This recipe truly captures that classic British elegance we all adore.
Why You’ll Love This Mary Berry Inspired Classic Strawberry Pavlova
- So Easy to Impress: Honestly, this classic recipe is surprisingly simple to whip up, yet it looks and tastes like something from a fancy patisserie. Perfect for making you look like a star!
- That Perfect Texture: You get that amazing contrast – a wonderfully crisp meringue shell giving way to a soft, chewy, marshmallowy centre that just melts in your mouth.
- Loads of Fruity Freshness: Topped with heaps of juicy strawberries and that yummy jam, it’s the quintessential taste of summer, any time of year.
Ingredients for Your Mary Berry Inspired Classic Strawberry Pavlova
So, you’re ready to make this stunner? Here’s what you’ll need to gather. Don’t worry, it’s all pretty standard stuff you probably have lurking in the pantry or fridge!
- 6 large egg whites (make sure they’re free from any yolk, it’s crucial for fluffy meringue!)
- A good pinch of table salt (just a little helper to get those egg whites whisking up nicely)
- 1 1/4 cups caster sugar (this fine sugar dissolves beautifully, giving you that lovely glossy finish)
- 1 teaspoon white vinegar (this is our secret weapon for that soft, marshmallowy centre!)
- 1 teaspoon vanilla bean paste (for that gorgeous aroma and classic flavour)
- 2 teaspoons cornflour (also known as cornstarch, this helps achieve that perfect texture)
- 1 1/4 cups double cream (give your whisk a good workout with this!)
- 12 ounces fresh strawberries (choose the ripest, juiciest ones you can find)
- 1/4 cup strawberry jam (for a lovely fruity boost and to bind those strawberries together)
Step-by-Step Guide to Making Your Mary Berry Inspired Classic Strawberry Pavlova
Right then, let’s get cracking with this gorgeous pavlova! It’s honestly not as daunting as it might look. Just follow these steps, and you’ll have a showstopper in no time. Remember, patience is key, especially with meringue!
- Step 1: Get that oven going! Preheat your oven to 150°C (that’s 130°C if you’ve got a fan oven, or Gas Mark 2). Grab a baking tray and line it with some baking paper. Then, using a pencil, draw an 8-inch circle right in the middle. This is your guide for shaping the meringue, so don’t skimp on it!
- Step 2: Whip up those egg whites. Make sure your bowl and whisk are spotlessly clean – not a speck of grease or yolk! Pop your egg whites in with that pinch of salt. Get whisking! You want to whip them until they form lovely, stiff peaks that stand up straight when you lift the whisk. It takes a bit of elbow grease, or use an electric mixer if you have one.
- Step 3: Sugar, sugar everywhere! This is where the magic happens. Now, start adding your caster sugar, just a tablespoon at a time, while you keep whisking continuously. You’ll feel the mixture getting thicker and glossier with each addition. Keep going until you’ve added all the sugar and the meringue is thick, shiny, and completely smooth when you rub a little between your fingers. If you feel any sugar grit, whisk a bit longer!
- Step 4: The secret ingredients. Now, gently fold in the white vinegar, vanilla bean paste, and cornflour. Just a gentle fold with a spatula is all you need – you don’t want to knock out all that lovely air you’ve whipped in. Make sure it’s all just evenly combined.
- Step 5: Shape your masterpiece. Spoon your glorious meringue mixture onto the baking paper, right inside that circle you drew. Pile it up a bit in the centre and shape it into a nice tall round, making sure the sides are a bit higher than the middle. This little dip is perfect for holding all that tasty cream and strawberries later on, just like in a classic Victoria sponge, you want those layers!
- Step 6: Bake until it’s dreamy. Pop it into your preheated oven and bake for a good 1 hour and 45 minutes. You’re looking for the outside to feel dry and crisp to the touch. Don’t be tempted to open the oven door too early!
- Step 7: The slow cool-down. Once it’s baked, turn off the oven completely, but leave the pavlova inside. Prop the oven door slightly ajar with a wooden spoon. This slow cooling is super important – it stops your pavlova from cracking too much and keeps that centre wonderfully soft and chewy. Let it cool down completely in there, which can take a few hours.
- Step 8: Strawberry prep is key! While your pavlova cools, let’s get those strawberries ready. Hull and slice most of them, but save a few whole ones for decorating later – they look so pretty! Gently toss the sliced strawberries with the strawberry jam. This just adds a lovely burst of flavour and helps them look glossy.
- Step 9: Whip that cream! Now for the best bit. Pour your double cream into a clean bowl and whip it until it holds soft peaks. Don’t overwhip it though, we want it soft and luscious, not stiff and buttery!
- Step 10: Assemble and admire! Carefully lift your completely cooled pavlova onto your serving plate. Spoon that lovely whipped cream all over the top, creating a cloud-like effect. Then, spoon those gorgeous jam-coated strawberries over the cream, and finally, dot your reserved whole strawberries on top for that perfect finishing touch.
Serving Suggestions for Your Classic Strawberry Pavlova
This pavlova is already a star, but here are a few little extras to make it truly shine. Sometimes a little something extra just perfects the whole experience, don’t you think?
A Sprinkle of Icing Sugar: For that extra touch of elegance, a very light dusting of icing sugar over the finished pavlova looks absolutely beautiful, like a gentle snowfall.
More Berries Galore: While strawberries are the star, why not add a handful of other lovely summer berries? A mix of raspberries and blueberries tossed with the strawberries can add even more tartness and colour. You could even make a berry compote to drizzle over!
A Sprig of Mint: A few fresh mint leaves tucked in amongst the whipped cream and strawberries add a lovely pop of green and a subtle refreshing aroma.
Storing and Reheating Your Mary Berry Inspired Classic Strawberry Pavlova
Oh, the thought of leftover pavlova! It’s a rare treat, but if by some miracle you do have some, storing it properly is key to keeping that lovely crispness. My top tip is to keep things separate. Store any leftover cream in an airtight container in the fridge – it’ll be good for about 2-3 days. Same goes for any leftover sliced strawberries; keep them chilled too. As for the pavlova meringue base itself, once it’s completely cooled, wrap it up tightly in cling film or pop it in an airtight container. It’s best eaten within a day or two to maintain that super crisp exterior, so think of it less as a ‘leftover’ and more as a delicious future snack!
Frequently Asked Questions About Mary Berry Inspired Classic Strawberry Pavlova
Got a few little pavlova puzzles buzzing around your head? Don’t you worry, I’ve got the answers! Making a perfect pavlova is easier than you think once you know a few little tricks.
What if my pavlova cracks when it’s baking or cooling?
Oh, a little crack or two is perfectly normal and honestly, totally fine! It just means your pavlova is doing its thing. It’s the nature of meringue! The important bit is that soft, marshmallowy centre, and a few little cracks won’t affect that one bit. The slow cooling in the oven is your best bet to minimise them, but don’t stress if it’s not perfectly smooth. It’ll still taste divine!
Can I make the pavlova base ahead of time?
Absolutely! This is one of my favourite things about pavlova. Once the meringue shell has completely cooled, you can wrap it really well in cling film and store it in an airtight container at room temperature. It should keep beautifully crisp for a day or two. Then, just whip your cream and slice your strawberries just before you’re ready to assemble and serve. It takes so much pressure off!
What are your best tips for whisking egg whites for meringue?
It’s all about being absolutely clean and patient! First off, make sure your bowl and whisk (whether hand-held or electric) are squeaky clean and totally free of any grease or yolk. Even a tiny bit of fat can stop your egg whites from whipping up properly. Then, start whisking on a medium speed until you get soft peaks, and gradually add the sugar, a tablespoon at a time, while whisking continuously. Keep going until it’s thick, glossy, and holds stiff peaks. Don’t rush this bit – it’s worth the wait for that perfect texture!
Before You Go
I genuinely hope you have a blast making this Mary Berry Inspired Classic Strawberry Pavlova! It’s such a joy to create and even better to share. If you give it a go, please do pop back and leave a comment or a rating – I’d absolutely love to hear how yours turned out! You can find more of my baking adventures over on my author page, or follow along on Medium.
Print
Classic Strawberry Pavlova
- Total Time: 2 hours 15 minutes
- Yield: 10 servings
- Diet: Vegetarian
Description
A light and crisp pavlova with a soft centre, topped with whipped cream and fresh strawberries.
Ingredients
- 6 large egg whites
- Pinch of table salt
- 1 1/4 cups caster sugar
- 1 teaspoon white vinegar
- 1 teaspoon vanilla bean paste
- 2 teaspoons cornflour
- 1 1/4 cups double cream
- 12 ounces fresh strawberries
- 1/4 cup strawberry jam
Instructions
- Preheat your oven to 150°C (130°C fan/gas 2). Line a baking tray with baking paper and draw an 8-inch circle as a guide.
- Add the egg whites and salt to a large clean bowl. Whisk until stiff peaks form.
- Gradually add the caster sugar one tablespoon at a time, whisking continuously until the mixture is thick and glossy.
- Gently fold in the white vinegar, vanilla bean paste, and cornflour until evenly combined.
- Spoon the meringue mixture onto the prepared baking tray, shaping it into a tall round inside the circle guide.
- Bake for 1 hour 45 minutes until the outside feels dry and crisp.
- Turn off the oven and leave the pavlova inside with the door slightly open until completely cooled.
- Hull and slice most of the strawberries, leaving a few whole for decoration. Toss the sliced strawberries with the strawberry jam.
- Whip the double cream to soft peaks.
- Spoon the whipped cream over the cooled pavlova and top with the jam-coated strawberries. Finish with the remaining whole strawberries.
Notes
- Allowing the pavlova to cool slowly in the oven helps prevent cracks and keeps the centre soft and marshmallow-like.
- Prep Time: 30 minutes
- Cook Time: 1 hour 45 minutes
- Category: Dessert
- Method: Baking
- Cuisine: British