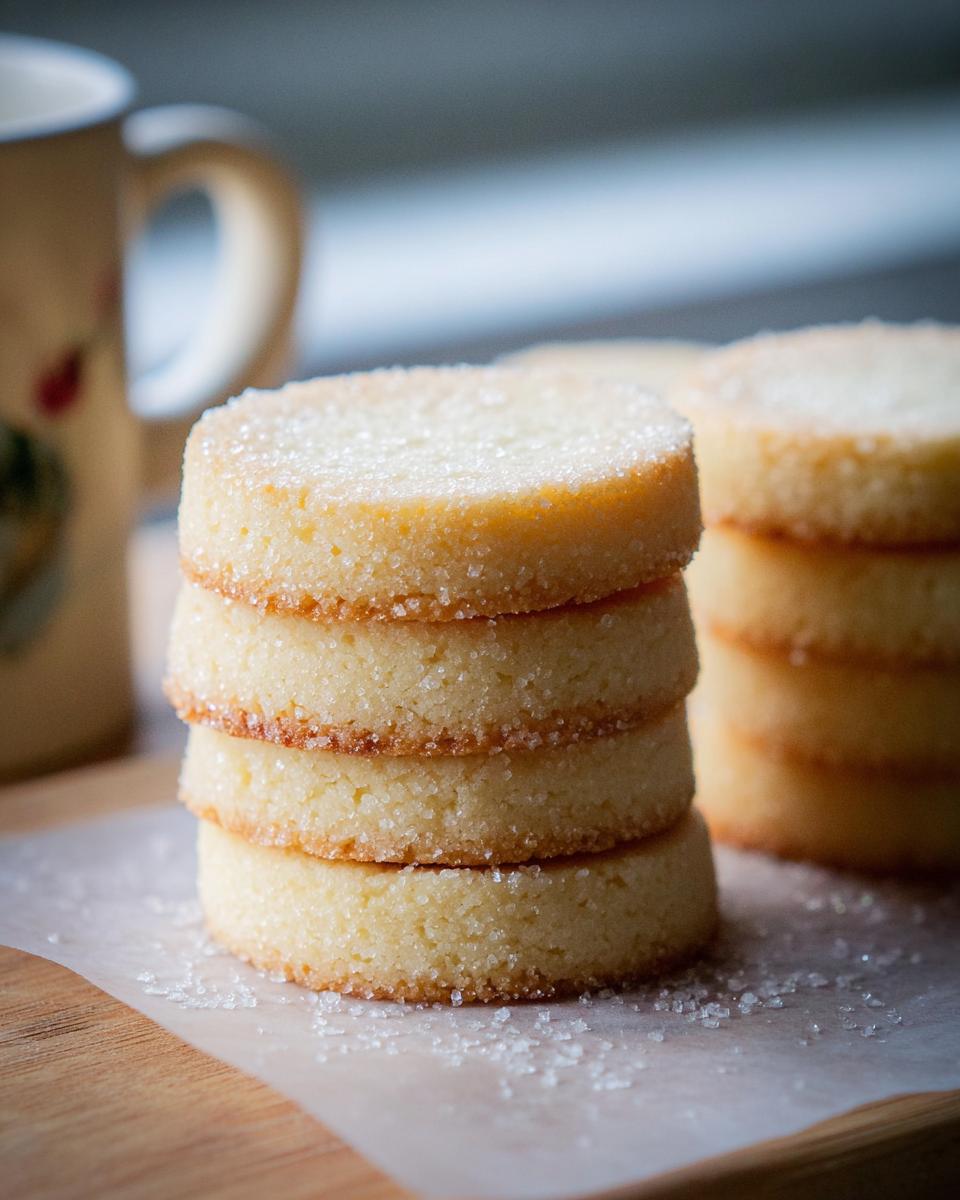
There’s just something about a perfectly buttery shortbread that takes me right back to my Nan’s kitchen. The smell alone is enough to make you happy! If you’re after that melt-in-your-mouth, crisp-yet-crumbly perfection, you’ve landed in the right spot. This Classic Shortbread Rounds Mary Berry Inspired recipe is my go-to treat when I need a little bit of comfort or want to whip up something lovely to share. It’s genuinely foolproof and results in the most delightful little biscuits every single time. Honestly, they’re almost too good to share!
Why You’ll Love This Classic Shortbread Rounds Mary Berry Inspired Recipe
- It’s incredibly easy to make – seriously, you can whip these up in no time!
- The texture is just perfect: buttery, crisp, and wonderfully crumbly.
- It’s inspired by the legendary Mary Berry, so you know it’s a winner.
- Perfect for dunking in your cuppa at tea time.
- They make the most delicious homemade gifts for friends and family.
- Super versatile – cut them into any shape you fancy!
Ingredients for Classic Shortbread Rounds Mary Berry Inspired
Honestly, the beauty of this shortbread is how simple the ingredients are! You probably have most of them in your pantry already. Using good quality, softened butter is key here, trust me. And the cornflour is my little secret for that extra crumbly texture Mary Berry is famous for.
- 2 ¼ cups plain flour
- ½ cup cornflour
- 1 cup salted butter, softened (make sure it’s proper soft, not melted!)
- ½ cup caster sugar (plus a little extra for sprinkling, of course!)
Step-by-Step Guide to Making Classic Shortbread Rounds Mary Berry Inspired
Right then, let’s get baking! These steps are super straightforward, so don’t be daunted. My absolute top tip? Don’t overwork the dough – you want a tender shortbread, not a tough one. And that chilling time is non-negotiable, trust me!
Step 1: First things first, get that oven preheating to 350°F (or 180°C for you lovely lot with fan ovens). While it’s warming up, line two decent-sized baking trays with some baking paper. This stops them sticking and makes for easier cleanup, which is always a win, isn’t it?
Step 2: Grab your largest mixing bowl. Pop in the softened butter and the ½ cup of caster sugar. Give it a good beat with your electric mixer – just for about a minute until it’s combined and smooth. Honestly, don’t go mad whipping it; you don’t want to beat in too much air. We’re after a rich, dense shortbread, not a light and airy cake!
Step 3: Now, tip in your plain flour and the cornflour. Get your wooden spoon in there and start stirring. It’ll feel a bit crumbly at first, but just keep going until the dough starts to pull away from the sides of the bowl and come together.
Step 4: Time to get your hands in! Gently bring the mixture together with your fingers to form a soft dough. It should be pliable but not sticky. If it feels a bit too dry, don’t panic – just give it a gentle squeeze. If it’s too sticky, a tiny bit more flour dusted over your hands should do the trick.
Step 5: Shape the dough into a flat disc, wrap it up snugly in some cling film, and pop it in the fridge for at least 30 minutes. This chilling bit is crucial; it makes the dough much easier to handle and stops those biscuits spreading too much in the oven. You can visit my Mary Berry shortbread recipe for more tips while you wait!
Step 6: Once chilled, lightly flour your work surface – just a dusting is fine. Roll out the dough to about ¼ inch thick. Aim for an even thickness so they all bake at the same rate. Use your favourite biscuit cutters – rounds are classic, but stars or hearts are lovely too!
Step 7: Carefully place your cut-out shapes onto the prepared baking trays. Leave a little bit of space between each one; they might spread just a tiny bit, and you don’t want them all merging into one giant shortbread blob!
Step 8: Into the preheated oven they go! Bake for about 15 to 18 minutes. You’re looking for the edges to be just lightly golden. The centres should still look pale; that’s exactly what you want for that classic shortbread texture. Overbaking will make them too hard!
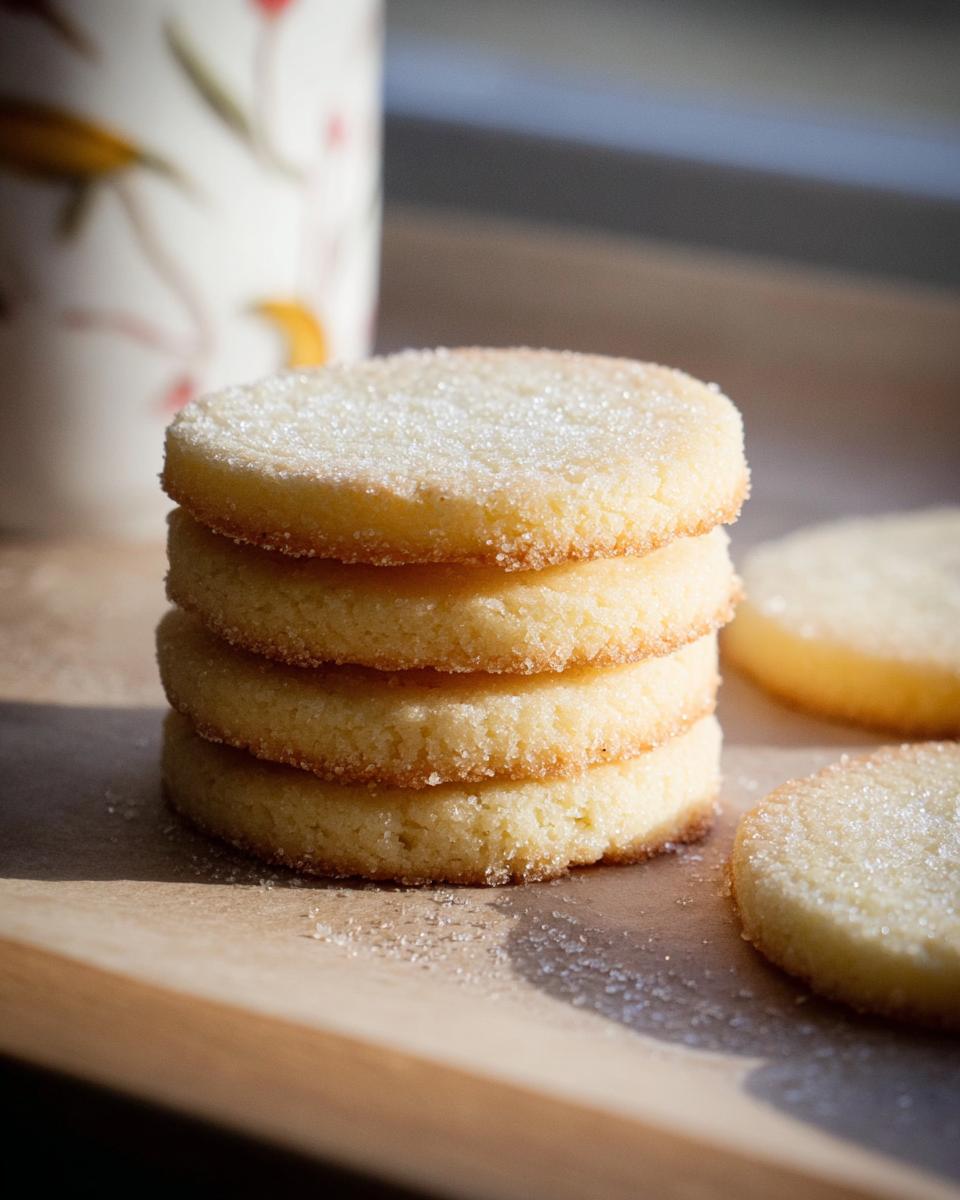
Step 9: As soon as they come out of the oven, while they’re still piping hot, sprinkle them immediately with that extra caster sugar. It sticks beautifully to the hot surface and gives them a lovely little sparkle and sweet crunch.
Step 10: Now, this is important: let them cool completely on the trays. They need a good bit of time to firm up and become properly crisp. Resist the temptation to poke them too early – they need to set!
Serving Suggestions for Your Classic Shortbread Rounds
With a Cup of Tea: Honestly, these are *made* for dunking! A classic British cuppa is the ultimate pairing for perfect shortbread rounds.
Alongside Coffee Mousse: Planning a nice dinner? These little beauties are fantastic served with something rich like my easy coffee mousse – the crisp biscuit adds a lovely contrast.
As a Sweet Treat Base: Crumble them up and use as a base for cheesecakes or trifles for an extra buttery flavour.
Storing and Reheating Your Classic Shortbread Rounds
These biscuits are best when they’re fresh and crisp, I always find! While they’re delicious at room temp, a little care in storage goes a long way to keep them tasting just as good as the day you baked them.
Once your shortbread rounds have cooled completely – and I mean *completely* – store them in an airtight tin. Honestly, a good quality tin is your best friend here! They should stay wonderfully crisp and buttery for up to a week. Don’t even think about putting them in the fridge; that’ll just make them soggy. As for reheating, I never bother for shortbread. They’re perfect at room temperature. For meal prep though, just make the dough, wrap it up, and chill it until you’re ready to bake a fresh batch!
Frequently Asked Questions About Classic Shortbread Rounds
Got a question about these lovely bakes? I’ve tried to cover the most common ones here, but if you’ve got another burning query, just drop me a comment! For more simple shortbread ideas, you might like to check out my easy classic shortbread fingers recipe too.
Can I use unsalted butter instead of salted?
You absolutely can! If you use unsalted butter, just add about ½ teaspoon of salt to your dry ingredients when you mix them. It makes a teeny tiny difference, but salted butter just gives that little extra flavour boost I like.
Why are my shortbread rounds spreading so much?
Oh, that’s a common one! Usually, it’s because the butter was too soft when you started, or you overworked the dough. Make sure your butter is just softened, not melted, and try to handle the dough as little as possible. Chilling the dough properly, as in Step 5, also helps loads!
How do I get perfectly crisp shortbread?
For that lovely crisp texture, make sure you don’t overbake them – they should still be pale in the middle. And let them cool down completely on the baking tray so they firm up properly. Storing them in an airtight container is also key to keeping that crispness!
Before You Go
I really hope you give these Classic Shortbread Rounds a go! They’re such a joy to make and even better to eat. If you do try them, please let me know how you got on in the comments below, or better yet, give it a rating! And don’t forget to share your creations over on Pinterest! @easydetoxrecipes
Print
Classic Shortbread Rounds
- Total Time: 55 minutes
- Yield: 24 biscuits
- Diet: Vegetarian
Description
Buttery classic shortbread rounds with a crisp crumbly texture and rich flavour. An easy British biscuit recipe perfect for gifting or tea time.
Ingredients
- 2 ¼ cups plain flour
- ½ cup cornflour
- 1 cup salted butter softened
- ½ cup caster sugar
- 2 tablespoons extra caster sugar for finishing
Instructions
- Preheat the oven to 350°F and line 2 baking trays with baking paper.
- Add the softened butter and caster sugar to a large mixing bowl. Beat for 1 minute until just combined and smooth. Do not whip too much air into the mixture.
- Add the plain flour and cornflour. Stir with a wooden spoon until the dough starts to come together.
- Use your hands to gently press the mixture into a soft dough.
- Flatten the dough into a disc, wrap, and chill in the fridge for 30 minutes.
- Lightly flour a work surface and roll the dough to about ¼ inch thickness.
- Cut into rounds or decorative shapes using biscuit cutters and place them onto the prepared baking trays with a little space between each biscuit.
- Bake for 15 to 18 minutes until the edges are lightly golden and the centres remain pale.
- Remove from the oven and immediately sprinkle with the extra caster sugar.
- Leave the shortbread to cool fully on the trays until firm and crisp.
Notes
- Keep the shortbread in an airtight tin for up to 1 week to maintain its buttery texture and crisp finish.
- Prep Time: 10 minutes
- Cook Time: 15 minutes
- Category: Dessert
- Method: Baking
- Cuisine: British