

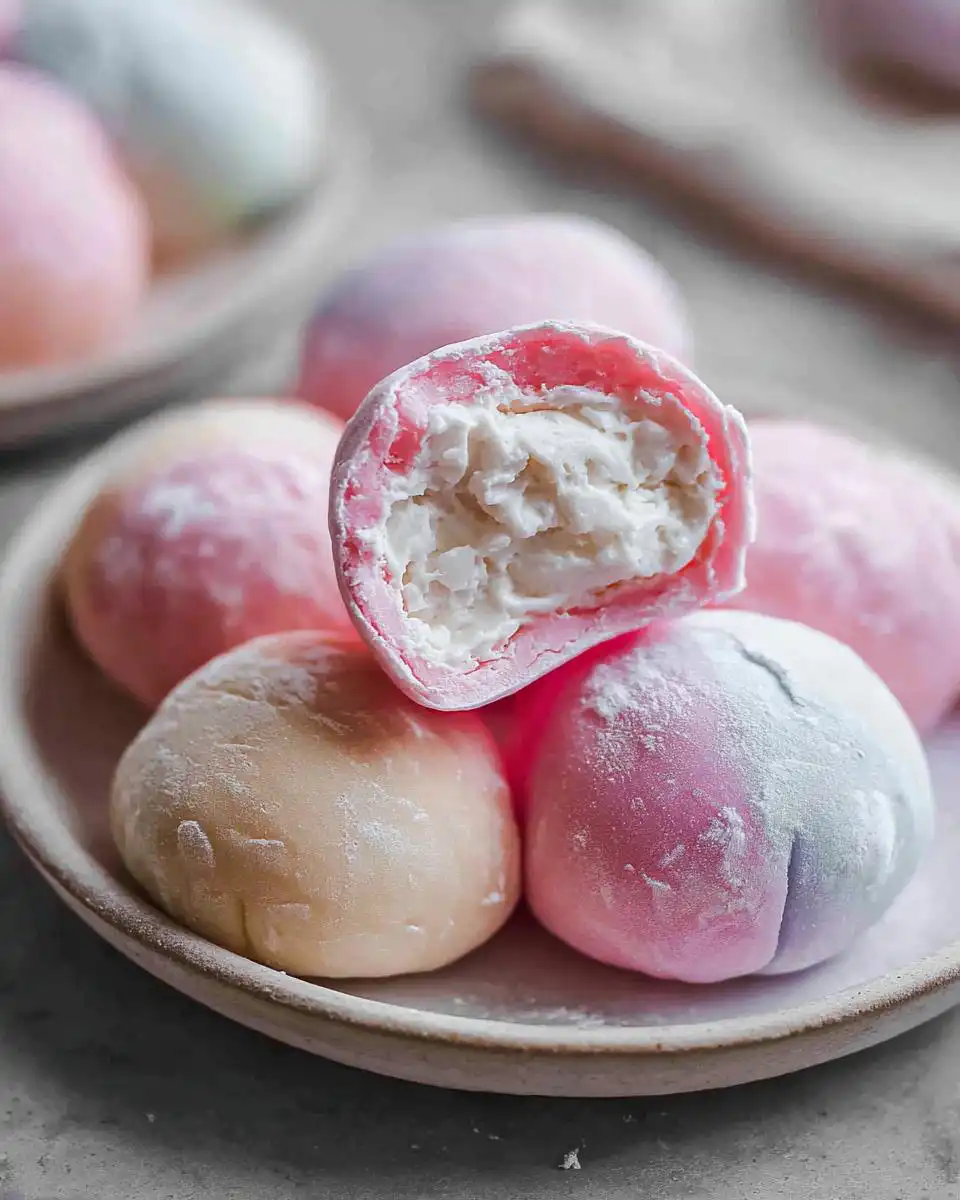
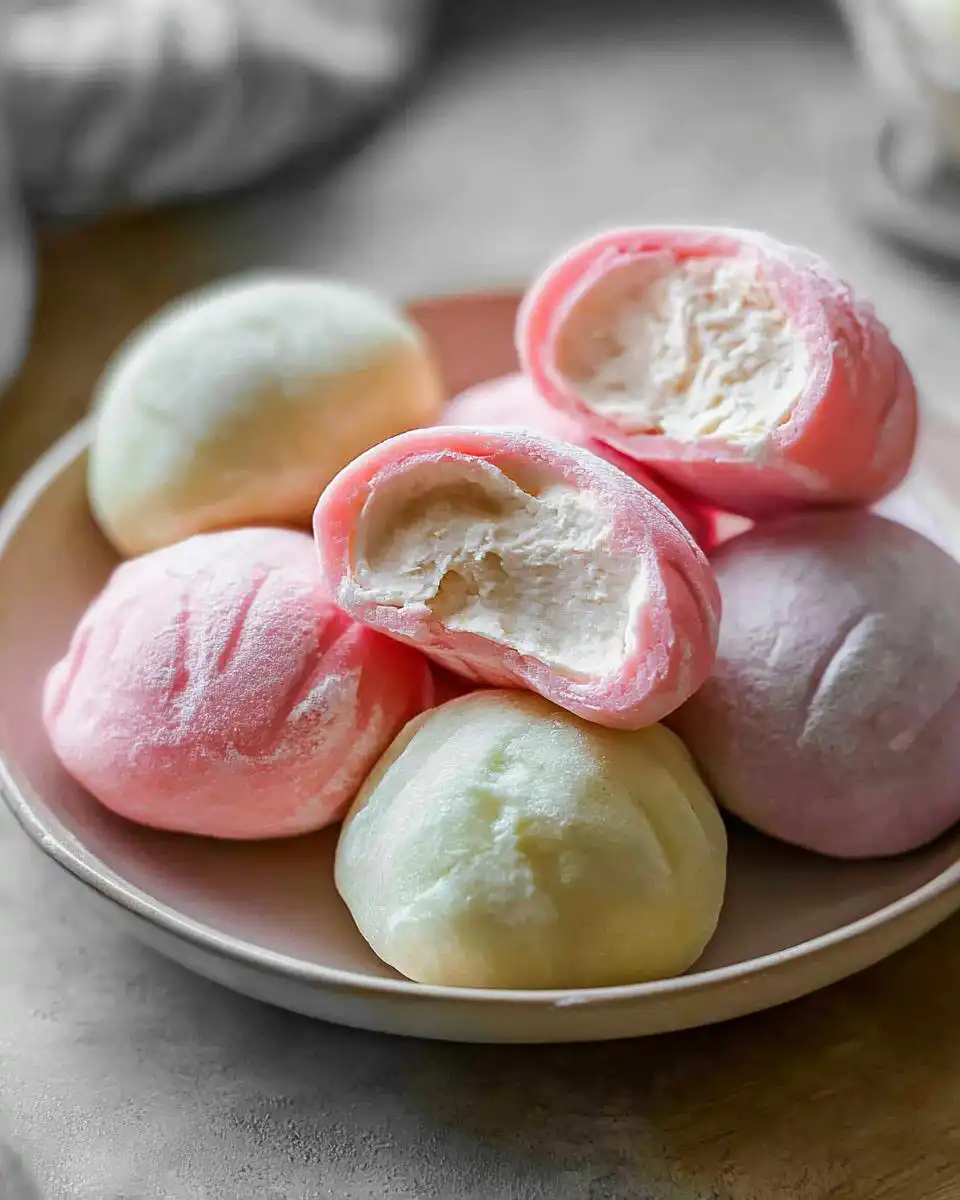
Okay, can we just talk about Mochi Ice Cream for a second? Seriously, it’s like biting into a cloud of pure happiness! I remember the first time I tried authentic Mochi Ice Cream at a little Japanese bakery – those soft, chewy little bites holding creamy, dreamy ice cream felt like magic. I honestly thought it would be impossible to recreate at home, but trust me, this recipe is a game-changer! It’s surprisingly simple to make these delightful little frozen treats yourself, and you can customize them with all your favorite ice cream flavors. Get ready to impress yourself (and anyone you share them with!).
Why You’ll Love This Homemade Mochi Ice Cream
- It’s surprisingly easy to make, all thanks to a simple microwave dough technique.
- You get that perfectly chewy mochi wrapper around your favorite ice cream flavors.
- It’s totally customizable – switch up the ice cream and even add a touch of food coloring to the dough!
- They make for the cutest, most impressive little desserts for any occasion.
- Seriously fun to make, especially with kids!
Ingredients for Your Perfect Mochi Ice Cream
- 1 cup glutinous rice flour (this is key for that chewy texture!)
- 1/4 cup granulated sugar
- 2 tablespoons powdered sugar
- 1 cup water
- Food coloring (optional, but makes them super fun!)
- Cornstarch (lots of it for dusting so things don’t stick!)
- 2 cups ice cream of your absolute favorite flavor, scooped into balls
Step-by-Step Guide to Making Mochi Ice Cream
Step 1: First things first, get your ice cream ready! You’ll want to scoop about 12 small balls of your favorite ice cream. I like to use a cookie scoop for consistency. Pop these onto a baking sheet lined with parchment paper, kind of like little ice cream cookies. Flatten the bottoms just a tiny bit so they sit nicely. Then, pop the whole tray into the freezer for at least an hour. This is super important – you need them rock solid so they don’t turn into a melty mess later!
Step 2: While your ice cream is getting nice and frosty, let’s make the mochi dough. Grab a microwave-safe bowl. Whisk together the glutinous rice flour (trust me, this is the secret ingredient for that chewy texture!), granulated sugar, and powdered sugar. Pour in the water and give it a good stir until it’s all smooth and there are no lumps. If you’re feeling fancy and want colorful mochi, now’s the time to add a tiny drop of food coloring. Stir it in really well!
Step 3: Time for the magic microwave step! Cover the bowl loosely with plastic wrap or a paper towel – you don’t want it to seal tight. Microwave on high for about 1 minute. Carefully take it out (it’ll be hot!) and give the dough a good stir with a damp spatula. You’ll see it start to thicken. Then, cover it again and microwave for another minute. Stir it again. Now, microwave it for a final 30 seconds, or until the dough looks thick, glossy, and totally transformed. It should be stretchy and sticky!
Step 4: Get another piece of parchment paper ready and generously dust it with cornstarch. This is crucial to prevent sticking! Carefully scrape the hot mochi dough onto the cornstarched parchment. Sprinkle a little more cornstarch on top of the dough, then use your hands (lightly dusted with cornstarch too!) to gently spread it out into a rectangle about 1/4-inch thick. Be patient here; it can be a little sticky, but the cornstarch really helps!
Step 5: Place this dough-covered parchment onto a baking sheet and pop it into the fridge for about 30 minutes. This lets it cool down and firm up a bit, making it easier to work with. You can also use this time to prep any other yummy desserts, like these no-bake chocolate coconut energy bars!
Step 6: Once the dough is chilled, cut it into 12 equal-sized circles. I use a 3-inch round cookie cutter, but a glass rim works too. Gently brush off any excess cornstarch from each circle. You don’t want too much on there, just enough to stop the sticking.
Step 7: Now for the assembly! Take one frozen ice cream ball out of the freezer. Place it in the center of a dough circle. Gently stretch the dough up and around the ice cream ball, bringing the edges together at the top. Pinch them closed really well to seal. It takes a little practice to get it perfect, but don’t worry if they aren’t perfectly shaped – they’ll taste amazing either way! If they start to get soft, just pop them back in the freezer for a few minutes.
Step 8: Wrap each stuffed mochi tightly in plastic wrap. Twist the ends like a little candy wrapper to keep them together and prevent freezer burn. This step is super important for keeping them fresh and preventing ice crystals from forming.
Step 9: Place your wrapped mochi, seam-side down, on a tray and freeze them for at least another hour. This makes sure the ice cream inside is frozen solid again and the mochi is firm.
Step 10: When you’re ready to eat, take your homemade Mochi Ice Cream out of the freezer. Let them sit at room temperature for just a few minutes – about 5 minutes should do it. This softens the mochi wrapper just enough so it’s perfectly chewy and not hard like a rock. Enjoy your delicious, homemade treat! If you’re looking for more easy no-bake ideas, check out these no-bake strawberry cheesecake bars!
Serving Suggestions for Your Mochi Ice Cream
- A light dusting of matcha powder: It adds a beautiful color and a subtle, slightly bitter contrast that’s lovely with sweet ice cream.
- Fresh berries: A few fresh raspberries or sliced strawberries alongside your mochi adds a pop of freshness and color.
- A drizzle of condensed milk: For an extra touch of sweetness and a creamy finish, this really takes it to the next level! These would also pair wonderfully with some of the healthy muffins I like to make.
Storing and Reheating Your Homemade Mochi Ice Cream
These little gems are best enjoyed fresh, but you can totally store any leftovers! The trick is to keep them well-wrapped. Once your mochi are completely frozen and firm, wrap each one tightly in plastic wrap, twist the ends, and then place them in an airtight container or a freezer bag. They’ll stay delicious in the freezer for about 2-3 weeks. Honestly, storing them is mostly about preventing freezer burn so they stay nice and chewy, not hard. They don’t really need reheating – just let them sit out for about 5 minutes before taking a bite!
Frequently Asked Questions About Mochi Ice Cream
Can I use store-bought ice cream balls for my mochi?
Yes, absolutely! Using pre-made ice cream balls can save you a bit of time, especially if you’re in a hurry. Just make sure they’re small enough to be fully encased by the mochi dough. And remember, keep them frozen until you’re ready to wrap them!
My mochi dough is too sticky! What should I do?
Oh, sticky dough is the classic mochi challenge! The most important thing is to use plenty of cornstarch. Dust your work surface, your hands, and the dough itself generously. Think of it as a protective layer. If it’s still being super difficult, you can pop it back in the fridge for another 10-15 minutes to firm up before trying to roll or cut it. Don’t be afraid to add more cornstarch – it really is your best friend here. It’s way better than having it stick everywhere! For other easy handheld treats, check out my energy balls!
Can I make the mochi dough ahead of time?
You can make the dough itself a few hours ahead, but I wouldn’t recommend making the fully assembled mochi too far in advance. The mochi wrapper can get a bit tough if it sits in the freezer for too long before eating. It’s best to assemble them the day you plan to serve them, or at most, a day before. If you need more no-bake ideas, I have tons of quick and healthy no-bake desserts!
Before You Go: Enjoy Your Mochi Ice Cream!
I hope you’re as excited to try making these Mochi Ice Cream bites as I am to tell you about them! They’re such a fun little treat. If you make them, I’d absolutely love to hear what you think! Drop a comment below, or better yet, share your creations on Pinterest (you can find me here!) and tag me, or check out my latest thoughts on Medium! Let me know your favorite ice cream flavors!
Print
Homemade Mochi Ice Cream
- Total Time: 2 hours 30 min
- Yield: 12 pieces
- Diet: Vegetarian
Description
A dessert of soft, chewy sweet rice dough wrapped around frozen ice cream centers.
Ingredients
- 1 cup glutinous rice flour
- 1/4 cup granulated sugar
- 2 tablespoons powdered sugar
- 1 cup water
- Food coloring (optional)
- Cornstarch for dusting
- 2 cups ice cream of choice
Instructions
- Line a baking sheet with parchment paper. Scoop 12 small ice cream balls, pack them tight, and flatten the bottoms. Freeze for 1 hour.
- In a microwave-safe bowl, whisk glutinous rice flour, granulated sugar, and powdered sugar. Add water and stir until smooth.
- Cover the bowl loosely and microwave for 1 minute. Stir with a damp spatula. Cover and microwave for 1 more minute. Stir and microwave for 30 seconds until the dough is glossy and thick.
- Dust parchment paper with cornstarch. Transfer the hot dough onto it. Dust the top with more cornstarch and roll into a 1/4-inch thick rectangle.
- Place the dough on the parchment on a baking sheet. Refrigerate for 30 minutes.
- Cut the dough into 3-inch circles. Brush off excess cornstarch.
- Place one frozen ice cream ball in the center of a dough circle. Stretch and wrap the dough around it, pinching to seal.
- Wrap each mochi tightly in plastic wrap, twisting the top to secure.
- Place seam-side down on a tray. Freeze for at least 1 hour.
- Let mochi sit at room temperature for a few minutes before eating to soften.
Notes
- Keep the ice cream frozen between steps to prevent melting.
- Use plenty of cornstarch to prevent the dough from sticking.
- Prep Time: 25 min
- Cook Time: 5 min
- Category: Dessert
- Method: No-Bake
- Cuisine: Japanese


