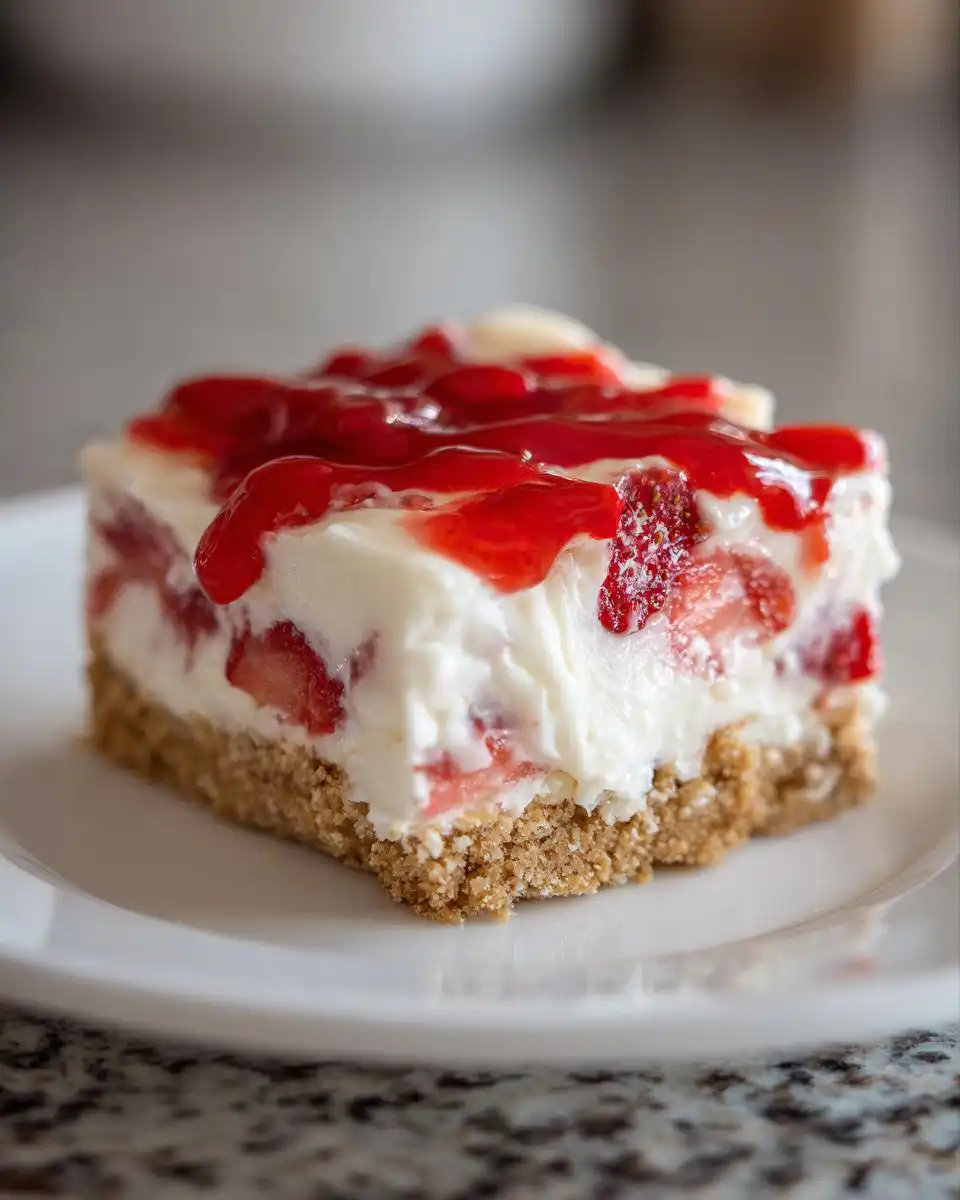
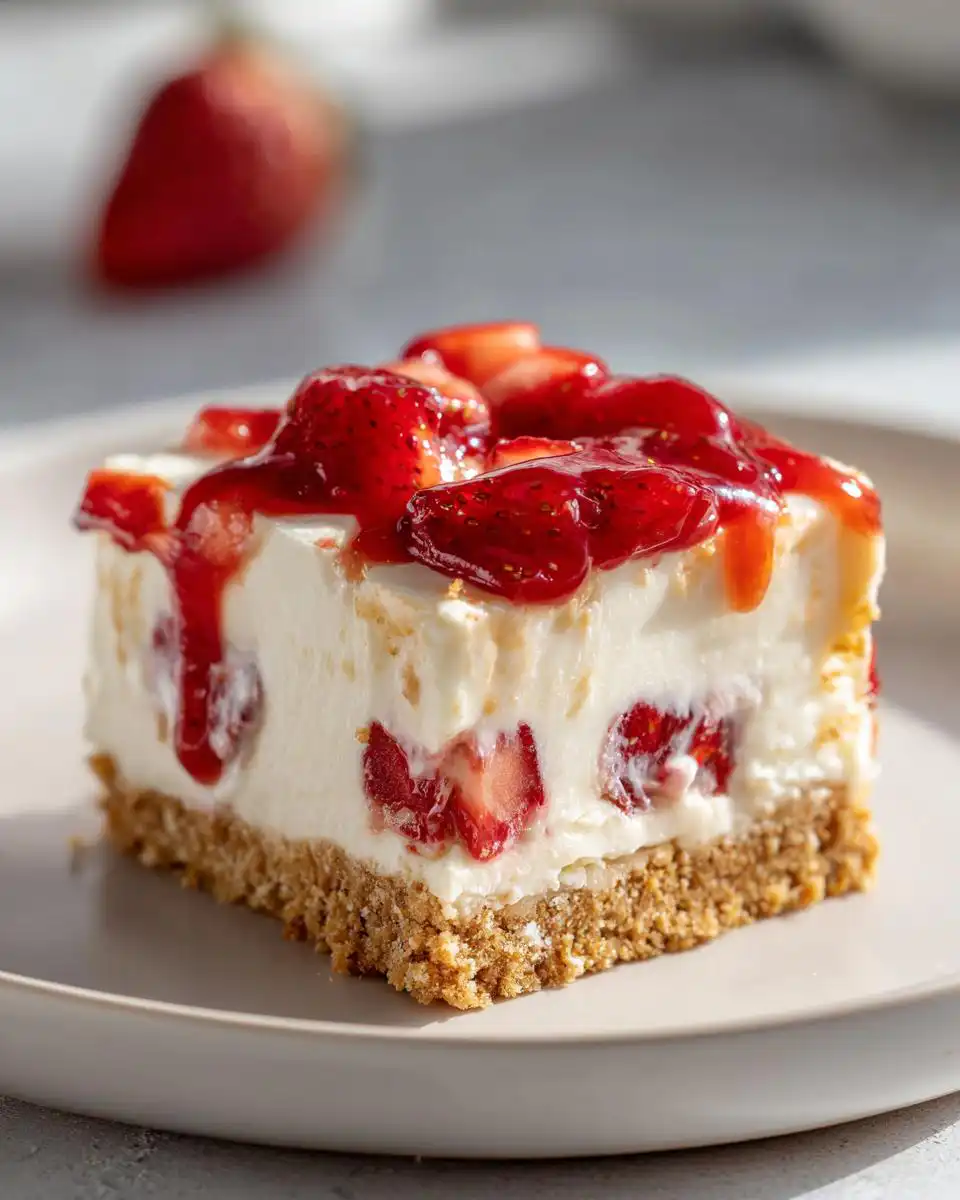
I am obsessed with this recipe for No-Bake Strawberry Cheesecake Bars Easy. Honestly, it’s my secret weapon for hot summer days when turning on the oven feels like a crime. You get all that classic, creamy cheesecake flavor with a burst of fresh strawberries, and it couldn’t be simpler. I first made these for a last-minute Fourth of July BBQ, scrambling for a dessert that felt special but wouldn’t heat up my kitchen. My neighbors still ask me for the recipe! The best part? The active prep is only about 25 minutes, then your fridge does all the work. After a chill time of about 4 hours, you’ll have 12 perfect, dreamy bars ready to impress. It’s beginner-friendly, foolproof, and so deliciously creamy.
Why You’ll Love These No-Bake Strawberry Cheesecake Bars Easy
Trust me, these are the bars that will make you feel like a dessert genius with practically zero effort. They’re my go-to when I need something guaranteed to disappear at a party.
Seriously, what’s not to love? Here’s why I think you’ll become as addicted as I am:
- No Sweaty Oven Drama: My kitchen stays cool! It’s a game-changer for summer or when you just can’t be bothered to preheat anything. Perfect for when you want a taste of summer without the heat.
- Shockingly Fast to Make: The hands-on work is maybe 25 minutes. You can throw these together during your kids’ naptime or right after work, then just walk away while they set in the fridge.
- Unbelievably Creamy Dreaminess: The texture is everything. It’s light from the whipped cream, rich from the cream cheese, and just melts in your mouth. It feels decadent without being heavy.
- Real Strawberry Magic: I love using fresh berries for that bright, juicy pop of flavor in the middle. It beats artificial strawberry anything any day! And if you’re looking for more berry inspiration, check out these 20 healthy strawberry dessert recipes for spring.
- The Ultimate Make-Ahead Dessert: I always make them the night before. No last-minute stress. They just get better as they chill, which is a total win in my book. They fit right in with other healthy no-bake dessert recipes for quick treats you can have ready to go.
- Instant Crowd-Pleaser: I’ve brought these to everything from book club to backyard barbecues, and the plate is always empty. They look fancy, taste incredible, and please literally everyone.
Ingredients for Your No-Bake Strawberry Cheesecake Bars Easy
I promise you won’t need to hunt for anything special. These are all simple ingredients I almost always have on hand, and they come together so easily. Just make sure your cream cheese is truly soft—it makes all the difference for a silky smooth filling.
The best part about this recipe is that you probably have most of this in your pantry right now. Here’s everything you need, broken down so it’s super easy to grab and go.
- For the Crust:
- 2 cups graham cracker crumbs (That’s about 15 full sheets. I use a food processor, but a ziploc bag and a rolling pin work perfectly too!)
- 1/2 cup unsalted butter, melted (One standard stick)
- 1/4 cup granulated sugar
- For the Filling:
- 16 oz cream cheese, softened to room temperature (That’s two 8-ounce blocks. Go for the full-fat kind for the best creamy texture, trust me.)
- 1 cup powdered sugar (Also called confectioners’ sugar)
- 1 teaspoon pure vanilla extract
- 1 cup heavy whipping cream (Chill the bowl and beaters for a few minutes first—it whips up so much faster!)
- For the Strawberry Layer:
- 1 1/2 cups fresh strawberries, finely chopped (Hulled first, of course. This is about 10-12 medium berries.)
- 1/4 cup strawberry jam (Any kind you like. I usually grab seedless, but it’s totally up to you!)
I love how versatile the base is, by the way. It’s similar to the vibe of my healthy blueberry cottage cheese breakfast bake with oats where you can rely on simple, wholesome ingredients for something really special.
How to Make No-Bake Strawberry Cheesecake Bars Easy: Step-by-Step
My biggest tip? Get the crust in the fridge first. That 15-minute chill gives it a head start on firming up so it doesn’t crumble when you add the filling. It’s the secret to those perfect, clean layers.
Step 1: First, grab an 8×8 inch baking pan and line it with parchment paper, leaving some overhang on the sides. This is your magic trick for lifting the whole slab of bars out later for easy, clean cutting. In a medium bowl, stir together the graham cracker crumbs, melted butter, and that 1/4 cup of granulated sugar until it looks like wet sand. Dump it all into your prepared pan and press it down firmly and evenly. I use the bottom of a flat drinking glass to get it really packed in there. Pop the whole pan in the fridge to chill for a solid 15 minutes. Don’t skip this—it makes the crust sturdy!
Step 2: While the crust chills, let’s tackle the filling. This is where that softened cream cheese is non-negotiable. If it’s still cold, you’ll get lumps, and we don’t want that. In a large bowl, beat the softened cream cheese with an electric mixer on medium speed until it’s super smooth and creamy. This takes about a minute. Scrape down the sides, then add the powdered sugar and vanilla extract. Beat again until everything is completely combined and silky.
Step 3: Now, in a separate, clean bowl, pour in that cold heavy whipping cream. Whip it on high speed until you get beautiful, stiff peaks. You’ll know they’re ready when you lift the beaters and the peaks stand straight up and don’t flop over. This gives our cheesecake its light, airy texture.
Step 4: Time to be gentle! Add about a third of the whipped cream to the cream cheese mixture. Use a spatula to fold it in—that means scooping from the bottom and turning it over on itself until it’s mostly mixed. This lightens the base. Now, gently fold in the remaining whipped cream until no white streaks remain. Be patient here; you want to keep all that air you just whipped in! The technique is similar to my other no-bake favorites, like this No-Bake Key Lime Cheesecake Recipe.
Step 5: Take your chilled crust out of the fridge. Spoon about half of that gorgeous creamy filling over the crust and spread it into an even layer. Scatter all of your finely chopped fresh strawberries evenly over this first layer of filling. Then, carefully spread the rest of the filling over the strawberries. A little fruit might poke through—that’s totally fine and looks beautiful!
Step 6: For the glossy finish, warm your strawberry jam for about 10-15 seconds in the microwave so it’s just pourable. Drizzle it all over the top of the bars. You can use a spoon or a fork to make pretty swirls if you’re feeling fancy.
Step 7: The final, most important step: patience! Cover the pan loosely with plastic wrap and refrigerate the bars for at least 4 hours, but overnight is honestly best. This sets everything perfectly so you can get those clean, sharp cuts. When you’re ready, use the parchment paper overhang to lift the whole block out, place it on a cutting board, and slice into 12 bars. They’re as easy to assemble as my no-bake peanut butter oatmeal bars, but with a totally different, fruity vibe.
What to Serve with Your Strawberry Cheesecake Bars
Honestly, these bars are incredible on their own, but I love adding a little something extra on the side. It makes a simple dessert feel like a whole special occasion.
Fresh Berry Medley: Toss some extra blueberries, raspberries, and sliced strawberries with a tiny squeeze of lemon juice and a pinch of sugar. The mixed berries add a beautiful pop of color and a fresh, juicy bite that cuts right through the creamy richness.
Whipped Cream Dollop: I know, there’s already whipped cream in the bars, but trust me—a little extra cloud of fresh whipped cream on top just before serving is pure magic. It adds a cool, light texture that’s so satisfying.
Iced Tea or Sparkling Lemonade: For drinks, you can’t go wrong with something cold and refreshing. A big pitcher of herbal iced tea or fizzy lemonade balances the sweetness perfectly and makes the whole dessert feel like a real summer treat.
Storage and Reheating Instructions
These bars are a meal-prep dream. I often make the whole pan on a Sunday and have a sweet, portion-controlled treat ready to grab all week long.
Keep your bars in the pan, covered tightly with plastic wrap, or transfer them to an airtight container. They’ll stay fresh and delicious in the fridge for up to 5 days. The texture actually gets a bit better on day two!
You can totally freeze them, too. I wrap individual bars tightly in plastic wrap, then pop them into a freezer bag. They’ll keep for about 2 months. Thaw them overnight in the fridge before you want one.
And reheating? Not needed! That’s the beauty of a no-bake dessert. Just grab one straight from the fridge (or let it sit out for 5 minutes if you want it a touch softer) and enjoy.
No-Bake Strawberry Cheesecake Bars Easy FAQ
I’ve made these bars so many times, I’ve run into all the little questions. Here’s the scoop on the things I get asked most often so you can bake (well, no-bake!) with confidence.
Can I use frozen strawberries?
Absolutely! I do it all the time when fresh berries aren’t in season. Just make sure to thaw them completely first, then drain them really, really well in a colander. I even give them a gentle press with a paper towel to soak up any extra juice. If you skip this, the extra liquid can make your filling a bit runny and prevent it from setting properly.
How do I make sure the cream cheese filling is smooth?
This is the key to that dreamy texture. The number one rule: your cream cheese must be softened. I take my blocks out of the fridge at least an hour before I start. When you press it with your finger, it should give easily. If it’s still cold, you’ll have lumps no matter how long you beat it. Also, scrape down the sides of your bowl a few times while mixing to catch any stubborn bits.
Can I make these gluten-free?
Yes, and it’s super simple! Just swap the graham crackers for your favorite gluten-free graham-style crackers or even gluten-free vanilla wafers. Crush them up the same way. I’ve also used gluten-free pretzels for a salty-sweet crust, and it was amazing! For more fun tweaks and dessert ideas, I’m always saving inspiration over on Pinterest.
Nutritional Information Disclaimer
I’m not a nutritionist, I’m just a home cook who loves sharing delicious food! I always think it’s helpful to have a ballpark idea of what you’re eating, but there are so many variables in our own kitchens.
The nutrition facts listed, like around 320 calories and 22 grams of sugar per bar, are my best estimates based on the exact brands and measurements I use. Your numbers might vary depending on your specific ingredients. Please use this data as a general guide for informational purposes only, not a strict calculation.
Before You Go
I really hope you give this recipe a try. It’s one of those happy, no-fuss desserts that never lets me down, and I think your family will love it just as much as mine does.
If you make these creamy strawberry cheesecake bars, I’d be thrilled to hear how they turned out! Leave a comment below or tag me on social media so I can see your beautiful creation. Happy no-baking!
Print
No-Bake Strawberry Cheesecake Bars
- Total Time: 4 hours 25 min
- Yield: 12 bars
- Diet: Vegetarian
Description
Easy, creamy strawberry cheesecake bars with a graham cracker crust, requiring no oven.
Ingredients
- 2 cups graham cracker crumbs
- 1/2 cup unsalted butter, melted
- 1/4 cup granulated sugar
- 16 oz cream cheese, softened
- 1 cup powdered sugar
- 1 tsp vanilla extract
- 1 cup heavy whipping cream
- 1 1/2 cups fresh strawberries, chopped
- 1/4 cup strawberry jam
Instructions
- Mix graham cracker crumbs, melted butter, and granulated sugar in a bowl.
- Press the mixture firmly into a lined 8×8 inch baking pan. Chill for 15 minutes.
- Beat the softened cream cheese, powdered sugar, and vanilla extract until smooth.
- In another bowl, whip the heavy cream until stiff peaks form.
- Fold the whipped cream into the cream cheese mixture until combined.
- Spread half of the cheesecake filling over the chilled crust.
- Top with chopped strawberries, then spread the remaining filling over the strawberries.
- Warm the strawberry jam slightly and drizzle it over the top.
- Refrigerate for at least 4 hours, or until set. Cut into bars before serving.
Notes
- Use full-fat cream cheese for the best texture.
- Ensure your cream cheese is fully softened to avoid lumps.
- You can use frozen strawberries if fresh are not available; thaw and drain them first.
- Prep Time: 25 min
- Cook Time: 0 min
- Category: Dessert
- Method: No-Bake
- Cuisine: American