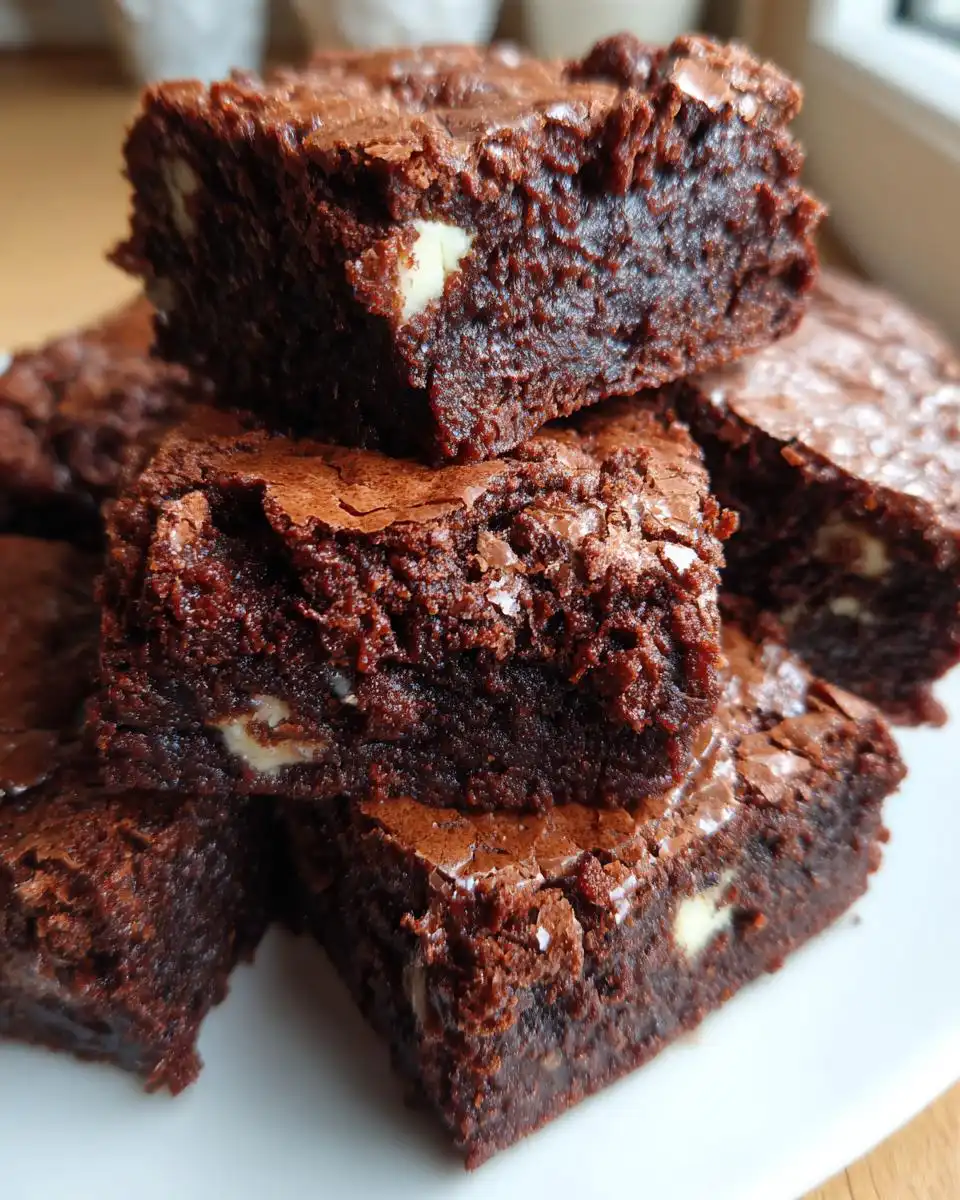
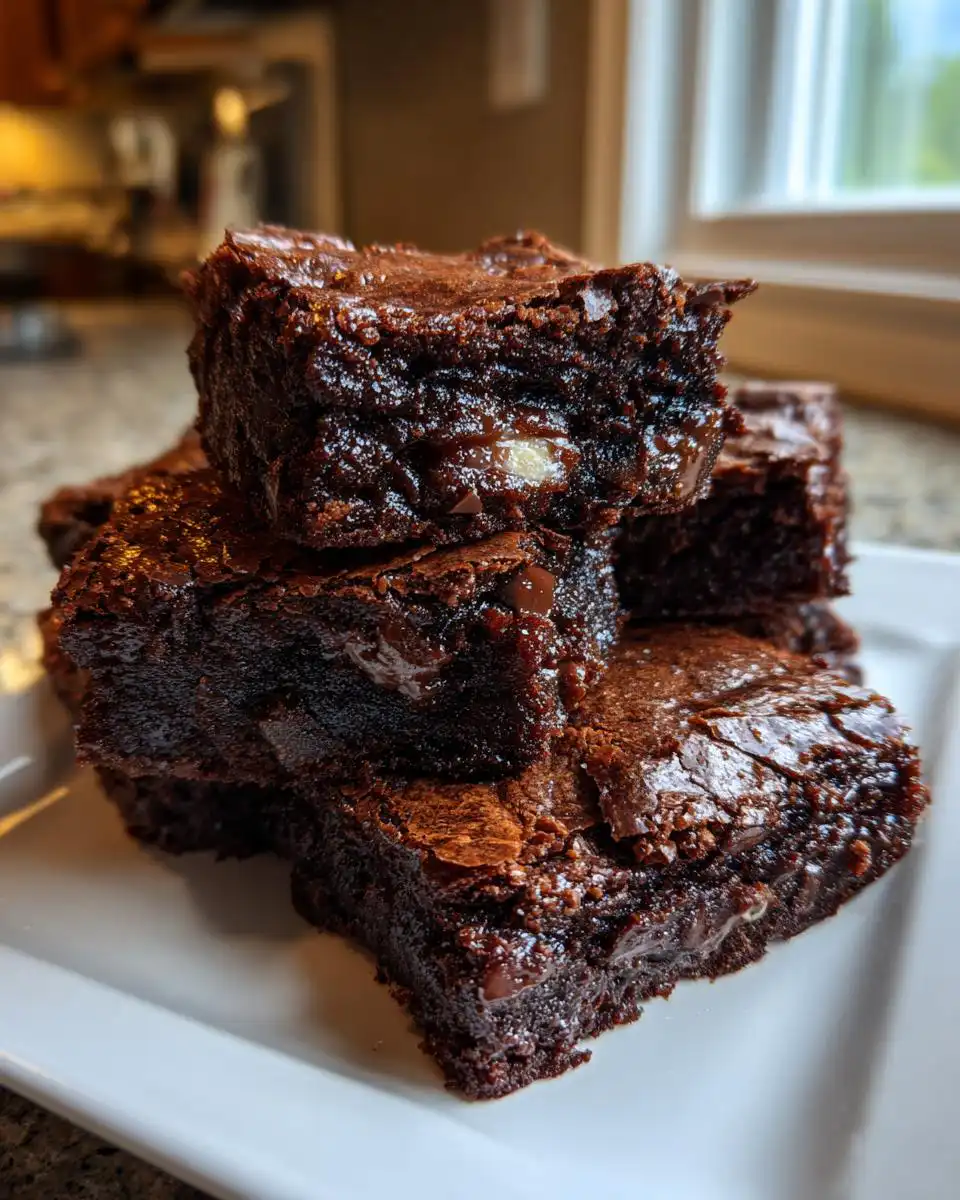
There’s something about a perfect chocolate brownie that feels like a hug in a baking tin, isn’t there? That rich, fudgy centre with a crisp, papery top and pockets of melty chocolate is my absolute favourite treat. After years of trying countless recipes that were either too cakey or just fell flat, I finally found my go-to in this classic. These Mary Berry chocolate brownies are the real deal. Inspired by the absolute queen of British baking herself, this method is a wonderfully foolproof route to that dreamy texture we all crave. It’s a trusted, no-nonsense recipe that delivers every single time, and it’s become the one I bake when I really want to impress (or just make myself very, very happy on a Tuesday afternoon).
Why You’ll Love This Mary Berry Chocolate Brownies Recipe
Honestly, this is the recipe I pull out when I need a guaranteed win. It’s never let me down, and the look on people’s faces when they bite into that fudgy centre is just the best.
So, why is this one special? Here’s my top reasons:
- The legendary fudge-to-crunch ratio: You get that gloriously gooey, rich interior and a satisfyingly crisp, shiny top all in one bite. It’s texture heaven.
- It’s deceptively simple: Don’t let the step of whisking eggs and sugar scare you. It’s just a few straightforward stages, and the result feels really professional.
- Chocolate in every form: You’ve got the deep, intense base from the dark chocolate, then those lovely melty pockets of white and milk chocolate chunks. It’s a full chocolate experience.
- Mary Berry’s trusted method: This approach is a classic for a reason. Following her guidance on the ‘slight wobble’ test is the secret to avoiding dry, cakey brownies forever.
- They’re incredibly versatile: They’re perfect as they are, but they also make a brilliant base for other desserts. Looking for a slightly different treat? Check out my healthy brownie recipes for more inspiration!
Ingredients for Mary Berry Chocolate Brownies
Honestly, the chocolate is the star here, so don’t skimp. A good quality dark chocolate makes all the difference between a nice brownie and an absolutely unforgettable one.
Here’s everything you’ll need. I promise it’s a simple list, but every bit counts:
- 170g unsalted butter
- 200g dark chocolate, chopped
- 3 large eggs
- 250g granulated sugar
- 60g plain flour
- 35g cocoa powder
- 45g white chocolate chunks
- 45g milk chocolate chunks
How to Make Mary Berry Chocolate Brownies: Step-by-Step
This is where the magic happens! The key is to take your time with the whisking and be really gentle when folding. It feels a bit like a science experiment, but trust me, it’s worth it for that perfect texture.
Step 1: First things first, get your oven on to 180°C (or 160°C if you’re using a fan oven). Line your 20cm square tin with parchment paper – I leave a little overhang on the sides so I can lift the whole slab out later. It makes life so much easier.
Step then 2: Now, melt your butter and chopped dark chocolate together. I do this in a heatproof bowl over a pan of gently simmering water. Stir it until it’s completely smooth and glossy, then take it off the heat. This next bit is important: let it cool down to room temperature. If you add it hot to the eggs, you’ll scramble them, and we don’t want that!
Step 3: While that’s cooling, sift your plain flour and cocoa powder together into another bowl. Sifting gets rid of any lumps and makes everything lovely and light, which helps when we fold it in later.
Step 4: Here’s the arm workout! Grab a large bowl and your electric mixer. Whisk the eggs and granulated sugar together on a high speed. You’re looking for it to become really thick, pale, and doubled in volume. This should take a good 4 to 6 minutes. Don’t rush this – it’s what creates that amazing crackly top.
Step 5: Right, time to combine. Pour your cooled chocolate mixture into the fluffy egg mixture. Now, be gentle. Use a spatula and fold it in with big, slow strokes until it’s just combined. You want to keep as much of that air in as possible.
Step 6: Sift your flour and cocoa mix over the top of the batter. Again, fold it in gently until you can’t see any dry streaks. A few small lumps are fine, but no big pockets of flour. Then, fold through your white and milk chocolate chunks.
Step 7: Pour all that gorgeous batter into your prepared tin and smooth the top with the back of your spatula.
Step 8: Bake for 27 to 32 minutes. This is the crucial part! The top should look shiny and set, but if you give the tin a gentle shake, there should still be a slight wobble in the very centre. That wobble is your ticket to fudgy brownies. Take them out even if you think they need another minute – they keep cooking as they cool.
Step 9: Patience, I know it’s hard! Let the tin cool completely on a wire rack before you even think about slicing. Cutting into warm brownies is a messy disaster. Once they’re cool, lift them out and slice into 16 perfect squares. Now, enjoy! And if you fancy branching out from brownies, this gentle folding method is great for things like my healthy blueberry banana protein muffins or even these gluten-free banana bread cookies.
Tips for Perfect Brownies
I learned the hard way that a few small tweaks make all the difference between good brownies and knock-your-socks-off brownies. Here are my absolute must-dos.
Don’t overbake them! This is the golden rule. You want to take them out of the oven when the top is shiny and set, but the centre still has a slight wobble when you gently shake the tin. They’ll keep cooking as they cool, and that wobble is your guarantee for a gorgeously fudgy middle. I ruined a whole batch once by ignoring it – never again!
Whisk those eggs and sugar properly. Seriously, give it the full 4 to 6 minutes on high speed with your electric mixer. You’re looking for it to be really thick, pale, and almost doubled in volume. This isn’t just busywork; it’s what creates that amazing, crisp, papery top we all love.
Let your melted chocolate cool. After you’ve melted the butter and dark chocolate, take the bowl off the heat and let it sit until it’s just warm or room temperature. If you pour it in hot, you’ll cook the eggs and end up with a grainy texture instead of a smooth batter.
Fold, don’t stir! When you’re combining the chocolate with the eggs, and again when adding the flour, use a large metal spoon or spatula. Cut through the middle and fold it over gently. You want to keep all that lovely air you whisked into the eggs, so be patient and gentle.
Serving and Storing Your Mary Berry Chocolate Brownies
These brownies are fantastic on their own, but a little something on the side can make them feel extra special. And trust me, you’ll want to save some for later!
What to Serve with Your Brownies
With a scoop of vanilla ice cream: This is my family’s favourite way to eat them, still slightly warm. The cold, creamy ice cream melting into the warm, fudgy brownie is pure bliss. For a super easy homemade version, my easy no-machine vanilla ice cream is perfect.
With fresh berries: A handful of raspberries or strawberries on the side cuts through the richness beautifully. The tartness of the fruit makes the chocolate taste even deeper and more luxurious.
For a fancy finish: A light dusting of icing sugar or a drizzle of salted caramel sauce transforms them into a proper dinner party dessert. It looks impressive with zero effort!
Storage and Reheating Instructions
First, let them cool completely in the tin – this is non-negotiable. Then, pop them into an airtight container.
They’ll keep beautifully at room temperature for up to 3 days. If your kitchen is warm, I’d store them in the fridge where they’ll last for 5 days. They also freeze brilliantly for up to 3 months – just wrap them tightly.
My top tip? They are absolutely best served at room temperature. If they’ve been in the fridge, let them sit out for 30 minutes before eating. For a real treat, you can warm a slice in the microwave for 10 seconds to get those chocolate chunks gooey again. For more baking inspiration, you can always find me saving ideas over on Pinterest too!
Mary Berry Chocolate Brownies FAQs
I get a few questions popping up again and again whenever I make these, so I thought I’d answer the big ones here. Hopefully it saves you some head-scratching!
Can I use milk chocolate instead of dark chocolate for melting?
I wouldn’t recommend it, honestly. The dark chocolate gives that deep, rich base flavour and helps set the structure. Using milk chocolate would make the brownies much sweeter and they might not set as well. But you can absolutely swap the chunks for whatever you fancy – try dark chocolate chips or even chopped nuts!
My brownies turned out cakey, not fudgy. What went wrong?
This usually comes down to two things: overbaking or overmixing. If you baked them past the ‘slight wobble’ stage, they’ll firm up too much. And if you were a bit vigorous when folding in the flour, you can knock out the air, leading to a denser, cake-like texture. Remember, gentle folds are key!
Can I make these gluten-free?
Yes, you can! Just swap the plain flour for a good gluten-free plain flour blend. I’d add an extra ½ teaspoon of xanthan gum if your blend doesn’t already include it, to help with the texture. They’ll be just as delicious. For other gluten-free bakes, my gluten-free banana bread cookies are a favourite. And if you’re looking for a different protein-packed brownie twist, my cottage cheese brownies or even the keto version are brilliant options too.
Nutritional Information
I’m a cook, not a scientist! While I love knowing what I’m eating, getting precise numbers can be tricky in home baking.
Just a quick note on the nutritional side of things: any values you see for a recipe like this are always an estimate. The exact numbers can vary quite a bit depending on the specific brands of chocolate, butter, and sugar you use. So, while I aim for balanced recipes, please use any provided figures as a helpful guide rather than an exact measurement.
Before You Go
I really hope you give this classic recipe a try. It’s the one I come back to whenever I need a guaranteed chocolate hit that feels a bit special. If you do bake a batch, please leave a comment and let me know how your Mary Berry chocolate brownies turned out – I’d love to hear!
Print
Mary Berry Chocolate Brownies
- Total Time: 55 min
- Yield: 16 squares
- Diet: Vegetarian
Description
Rich, fudgy chocolate brownies with a crisp top and chunks of white and milk chocolate.
Ingredients
- 170g unsalted butter
- 200g dark chocolate, chopped
- 60g plain flour
- 35g cocoa powder
- 45g white chocolate chunks
- 45g milk chocolate chunks
- 3 large eggs
- 250g granulated sugar
Instructions
- Preheat your oven to 180°C (160°C fan). Line a 20cm square baking tin with parchment paper.
- Place the butter and dark chocolate in a heatproof bowl. Melt gently over a pan of simmering water, stirring until smooth. Remove from the heat and let it cool to room temperature.
- Sift the plain flour and cocoa powder together into a separate bowl until combined.
- In a large bowl, use an electric mixer to whisk the eggs and sugar on high speed for 4 to 6 minutes. The mixture should become thick, pale, and doubled in volume.
- Pour the cooled chocolate mixture into the egg mixture. Gently fold together with a spatula until just combined.
- Sift the flour and cocoa mixture over the batter. Fold gently until no dry streaks remain.
- Fold the white and milk chocolate chunks evenly through the batter.
- Pour the batter into your prepared tin and smooth the top.
- Bake for 27 to 32 minutes. The top should be shiny and set, with a slight wobble in the centre.
- Remove from the oven and let the brownies cool completely in the tin before slicing into squares.
Notes
- For a fudgy texture, avoid overbaking. Remove the brownies when the centre still has a slight wobble.
- Prep Time: 25 min
- Cook Time: 30 min
- Category: Dessert
- Method: Baking
- Cuisine: British