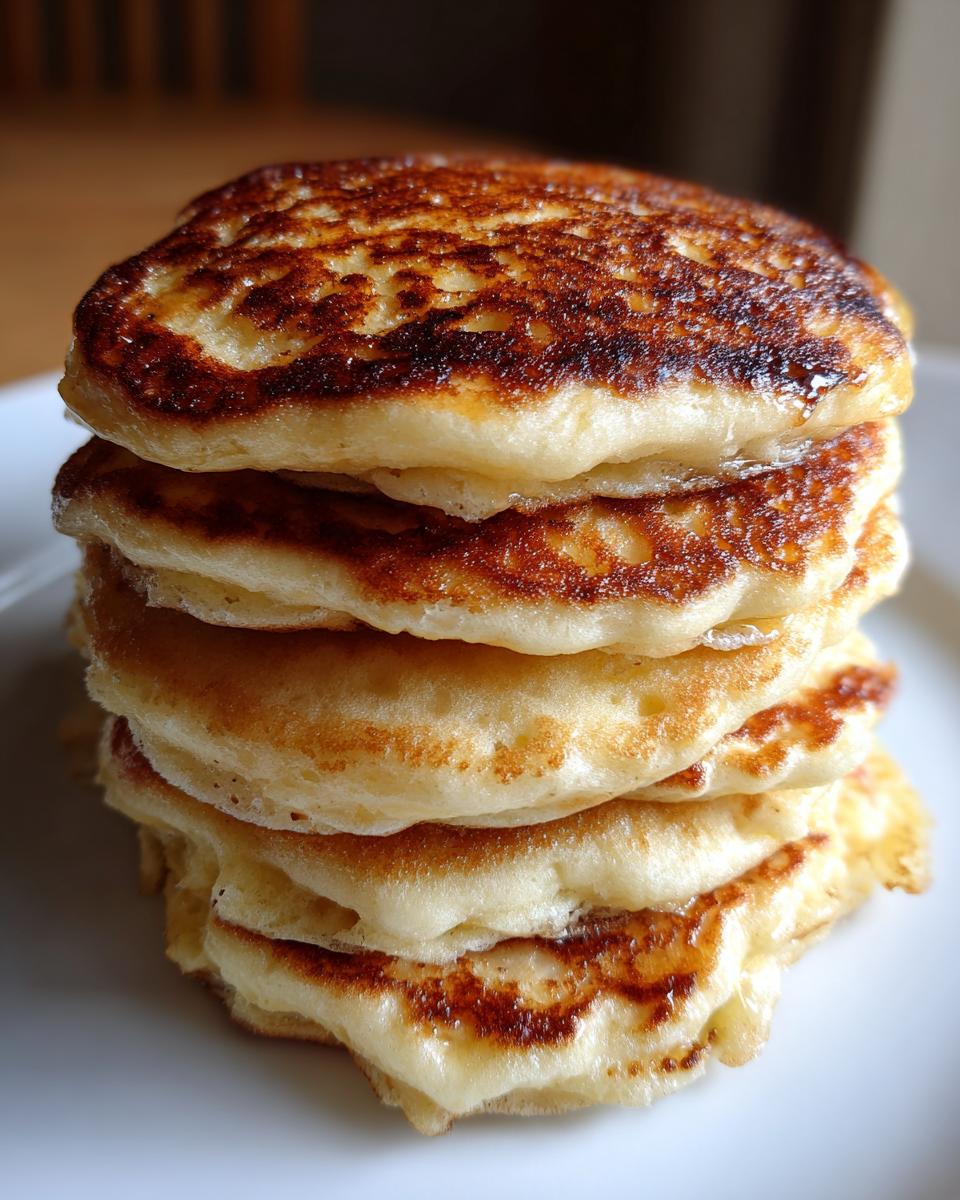
Forget those sad, flat breakfast discs you sometimes end up with! I’m letting you in on a secret that completely changed my weekend mornings: these yogurt pancakes. Seriously, they are the fluffiest things you will ever cook on a griddle. I used to think making truly light, cake-like pancakes was hard work, but then I started swapping out half the milk for plain yogurt—Greek or regular, your call—and wow, the game changed.
The yogurt does double duty, right? It adds this incredible tenderness, almost like a built-in buttermilk tang, but it also packs a protein punch so we feel a little better about eating three of them before 9 AM. My kids devour these, and honestly, I think it’s because they are so thick! They hold toppings beautifully without collapsing. Trust me on this one; once you try these yogurt pancakes, you won’t go back to the old recipe. They are that good, and they come together faster than brewing a second pot of coffee!
Gathering Your Ingredients for Yogurt Pancakes
To get those wonderfully thick and airy results for your yogurt pancakes, you need to make sure you have everything ready to go before you even think about turning on the heat. It’s a simple list, really, but precision matters when you’re aiming for maximum fluffiness. Don’t try to rush the measuring process; that’s how you end up with a sticky mess instead of a perfect stack!
Essential Components List
For clarity, I’ve laid out exactly what you need below. Please use standard measuring cups and spoons—no guessing here!
| Ingredient | Amount |
|---|---|
| All-purpose flour | 1 cup |
| Granulated sugar | 2 tablespoons |
| Baking powder | 1 1/4 teaspoons |
| Baking soda | 1/4 teaspoon |
| Kosher salt | 1/4 teaspoon |
| Plain whole milk yogurt | 1 cup |
| Large eggs | 2 |
| Melted unsalted butter | 2 tablespoons |
| Whole milk | 1/4 cup |
| Vegetable oil (for the pan) | As needed |
Ingredient Notes and Substitutions for Your Yogurt Pancakes
Now, let’s talk specifics for these yogurt pancakes. You can absolutely use Greek yogurt, but be aware it’s thicker, so you might need that extra splash of milk later on to get the batter moving. If you use plain yogurt, it’s a bit looser, which is fine too! The butter must be melted, but make sure it has cooled slightly before you add it to the wet mix. Hot butter will scramble your eggs, and we absolutely don’t want that happening!
Equipment Needed for Making Yogurt Pancakes
You don’t need a lot of fancy gadgets for these, thankfully! I always grab my trusty large non-stick skillet or a flat griddle—make sure your pan is big enough so you aren’t crowding the cakes while cooking. You’ll also need two mixing bowls, one for the dry stuff and one for the wet. And definitely grab a whisk for the dry ingredients and a spatula for gentle folding and flipping. Safety first: always have a paper towel handy for wiping down the hot pan!
Step-by-Step Instructions for Amazing Yogurt Pancakes
Okay, this is where the magic happens! Making great yogurt pancakes is all about timing and being gentle with your batter. Overmixing is the enemy here, so channel your inner zen master while stirring. We want lumps, believe it or not—those are air pockets waiting to expand!
Preparing the Dry and Wet Mixtures for Yogurt Pancakes
First things first, get that griddle or skillet warming up over medium heat. It needs a good five minutes to get evenly hot, so don’t skip this preheating step! While that’s happening, tackle the dry ingredients. In your biggest bowl, whisk together the flour, sugar, baking powder, baking soda, and salt. Whisking really well here makes sure the leavening agents are perfectly distributed, which is crucial for an even rise.
Now for the wet side. In a separate, smaller bowl, take your two eggs and beat them just until they look uniform. Then, fold in that cup of whole milk yogurt and your slightly cooled melted butter. You want this mixture smooth, so beat those eggs well into the yogurt until there are no streaks of white left. Keep these two bowls separate for now!
Combining the Batter and Achieving the Right Consistency
Time to bring them together! Make a little dip, a well, right in the middle of your dry ingredients. Pour all of your wet mixture right into that well. Now, grab a rubber spatula—forget the whisk for this part! Gently fold the wet into the dry. I mean, *gently*. Stop stirring the second you see the flour disappear. If you see a few dry streaks or small lumps, that’s perfect. Seriously, stop mixing!
Sometimes, depending on how thick your yogurt was, the batter can feel a little too stiff to pour easily. If you try to drop a spoonful and it just sits there like thick mud, don’t panic! Add your whole milk one tablespoon at a time, folding it in just until the batter flows slowly off the spatula. Remember, we are aiming for thick, not runny, but it has to move.
Cooking Your Beautiful Yogurt Pancakes to Golden Perfection
Once the pan is hot, lightly coat it with vegetable oil. I put a dab on a folded paper towel and wipe the whole surface down—this removes excess oil so you don’t end up with greasy cakes. Now, drop about a quarter cup of your glorious yogurt pancakes batter onto the hot surface. Give them plenty of space; they puff up nicely!
Watch them closely. They cook fast! You’re looking for about two to three minutes on the first side. The edges will start to look set, and those beautiful little bubbles will form on top and start popping. That’s your cue! Slide your spatula underneath and flip them confidently. The second side needs maybe two more minutes until it’s a rich, deep golden brown. Transfer them immediately to a plate that you keep warm!
Tips for Success with Fluffy Yogurt Pancakes
Getting truly restaurant-quality fluffy yogurt pancakes right in your home kitchen is all about paying attention to a few non-negotiable details. My biggest piece of advice, straight from years of testing, is temperature control. Make sure your eggs and especially your yogurt are at room temperature before you start mixing. Cold ingredients stiffen the melted butter and prevent that smooth emulsion we need for the best rise.
Also, don’t skip the quick rest! After you finish folding the batter—and I mean *just* after you stop mixing—let the bowl sit on the counter for five minutes. This lets the gluten relax and gives the baking powder a head start. It’s a small step, but it guarantees a softer, more tender crumb. This resting period is also perfect for quickly wiping down your pan again before you start dropping the batter. If you want more baking tips, check out my thoughts on baking.
Finally, for sticking, remember that light oil coating we did? That’s key. If you see any batter start to stick or spread unevenly, the pan is either too cold or needs a quick wipe-down and re-oiling. When you get those visual cues right—the set edges and popping bubbles—you’ll have the most tender yogurt pancakes ever! For more recipe ideas, see what I’m pinning on Pinterest.
Frequently Asked Questions About Yogurt Pancakes
I get so many questions about these, which just proves how popular this easy breakfast really is! Here are the answers to the things folks ask me most often about making the best yogurt pancakes.
Can I use low-fat yogurt in these Yogurt Pancakes?
You totally can, but I have to warn you: the texture won’t be quite as rich or fluffy. The whole milk yogurt provides necessary fat, which contributes to that luxurious, tender crumb we are chasing. Low-fat versions are thinner, so you’ll definitely need to skip adding any extra milk, and the final product might be slightly less cake-like. Stick with whole milk if you want that signature fluffiness!
How long should I let the batter rest before cooking?
This is a great question, especially since we’re using both baking powder and baking soda! I recommend letting the batter rest for exactly five minutes after you finish gently folding everything together. This short rest allows the liquid to fully hydrate the flour and gives the leavening agents a chance to activate before hitting the heat. Don’t let it sit for more than ten minutes, though, or they might deflate! If you are looking for other high-protein breakfast options, check out my recipe for high-protein mini pancakes.
What is the best way to keep Yogurt Pancakes warm?
If you’re making a big batch, the best trick is to use a wire cooling rack placed over a baking sheet. Pop that sheet into an oven set to its absolute lowest temperature—around 200 degrees Fahrenheit works perfectly. This keeps the yogurt pancakes warm and steamy without letting the bottoms get soggy while you finish up the rest of the batter!
Serving Suggestions for Your Yogurt Pancakes
The beauty of these thick, tender yogurt pancakes is that they are almost a meal all on their own, thanks to that protein boost! But of course, we need toppings, right? For me, the classic choice is always pure maple syrup—don’t settle for the imitation stuff; the real maple cuts through the richness of the yogurt beautifully. Because these cakes are so sturdy, they handle heavy toppings really well. If you enjoy sweet toppings, you might also like my recipe for stewed apples.
If you want something fresh, try a handful of lightly sautéed cinnamon apples. They get soft and sweet without being mushy. A dollop of extra plain yogurt or a spoonful of good quality lemon curd is fantastic for cutting the sweetness. And if you have fresh berries lying around, even better! A simple pile of blueberries and raspberries makes for a gorgeous presentation and adds a nice bright flavor to complement the slightly tangy pancakes.
Storing and Reheating Leftover Yogurt Pancakes
Don’t let any of these amazing yogurt pancakes go to waste! They store beautifully, though they are definitely best eaten fresh. For leftovers, you must let them cool completely first—put them on a wire rack until they aren’t steaming anymore. If you stack them warm, they’ll turn gummy, and nobody wants that!
For storage safety and easy reheating, I always use this quick method. It keeps them tasting almost as good as when they were first made. For other make-ahead breakfast ideas, consider my banana oatmeal bars.
| Storage Method | Reheating Instructions |
|---|---|
| Airtight container in the fridge | Microwave for 20-30 seconds, or toast lightly. |
| Plastic bag, freezer safe | Reheat directly from frozen in a toaster oven until warm through. |
Share Your Favorite Yogurt Pancakes Creation
Now that you’ve mastered these wonderfully fluffy yogurt pancakes, I absolutely need to know how they turned out for you! Did you load them up with chocolate chips? Did you try my lemon curd idea? Don’t be shy! Head down to the comments section right now, give this recipe a rating so others know how amazing it is, and share a picture of your stack. I love seeing your kitchen creations!
Print
Amazing 2-Minute Yogurt Pancakes Fluff Secret
- Total Time: 20 minutes
- Yield: 4 servings 1x
- Diet: Vegetarian
Description
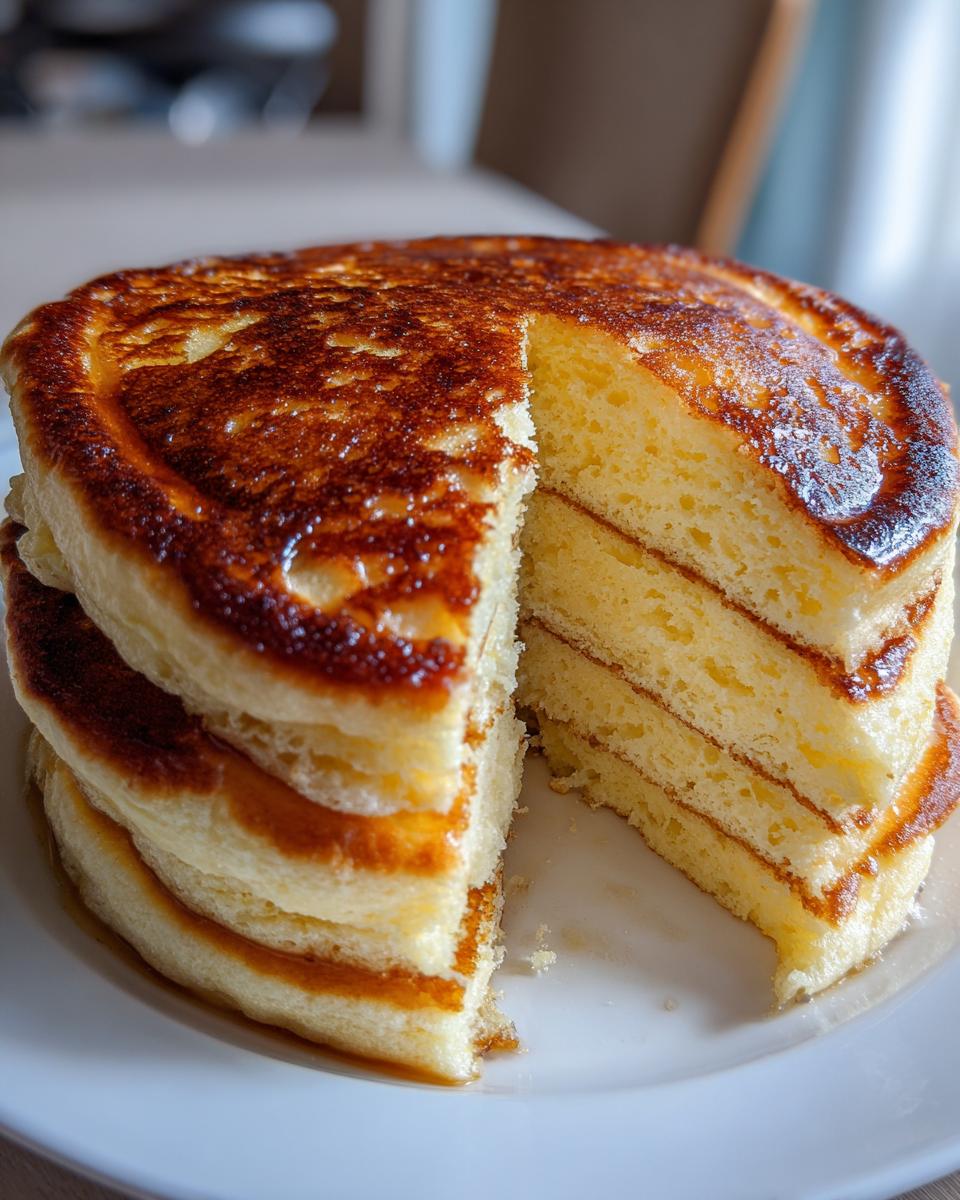
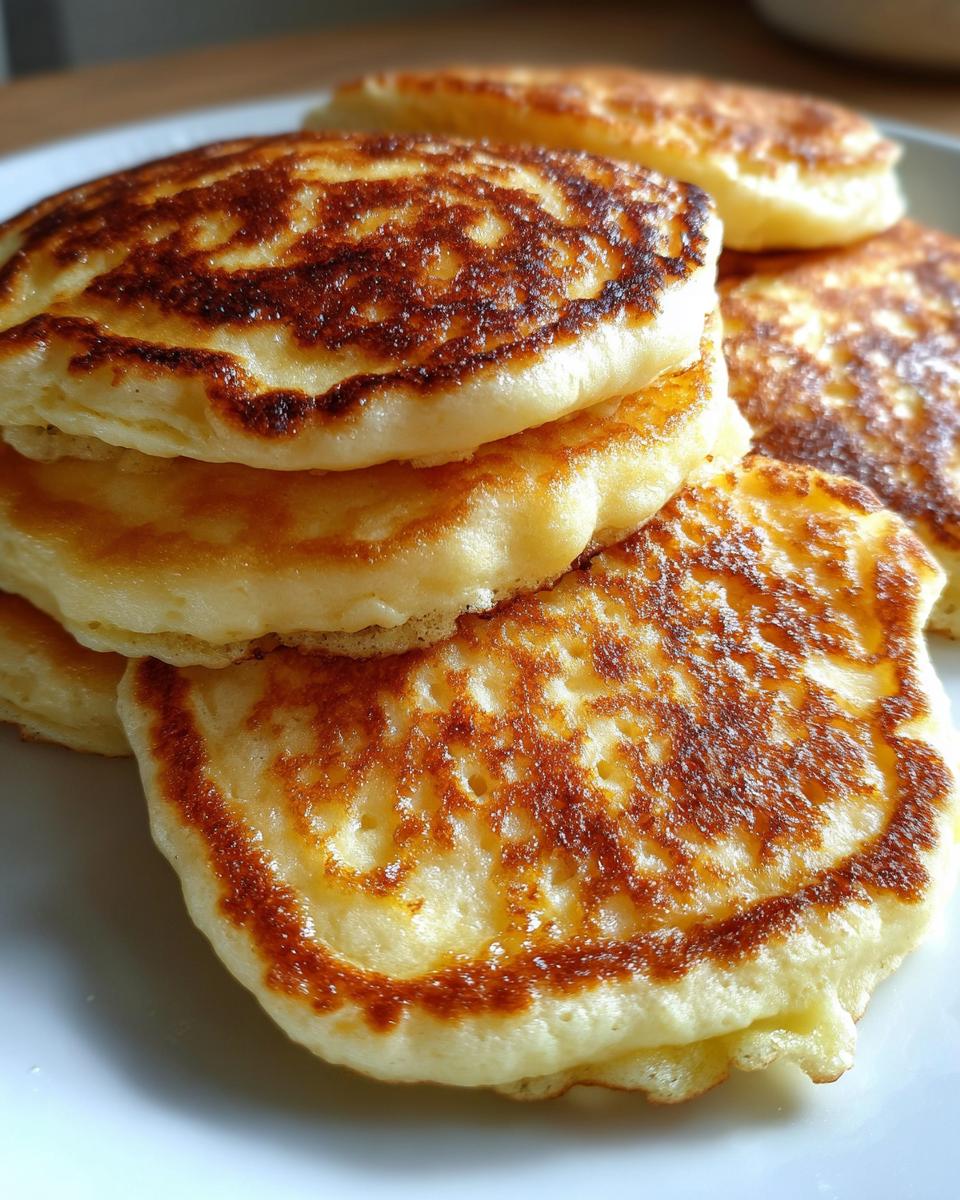
These fluffy yogurt pancakes are thick, tender, and incredibly easy to make. Use Greek or plain yogurt for a protein-packed breakfast the whole family will love. The yogurt creates an extra airy lift for a cake-like texture.
Ingredients
- 1 cup all-purpose flour
- 2 tablespoons granulated sugar
- 1 1/4 teaspoons baking powder
- 1/4 teaspoon baking soda
- 1/4 teaspoon kosher salt
- 1 cup plain whole milk yogurt
- 2 large eggs
- 2 tablespoons melted unsalted butter
- 1/4 cup whole milk
- Vegetable oil for the pan
Instructions
- Set a large non-stick griddle or skillet over medium heat to preheat thoroughly.
- Whisk the flour, sugar, baking powder, baking soda, and salt together in a large mixing bowl until well combined.
- In a separate bowl, beat the eggs into the yogurt until the mixture is smooth and uniform.
- Create a well in the center of the dry ingredients and pour in the yogurt mixture along with the melted butter.
- Stir the batter gently with a spatula until just moistened, being careful not to overmix the flour.
- Check the consistency of the batter; if it is too stiff to pour, stir in the milk 1 tablespoon at a time until it reaches a thick but pourable state.
- Lightly coat the hot skillet with vegetable oil and wipe away any excess with a paper towel.
- Drop 1/4 cup portions of batter onto the pan, leaving space between each cake for easy flipping.
- Cook for approximately 2 to 3 minutes until the edges appear set and small bubbles begin to pop on the surface.
- Flip the pancakes and cook for an additional 2 minutes until the bottoms are deep golden brown.
- Transfer the finished pancakes to a warm plate and serve immediately with your favorite toppings.
Notes
- Ensure eggs are cooked until the yolks and whites are firm to prevent foodborne illness.
- Prep Time: 10 minutes
- Cook Time: 10 minutes
- Category: Breakfast
- Method: Griddling
- Cuisine: American
Nutrition
- Serving Size: 1 serving
- Calories: 245
- Sugar: Not specified
- Sodium: Not specified
- Fat: 11g
- Saturated Fat: Not specified
- Unsaturated Fat: Not specified
- Trans Fat: Not specified
- Carbohydrates: 30g
- Fiber: Not specified
- Protein: 8g
- Cholesterol: Not specified