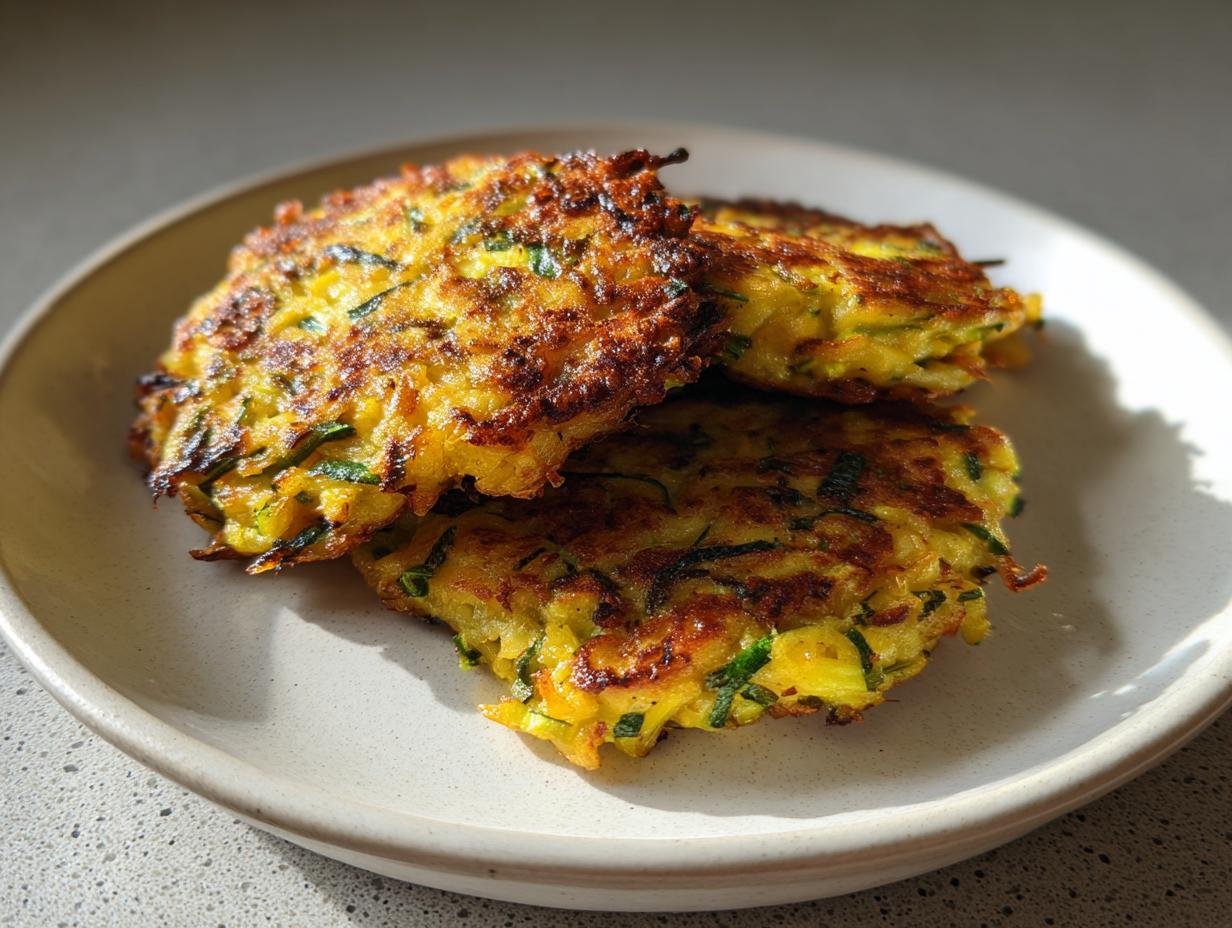
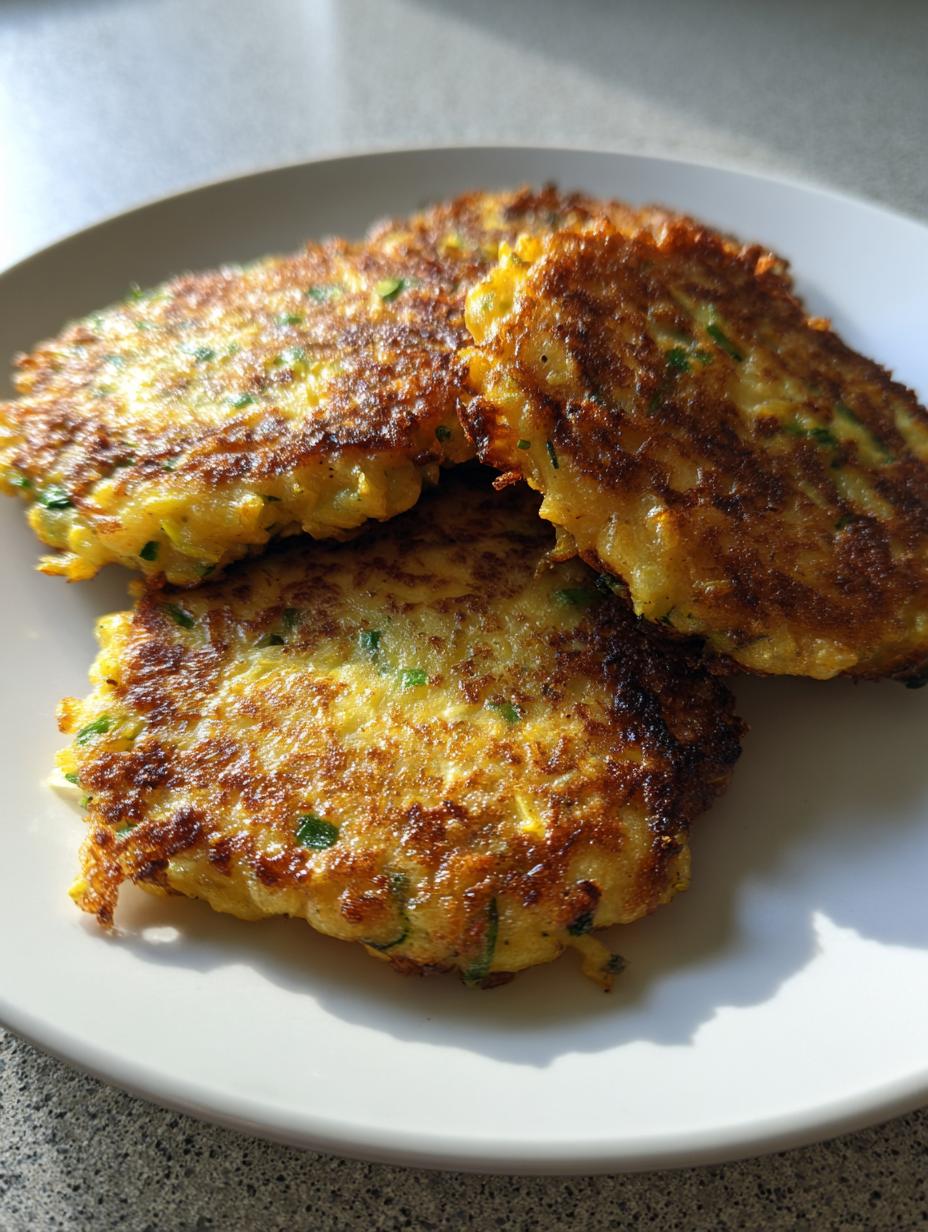
Oh, summer squash! When those beautiful yellow vegetables flood the farmer’s market, you know it’s time to make something truly special. Forget heavy, dull sides; we’re aiming for light, crispy, and bursting with fresh flavor. That’s why I perfected these Yellow Squash Fritters. They come together faster than you can set the table, which is my favorite kind of recipe!
I used to struggle with watery fritters, honestly. I’d mix everything up, fry them, and end up with little squash pancakes that steamed themselves into sogginess. It took me three whole batches one July afternoon to realize the secret wasn’t in the batter—it was in the prep work. You have to be ruthless with that water! Once I started treating the salting and squeezing step like my sworn duty, these fritters turned out golden and shatteringly crisp every single time. Trust me, once you master that squeeze, you’re set for the summer. You can see more tips on my Medium page.
Essential Ingredients for Perfect Yellow Squash Fritters
When you look at the list below, you’ll see we aren’t using a ton of fancy stuff. That’s the beauty of a great summer recipe! Everything is straightforward, designed to let that fresh squash shine. You’ll want to check out the full ingredient list in the table later on, but let’s talk about what really makes these fritters sing.
For me, the ratio of flour to eggs is crucial for getting that beautiful, non-soggy structure. We aren’t looking for a thick pancake batter here; we want just enough binder to hold the squash together. And yes, that Parmesan cheese isn’t just for flavor—it helps crisp up those edges beautifully!
Sourcing and Preparing Your Squash
This is where we earn our crispiness. Yellow squash is mostly water, and if you skip the draining, you’ll end up with a sad, steamed mess. Don’t let that happen!
We sprinkle the grated squash with salt first. Why salt? It draws the water out through osmosis—fancy science, simple result! It pulls all that excess moisture to the surface. After letting it sit for ten minutes, you must squeeze it until your hands hurt. Seriously, squeeze it like you mean it. You want the squash to look almost dry before it even sees the egg.

Equipment Needed for Making Yellow Squash Fritters
You don’t need a huge arsenal of gadgets to get these done, which is part of why I love making Yellow Squash Fritters on a busy weeknight. Grab your box grater first—no fancy food processor attachments needed here. We want that classic, slightly rustic shred.
You’ll also need a colander for the salting step. After that, a good sturdy mixing bowl is key. When it comes time to fry, a large nonstick skillet is your best friend. And definitely have a plate lined with paper towels ready to catch the excess oil. That’s it! Simple tools for a perfect, crispy snack.
Step-by-Step Instructions for Yellow Squash Fritters
Alright, now that we’ve prepped the squash and gathered our ingredients, it’s time for the fun part! This process moves fast, so make sure you have your pan heating up while you finish mixing. Remember, these are best enjoyed right out of the skillet, so speed is your friend here.
Moisture Removal: The Secret to Crispy Yellow Squash Fritters
If you skipped this part in the ingredients section, go back! This is Step One, and it’s non-negotiable if you want true crispiness. First, grate your two medium yellow squash. Toss them right into a colander and sprinkle that teaspoon of salt all over them. Now, walk away for ten minutes—don’t peek! The salt is working its magic, pulling all that liquid out.
When those ten minutes are up, grab a clean, thick kitchen towel—or just use a big stack of paper towels if that’s all you have. Scoop all that salty squash into the middle of the cloth. Now, this is the crucial part: Squeeze. You need to squeeze until your arms get tired! Seriously, twist that towel over the sink and wring out every single drop of water you can manage. The squash should feel significantly drier and look slightly matted down. If you think you’ve squeezed enough, squeeze twice more. This thoroughness is what guarantees your Yellow Squash Fritters won’t turn into mush.
Mixing the Yellow Squash Fritters Batter
Once the squash is dry, move everything to a large bowl. Crack in your two eggs first, just to start binding things. Then add the flour, the Parmesan cheese, your chopped green onions, the minced garlic, the pepper, and that tiny bit of smoked paprika for color and depth. Don’t go crazy mixing! You want to stir everything just until you see no more dry streaks of flour. That’s it. If you overmix, you’ll activate the gluten in the flour, and your fritters will be tough instead of tender. We want tender, remember? A creamy dip like this Greek Yogurt Aioli pairs perfectly.
Pan-Frying Your Yellow Squash Fritters to Golden Perfection
Time to cook! Get your large nonstick skillet heating over medium heat. Add about two tablespoons of olive oil. You want the oil shimmering slightly, but you don’t want it smoking hot—medium heat is perfect for cooking the inside without burning the outside before the squash is done.
Use a regular tablespoon to scoop out about two tablespoons of batter for each fritter. Drop them carefully into the hot oil. Use the back of your spoon to gently flatten them a bit; they shouldn’t be perfect little balls, but rather flat discs. Don’t crowd the pan! Give them space to breathe and crisp up.
Here’s the timing: Let them cook undisturbed for about three to four minutes per side. You are looking for that lovely, deep golden-brown color. When they look perfectly crisp on the bottom, carefully flip them over. Cook the second side for another three to four minutes until they match the first side. Once they are done, use a spatula to move them immediately over to a plate lined with paper towels. This catches any extra oil. If your pan starts looking dry before you finish the next batch of Yellow Squash Fritters, just add another drizzle of oil. Repeat until all the batter is gone. Don’t forget that optional dollop of Greek yogurt or sour cream on top when serving!
Tips for Success with Your Yellow Squash Fritters
I’ve learned a few tricks over the years to make sure these fritters come out perfectly every time, especially if you’re making a big batch for a crowd. If you follow these tips, you can avoid the dreaded soggy bottom that plagues so many vegetable fritter recipes!
First, and I can’t stress this enough, squeeze the squash harder. I mean it. If you think you got all the water out, try again. The drier the squash, the crispier the final product. This is the number one factor separating good fritters from great ones.
Second, watch your oil temperature like a hawk. If the oil is too cool, the fritters will soak up the grease like a sponge, and they won’t brown properly. If it’s too hot, the outside burns before the egg and flour mixture in the center even sets. Medium heat is your happy medium for these Yellow Squash Fritters.
Third, don’t try to make them too big. If you use more than two tablespoons of batter per fritter, they become too heavy and thick to cook through quickly, which again leads to sogginess. Keep them smaller, about two inches wide, so they cook fast and crisp up nicely on both sides.
Finally, serve them immediately! While these freeze okay, they are truly sublime when they hit the plate straight from the hot pan. Don’t let them sit around steaming on a platter. Follow me on Pinterest for more quick recipes.
Ingredient Notes and Simple Substitutions
We keep the ingredient list simple, but a couple of items deserve a quick chat. That Parmesan cheese we use? It needs to be the real, grated stuff, not the shelf-stable powder in the green canister. The real cheese melts better and provides that salty, nutty flavor that works so well with the squash. If you don’t have Parmesan, a sharp Pecorino Romano works beautifully as a direct swap, keeping us firmly in the vegetarian camp.
Now for the flour. While the recipe calls for regular all-purpose flour, I know some folks are trying gluten-free options. You can absolutely use a 1-to-1 gluten-free blend here without much fuss. Just make sure it contains xanthan gum or add about half a teaspoon yourself. If you skip the binder, you’ll end up with loose squash bits rather than cohesive Yellow Squash Fritters!
Serving Suggestions for Yellow Squash Fritters
These savory little bites are so versatile! Since they are light and herbaceous, they pair wonderfully with almost anything you’d serve at a summer barbecue or a light lunch. The classic pairing, which I always default to, is a creamy, cool dip. That little bit of tang cuts through the richness of the pan-frying beautifully.
My absolute favorite topping for these Yellow Squash Fritters is plain Greek yogurt mixed with a squeeze of fresh lemon juice and a tiny pinch of salt and pepper. If you want something a little bolder, try mixing in some finely chopped dill or chives into the yogurt. It makes them taste so fresh! If you are looking for other great sides, check out my recipe for Simple Healthy Orzo.
If you’re serving them as a side dish instead of a snack, they are fantastic alongside grilled chicken or flaky white fish. They offer a lovely, non-starchy alternative to potatoes. Honestly, once you pull them out of the pan, they disappear so fast you might need to double the recipe!
Storing and Reheating Your Yellow Squash Fritters
While these fritters are truly at their peak texture when devoured immediately, life happens, and sometimes you need leftovers! Good news: these hold up better than most fried things, but you have to store them correctly to keep that crispness alive for later.
If you have any extras, let them cool completely on the counter first. Putting warm, oily fritters into a sealed container is a recipe for steam and sogginess. Once cool, you can refrigerate them for up to three days. For longer storage, freezing is a great option for up to a month.
When it comes time to reheat your Yellow Squash Fritters, avoid the microwave entirely—it turns them soft! The best way to bring back that golden crunch is using the oven or, even better, an air fryer. A quick five minutes at about 375 degrees Fahrenheit will crisp them right back up.
Here’s a quick guide for reference:
| Storage Method | Maximum Time | Best Reheating Method |
|---|---|---|
| Refrigeration | 3 Days | Air Fryer or Oven |
| Freezing | 1 Month | Air Fryer (from frozen) |
Frequently Asked Questions About Yellow Squash Fritters
I get so many questions whenever I post this recipe on social media! That’s great, because it means you’re excited to get cooking. Most of the concerns I hear boil down to texture, which, as we discussed, is all about moisture management. Here are the top three things people ask me about making this Summer Squash Recipe.
Can I bake these Yellow Squash Fritters instead of frying?
You certainly can try! If you want to skip the oil, you can bake them. Preheat your oven to 400 degrees Fahrenheit and use a baking sheet lined with parchment paper. You might want to lightly spray the tops of the fritters with cooking spray before baking. Just know, the texture will change quite a bit. They won’t have that shatteringly crisp crust that comes from pan-frying. They will be softer, more like a baked vegetable patty, but still tasty!
Why are my Yellow Squash Fritters soggy?
If your Yellow Squash Fritters end up soggy, I promise you skipped Step One! That step—the salting and squeezing—is the absolute make-or-break moment. If you don’t get nearly all the water out of that grated squash, the water will turn to steam in the hot oil, and that steam will ruin your crispiness. Go back and squeeze that towel until your knuckles hurt. That’s the only way to ensure they cook up beautifully golden.
What is the best way to serve this Easy Vegetable Side?
This Easy Vegetable Side screams for something cool and tangy! While the Greek yogurt dip is my go-to, you can get creative. A simple sour cream mixed with a little dried ranch seasoning is fantastic. If you want to keep it very light, just a squeeze of fresh lemon juice right over the hot fritters works wonders. Fresh herbs like dill or parsley sprinkled on top right before serving also add a beautiful pop of color and freshness that balances the savory flavor perfectly!
Share Your Experience Making Yellow Squash Fritters
I am so excited for you to try these! Seriously, once you nail the squeezing technique, you’ll be making these all summer long. Please come back and let me know how they turned out for you! Did you try my yogurt dip suggestion? Don’t be shy—leave a rating and tell me what you thought in the comments below. Happy cooking!
Print
Amazing 3 Yellow Squash Fritters Crispy Secrets
- Total Time: 20 minutes
- Yield: 10 fritters 1x
- Diet: Vegetarian
Description
These yellow squash fritters are light, crispy, and burst with fresh summer flavor. Grated yellow squash mixes with herbs and Parmesan for a golden, pan-fried snack or side dish.
Ingredients
- 2 medium yellow squash (about 1 pound total)
- 1 teaspoon salt (for draining moisture)
- 2 large eggs
- ⅓ cup all-purpose flour
- ¼ cup grated Parmesan cheese
- 2 green onions, finely chopped
- 1 clove garlic, minced
- ¼ teaspoon black pepper
- ¼ teaspoon smoked paprika
- 2 tablespoons olive oil (for frying)
- Greek yogurt or sour cream, for serving (Optional Topping)
Instructions
- Grate the yellow squash. Place it in a colander, sprinkle with 1 teaspoon of salt, and let it sit for 10 minutes. Squeeze out as much liquid as possible using a clean kitchen towel or paper towels.
- In a large bowl, combine the grated squash, eggs, flour, Parmesan, green onions, garlic, pepper, and paprika. Stir until evenly mixed.
- Heat olive oil in a large nonstick skillet over medium heat.
- Scoop about 2 tablespoons of batter for each fritter into the pan. Flatten slightly with the back of a spoon.
- Cook for 3–4 minutes per side until golden brown and crisp.
- Move cooked fritters to a paper towel-lined plate to drain extra oil.
- Repeat with the remaining batter, adding more oil to the pan if necessary.
- Serve warm with Greek yogurt or sour cream if you want a topping.
Notes
- Best enjoyed fresh.
- Fritters can be refrigerated for up to 3 days.
- Fritters can be frozen for up to 1 month.
- Reheat in the oven or air fryer until crisp.
- Prep Time: 10 minutes
- Cook Time: 10 minutes
- Category: Side Dish/Snack
- Method: Pan-Fried
- Cuisine: American
Nutrition
- Serving Size: 1 fritter (estimated)
- Calories: 110
- Sugar: N/A
- Sodium: N/A
- Fat: 7g
- Saturated Fat: N/A
- Unsaturated Fat: N/A
- Trans Fat: N/A
- Carbohydrates: 8g
- Fiber: N/A
- Protein: 5g
- Cholesterol: N/A