I’m so excited you’re here to learn my secrets for the absolute BEST **vegan chocolate pudding** you will ever taste. Forget everything you think you know about dairy-free desserts; this isn’t some grainy, disappointing substitute. This recipe delivers a rich, intensely chocolaty flavor and a texture so incredibly silky, you’ll swear there’s heavy cream hiding in there! I developed this stovetop method after years of trying to find a quick, reliable recipe that didn’t rely on weird gums or hours of chilling.
Seriously, this is my go-to when I need something decadent in under 30 minutes. My partner always asks if I bought it from a fancy bakery when I pull these out of the fridge. The magic really lies in the combination of Dutch cocoa and full-fat coconut milk—it creates that luxurious mouthfeel that makes this **easy pudding** feel like a real treat. Trust me, once you master this simple stovetop technique, you won’t look back. It’s wholesome comfort food, pure and simple!
Essential Ingredients for Your Vegan Chocolate Pudding
Okay, so the beauty of this recipe is how simple the pantry staples are, but the quality of those staples absolutely makes or breaks the final result. I’m not kidding! We aren’t using obscure powders here; we’re relying on basic items to create something truly special. If you want that deep, dark chocolate flavor that screams decadence, you have to pay attention to the cocoa powder we choose.
We need that rich, almost black color and smooth finish, so make sure you snag some Dutch-processed cocoa powder. Regular cocoa just doesn’t give you the same punch. Also, the fats in this recipe are crucial for that amazing silky mouthfeel. I know some recipes try to cut corners, but we aren’t!
I’ve laid out the exact measurements below, but before we jump into the full list, let’s chat about the few things that require a little extra attention during prep. You’ll see a separate table later listing everything, but these few points are non-negotiable for success.
Ingredient Clarity and Preparation Notes
The first thing you absolutely must do is sift that cocoa powder. I learned the hard way that even the best cocoa clumps up like tiny rocks when you start whisking, and trying to fish those out while the milk is warming up is a nightmare. So, grab a fine-mesh sieve!
Next, for the coconut milk, please grab the *full-fat* canned variety, not the carton you put in your coffee. We need that high fat content from the can to give the pudding body and that luxurious texture. If you use the light stuff, it’ll be thin, and we are aiming for thick and creamy here!
Finally, the maple syrup is our sweetener. It adds a lovely background note that white sugar just can’t touch. Measure it accurately! Too much, and you might end up with pudding that never quite sets up right because the liquid balance will be off. I’m telling you, these little details are what separate good pudding from *amazing* pudding!
Gathering Necessary Equipment for Vegan Chocolate Pudding
You don’t need any fancy gadgets for this rich chocolate pudding, which is part of why I love it so much! Since this is a stovetop recipe, we rely on good old-fashioned elbow grease and the right basic tools to get that perfect texture. Make sure you have these things ready before you even turn on the burner, because once we start mixing, things move pretty fast!
Having everything nearby means you can focus entirely on whisking—which is vital for avoiding lumps. Don’t skip setting up your space first!
Equipment Checklist
- A medium saucepan (nothing too wide, we want some depth for whisking)
- A sturdy whisk (the balloon type works best for incorporating air)
- One small bowl for mixing the liquids separately
- A sifter or fine-mesh sieve for the cocoa powder
- Your preferred serving bowls or small jars (we need four!)
Step-by-Step Instructions for Perfect Vegan Chocolate Pudding
Alright, let’s get cooking! This is where the magic happens, and honestly, it’s incredibly fast. The most important thing to remember throughout this process is to keep that whisk moving! We are aiming for a luxurious, baby-smooth finish for our **vegan chocolate pudding**, and that only happens with constant attention.
Combining Dry and Wet Mixtures
First things first: those dry ingredients we talked about. Get your cocoa powder, cornstarch, and salt right into that medium saucepan. Whisk them together really well until you can’t see any white streaks of cornstarch peeking through. This preemptive mixing is important!
Now, switch to a separate bowl for the wet ingredients. Combine your maple syrup, almond milk, and that thick coconut milk. Whisk them until they look uniform. When you’re ready to merge them, you have to be careful. Slowly pour that liquid mixture into the dry ingredients in the saucepan. Don’t just dump it all in! Pour slowly while you whisk the mixture continuously. If you rush this part, you’ll end up with those stubborn little cocoa clumps, and trust me, they are impossible to get rid of once they start cooking.
Cooking the Vegan Chocolate Pudding on the Stovetop
Once everything is smooth and lump-free, set the saucepan over medium heat. Now, you cannot walk away! You need to whisk constantly. The mixture will start off looking thin, but after about 8 to 10 minutes, you’ll notice it starting to change—it will slowly bubble and thicken up considerably. Keep that whisk scraping the bottom and sides of the pan so nothing scorches.
Once it starts bubbling, reduce the heat right down to low. We aren’t done yet! Continue cooking and whisking for about 2 to 3 more minutes. You are looking for that perfect visual cue: when you lift your whisk, the pudding should coat the back of the spoon thickly. If you run your finger across the back of the spoon, the line should hold cleanly without the pudding immediately running back together. That’s how you know your **easy pudding** is ready!
Immediately pull the pan off the heat. This is the time to whisk in your vanilla extract. That smells amazing! Don’t let it sit on the hot burner, or it might cook too much and get gluey.
Cooling and Setting Your Rich Chocolate Pudding
Now, divide that gorgeous, steaming pudding evenly into your four serving bowls or jars. It’s going to look a little looser than you expect, but don’t panic! It sets up beautifully as it cools down. Let them sit on the counter for about 20 minutes to lose that initial scorching heat.
Here is the absolute secret to preventing that gross, rubbery skin from forming on top: take a piece of plastic wrap and gently press it directly onto the surface of the pudding in each bowl. Make sure the plastic is touching the pudding everywhere. This stops air from hitting the surface.
Once they’ve cooled a bit on the counter, pop them into the refrigerator. They need at least 2 hours, but honestly, 3 or 4 hours is better for that firm, decadent set. When you pull them out, just peel off the plastic wrap, top with your coconut whip, and enjoy the best **dairy-free dessert** you’ve ever made!
Tips for Success Making This Vegan Chocolate Pudding
Even though this recipe is super straightforward, there are a couple of little tricks that elevate it from good to “Wait, this is vegan?!” Knowing how to handle the heat and the whisk is the key to getting that incredible, luxurious texture we are after in this **vegan chocolate pudding**.
Don’t rush the stovetop time, but equally, don’t overcook it once it starts thickening. It’s a delicate balance, but once you do it once, you’ll remember exactly what it feels like!
Achieving Maximum Smoothness
The number one pitfall is lumps, and they come from two places: not sifting the cocoa or stopping the whisking when it gets hot. When you start cooking, use medium heat but keep the whisk moving constantly—I mean *constantly*! Use a figure-eight motion to really scrape the bottom corners of the pan where the cornstarch likes to settle and burn. If you see it start to simmer, immediately drop the heat to low. That rapid change in temperature is what sets the starch too fast, and you get gluey patches instead of silkiness.
Adjusting Sweetness in Your Vegan Chocolate Pudding
Since maple syrup can vary in intensity, I always recommend a quick taste test right before you pour the mixture into the bowls. Remember, the sweetness will mellow slightly as the **vegan chocolate pudding** chills, but you want it to taste exactly how you like it now. If it seems a little flat, stir in an extra teaspoon of maple syrup while it’s still hot on the stove. Once it’s chilled, it’s too late to adjust, so trust your palate before that final cooling step!
Storing and Reheating Your Vegan Chocolate Pudding
This rich chocolate pudding is honestly even better the next day, which is great because we always make a double batch! Because we used full-fat coconut milk, it sets up beautifully firm in the fridge. The key here is keeping that plastic wrap pressed right onto the surface, even when storing it. That prevents any weird fridge smells from getting in and, more importantly, stops that dry skin from ruining the lovely silky top layer.
It keeps really well for up to four days in the refrigerator. Honestly, I’ve never tried to reheat this particular recipe because it’s designed to be served cold—it’s just so refreshing that way! If you absolutely had to warm it up, I’d suggest doing it very gently on the stovetop over the lowest heat possible, whisking constantly until just warm, but I highly recommend just eating it chilled!
Storage Table
I’ll put a detailed chart in the next section that breaks down exactly how long everything lasts, but generally, keep it covered tightly in the fridge for up to four days. Remember, no microwave reheating for this beauty!
Frequently Asked Questions About Dairy-Free Dessert
I get so many messages asking about tweaks and substitutions for this **dairy-free dessert**! It’s wonderful that so many people are trying to make healthier swaps, but sometimes those swaps can change the texture of something delicate like pudding. Here are the most common questions I get asked about making this **easy pudding** perfect every time.
Don’t be afraid to experiment once you nail the base recipe, but for your first few tries, stick exactly to the full-fat coconut milk. It’s the secret weapon that mimics heavy cream so well! You can find more tips on our Medium profile.
Can I substitute the almond milk in this Vegan Chocolate Pudding?
You certainly can! If you need to avoid nuts, soy milk or oat milk work beautifully as substitutes for the almond milk. Oat milk tends to be a bit thicker, which might make the final set slightly firmer, but it’s a great swap. If you use water instead—maybe you’re allergic to everything?—the pudding will still set thanks to the cornstarch and coconut fat, but it will taste much less rich and creamy. You lose a lot of the depth when you remove that extra plant milk.
How thick should the easy pudding be before removing it from the heat?
This is the most crucial visual cue! When the pudding is ready, it should be thick enough that it coats the back of your spoon completely. When you drag your finger across the spoon, a clean line should stay put for a second or two before the pudding flows back together. If it runs immediately, it needs another minute or two on low heat. If it’s already gloopy and pulling away from the spoon entirely, pull it off fast, because it will seize up when it cools!
Serving Suggestions for Your Vegan Chocolate Pudding
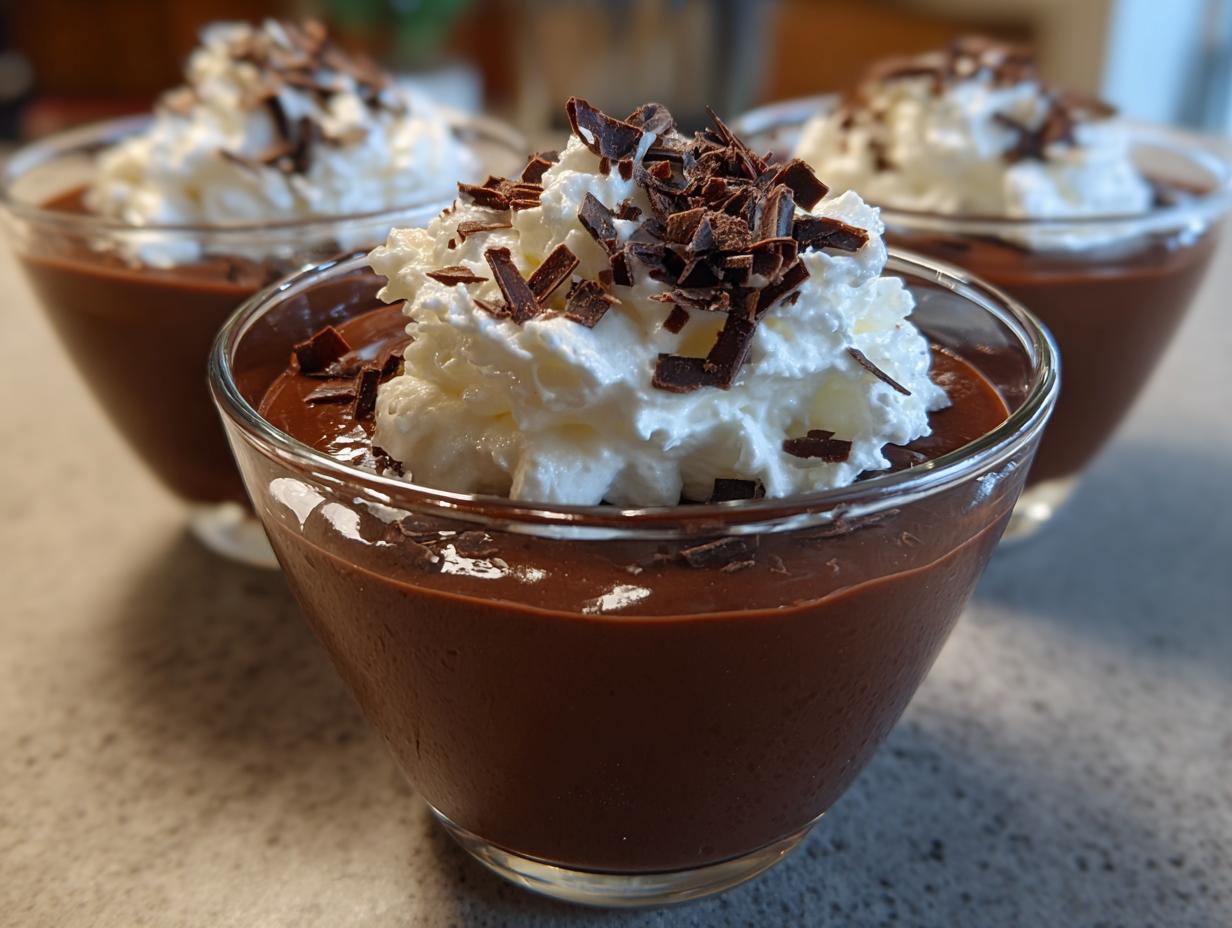
Once your **vegan chocolate pudding** is perfectly chilled and set, it’s time for the fun part—the toppings! While the coconut whipped cream and shaved chocolate are fantastic, don’t stop there. Think about texture contrast! A sprinkle of flaky sea salt right before serving really makes the chocolate flavor pop, so don’t skip that if you have some handy. For more sweet inspiration, check out our dessert recipes.
For something extra special, try layering it in a clear glass with crushed shortbread cookies or crumbled vegan graham crackers for a crunchy base. A spoonful of tart raspberry jam swirled in also cuts through the richness beautifully. This **dairy-free dessert** is the perfect canvas for all your favorite sweet extras! If you are looking for other sweet treats, you might enjoy our banana oatmeal bars.
Print
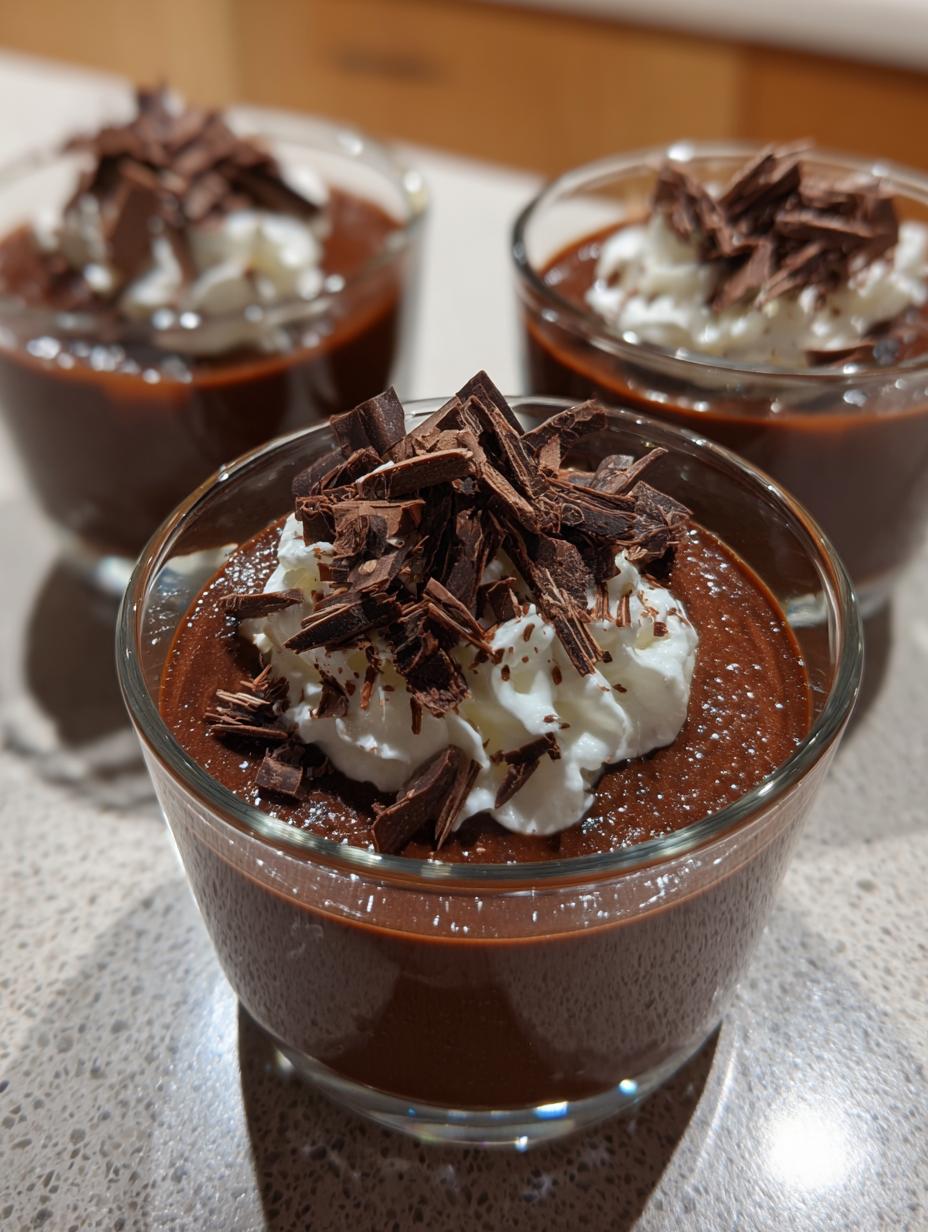
Best Vegan chocolate pudding: 4 silky servings
- Total Time: 20 minutes
- Yield: 4 servings 1x
- Diet: Vegan
Description
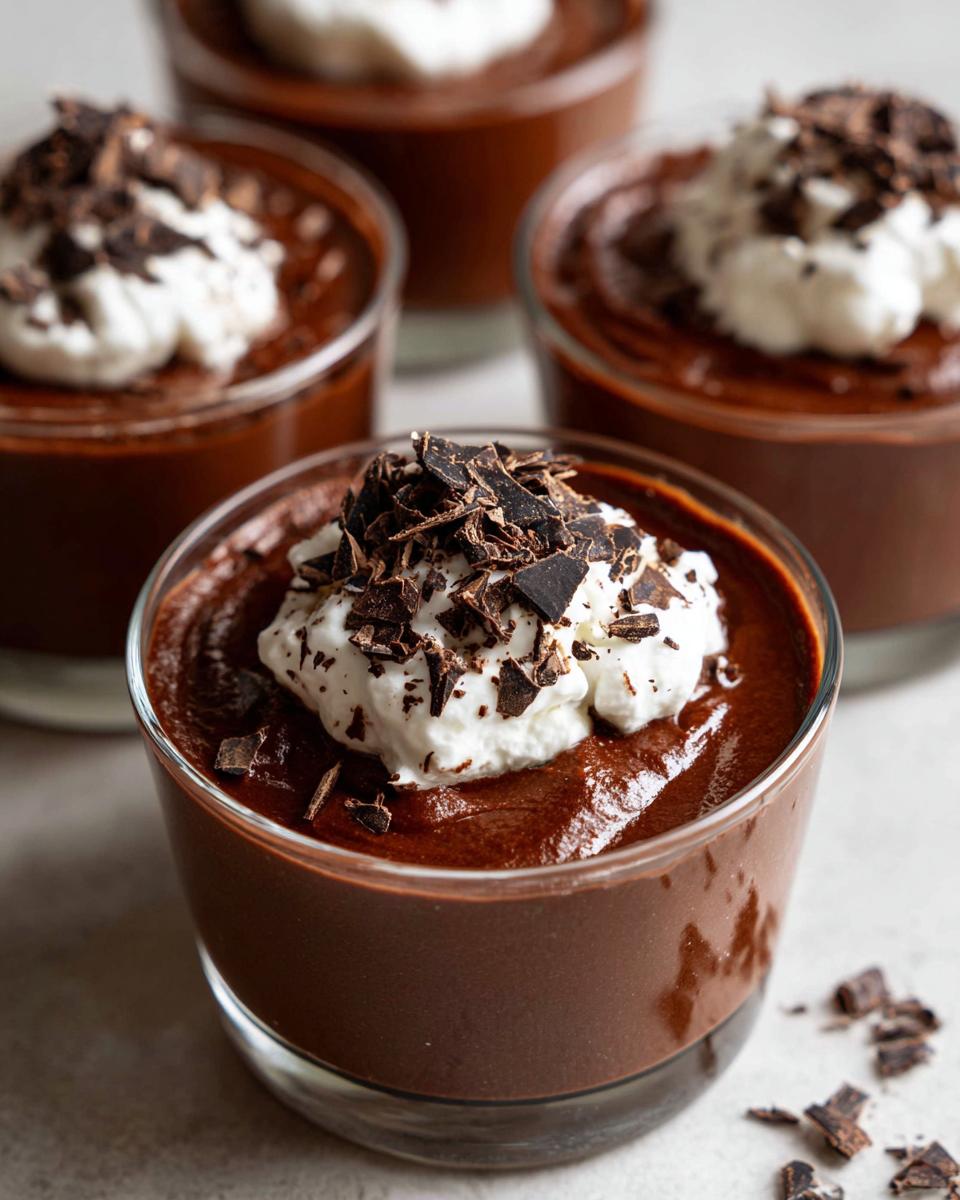
This vegan chocolate pudding is silky, rich, and deeply chocolaty. It is a quick and wholesome stovetop dessert made with simple pantry ingredients.
Ingredients
- 1/2 cup unsweetened Dutch-processed cocoa powder, sifted
- 3 tablespoons cornstarch
- 1/4 teaspoon fine sea salt
- 1/2 cup pure maple syrup
- 1 1/2 cups unsweetened almond milk
- 1 cup full-fat coconut milk
- 2 teaspoons pure vanilla extract
- Coconut whipped cream, for topping
- Shaved dark chocolate or cacao nibs, for garnish
Instructions
- In a medium saucepan, whisk together cocoa powder, cornstarch, and salt until evenly combined.
- In a separate bowl, whisk together maple syrup, almond milk, and coconut milk until smooth.
- Slowly pour the liquid mixture into the dry ingredients while whisking to prevent lumps.
- Place the pan over medium heat and cook, whisking constantly, until the mixture begins to bubble and thicken, about 8 to 10 minutes.
- Reduce heat to low and continue to cook for 2 to 3 minutes more until the pudding coats the back of a spoon.
- Remove from heat and whisk in vanilla extract.
- Pour the pudding into 4 serving bowls or jars. Let cool for 20 minutes at room temperature.
- Cover with plastic wrap directly on the surface to prevent a skin from forming and refrigerate for at least 2 hours or until chilled.
- Before serving, top each portion with coconut whipped cream and a sprinkle of shaved chocolate or cacao nibs.
Notes
- Sifting the cocoa powder helps prevent lumps.
- Constant whisking is necessary while cooking to achieve a smooth texture.
- Prep Time: 5 minutes
- Cook Time: 15 minutes
- Category: Dessert
- Method: Stovetop
- Cuisine: American
Nutrition
- Serving Size: 1 serving
- Calories: 280
- Sugar: Unknown
- Sodium: Unknown
- Fat: 15g
- Saturated Fat: Unknown
- Unsaturated Fat: Unknown
- Trans Fat: Unknown
- Carbohydrates: 33g
- Fiber: Unknown
- Protein: 3g
- Cholesterol: 0mg