Hey y’all! Jordan Bell here, coming to you from Asheville, North Carolina! If you’ve been following my journey, you know I’ve shed about 80 pounds by focusing on making Southern comfort food clean and delicious. That’s exactly what my blog, Easy Detox Recipes, is all about – proving that healthy eating doesn’t mean sacrificing flavor or tradition. And today, we’re diving into what I truly believe is The BEST and Simplest Homemade Bread recipe out there. Forget those complicated methods; we’re going back to basics with a recipe so straightforward, anyone can nail it. My philosophy is that nourishing your body shouldn’t feel like a chore, and this bread is proof! It’s the perfect staple to have on hand, making healthy eating feel comforting and totally achievable, just like Grandma used to make, but with a modern, health-conscious twist.
Why You’ll Love This The BEST and Simplest Homemade Bread Recipe
Seriously, this bread is a game-changer for your kitchen! Here’s why it’s become my go-to:
- Super Easy: You don’t need to be a master baker. If you can mix ingredients and let dough rise, you can make this bread. It’s honestly foolproof!
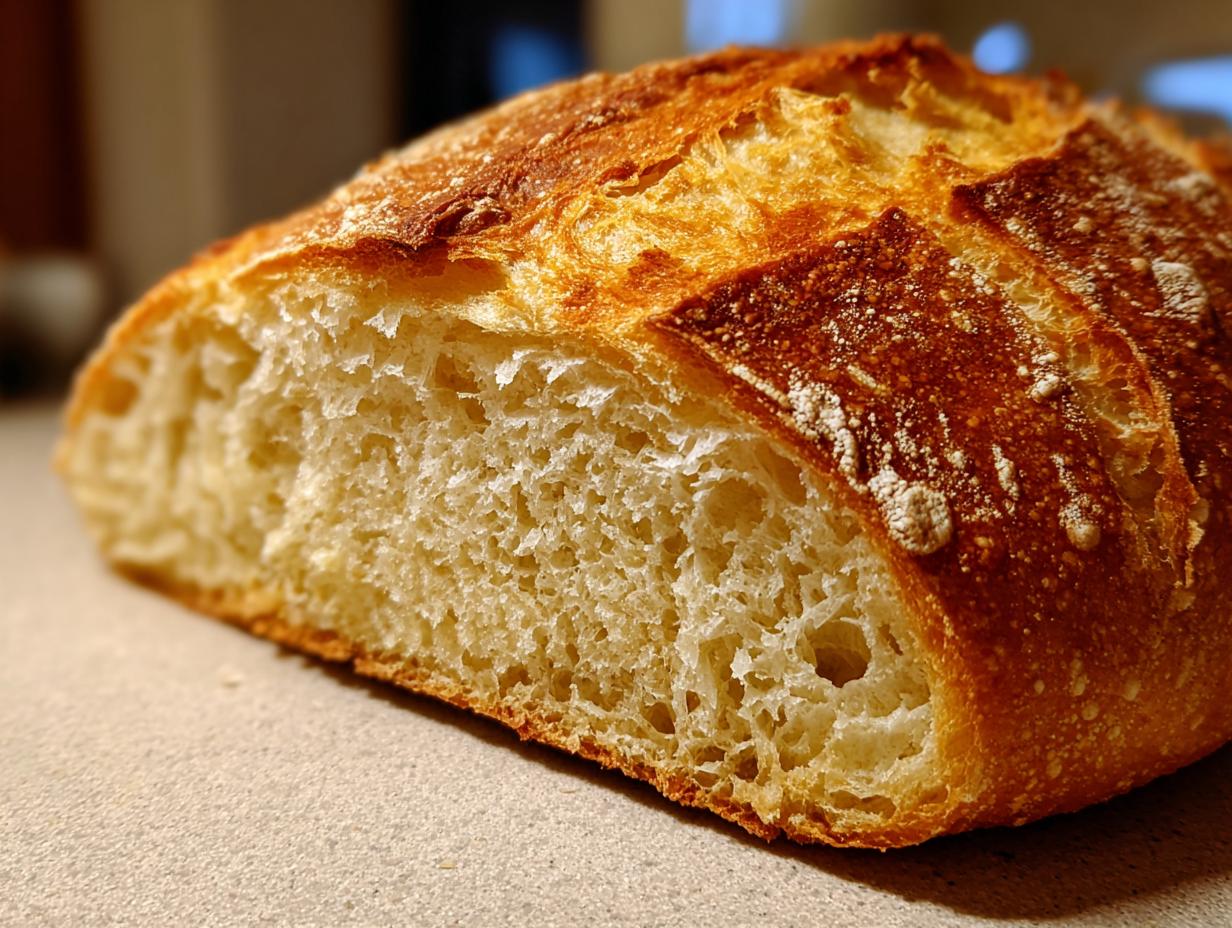
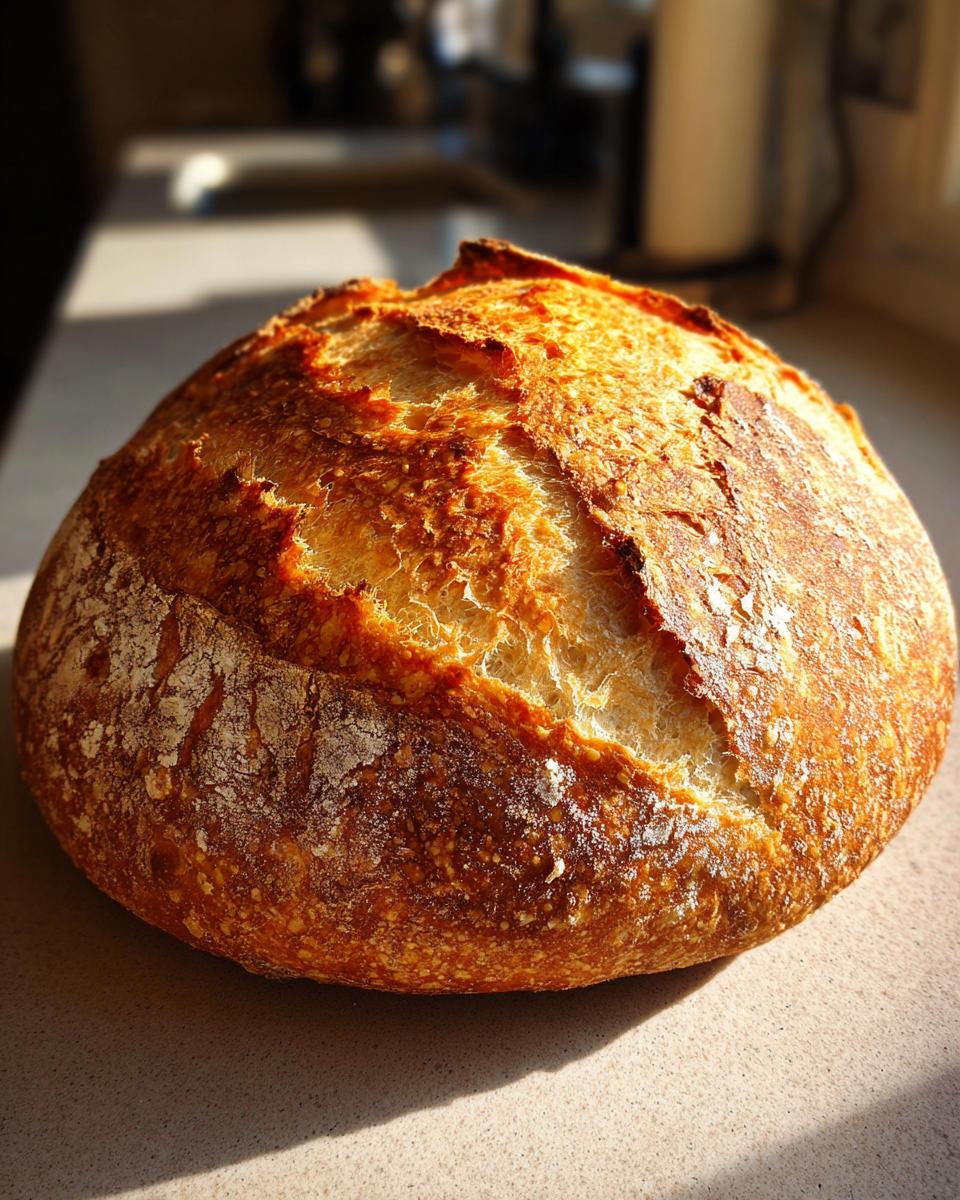
- Incredible Flavor & Texture: It comes out with that perfect soft, slightly chewy crumb and a gorgeous golden crust. It tastes so much better than anything store-bought.
- So Versatile: This loaf is your culinary best friend. Think perfect toast, amazing sandwiches, or just slathered with a little butter. It’s a blank canvas for all your favorite toppings!
- Healthy & Wholesome: Made with simple, wholesome ingredients, you know exactly what’s going into it. It’s a fantastic way to enjoy comforting bread without all the preservatives and extras.
- Smells Amazing: Nothing beats the aroma of fresh bread baking in your home. This recipe fills your kitchen with that comforting, nostalgic scent.
Ingredients for The BEST and Simplest Homemade Bread Recipe
Alright, let’s talk about what you’ll need for this magic bread! It’s really just a handful of pantry staples that come together to make something truly special. You won’t believe how simple it is to get such amazing results.
- 2 cups warm water (Make sure it’s between 105-115 degrees Fahrenheit – too hot kills the yeast, too cool won’t wake it up!)
- 1 Tablespoon active dry yeast
- 1/4 cup honey or granulated sugar (Honey adds a lovely subtle sweetness and helps with browning!)
- 2 teaspoons salt (Don’t skip this, it’s crucial for flavor and structure!)
- 2 Tablespoons neutral oil (like canola or vegetable oil. This keeps the bread nice and tender.)
- 4 to 5 1/2 cups all-purpose flour or bread flour (plus more for dusting your hands and the counter when you’re ready to knead!)
That’s it! See? Nothing fancy, just good old-fashioned ingredients that create pure comfort in a loaf.
Ingredient Notes and Substitutions
Let’s chat a little about these ingredients. For the flour, both all-purpose and bread flour work beautifully here. Bread flour has a higher protein content, which gives you a chewier loaf with a bit more structure – perfect for hearty sandwiches. All-purpose flour will still give you a wonderful, soft loaf, just a touch less chewy. If you’re using instant or rapid-rise yeast instead of active dry, you can skip the initial proofing step (step 1 in the instructions) and just add it right in with the rest of the wet ingredients and 3 cups of flour in step 2. It’s a little time-saver if you’re in a pinch!
How to Prepare The BEST and Simplest Homemade Bread Recipe
Alright, let’s get our hands in this dough and make some magic happen! This is the fun part where you really get to feel the bread come to life. Don’t worry if it seems a little messy at first; that’s part of the charm of homemade bread!
-
Wake Up the Yeast: Grab your large mixing bowl. Pour in the warm water – remember, cozy, not hot! Sprinkle the active dry yeast over the top, and add just a tiny pinch of your honey or sugar. Give it a gentle stir and then just let it hang out for about 5 to 10 minutes. You’ll know it’s ready when it gets nice and foamy, like a little bubbly science experiment. If it doesn’t foam, your yeast might be old, and you’ll want to start over with fresh yeast.
-
Mix the Wet and Dry: Now, add the rest of your honey or sugar, the salt, and the oil to that foamy yeast mixture. Give it another quick stir. Then, dump in about 3 cups of your flour. Start mixing this all together. It’ll be pretty thick and sticky!
-
Getting the Dough Just Right: Add another cup of flour and keep mixing. Now, this is where you add more flour gradually, about half a cup at a time. Keep mixing until the dough starts to pull away from the sides of the bowl. You’re looking for a dough that’s smooth and elastic. It shouldn’t be super sticky anymore, but still soft. You might not need all 5 1/2 cups of flour, or you might need a tiny bit more – just go by how the dough feels.
-
Kneading Time: Lightly flour your counter or a clean surface. Turn the dough out onto it. Now, knead this dough for about 4-5 minutes if you’re using a stand mixer with a dough hook on medium speed, or about 5-8 minutes if you’re doing it by hand. You want to push, fold, and turn the dough until it feels smooth and elastic. It’s like giving it a little massage!
-
First Rise: Grab another large bowl and give it a light greasing with a little oil. Pop your kneaded dough inside and turn it around so the whole ball is coated in oil. This stops it from sticking. Cover the bowl tightly with plastic wrap or a clean kitchen towel. Find a nice, warm spot in your kitchen – maybe near a sunny window or on top of the fridge – and let it rise until it’s doubled in size. This usually takes about 1.5 hours, but it can vary!
-
Get Pans Ready: While your dough is doing its thing, go ahead and grease up two 9×5 inch bread pans really well. Nobody wants their beautiful bread stuck!
-
Shape Those Loaves: Once the dough has doubled, gently punch it down to release the air. Divide the dough into two equal portions. Now, let’s shape them!
Shaping Your Loaves
Take each portion of dough and gently flatten it into a rough rectangle. Then, starting from one of the longer sides, tightly roll up the dough, like you’re making a jelly roll. Pinch the seam closed really well, and tuck the ends under so you have a nice, smooth log shape. Place each log seam-side down into your prepared bread pans. This helps them bake up nice and even.
-
Second Rise: Cover the pans loosely with plastic wrap or a light towel. Let them rise again in a warm place for about 45-60 minutes. You want them to get nice and puffy, rising about an inch above the rim of the pans. Don’p let them overproof, or they might collapse in the oven!
-
Bake to Perfection: While the loaves are doing their second rise, preheat your oven to 350 degrees Fahrenheit (175 degrees Celsius). You want that oven nice and hot when the dough is ready.
Baking to Golden Perfection
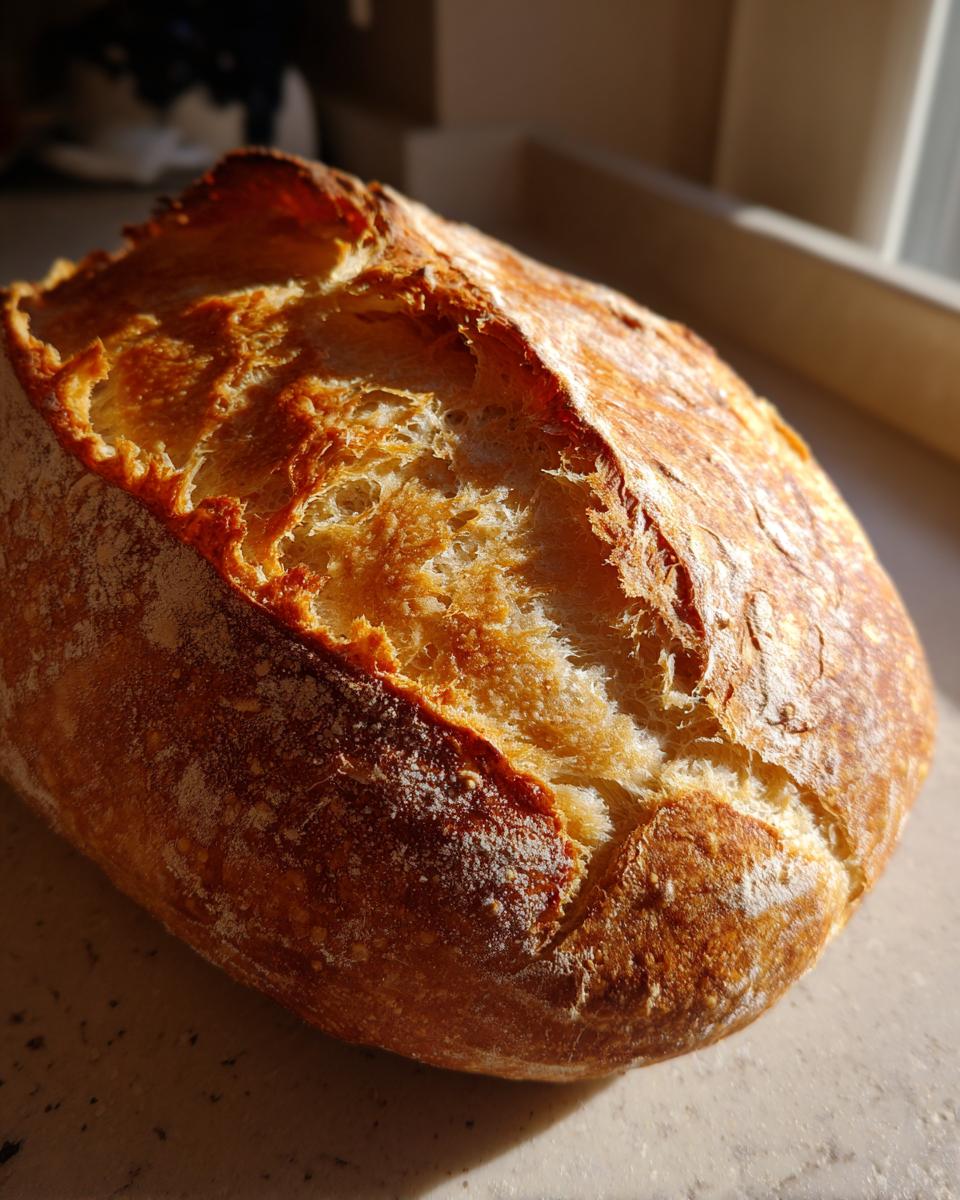
Once the loaves have had their second rise, carefully place the pans into the preheated oven. Bake for about 30 to 33 minutes. You’ll know they’re done when they’re beautifully golden brown on top. A good trick is to gently tap the bottom of the loaf – it should sound hollow. If it sounds doughy, give them a few more minutes.
Cooling and Slicing
As soon as the bread comes out of the oven, carefully remove the loaves from the pans and place them onto a wire cooling rack. This is super important so the bottoms don’t get soggy. While they’re still warm, you can brush the tops with a little melted butter for extra flavor and a lovely sheen. Let them cool for at least 10 minutes before you even think about slicing. Trust me, letting it cool properly makes all the difference in the texture!
Tips for The BEST and Simplest Homemade Bread Recipe Success
Making bread at home is so rewarding, and a few little tricks can make sure you get that perfect loaf every single time. First off, pay close attention to that dough consistency! If it feels way too sticky, don’t be afraid to add a tablespoon more flour at a time. Conversely, if it feels too stiff, a tiny splash more warm water can work wonders. Getting that perfect balance is key. For the rise, a warm, draft-free spot is your best friend. My trick is to pop the covered bowl into a slightly ajar oven that I’ve preheated to 180°F and then immediately turned off – it creates a cozy little bread spa! If your dough isn’t doubling, it could be the temperature of your water or the age of your yeast, so don’t get discouraged if you have to troubleshoot a bit. And remember, patience is a baker’s virtue; letting that dough rise properly makes all the difference in the final texture and flavor!
Frequently Asked Questions about The BEST and Simplest Homemade Bread Recipe
Q1. Can I use whole wheat flour in this bread recipe?
You sure can! You can substitute up to half of the all-purpose or bread flour with whole wheat flour for a heartier loaf. Just keep in mind that whole wheat flour can make the dough a bit denser, so you might need an extra splash of water. For a fully whole wheat loaf, you’ll definitely want to use bread flour and maybe add a bit more liquid.
Q2. How do I store this homemade bread to keep it fresh?
Once your beautiful loaf has cooled completely, the best way to store it is in a bread box or a loosely sealed plastic bag at room temperature. This lets it breathe a bit. It’s usually best enjoyed within 2-3 days. For longer storage, slicing and freezing is your best bet!
Q3. Can I make this bread faster than the recipe states?
Yes, you can speed up that first rise! My favorite trick is to place the covered dough bowl in a slightly ajar oven that’s been preheated to 180°F and then turned off. It creates a perfect warm environment for the dough to double quickly. Just keep an eye on it, as it can rise faster than the usual 1.5 hours.
Q4. My dough feels too sticky, what should I do?
Don’t panic! A little stickiness is normal as you add flour. If it’s really unmanageable and sticking to your fingers excessively after adding about 4.5 cups of flour, just add another tablespoon or two of flour at a time until it pulls away from the sides of the bowl and is just slightly tacky. Too much flour will make your bread dense, so add it slowly!
Nutritional Information
Please keep in mind that the nutritional values below are estimates and can vary slightly based on the specific ingredients you use, like the type of flour or sweetener. This information is provided to give you a general idea of what you’re consuming per slice with this delicious homemade bread.
| Nutrient | Amount per slice |
|---|---|
| Serving Size | 1 slice |
| Calories | 150 |
| Total Fat | 3g |
| Saturated Fat | 0.5g |
| Trans Fat | 0g |
| Cholesterol | 0mg |
| Sodium | 200mg |
| Total Carbohydrates | 26g |
| Dietary Fiber | 1g |
| Total Sugars | 4g |
| Protein | 5g |
Storing and Reheating Your Homemade Bread
Keeping this beautiful homemade bread fresh is super simple, and reheating is a breeze! Once your loaves have completely cooled on the wire rack (seriously, let them cool!), you can store them at room temperature for about 2-3 days. I like to use a bread box or a loosely sealed plastic bag; this lets a little air circulate, which is key to preventing sogginess.
If you know you won’t get through the whole loaf that quickly, freezing is your best friend! You can freeze the whole loaf or pre-slice it before freezing. Just wrap it tightly in plastic wrap and then a layer of aluminum foil, or pop it into a freezer-safe bag. It’ll keep wonderfully for up to 3 months. To reheat, just let it thaw at room temperature, or pop slices directly into the toaster or a low oven (around 300°F) for a few minutes until warm and toasty again!
| Method | Instructions | Best For |
|---|---|---|
| Room Temperature Storage | Store in a bread box or loosely sealed plastic bag. | 2-3 days freshness |
| Freezing (Whole Loaf or Slices) | Wrap tightly in plastic wrap, then foil, or place in a freezer bag. | Up to 3 months |
| Reheating Slices | Toast in a toaster or warm in a 300°F oven for a few minutes. | Crispy crust, warm interior |
| Thawing Frozen Bread | Allow to thaw completely at room temperature. | Restores soft texture |
For more delicious recipes and tips, be sure to check out our Pinterest and Medium pages!
Print
The BEST and Simplest Homemade Bread Recipe Now
- Total Time: 2 hours 30 minutes
- Yield: 2 loaves 1x
- Diet: N/A
Description
Learn to bake the BEST and simplest homemade bread. This easy recipe yields a soft, delicious loaf perfect for any meal.
Ingredients
- 2 cups warm water (105–115 degrees)
- 1 Tablespoon active dry yeast
- 1/4 cup honey or sugar
- 2 teaspoons salt
- 2 Tablespoons oil (canola or vegetable)
- 4 – 5 1/2 cups all-purpose or bread flour
Instructions
- Combine yeast, warm water, and a pinch of sugar or honey in a large bowl. Let sit for 5-10 minutes until foamy.
- Add remaining sugar or honey, salt, oil, and 3 cups of flour. Mix.
- Add another cup of flour and mix. Gradually add more flour, 1/2 cup at a time, until the dough pulls away from the bowl’s sides. The dough should be smooth and elastic.
- Knead the dough for 4-5 minutes on medium speed or 5-8 minutes by hand.
- Grease a large bowl, place dough inside, and turn to coat. Cover and let rise in a warm place until doubled, about 1.5 hours.
- Grease two 9×5” bread pans.
- Punch down the dough, divide into two equal portions, shape into logs, and place in the greased pans.
- Cover the pans and let the dough rise again for 45-60 minutes, or until about 1 inch above the pans.
- Preheat oven to 350 F. Bake for 30-33 minutes, or until golden brown and the bottom sounds hollow when tapped.
- Invert loaves onto a wire rack. Brush tops with butter and cool for at least 10 minutes before slicing.
Notes
- Bread flour or all-purpose flour can be used. Bread flour results in a chewier loaf.
- To substitute Instant or Rapid Rise yeast, skip the proofing step and add yeast with step 2.
- To speed up the first rise, place the covered dough bowl in a slightly ajar oven preheated to 180 degrees F, then turned off.
- Dough can be made up to the first rise, refrigerated for up to a day, then brought to room temperature before proceeding.
- To freeze dough, prepare through step 6, shape loaves, and freeze in freezer-safe pans, tightly covered with foil. Thaw and complete second rise at room temperature before baking.
- To freeze baked bread, cool completely, place in freezer-safe bags, and freeze for up to 3 months. Thaw at room temperature or in the refrigerator.
- For a bread machine, consider halving the recipe.
- Prep Time: 20 minutes
- Cook Time: 30-33 minutes
- Category: Baking
- Method: Baking
- Cuisine: American
Nutrition
- Serving Size: 1 slice
- Calories: 150
- Sugar: 4g
- Sodium: 200mg
- Fat: 3g
- Saturated Fat: 0.5g
- Unsaturated Fat: 2.5g
- Trans Fat: 0g
- Carbohydrates: 26g
- Fiber: 1g
- Protein: 5g
- Cholesterol: 0mg