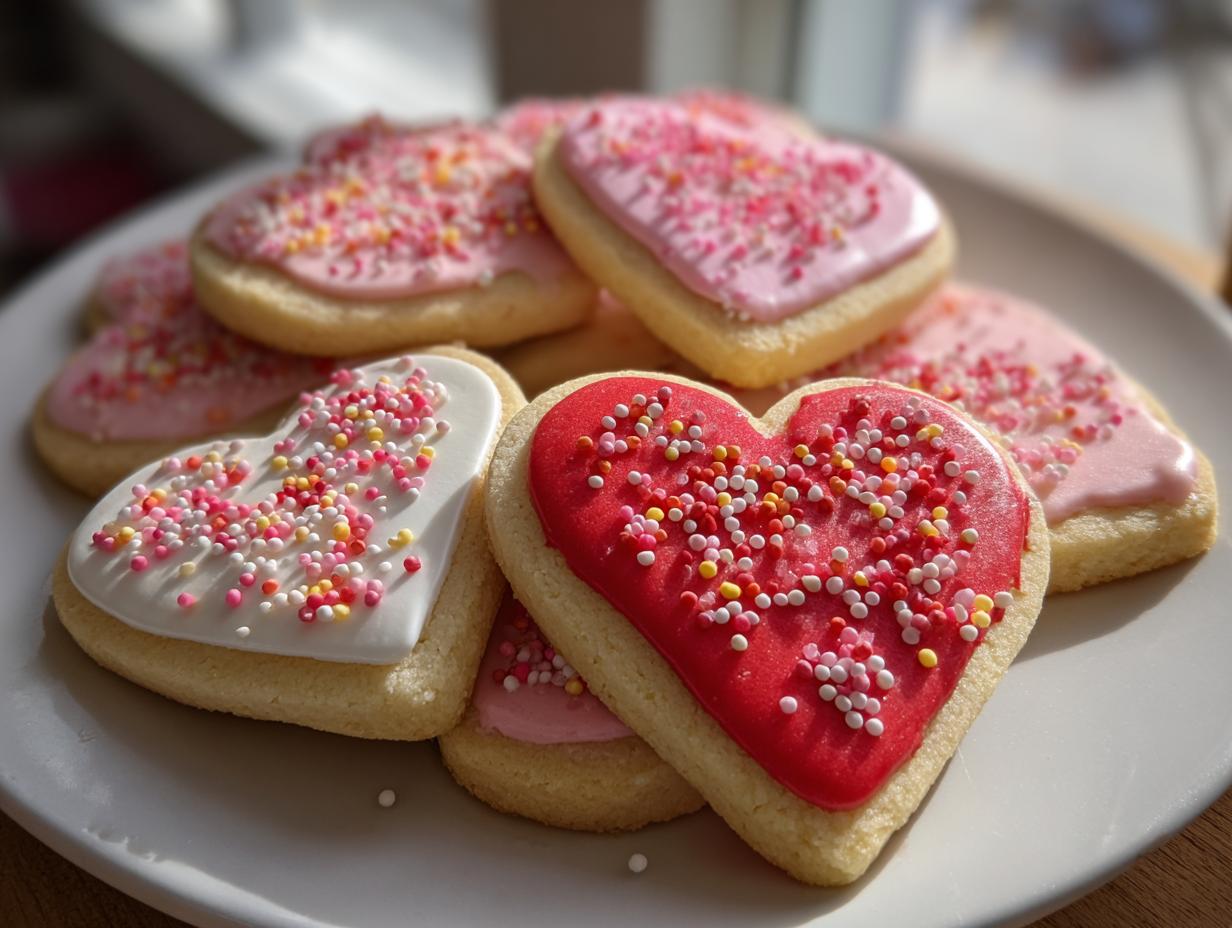
Oh my goodness, let’s talk about these Heart Cookies! If you need something that screams “I spent hours crafting this beautiful dessert” but actually came together super fast, this is your winner. Honestly, baking for holidays always felt stressful until I found this simple sugar cookie base. It’s the perfect canvas.
My absolute favorite part is topping them with the rolled fondant. You get these incredibly professional-looking, smooth tops, and you don’t even have to mess around with complicated piping bags. I remember the first time I made a batch for Valentine’s Day; everyone thought I bought them from a fancy bakery! These soft treats are just magic, and they are fantastic for getting the kids involved in the decorating stage.
Essential Ingredients for Your Heart Cookies
Okay, listen up, because the success of these beautiful Heart Cookies truly hinges on what you pull out of your pantry. We aren’t using any fancy cake mixes here; this is a straightforward, buttery sugar cookie that needs good quality stuff to shine. Don’t skimp on the butter—it makes all the difference in how soft they stay! And the fondant? It needs to be smooth and pliable so we get those clean edges when we cut the shapes.
You’ll need a good mixer for the creaming part, but the ingredients themselves are simple. Here’s the breakdown of exactly what you need to gather before you even turn the oven on. Seriously, having everything measured out makes the process so much less chaotic!
| Component | Amount |
|---|---|
| All-Purpose Flour | 2 1/2 cups |
| Unsalted Butter | 1 cup (softened) |
| Granulated Sugar | 3/4 cup |
| Fondant (Red, Pink, White) | 6 ounces each |
| Powdered Sugar | 1 cup (for glue) |
Dry Components and Fats for Heart Cookies
For the structure, we start with 2 1/2 cups of all-purpose flour. We mix that with just a little lift: 1/2 teaspoon of baking soda and 1/4 teaspoon of baking powder. Don’t forget the salt—just 1/4 teaspoon—it balances out all that sugar! The most important fat here is 1 full cup of unsalted butter, and it absolutely must be softened. I mean, room temperature soft, not melted and oily. If it’s too cold, you won’t get that beautiful fluff when you cream it.
Wet Ingredients and Flavorings for Heart Cookies
For moisture and binding, we use 1 large egg. Make sure it’s not straight from the fridge; let it sit out for ten minutes if you can. That egg gets mixed with 1 teaspoon of pure vanilla extract. I know some people try to substitute with imitation, but trust me, the real vanilla really makes these soft cookies sing against the sweet fondant.
Fondant Toppers and Assembly Supplies
This is where the color comes in! You need 6 ounces each of white, pink, and red fondant. That gives you plenty to work with for cutting out those perfect hearts. For the sticky stuff that holds it all together, you’ll need 1 cup of powdered sugar and 1 tablespoon of water to make a thin icing glue. And finally, you need cornstarch for dusting your work surface so the fondant doesn’t stick to everything!
Equipment List for Making Heart Cookies
You don’t need anything too fancy for these Heart Cookies, thankfully! We rely on standard kitchen gear. Make sure your stand or hand mixer is ready for the creaming stage—it saves your arm! You’ll definitely need a sturdy rolling pin for both the cookie dough and the fondant.
A good set of 3-inch cookie cutters is essential for that classic heart shape. Line your baking sheets with parchment paper; it’s non-negotiable for easy cleanup. Also, have a few small bowls handy for mixing the glue and holding your sprinkles. That’s pretty much it!
Step-by-Step Instructions for Soft Heart Cookies
Alright, let’s get baking! This process flows really nicely once you get into a rhythm. We start with the dough, take a short break while it chills, and then it’s all about cutting and baking. The key here is not rushing the mixing or the cooling stages. If you try to decorate warm cookies, you’re just asking for melted fondant disasters, and trust me, I’ve learned that the hard way!
We’re making enough for about 24 lovely cookies, so make sure you have space on your counter for rolling and cooling. Once they are baked and cooled, you can store the plain cookies in an airtight container for a couple of days before decorating, but honestly, they are best enjoyed fresh! These soft cut-out sugar cookies are worth the wait.
| Storage Method | Notes |
|---|---|
| Un-iced Cookies | Airtight container at room temperature for up to 3 days. |
| Decorated Cookies | A single layer in an airtight container for up to 2 days. Avoid stacking if possible. |
Mixing the Dough for Your Heart Cookies
First things first: grab that softened butter and the granulated sugar. Pop them into your mixer bowl. You need to cream these together until they look light and fluffy—this takes a few minutes, so don’t stop early! This step is crucial because it whips air into the fat, which keeps our Heart Cookies soft. Once that’s looking pale yellow and airy, drop in your egg and the vanilla extract and mix until it’s just combined. Scrape down the sides of the bowl, you don’t want any unmixed pockets!
Now for the dry ingredients we whisked earlier. You have to add these gradually! I usually do about a third of the flour mixture, mix on low until just barely incorporated, then repeat until it’s all in. Stop mixing the second you see no more streaks of dry flour. Overmixing here develops the gluten too much, and that’s how you get tough cookies instead of soft ones. Once it comes together into a cohesive dough, stop the machine immediately! If you want more baking inspiration, check out my thoughts on baking.
Preparing and Baking the Heart Cookies
Wrap that dough up tightly and pop it into the fridge for 20 minutes. This chilling time is short but important—it firms up the butter so the cookies hold their shape perfectly when you cut them out. While it’s chilling, get your oven preheated to 375°F and make sure those baking sheets are lined with parchment paper.
Take the dough out and roll it on a lightly floured surface until it’s about 1/4-inch thick. Use your 3-inch heart cutter and place the shapes about 2 inches apart on the prepared sheets. Now for the bake: pop them in the hot oven for exactly 8 minutes. You are looking for the edges to be just barely golden brown. Any longer, and they’ll be crispy, not soft! Pull them out and let them cool completely on a wire rack before you even think about decorating. Seriously, wait until they are totally cold.
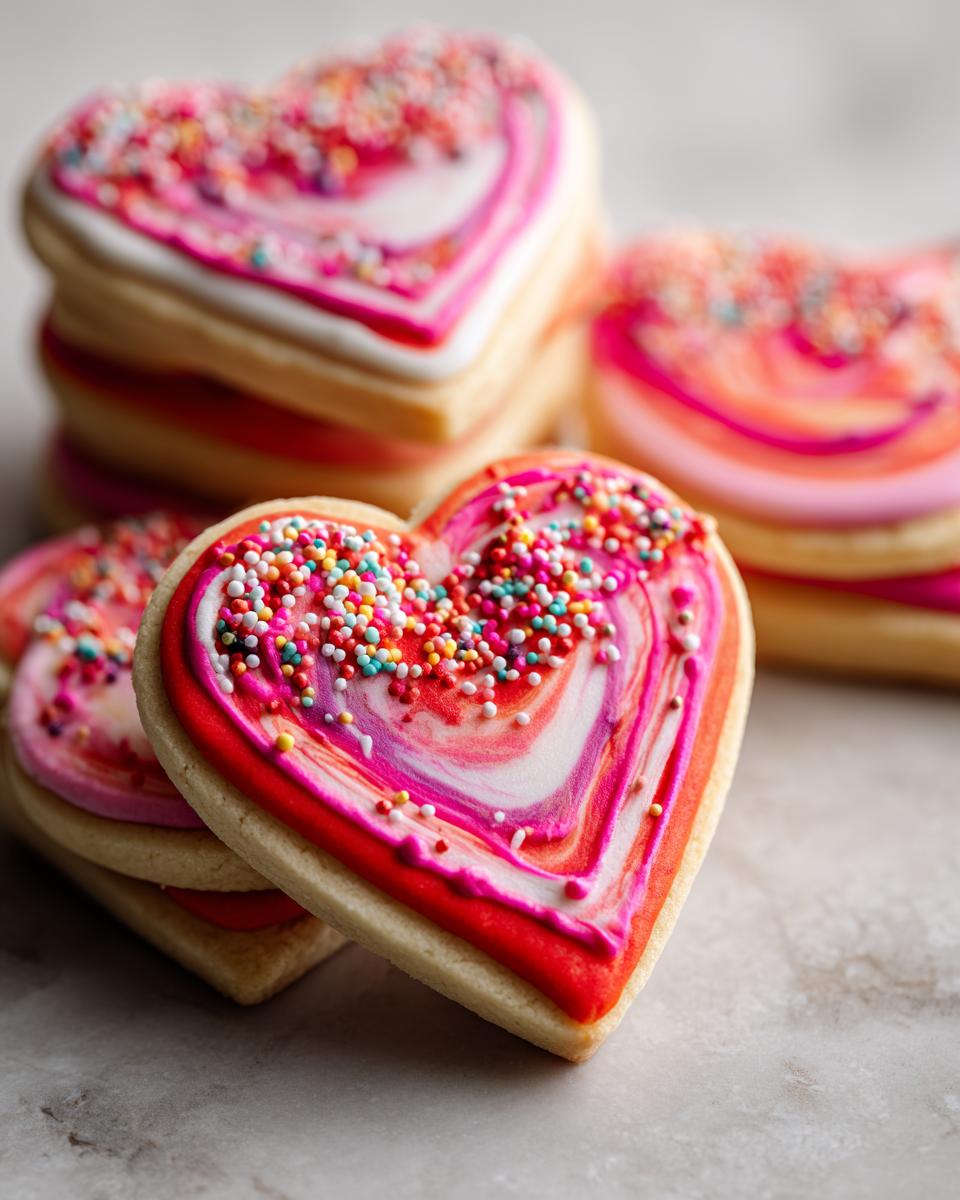
Creating and Applying Fondant Toppers for Heart Cookies
While the cookies cool, let’s prep the tops. Take your red, pink, and white fondant pieces. Dust your clean counter generously with cornstarch—this stops the fondant from grabbing everything! Roll each color out until it’s about 1/8-inch thick. You want them thin enough to look delicate but thick enough not to tear. Cut out hearts that match the size of your baked cookies.
For the glue, mix that 1 cup of powdered sugar with just 1 tablespoon of water until you have a thin but still slightly opaque icing. It should be runny enough to brush on easily but thick enough to stick. Lightly brush the top surface of a cooled cookie with this thin glue. Gently place one of your fondant hearts right on top and smooth it down. Finally, take those heart-shaped sprinkles and use a tiny dab of extra glue to attach 8 to 10 sprinkles around the edge of the fondant heart. Ta-da! Almost done!

Tips for Success with Your Soft Heart Cookies
I’ve made enough batches of these Heart Cookies to know exactly where things can go wrong if you rush! The biggest secret to getting those professional-looking, clean-edged hearts is temperature control, both for the dough and for the final assembly. If you follow these little nuggets of wisdom, your cookies will look flawless, just like they came from a commercial kitchen.
Don’t be tempted to skip the chilling step or try to rush the cooling process. Patience pays off hugely here, especially when dealing with that delicate fondant topping. These tips are what separate a good batch from a truly stunning one!
Handling Dough Temperature for Clean Heart Cookies
That 20-minute chill time isn’t just a suggestion; it’s mandatory for retaining shape! If the dough is too warm when you cut the hearts, the butter is soft, and when those soft shapes hit the hot oven, they spread out immediately. That’s how you lose a perfect heart shape and get sad, puffy blobs instead. Chilling firms up the fat, locking in the shape right before the baking starts. If your kitchen is really warm while you are cutting, put the cut-out cookies on the tray back in the fridge for 5 minutes before they go into the oven. It’s a small extra step that guarantees sharp edges!
Achieving Smooth Fondant Adherence on Heart Cookies
When you are brushing on that powdered sugar glue, less is genuinely more. If you use too much liquid or brush it on too heavily, the moisture soaks into the cookie surface, and then the fondant starts to dissolve or get gummy underneath. You only need a very thin, even coat over the top of the cookie—just enough to feel tacky. If you’re using the sprinkles, use a toothpick to place the glue dots for the sprinkles rather than brushing the whole edge. That precision keeps the edges of your fondant looking crisp and clean, not soggy! For more baking ideas, see my Pinterest boards.
Variations for Your Heart Cookies
While the vanilla is classic, these Heart Cookies are just begging for a little customization, especially if you’re making them for a specific event that isn’t Valentine’s Day! Since the base cookie is so neutral and buttery, it holds onto extra flavors beautifully without interfering with the sweet fondant topper. Don’t be afraid to sneak in some extra zing or spice!
The key is keeping the dry ingredients and the overall structure exactly the same. We only swap out the flavoring agents. A little bit of extra natural oil from zest or a different extract blends right into the butter and sugar when you cream them, so the texture stays spot-on for that soft bite.
Flavor Adjustments in Heart Cookies Dough
If vanilla is too plain for you, try swapping it out entirely! For a brighter, almost floral cookie, use 1 teaspoon of almond extract instead of vanilla. It gives the dough a lovely, sophisticated aroma that pairs really well with the pure white fondant. Or, if you want something zesty, use the zest of one full orange or lemon in place of the vanilla. Make sure you really zest it right into the butter and sugar when you are creaming them, as the oils in the zest need that fat to carry the flavor through the baking process. It makes for a wonderful surprise when someone bites into what looks like a traditional cookie! Try these banana oatmeal bars for another simple treat.
Answering Common Questions About Heart Cookies
I always get so many questions when people try this recipe for the first time, especially about the fondant part! It’s easy to get nervous about making something look this polished, but I promise, once you know a couple of tricks, you’ll be whipping these out for every occasion. Here are the things I hear most often about mastering these soft sugar cookies and their toppers.
Can I use cookie cutters other than hearts for these cookies?
Absolutely! These are fantastic sugar cookies, and they are wonderfully versatile. You can use any 3-inch cookie cutter you like—stars, circles, squares—whatever fits your theme! Just make sure you cut the fondant pieces to match the cutter you use. The baking time won’t change, but you might want to switch up the sprinkles to match the new shape!
How far in advance can I make these Heart Cookies?
This is one of the best things about them! The un-iced cookies are great; they stay soft for about three days stored in an airtight container at room temperature. However, I recommend decorating them within 24 hours of baking for the absolute best texture. Once the fondant is on and the glue has set, they hold up well for another couple of days, but they are definitely best eaten fresh. Don’t make them a week ahead, or the cookie will start to firm up too much. For more baking tips, check out my sugar cookies recipe.
Why is my fondant sticking to my rolling surface when making Heart Cookies?
Ah, the dreaded sticking! That’s exactly why we talk about cornstarch so much. Fondant loves to stick to absolutely everything, especially if your kitchen is warm. You need a generous dusting of cornstarch on your surface before you start rolling. Think of it like flour for bread dough, but for fondant. If it still seems tacky while you’re rolling it out to that perfect 1/8-inch thickness, add just a tiny bit more cornstarch to your rolling pin. It prevents that sticky mess and keeps your cutouts clean!
Nutritional Estimate for Your Heart Cookies
I always have to put a little disclaimer here: since we are mixing and matching ingredients, especially the amount of sugar in the glue and the exact amount of fat absorbed by the cookie, these numbers are just estimates based on the general recipe breakdown. Don’t treat this as exact medical advice, but it gives you a good general idea of what you’re enjoying in one of these lovely Heart Cookies!
| Nutrient | Amount (Per Cookie) |
|---|---|
| Calories | 180 |
| Fat | 7g |
| Carbohydrates | 28g |
| Protein | 2g |
Share Your Beautiful Heart Cookies Creations
I truly hope you loved making these soft and beautiful Heart Cookies as much as I love sharing them with you! They look stunning on any platter, and they taste even better. Now, I want to see what colors you chose for your fondant and sprinkles!
If you made a batch, please leave a rating right below this post—it helps other bakers know this recipe is a keeper. And don’t forget to snap a picture and tag me on social media! I can’t wait to see all your gorgeous, professional-looking creations! If you need more inspiration, check out my desserts section.
Print
Soft Heart Cookies: 24 Amazing Bites
- Total Time: 38 minutes
- Yield: 24 servings 1x
- Diet: Vegetarian
Description
Festive Heart Cookies with Fondant Toppers. Create beautiful heart-shaped cookies topped with colorful fondant for seasonal celebrations. These soft treats feature simple assembly and produce results that impress.
Ingredients
- 2 1/2 cups all-purpose flour
- 1/2 teaspoon baking soda
- 1/4 teaspoon baking powder
- 1/4 teaspoon salt
- 1 cup unsalted butter, softened
- 3/4 cup granulated sugar
- 1 large egg
- 1 teaspoon vanilla extract
- 1 cup powdered sugar
- 1 tablespoon water
- 6 ounces white fondant
- 6 ounces pink fondant
- 6 ounces red fondant
- 1/4 cup heart-shaped sprinkles
- Cornstarch for dusting
Instructions
- Whisk flour, baking soda, baking powder, and salt in a bowl.
- Beat softened butter and sugar until fluffy.
- Add egg and vanilla, mixing until combined.
- Gradually stir in flour mixture to form dough.
- Chill dough 20 minutes.
- Preheat oven to 375°F and line sheets with parchment.
- Roll dough 1/4-inch thick on floured surface.
- Cut 3-inch hearts, place on sheets 2 inches apart.
- Bake 8 minutes until edges are lightly golden.
- Cool cookies fully on wire racks.
- Mix powdered sugar and water to make thin glue.
- Dust surface with cornstarch, roll fondants 1/8-inch thick, cut matching hearts.
- Brush cookie tops with glue, attach fondant hearts.
- Add 8 to 10 sprinkles per cookie using more glue.
Notes
- Soft sugar cookies pair perfectly with rolled fondant cutouts.
- Ideal for family baking sessions.
- These cookies provide professional looks without complex piping skills.
- Prep Time: 30 minutes
- Cook Time: 8 minutes
- Category: Dessert
- Method: Baking
- Cuisine: American
Nutrition
- Serving Size: 1 cookie
- Calories: 180
- Sugar: Unknown
- Sodium: Unknown
- Fat: 7g
- Saturated Fat: Unknown
- Unsaturated Fat: Unknown
- Trans Fat: Unknown
- Carbohydrates: 28g
- Fiber: Unknown
- Protein: 2g
- Cholesterol: Unknown