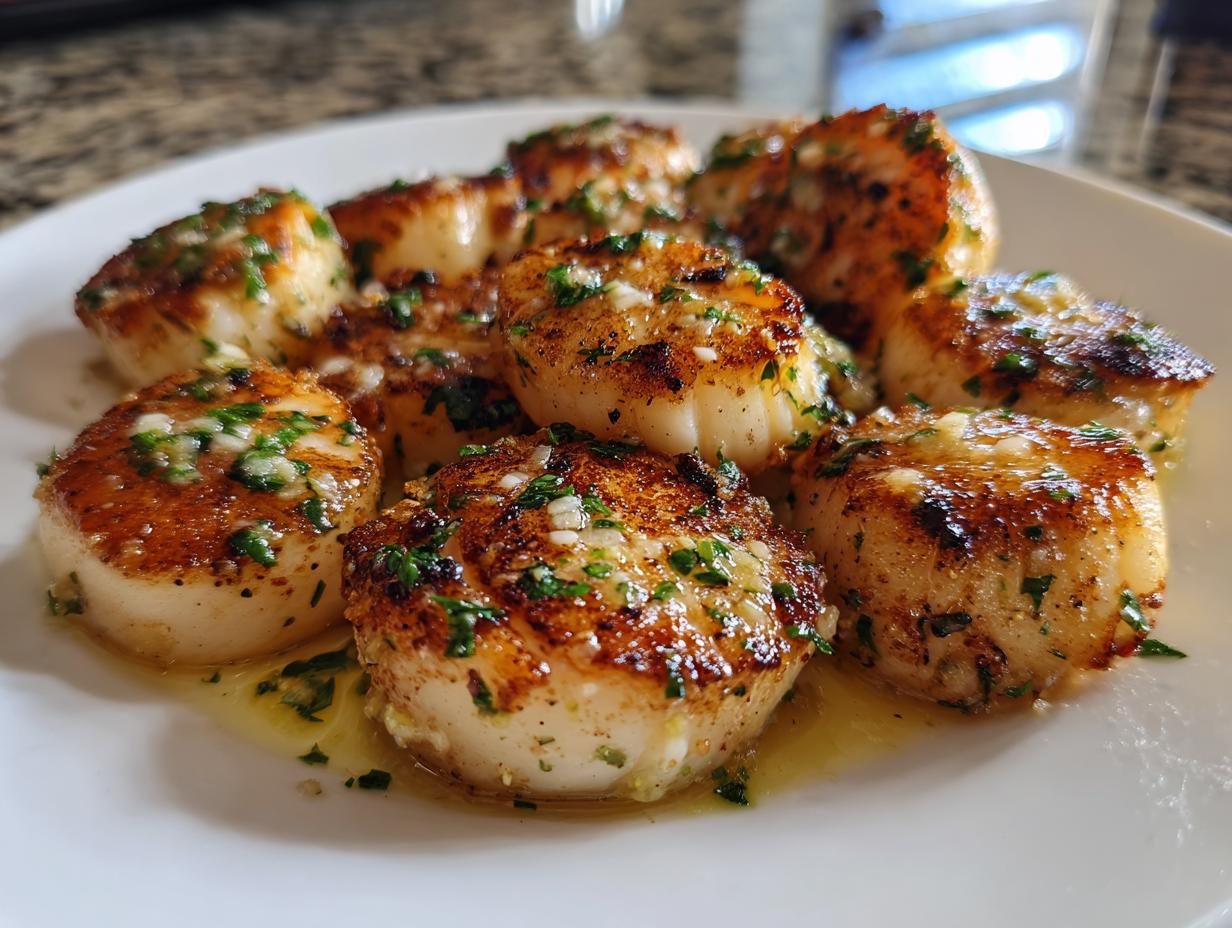
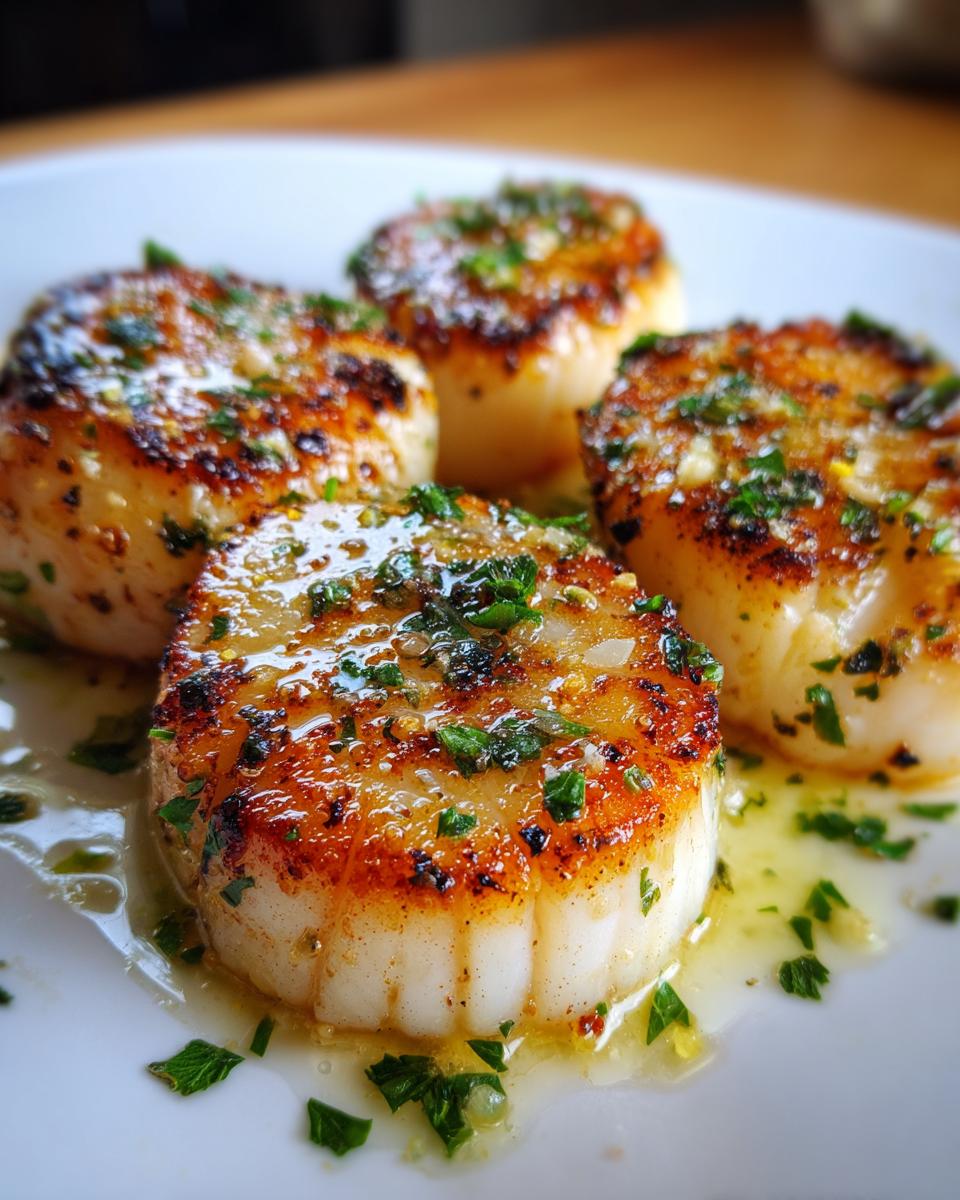
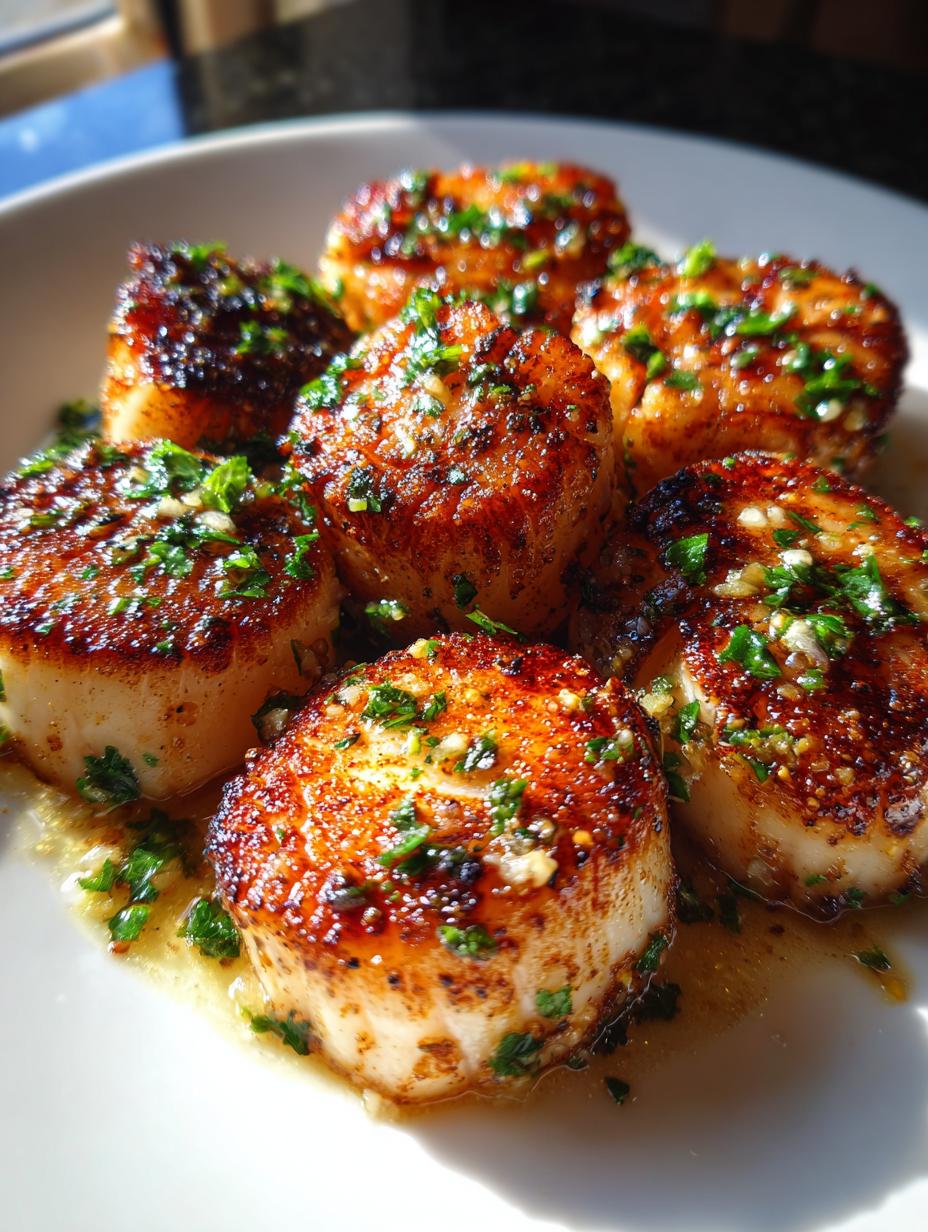
I swear, people look at a plate of beautifully golden, buttery seared scallops and immediately think, “That must have taken hours!” But trust me, that’s simply not true. This recipe is my absolute go-to when I need something that looks like I spent all day fussing in the kitchen, when really, we’re talking about a complete, elegant dinner on the table in under 20 minutes. It’s pure magic!
My secret, which I’ve honed over years of making seafood for last-minute dinner guests, lies entirely in preparation and heat management. I’ve tested every trick in the book, and I’m telling you now: if you follow these steps, you will achieve that restaurant-quality crust every single time. Forget takeout; these seared scallops are so simple, yet they feel fancy enough for any special occasion.
When I first started cooking seafood, I ruined so many batches by moving them too soon or using the wrong oil. I learned the hard way! That’s why I’m sharing my tried-and-true method below. We’re going for that perfect, sweet caramelization on the outside and a tender, almost creamy bite inside. You’ve got this!
Essential Ingredients for Seared Scallops
When you’re making something this quick, the quality of your ingredients really shines through, especially when we’re talking about those gorgeous seared scallops. You don’t need a long shopping list; you just need the right building blocks. Seriously, don’t try to skimp on the scallops themselves—they are the star of the show here!
I always stick to the core list: good scallops, decent olive oil for high heat, real butter for flavor, and the trinity of garlic, lemon, and parsley to finish. That’s it! It proves you don’t need twenty ingredients to make something taste incredible. It’s all about technique meeting simplicity.
Selecting Quality Sea Scallops
This is where you absolutely cannot cut corners. We need sea scallops, not those tiny bay scallops, because we want enough surface area to get that beautiful golden crust. I look for large ones—usually aiming for a count between 10 and 20 per pound. They should look plump and slightly glossy.
Most importantly, you need to make sure they are “dry” scallops. If you see a milky liquid in the package or they smell overly fishy, they are probably “wet” scallops treated with phosphates. Those things will steam in the pan instead of searing. Trust me, patting dry is key, but starting dry saves so much heartache later!
Building the Lemon Garlic Butter Sauce
The sauce is fast, but it needs punch. We use butter because nothing beats that nutty flavor when it browns slightly in the pan, and the olive oil helps keep the butter from burning too quickly. Minced fresh garlic is non-negotiable; the pre-minced stuff just doesn’t have the same aromatic kick when it hits the hot fat.
Then we balance everything with fresh lemon juice and zest. The zest is vital because it holds all the bright, fragrant oils. A tiny bit of parsley at the very end just adds that pop of green color and freshness right before serving. Keep these components ready to go because the sauce happens in about 45 seconds!
Equipment Needed for Perfect Seared Scallops
You don’t need fancy gadgets for this recipe, which is another reason I love it so much! But you do need a few specific items ready to go before you even think about seasoning your seared scallops. Since the cooking time is so fast, having everything measured out and within arm’s reach is crucial. Think of it like setting up your cooking station!
Basically, you’ll need your cutting board, a sharp knife for the garlic and parsley, paper towels (so many paper towels!), a small bowl for seasoning, and your serving platter warmed slightly. That’s the prep work done. Now, let’s talk about the most important piece of gear: the pan.
Choosing the Right Skillet
Look, if you want that gorgeous, deep brown crust on your seared scallops, you need a skillet that holds heat well and distributes it evenly. Forget your non-stick pans for this job! They just don’t get hot enough or give you that authentic sear texture.
I always reach for my heavy cast iron skillet or a good quality stainless steel pan. Cast iron is king because it retains heat like nothing else. Make sure your skillet is large enough that you can fit all the scallops in one layer without them touching. If they’re touching, they steam, and we absolutely do not want steamed scallops!
Step-by-Step Instructions for Seared Scallops
Okay, this is the moment of truth! Once you get the heat right, these instructions are so straightforward you’ll be making seared scallops every week. Remember, timing is everything here; we are moving fast once the pan gets hot. Have your plate ready for the finished product before you even turn on the stove!
Prepping the Scallops for the Sear
The absolute non-negotiable first step, and I cannot stress this enough, is drying the scallops. Grab a big stack of paper towels—seriously, more than you think you need—and pat every single side of every scallop until they feel dry to the touch. Any residual moisture turns into steam, and steam ruins the crust. Do this until the towels aren’t even damp anymore.
While you’re drying them, take a second to check for those little tough side muscles—they look like tiny, flat tabs stuck to the side of the scallop. If you find one, just pinch it and pull it off. It’s chewy and won’t cook the same way as the rest of the scallop. Once they are bone dry, give them an even sprinkle of salt and pepper. Don’t be shy with the seasoning, as the crust needs flavor!
Achieving the Golden Sear on Your Seared Scallops
Now, crank that heat up! Put your heavy skillet (cast iron or stainless steel) over medium-high heat. Add your tablespoon of olive oil. You want that oil to be shimmering slightly, almost smoking, before anything touches the pan. This high heat is what creates the crust for perfect seared scallops.
Gently place your seasoned scallops into the hot pan. I mean gently! Lay them down away from you so you don’t splatter yourself. Crucially, do not crowd them! If your pan is too small, do half the batch, take them out, and then do the second batch. Crowding drops the temperature instantly. You’ll let them sit there, undisturbed, for about a minute and a half to two minutes. Resist the urge to peek or move them! When they are ready to flip, they will naturally release from the pan. If you try to move them and they stick, they need another 30 seconds. Flip them over, cook the second side for another minute to two minutes until they are opaque throughout. Scoop them out immediately and keep them warm on a clean plate.
Finishing with the Lemon Garlic Butter Sauce
Turn the heat down to medium now—we don’t want the garlic to burn! Drop in your two tablespoons of butter. As soon as it starts foaming, toss in your minced garlic. Stir constantly for about 30 seconds until you can really smell that gorgeous aroma. Don’t let it go brown, or it’ll taste bitter.
Quickly stir in the lemon juice and the lemon zest. That’s it for the sauce base! Now, just return your beautifully browned seared scallops to the pan. Swirl the pan gently so that lovely lemon garlic butter coats every single one. Sprinkle with the chopped parsley, grab your lemon wedges, and serve them right away. That whole sauce process takes less than a minute!
Tips for Achieving Expert Seared Scallops Every Time
After messing up countless pans of seafood early in my cooking journey, I’ve learned a few tricks that separate a good sear from a truly spectacular one when making seared scallops. These aren’t in the recipe steps, but they are the wisdom I rely on every time I hit the stovetop. It’s about respecting the scallop and understanding heat transfer.
First, always use cold scallops straight from the fridge, even after drying them thoroughly. A slightly colder item hitting a screaming hot pan allows you a fraction more time to develop that crust before the interior overcooks. Also, make sure your pan is legitimately hot—I mean, really hot—before the fat goes in. If the oil isn’t shimmering, it’s not ready. That initial contact is everything for that perfect golden shell.
Avoiding Common Mistakes When Preparing Seared Scallops
The two biggest mistakes that sabotage beautiful seared scallops are overcrowding and insufficient heat. If you pile too many scallops into the skillet, you drop the pan temperature dramatically. Instead of searing, they steam in their own moisture, resulting in a pale, rubbery texture. You absolutely must cook in batches if necessary; it’s worth the extra minute! You want space between them so the hot air can circulate and brown the surface.
The second mistake is impatience with the heat. If you use medium heat, you’re just going to gently cook the scallop through without ever developing that rich, buttery crust we’re aiming for. Medium-high is the minimum for the initial sear. Don’t worry about the garlic burning during the sear part—we add the garlic *after* the scallops are cooked and removed. Keep the heat high for the sear, then drop it for the sauce!
Why This Recipe for Seared Scallops Works So Well
I really believe this recipe for seared scallops is a winner because it strips away all the complexity and leaves you with pure, delicious seafood perfection. It proves that you don’t need fancy techniques or hours of time to make an impressive meal. It’s the kind of recipe I turn to when I want to impress someone without stressing out.
Here’s a quick rundown on why this method keeps me coming back:
Quick Preparation and Elegant Results
- Total time is under 20 minutes, making it perfect for busy weeknights.
- The sear provides a stunning, golden presentation that looks restaurant-quality.
- It relies on simple, high-impact ingredients rather than complicated steps.
Flavor Synergy of Lemon and Garlic
- The acidity from the fresh lemon juice cuts perfectly through the richness of the butter.
- Garlic infuses the butter with a warm, savory depth that complements the sweetness of the scallops.
- The parsley adds a necessary, bright finish that makes the whole dish pop visually and aromatically.
Storing and Reheating Your Seared Scallops
I hope you eat them all right away because seared scallops are truly best enjoyed fresh off the heat! That beautiful crust we worked so hard to achieve doesn’t hold up well to sitting around, but if you do have leftovers, a little care goes a long way. Don’t just toss them in the fridge and forget about them, though; we need a plan to salvage that texture!
Best Practices for Leftover Storage
The biggest enemy of leftover scallops is moisture. You want to store them in a shallow, airtight container. Make sure you drain off any excess lemon garlic butter pooling at the bottom of your serving dish before sealing them up. I usually give them about two days maximum in the fridge. Any longer than that, and they start to get a bit sad and rubbery, even when reheated correctly.
Gentle Reheating Methods
Forget the microwave for these! Microwaving will turn your perfectly seared scallops into chewy little hockey pucks. The best way to bring them back is a very quick, gentle sauté. You want to use a non-stick pan over low heat—seriously low! Add just a tiny drizzle of fresh butter or oil, toss the scallops in for maybe 30 to 60 seconds total, just enough to warm them through. You are not trying to sear them again; you are just gently warming the inside. If you see any browning, pull them off immediately!
| Storage Element | Guideline |
|---|---|
| Storage Duration | Up to 2 days in the refrigerator |
| Container Type | Airtight, shallow container |
| Reheating Method | Quick, low-heat sauté |
Frequently Asked Questions About Seared Scallops
I get so many questions about this recipe, and honestly, that’s a good sign! It means people are trying to master the technique for beautiful seared scallops. Here are the most common things readers ask me when they’re gearing up to cook them for the first time. Don’t worry if you have a question—we’ve all been there! You can also check out my thoughts on quick meals on Medium.
Can I Use Frozen Scallops?
You can, but you have to treat them right! If you use frozen scallops, you must thaw them completely first. Then, you need to dry them even more aggressively than fresh ones. Thawed scallops hold a ton of water, so press them between several layers of paper towels for a good ten minutes, changing the towels frequently. If you skip this, you’ll end up steaming your seared scallops instead of getting that gorgeous crust. They can work in a pinch, but fresh, dry ones are always superior.
How Do I Know When Seared Scallops Are Cooked Through?
This is the trickiest part for new cooks because they go from perfect to tough in seconds! Visually, they should be opaque—meaning you can’t see any translucent, grayish parts in the center when you peek at one. They should be firm but still have a little give when you gently press the top with a fork or your finger. If they feel rock hard, you’ve gone too far, but if they are mushy, they need more time. For these seared scallops, usually 1.5 to 2 minutes per side is the sweet spot, depending on their size!
Estimated Nutritional Snapshot for Seared Scallops
When you whip up this quick meal of seared scallops, you’re getting a fantastic hit of protein without loading up on carbs or heavy fats, which is why I love serving them when I want something lighter but still satisfying. Remember, these numbers are estimates, but they give you a great idea of what you’re enjoying! For more quick meal ideas, see my easy sheet pan lemon garlic salmon.
| Nutrient | Amount (Per Serving) |
|---|---|
| Calories | 220 |
| Protein | 26g |
| Total Fat | 12g |
| Carbohydrates | 2g |
If you enjoy quick seafood recipes like this, you might also like my 30-minute magic chicken noodle soup for another fast dinner option. Don’t forget to follow my Pinterest board for more visual inspiration!
Print
Magic 20-Minute Seared Scallops Recipe
- Total Time: 20 minutes
- Yield: 4 servings 1x
- Diet: Low Fat
Description
These pan-seared scallops are golden, buttery, and perfectly tender. They feature a quick lemon garlic butter sauce, making for a simple yet elegant dinner ready in 20 minutes.
Ingredients
- 1 pound sea scallops (about 10–20 count)
- ½ teaspoon salt
- ¼ teaspoon black pepper
- 1 tablespoon olive oil
- 2 tablespoons butter
- 2 garlic cloves, minced
- 1 tablespoon lemon juice
- 1 teaspoon lemon zest
- 1 tablespoon chopped parsley
- Lemon wedges for serving
Instructions
- Pat scallops dry with paper towels and remove any small side muscles. Season with salt and pepper.
- In a large skillet, heat olive oil over medium-high heat until shimmering.
- Add scallops in a single layer without crowding. Sear for 1½ to 2 minutes per side, until golden brown and opaque in the center. Do not move them while searing to allow a crust to form. Remove from pan and keep warm.
- In the same skillet, reduce heat to medium. Add butter and garlic; cook 30 seconds until fragrant. Stir in lemon juice and zest.
- Return scallops to the skillet and spoon the lemon garlic butter over them. Sprinkle with parsley and serve immediately with lemon wedges.
Notes
- Patting the scallops very dry is key for achieving a good sear.
- Do not overcrowd the pan; sear in batches if necessary.
- Scallops cook quickly; watch them closely to avoid overcooking.
- Prep Time: 10 minutes
- Cook Time: 10 minutes
- Category: Main Course
- Method: Pan-searing
- Cuisine: American
Nutrition
- Serving Size: 1 serving
- Calories: 220
- Sugar: N/A
- Sodium: N/A
- Fat: 12g
- Saturated Fat: N/A
- Unsaturated Fat: N/A
- Trans Fat: N/A
- Carbohydrates: 2g
- Fiber: N/A
- Protein: 26g
- Cholesterol: N/A