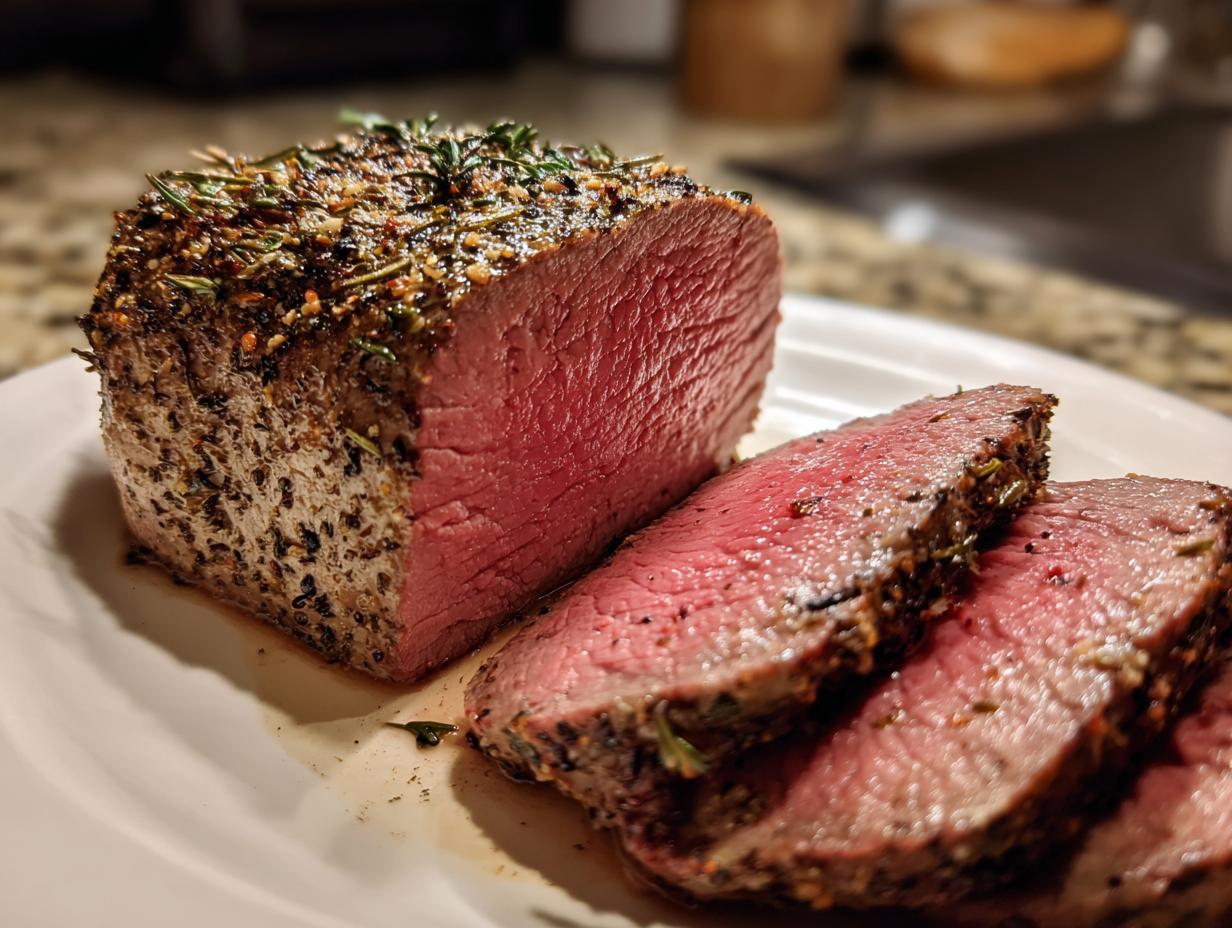
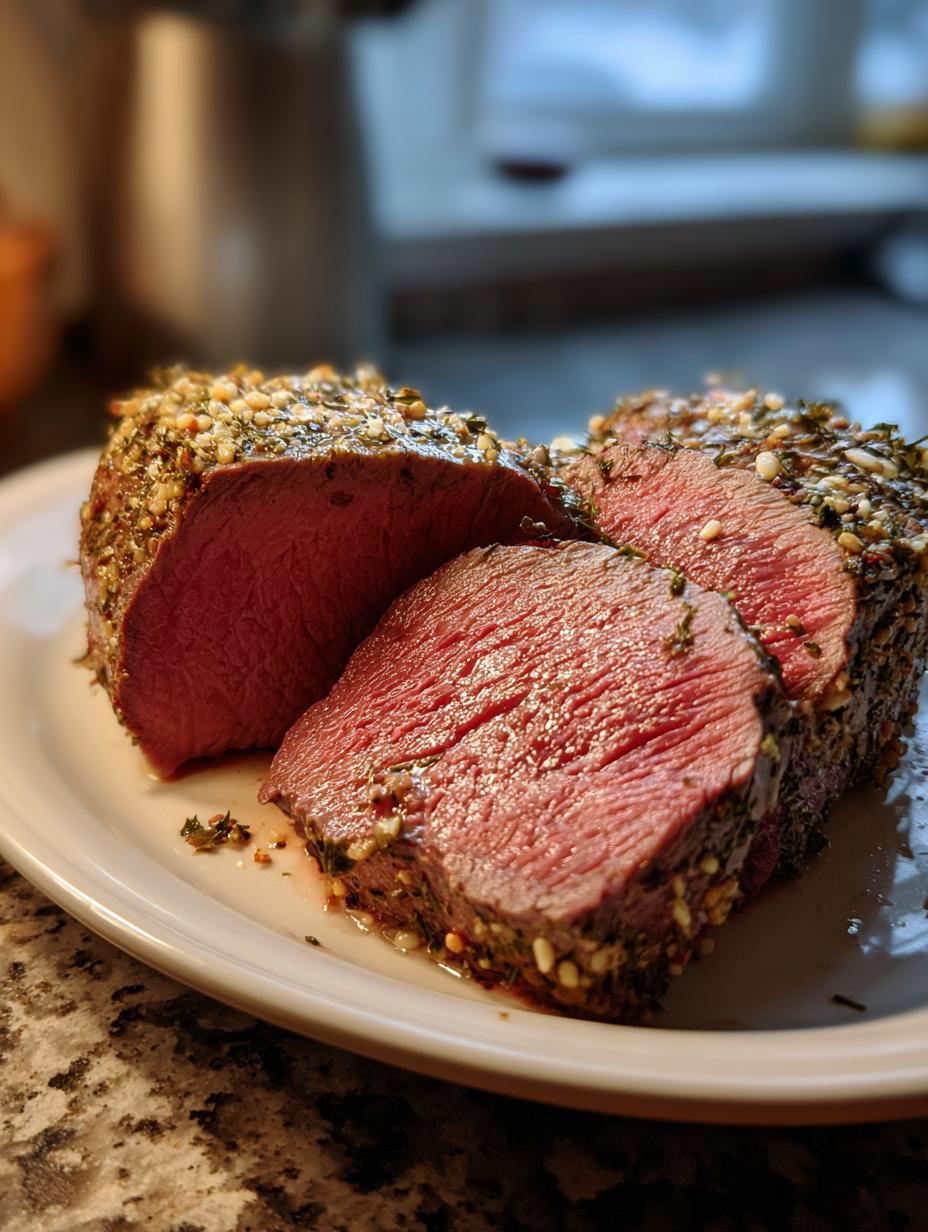
If you think cooking a show-stopping roast is too complicated for a weeknight, let me stop you right there! I’ve spent years wrestling with big cuts of meat, and I promise you, this roasted beef tenderloin recipe is the one. It’s shockingly easy, yet it looks like something straight out of a fancy magazine. Seriously, when you pull this golden beauty out of the oven, everyone will think you hired a chef.
What’s the secret sauce that makes this cut of meat taste like a million bucks? It’s all about that incredible garlic herb butter. We’re talking fresh rosemary, thyme, and tons of garlic melting right into the surface while it roasts. I’ve tried every trick in the book for large roasts, but the combination of a quick, hard sear followed by this rich butter coating is what guarantees a juicy, flavorful result every single time. Trust me; this is the method you’ll use for every holiday from now on.
Forget dry, flavorless beef! This recipe locks in all the moisture. We’re aiming for perfection here, and once you master this technique for your roasted beef tenderloin, you’ll never look back. It’s elegance made simple, folks!
Gathering Ingredients for Your Roasted Beef Tenderloin
Okay, let’s talk about what you need to make this happen. For the best results with your roasted beef tenderloin, you can’t skimp on quality here. Since the tenderloin is such a lean cut, the flavor comes almost entirely from the sear and that amazing herb butter we build. Don’t try to substitute the fresh herbs; the flavor just isn’t the same.
You’ll need a beautiful, trimmed, and tied tenderloin—about three pounds is perfect for a standard family gathering. Make sure you have good quality olive oil for the initial sear because that high heat needs something stable to work with. You can find more inspiration for savory meals on my Medium profile.
Essential Components for the Perfect Roast
Here is the lineup. Remember, we need fresh stuff for the rub, so plan on chopping right before you start!
- One whole beef tenderloin (about 3 lbs), make sure it’s tied!
- 2 tablespoons olive oil
- 2 teaspoons kosher salt and 1 teaspoon pepper
Creating the Garlic Herb Butter Rub
This is where the magic really happens. You need four tablespoons of unsalted butter, and this is crucial: it has to be softened. If it’s rock hard, the butter won’t spread evenly, and if it’s melted, it’ll just drip right off during the sear. You want it soft enough to mash with a fork.
Then, you mince up three cloves of garlic—don’t even think about using the jarred stuff here—and mix that right in with a tablespoon each of fresh rosemary, thyme, and parsley. That’s it! Mix it all together until it looks like a fragrant, green-flecked paste.
Equipment Needed for Roasting Beef Tenderloin
You don’t need a dozen fancy gadgets for this roasted beef tenderloin, but having the right tools makes the whole process smoother. Since we are searing first and then roasting, we need a few key players on our countertop.
First up, grab a sturdy, oven-safe skillet. You need that skillet screaming hot to get that beautiful crust on the beef. You’ll also want a standard baking sheet lined with foil—this is just for easy cleanup later, trust me on the foil!
The most important piece? A wire rack that fits inside that baking sheet. This lets the air circulate all around the roast, ensuring even cooking. And, of course, have a reliable meat thermometer handy. It’s your best friend for knowing exactly when that tenderloin is done! If you are looking for other easy dinner ideas, check out my easy sheet pan lemon garlic salmon.
Step-by-Step Instructions for Roasted Beef Tenderloin
Alright, deep breaths! This is the fun part where we turn those ingredients into the most gorgeous centerpiece you’ve ever made. Getting the timing right on this roasted beef tenderloin is everything, but once you nail the sear and the resting, you’ve basically mastered it. We’re going to take this from raw to magnificent!
Preparation and Searing the Meat
First things first: get that oven preheated to 450 degrees Fahrenheit. High heat is the name of the game initially! While it heats up, prepare your landing zone. I always line a baking sheet with heavy-duty foil and then set a wire rack right on top. This setup ensures that all the drippings fall away, keeping the bottom of your roast from getting soggy.
Now, grab that beautiful beef. You absolutely must pat it bone dry with paper towels. I mean it—dry! Any moisture on the surface will steam instead of sear, and we want that gorgeous brown crust. Once it’s dry, rub it all over with the olive oil, then season heavily with kosher salt and fresh black pepper. Don’t be shy with the seasoning; it’s a big piece of meat!
Get a large skillet smoking hot over medium-high heat. Add just a touch more oil if your pan looks dry. Carefully place the tenderloin in the hot pan. We’re searing it hard—about two to three minutes per side. You’re just looking for color here, not cooking it through. Use tongs to turn it until all sides have a deep, rich brown crust. Then, transfer that beautifully seared beef right onto the wire rack on your prepared sheet.
Applying the Herb Butter and Roasting Times
Time for the flavor bomb! Take that softened garlic herb butter we mixed up earlier and spread it evenly all over the top and sides of the seared tenderloin. Really press it in there so it sticks. This butter layer protects the meat and infuses it with flavor as it cooks.
Now, slide that sheet pan into the preheated 450°F oven. For a standard three-pound tenderloin aiming for medium-rare, you’re looking at about 20 to 25 minutes total roasting time. This is where your meat thermometer earns its keep! You are pulling it out when the internal temperature hits 135°F in the thickest part.
If you like it a little more done, let it go until it hits 140°F, but remember, we are NOT going past that before resting! If you need a quick soup while you wait, try my chicken noodle soup 30 minute magic.
Resting and Serving Your Roasted Beef Tenderloin
This next step is non-negotiable if you want the juiciest roasted beef tenderloin imaginable. Pull the pan out of the oven. Carefully take the roast off the rack and tent it loosely with foil—don’t wrap it tight, or the crust will steam! Let it rest undisturbed for a full 10 minutes.
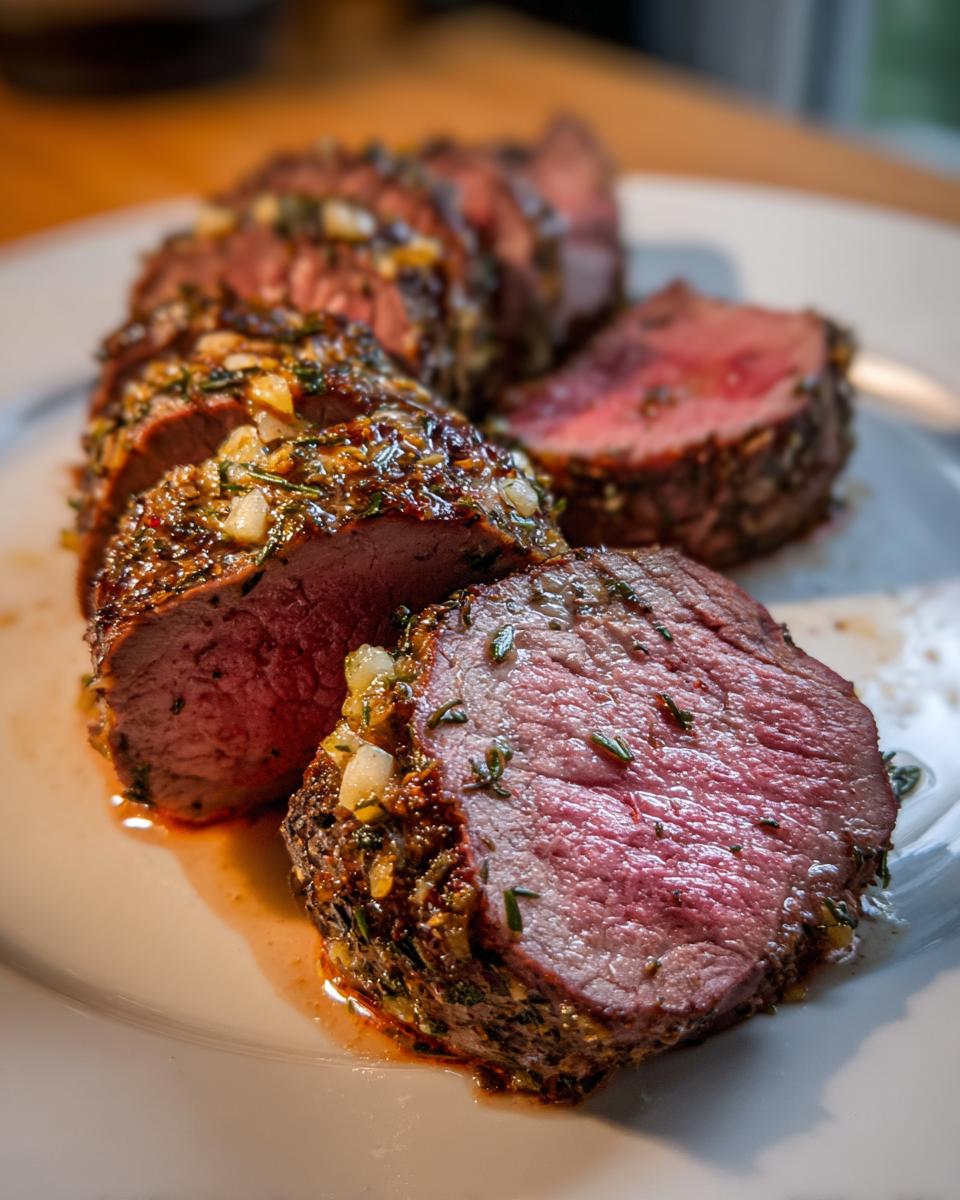
I know it’s hard to wait, but this resting period is crucial. While it rests, the internal temperature will climb another 5 to 10 degrees, settling perfectly at that safe, delicious 145°F mark, and all those lovely juices redistribute back into the meat fibers instead of running out onto your cutting board.
Once rested, slice it into thick medallions. For a final flourish that screams elegance, sprinkle just a tiny bit of coarse sea salt on top of each slice, along with a little fresh parsley for color. Serve immediately! You can check out my Pinterest boards for more serving ideas.
Tips for Achieving Expertly Cooked Roasted Beef Tenderloin
Look, anyone can follow a recipe, but turning out a truly restaurant-quality roasted beef tenderloin takes just a few insider tricks. My biggest piece of advice, which I learned the hard way after serving one slightly unevenly cooked roast, is all about temperature. Don’t just trust the clock; trust your thermometer. Pulling that roast out even five minutes too late can mean the difference between perfect medium-rare and slightly overdone beef.
Also, about tying the roast: please don’t skip it! When you buy a whole tenderloin, it usually comes tied, but if yours isn’t, you need to use butcher’s twine every inch or so. This keeps the roast a uniform cylinder shape. If you don’t tie it, the thinner ends will cook way faster than the thick middle, and you’ll end up with a mix of well-done and rare pieces. We want consistency in our roasted beef tenderloin!
One more thing: make sure your butter is truly room temperature soft for the herb rub. If you try to mash a cold pat of butter, you’ll tear the meat, and the herbs won’t incorporate well. A smooth, consistent herb coating ensures that every bite of your roast is perfectly seasoned and that beautiful crust sets up evenly across that whole glorious piece of beef! For more baking tips, see my recipe for cream cheese chocolate chip cookies.
Understanding the Nutrition of Roasted Beef Tenderloin
I know when we’re making something this decadent, we aren’t exactly counting every macro, but it’s good to have an idea of what you’re serving, right? Even though this roasted beef tenderloin is rich and flavorful, it’s surprisingly lean because tenderloin doesn’t have a lot of exterior fat to trim off. It’s mostly pure, high-quality protein!
The calories mostly come from the beef itself and the delicious garlic herb butter we slather on top. We’re keeping the sugar content super low here, which is great news for anyone watching their intake. This is definitely a celebratory dish, but one you can feel good about serving your family.
Estimated Nutritional Breakdown Table
This table provides the estimated nutritional information based on a standard six-serving yield from the recipe. Remember, these numbers can shift a bit depending on the exact size of your roast and how much butter you manage to leave on the pan!
| Nutrient | Amount Per Serving |
|---|---|
| Serving Size | 1 serving |
| Calories | 420 |
| Protein | 44g |
| Fat | 27g |
| Carbohydrates | 1g |
| Sugar | 1g |
Storing and Reheating Leftover Roasted Beef Tenderloin
Oh boy, leftovers! If you manage to have any of this gorgeous roasted beef tenderloin left over—which is rare in my house—you want to treat it right. The key to reheating beef is gentle heat; if you blast it in the microwave, you’ll turn that lovely medium-rare into shoe leather!
The best way to preserve the tenderness is to store it properly right away. Slice whatever remains thinly against the grain before you store it, as this makes reheating much easier and ensures the slices don’t dry out later. Remember, this beef is already cooked, so we are just warming it up, not cooking it again! For more storage tips, see my guide on Italian bean salad magic recipe.
Storage Guidelines and Reheating Methods
Here’s my quick guide for keeping your leftovers delicious for a few days:
| Storage/Reheating Aspect | Recommendation |
|---|---|
| Storage Duration (Refrigerator) | Up to 3-4 days |
| Best Storage Method | Thinly sliced, tightly wrapped in plastic wrap or airtight container |
| Best Reheating Method | In a low oven (275°F) with a splash of broth, covered tightly |
| Microwave Reheating Tip | Use in very short bursts (15-20 seconds) on 50% power |
Frequently Asked Questions About This Roasted Beef Tenderloin
I always get so many questions when people try this recipe for the first time, especially since roasting a whole tenderloin can feel a little intimidating. Don’t worry, though! Once you understand the fundamentals of this roasted beef tenderloin, you’ll be whipping it up like a pro. Here are the things folks ask me most often.
What Internal Temperature Means for Doneness
This is the most common question, and it’s all about precision! For a perfect medium-rare on your beef tenderloin, you want to pull it out of the oven when the thermometer reads 135°F. It’s going to coast up to about 140°F to 145°F while it rests, which is exactly where you want it for that tender, juicy pink center. If you push it much past 150°F before resting, you risk having a dryer roast, so keep a close eye on that gauge!
Can I Prepare the Herb Butter Ahead of Time
Yes, absolutely! I love prepping the garlic herb butter the day before. It saves so much time when you’re trying to get dinner on the table. Just mix all the softened butter, garlic, and herbs together until it’s uniform. Then, instead of spreading it right away, you can roll that butter mixture up tightly in plastic wrap into a little log shape. Pop it in the fridge. When you’re ready to use it, just let it sit on the counter for about 30 minutes so it softens up enough to spread easily over your seared roast.
Why Is Tying the Tenderloin Necessary
Tying is about geometry, really! A beef tenderloin is naturally tapered—thicker on one end and thinner on the other. If you don’t tie it securely with butcher’s twine every inch or so, the thin parts cook way faster than the middle. We want a beautiful, even roast from end to end. Tying forces the roast into a uniform cylinder shape, which guarantees that the entire piece cooks at the same rate. That way, every single slice of your roasted beef tenderloin is perfectly done!
Print
Amazing roasted beef tenderloin 4 perfect bites
- Total Time: 40 minutes
- Yield: 6 servings 1x
- Diet: N/A
Description
Perfectly tender roasted beef tenderloin coated in a savory garlic herb butter. This dish is juicy, flavorful, and elegant for holidays or special dinners.
Ingredients
- 1 whole beef tenderloin, about 3 pounds, trimmed and tied
- 2 tablespoons olive oil
- 2 teaspoons kosher salt
- 1 teaspoon black pepper
- 4 tablespoons unsalted butter, softened
- 3 garlic cloves, minced
- 1 tablespoon chopped fresh rosemary
- 1 tablespoon chopped fresh thyme
- 1 tablespoon chopped parsley
- Coarse sea salt for finishing
- Fresh parsley for garnish
Instructions
- Preheat oven to 450°F. Line a baking sheet with foil and set a wire rack on top.
- Pat beef dry with paper towels. Rub with olive oil, salt, and black pepper.
- Heat a large skillet over medium-high heat. Sear tenderloin 2–3 minutes per side until browned all over.
- Transfer beef to the prepared rack.
- In a small bowl, mix butter, garlic, rosemary, thyme, and parsley. Spread evenly over the top and sides of the tenderloin.
- Roast for 20–25 minutes for medium-rare, or until internal temperature reaches 135°F.
- Remove from oven, tent loosely with foil, and rest for 10 minutes. The temperature will rise to 145°F as it rests.
- Slice and sprinkle with coarse salt and fresh parsley before serving.
Notes
- The recipe targets a final internal temperature of 145°F after resting for safe consumption.
- Resting the meat for 10 minutes allows the juices to redistribute, making the tenderloin more tender.
- Prep Time: 15 minutes
- Cook Time: 25 minutes
- Category: Main Course
- Method: Roasting and Searing
- Cuisine: American
Nutrition
- Serving Size: 1 serving
- Calories: 420
- Sugar: 1g
- Sodium: N/A
- Fat: 27g
- Saturated Fat: N/A
- Unsaturated Fat: N/A
- Trans Fat: N/A
- Carbohydrates: 1g
- Fiber: N/A
- Protein: 44g
- Cholesterol: N/A