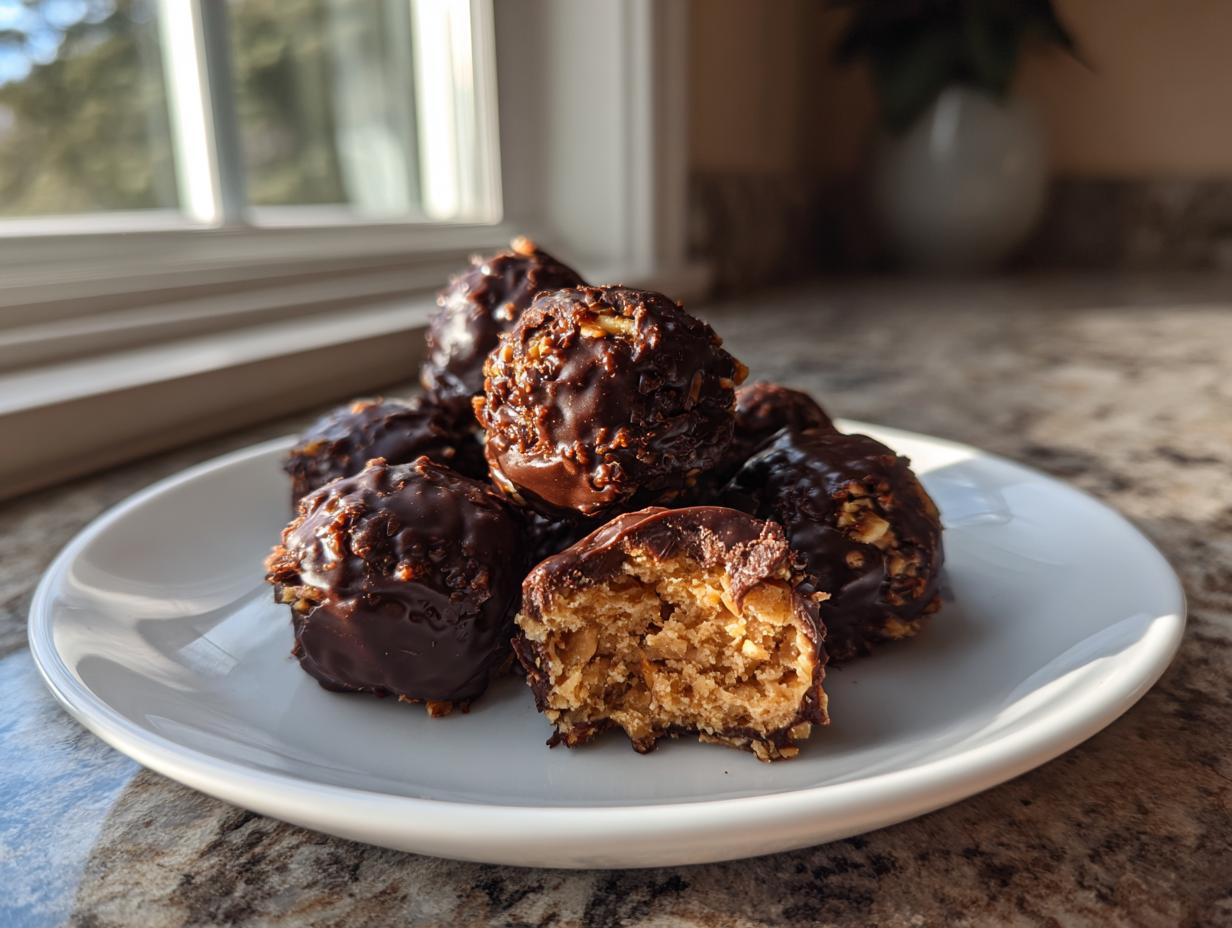
I’m going to let you in on a little secret: these absolutely addictive, no-bake Peanut Butter Balls are my go-to when I need something amazing fast. Seriously, forget the oven! This recipe is the one I’ve tested dozens of times, and it never fails to wow people at potlucks or just when the afternoon slump hits.
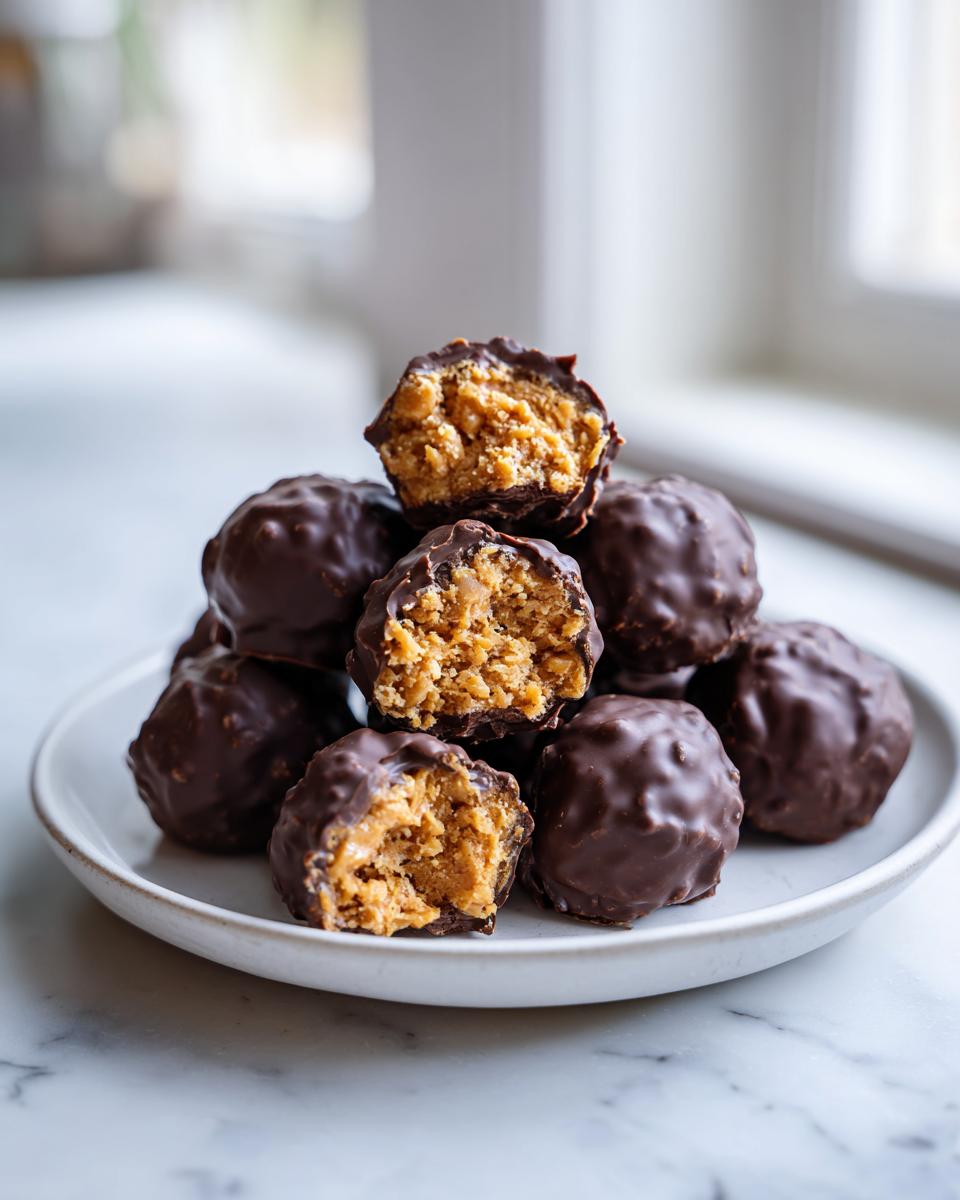
The beauty of these treats is how simple they are. We’re talking basic pantry staples coming together in about 20 minutes of actual work before they chill. If you’ve ever worried that homemade treats are too complicated, these are your answer. They have that perfect crunch from the cereal, a rich peanut butter center, and a snappy chocolate shell. Trust me, once you make this batch of Peanut Butter Balls, you’ll wonder why you didn’t try them sooner!
Essential Ingredients for Perfect Peanut Butter Balls
The magic behind excellent no-bake desserts always comes down to using the right stuff, and that’s especially true when making these easy Peanut Butter Balls. Since we aren’t baking anything, the quality of your core ingredients really shines through. Don’t just grab the first jar you see! A few small choices here make the difference between a good treat and the absolute best treat.
Getting the measurements spot-on is also key. Because there’s no rising or setting via heat, if you dump in too much sugar or not enough binder, you end up with a messy puddle instead of a perfectly rollable dough. I always recommend using measuring cups designed for dry ingredients for the sugar and cereal, and leveling them off carefully. Precision pays off here!
Here is a quick rundown of exactly what I use when whipping up my famous batch of Peanut Butter Balls:
Ingredient Specifications for Peanut Butter Balls
| Ingredient | My Recommendation | Why It Matters |
|---|---|---|
| Peanut Butter | Creamy only! Make sure it’s the standard, shelf-stable kind. | Natural peanut butter is too oily and won’t firm up correctly when mixed with the other binders. |
| Butter | Unsalted, melted just until liquid. | Unsalted gives you total control over the final flavor balance. Don’t substitute this with peanut butter! |
| Cereal | Classic Rice Krispies cereal. | They offer the best, lightest crunch that holds up well in the fridge. |
| Chocolate | Dark Chocolate Chips (high quality if you can find it). | Dark chocolate cuts the sweetness of the peanut butter filling beautifully. Milk chocolate can make it too sweet for my taste. |
Equipment Needed for Your Peanut Butter Balls
You don’t need a stand mixer or any fancy gadgets for this recipe, which is part of why I love it so much! You’ll want a sturdy, large mixing bowl for combining the filling. Make sure you have a good rubber spatula or wooden spoon for folding in those Rice Krispies gently.
A quarter-cup measuring scoop or a small cookie scoop is perfect for keeping your Peanut Butter Balls uniform in size—this helps them freeze and set evenly. Finally, grab a baking sheet lined with parchment paper. Seriously, don’t skip the parchment paper; it makes cleanup a breeze!
Step-by-Step Instructions for Amazing Peanut Butter Balls
Okay, let’s get down to the fun part! This is where we turn simple ingredients into those incredible, crunchy, chocolate-dipped Peanut Butter Balls. Remember, since this is a no-bake situation, we rely on chilling and freezing to do the heavy lifting. Make sure you have that parchment-lined baking sheet ready to go before you start mixing!
Mixing the Base of Your Peanut Butter Balls
First things first, grab that large bowl. We need to combine the wet and sticky bits before we introduce the dry ingredients. Pour in your creamy peanut butter, the melted butter—and be careful when melting butter, it gets hot fast!—along with your honey and that splash of vanilla extract. Stir this mixture vigorously until it’s completely smooth and uniform. It should look glossy and inviting.
Next comes the powdered sugar. This is what gives the filling its structure and sweetness. Add it slowly, mixing constantly. At first, it seems like it won’t incorporate, but keep stirring! It will get thick, almost like dough. You want it stiff enough that when you lift your spoon, it pulls away cleanly from the sides of the bowl. This thickness is crucial for rolling later on!
Forming and Chilling the Peanut Butter Balls
Now for the Rice Krispies. This is where you need a light hand. Gently fold those cereal squares into the thick peanut butter base. You want them evenly distributed, but if you stir too hard, you’ll crush them, and we want that satisfying crunch! Once they are mixed in, grab your scoop. I use a small cookie scoop—about one tablespoon—to keep all my Peanut Butter Balls the same size. Roll them gently between your palms until they form a nice sphere, and place them on that waiting baking sheet.
Once they are all rolled out, they need a quick vacation. Pop that sheet into the freezer for about 20 minutes. This initial freeze is non-negotiable! It hardens the centers just enough so they don’t fall apart when you dunk them into the hot chocolate. Don’t skip this chilling time; it saves so much frustration later!
Coating Your Peanut Butter Balls in Chocolate
While those centers are firming up, it’s time for the chocolate coating. In a microwave-safe bowl, combine your dark chocolate chips and that tiny bit of coconut oil. The oil is our secret weapon here; it helps the chocolate melt smoothly and gives it a beautiful shine when it sets. Microwave in short bursts—20 seconds at a time—stirring well between each session. Stop microwaving the moment most of the chips are melted, then just stir until the residual heat melts the rest. Don’t overheat it, or the chocolate will seize up!
Take your firm Peanut Butter Balls out of the freezer. Use a fork or a dipping tool to submerge one ball completely in the melted chocolate. Lift it out, gently tapping the fork against the side of the bowl to let the excess chocolate drip back in. We don’t want thick, gloppy coatings! Place the dipped ball back onto the parchment paper. Repeat until every ball is coated. Then, they go back into the refrigerator for about 30 minutes until that chocolate shell is completely hard and snappy. That’s it—perfection!
Why You Will Love These Peanut Butter Balls
Honestly, once you see how fast these come together, they will become a staple in your home. There’s just no beating the combination of texture and flavor. If you’re looking for a guaranteed crowd-pleaser that doesn’t require heating up the kitchen, these are the absolute winner.
Here’s the quick list of reasons why everyone goes crazy for these treats:
- They are completely no-bake! Zero oven time means less mess and cooler kitchens.
- The recipe is incredibly fast; you can have them mixed and ready for the freezer in under 20 minutes of active time.
- That signature snap of the chocolate shell contrasting with the creamy, crunchy center is addictive.
- These classic Peanut Butter Balls are perfect for holidays, school lunches, or just a spontaneous sweet craving.
Tips for Perfect Peanut Butter Balls Every Time
Even though this recipe is called “no-bake,” that doesn’t mean there aren’t a few little tricks I’ve learned over the years to keep things running smoothly. My biggest piece of advice for these Peanut Butter Balls is to pay attention to the consistency of the filling before you roll them. If your mixture seems too sticky even after adding all the powdered sugar, don’t panic!
If it’s still too soft to handle, you can always mix in another quarter cup of powdered sugar, maybe even half a cup if your peanut butter was oilier than mine. Just add it slowly until you can roll a firm ball that doesn’t immediately flatten out on your hands. Remember, the initial 20-minute freeze is your best friend for stability later!
Now, let’s talk about the chocolate coating, because that’s where things can go wrong. If your chocolate seizes up and gets grainy when you try to melt it, it means you introduced a tiny bit of water or steam. Next time, make sure your bowl and tools are bone dry! If you stir in an extra teaspoon of vegetable oil to that seized chocolate, sometimes you can bring it back enough to dip your Peanut Butter Balls, but usually, it’s best to start a fresh, dry batch of melted chocolate. Never try to dip cold balls into hot chocolate; let them sit out for just five minutes before dipping.
Storing and Reheating Your Peanut Butter Balls
These amazing Peanut Butter Balls are wonderful because they are so sturdy, but they definitely need proper storage to keep that chocolate shell looking perfect. Since they are no-bake, the refrigerator is their best friend! You don’t want them sitting out on the counter for too long, especially if your kitchen gets warm, because the filling can get a little soft.
I always store mine in an airtight container. You can layer them, but put a small piece of wax paper or parchment between the layers. This stops the chocolate coating from sticking to itself. They keep really well for about a week, maybe even ten days if you’re disciplined enough to leave them alone!
You never actually need to “reheat” these, of course, but if you like a slightly softer center, just pull the container out of the fridge about 15 minutes before serving. Here is how I generally keep track of my batches of Peanut Butter Balls:
| Storage Location | Maximum Freshness | Best Practice |
|---|---|---|
| Countertop (Room Temp) | 2-3 Hours | Only for serving time; the filling softens quickly. |
| Refrigerator | Up to 10 Days | Airtight container with parchment paper separators. |
| Freezer | Up to 3 Months | Wrap individually first, then place in a freezer bag. |
Common Questions About Peanut Butter Balls
I get so many emails asking about tweaking this recipe, and that’s totally fine! These Peanut Butter Balls are so reliable that people feel comfortable experimenting, but there are a few things you should probably know before you start swapping ingredients willy-nilly. Remember, because there is no baking involved, the structure relies entirely on that perfect ratio of sugar and fat.
If you’re wondering about making these ahead of time or adjusting the sweetness, you’ve come to the right place. I’ve gathered the most frequent questions I get about maximizing the crunch and minimizing the mess when making these legendary Peanut Butter Balls.
Can I use natural peanut butter in these Peanut Butter Balls?
Oh, honey, please don’t! I know natural peanut butter is healthier, but it separates. The extra oil in natural peanut butter means your mixture will never firm up properly, even with all that powdered sugar. You’ll end up with a greasy, soft mess that won’t roll into a ball. Stick to the standard, shelf-stable, creamy kind, like Jif or Skippy. It has the right stabilizers we need for these Peanut Butter Balls to hold their shape!
How long do these Peanut Butter Balls take to set completely?
Setting time has two parts! First, you need that quick 20-minute freeze to make them firm enough to dip into the warm chocolate without falling apart—that’s essential. After dipping, they need a good 30 minutes in the refrigerator for the chocolate shell to fully harden and set. If you rush that final chilling step, the chocolate might still be soft when you try to stack them, causing a sticky disaster. So, plan for about an hour total chilling time from start to finish for the best, snappiest Peanut Butter Balls!
Share Your Homemade Peanut Butter Balls Experience
I truly hope you get a chance to try these soon! They are such a joy to make and even better to eat. Once you have your batch of chocolate-coated treasures ready, I absolutely want to hear about it! If you want to see more quick dessert ideas, check out my Pinterest board!
Did you stick to the dark chocolate, or did you try milk chocolate? Let me know down in the comments how quickly they disappeared from your kitchen. Sharing our kitchen wins is the best part! You can also follow my journey and updates on Medium.
Print
Amazing 20-Minute Peanut Butter Balls Now
- Total Time: 20 minutes
- Yield: 16 peanut butter balls 1x
- Diet: Vegetarian
Description
Crispy peanut butter balls with Rice Krispies and a chocolate coating. This is an easy no-bake dessert perfect for parties or quick snacks.
Ingredients
- 1 cup creamy peanut butter
- 1/4 cup unsalted butter, melted
- 1/3 cup honey
- 1 tsp vanilla extract
- 1 1/2 cups Rice Krispies cereal
- 1 cup powdered sugar
- 1 1/2 cups dark chocolate chips
- 1 tsp coconut oil
Instructions
- Line a baking sheet with parchment paper and set aside.
- In a large bowl stir together peanut butter, melted butter, honey, and vanilla until smooth.
- Add powdered sugar and mix until fully incorporated and thick.
- Gently fold in Rice Krispies until evenly distributed without crushing them.
- Scoop 1 tablespoon portions and roll into balls, placing them on the prepared baking sheet.
- Freeze the balls for 20 minutes until firm.
- In a microwave-safe bowl combine dark chocolate chips and coconut oil. Microwave in 20-second intervals, stirring until melted and smooth.
- Dip each ball into the melted chocolate, letting excess drip off, then return to the baking sheet.
- Refrigerate for 30 minutes until the chocolate is fully set before serving.
Notes
- These treats can be stored in the refrigerator for easy access.
- Adjust the amount of powdered sugar for desired sweetness and firmness.
- Prep Time: 20 minutes
- Cook Time: 0 minutes
- Category: Dessert
- Method: No-Bake
- Cuisine: American
Nutrition
- Serving Size: 1 ball
- Calories: 180
- Sugar: Not specified
- Sodium: Not specified
- Fat: 12g
- Saturated Fat: Not specified
- Unsaturated Fat: Not specified
- Trans Fat: Not specified
- Carbohydrates: 16g
- Fiber: Not specified
- Protein: 4g
- Cholesterol: Not specified