Listen, I know everyone thinks baking requires hours of oven time and worrying about whether your cake rose evenly. Forget all that! If you want a show-stopping dessert that tastes like it took all day but actually takes maybe fifteen minutes of actual work, this is it. We are talking about pure, velvety indulgence here. This No-Bake Chocolate Raspberry Tart is my secret weapon when friends drop by unexpectedly. It’s elegant, it’s rich, and the only heat source you need is a stovetop for about three minutes. Trust me, once you nail this, you’ll be making it every single week!
Why You Will Love This No-Bake Chocolate Raspberry Tart
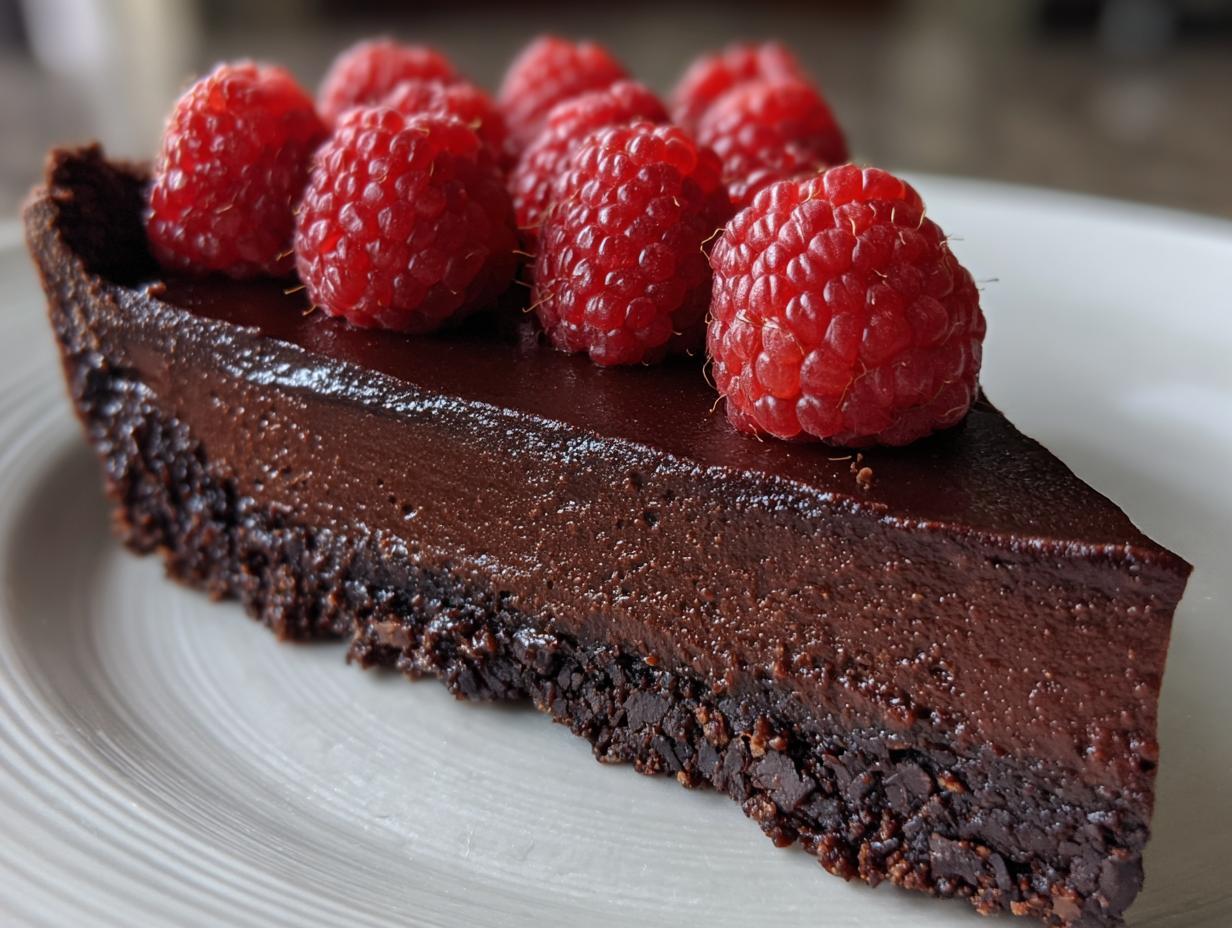
This dessert is pure genius because it skips the oven entirely! You get that deep, satisfying crunch from the almond cocoa crust, which is totally gluten-free, by the way. Then you pour in the ganache—oh, that ganache! It’s impossibly smooth dark chocolate cut perfectly by the tartness of the fresh raspberries on top. The final result is a truly luxurious No-Bake Chocolate Raspberry Tart that screams fancy but requires zero stress. It’s the perfect combination of speed and serious flavor payoff.
Essential Equipment for Your No-Bake Chocolate Raspberry Tart
You don’t need a million gadgets for this, thankfully. You definitely need a 9-inch tart pan with a removable bottom—that’s non-negotiable for pretty slices! Make sure you have a sturdy whisk, a heatproof bowl for the chocolate, and a couple of mixing bowls. That’s really it for the tools required to pull this off beautifully.
Gathering Ingredients for the No-Bake Chocolate Raspberry Tart
Okay, let’s talk supplies. Since we aren’t baking anything, the quality of what goes into the crust and the filling really shines through, so don’t skimp here! For the crust, we rely on almond flour—it gives such a nutty depth that regular flour just can’t touch. Then there’s the star of the show: the chocolate. You absolutely must use good quality dark chocolate, finely chopped. This isn’t the time for chocolate chips; we need that creamy melt for the ganache in our No-Bake Chocolate Raspberry Tart.
Almond Cocoa Crust Components
For the base, you’ll need two cups of almond flour, about a third of a cup of unsweetened cocoa powder, and just a tiny pinch of sea salt to keep things balanced. To bind it all up, we use melted coconut oil and three tablespoons of pure maple syrup. Make sure that coconut oil isn’t piping hot when you mix it in, or you’ll end up with sad, oily clumps instead of a nice dough!
Rich Ganache and Topping Ingredients for the No-Bake Chocolate Raspberry Tart
The filling is deceptively simple. You need about eight ounces of that dark chocolate you chopped up earlier, and half a cup of full-fat canned coconut milk—none of that thin carton stuff, please! That milk is what makes the ganache so incredibly rich and creamy. Then, for that little pop of brightness in the No-Bake Chocolate Raspberry Tart, grab three tablespoons of seedless raspberry jam. And, of course, you need about a cup and a half of gorgeous, fresh raspberries to pile on top before it sets.
Step-by-Step Instructions for the No-Bake Chocolate Raspberry Tart
Now for the fun part! Don’t stress about these steps; they are incredibly straightforward, but timing is everything when you’re working with ingredients that set up fast in the fridge. We move quickly from the crust to the filling so everything chills perfectly. Follow these steps exactly, and you’ll have the most stunning No-Bake Chocolate Raspberry Tart sitting in your fridge!
Preparing the Almond Crust Base
First things first: grab that 9-inch tart pan and give it a light coat of coconut oil. It just helps the release later. In a mixing bowl, combine your dry ingredients: the almond flour, the cocoa powder, and the salt. Whisk them really well—I mean, really get in there to break up any little clumps of cocoa, because nobody wants a dry pocket of powder in their slice!
Next, pour in the melted coconut oil and the maple syrup. Stir it up with a fork until it starts looking shaggy. You want to test it now: grab a handful and squeeze. If it holds together like wet sand, you’re golden. If it crumbles apart, add just a tiny drizzle more oil. Transfer that mixture into your prepared pan. Use your fingers or the flat bottom of a measuring cup to press it firmly—and I mean *firmly*—into the bottom and all the way up the sides. You want a solid wall here! Pop that shell into the refrigerator while we tackle the filling. It needs to chill while you work.
Crafting the Dark Chocolate Ganache Filling
This is where the magic happens. Put all your finely chopped dark chocolate into a heatproof bowl. Don’t touch it yet! In a small saucepan, heat up that full-fat coconut milk over medium heat. Watch it closely—you’re waiting for it to just start simmering, meaning you see those tiny little bubbles forming around the edges of the pan. It shouldn’t boil vigorously, just get hot and steamy.
Immediately pour that hot milk right over the chopped chocolate. Now, this is important: let it sit there, untouched, for a full minute. This gives the heat time to penetrate the chocolate without scorching it. After the minute is up, add your raspberry jam right on top. Now, switch to gentle whisking. You want to start in the middle and work your way out slowly. Keep whisking gently until everything melts together into this beautiful, glossy, perfectly smooth mixture. If you see any chocolate lumps, keep going softly until it’s unbelievably shiny.
Assembling and Setting Your No-Bake Chocolate Raspberry Tart
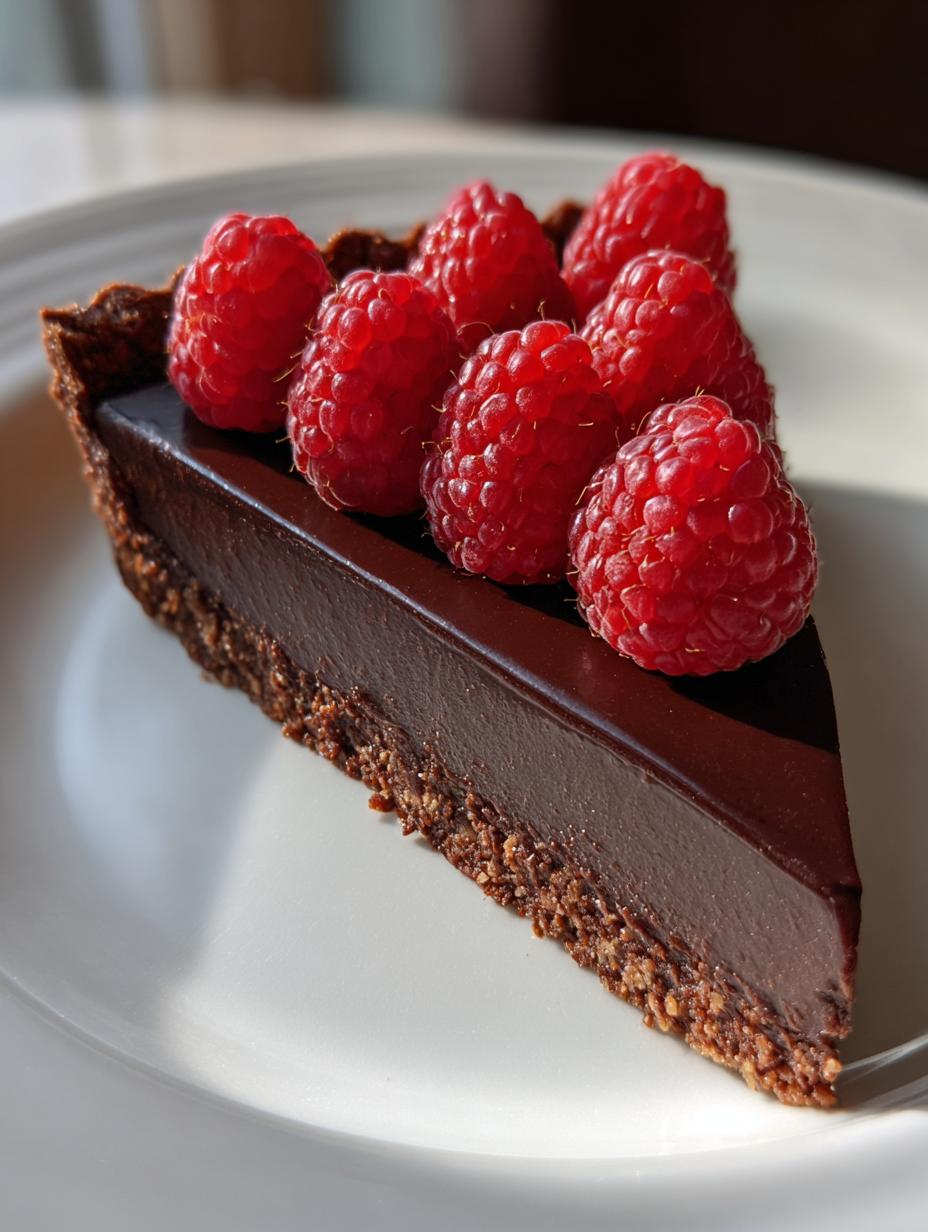
Pull that chilled crust out of the fridge. Pour the warm chocolate filling right into the crust. You need to gently tap the pan on the counter about three times—this is my secret for shaking out any hidden air bubbles that could ruin the surface. Now, quickly arrange those fresh raspberries over the top. Press them in just slightly so they stick firmly when the ganache sets around them.
Back into the refrigerator it goes! You need to let this No-Bake Chocolate Raspberry Tart chill, uncovered, for a minimum of two hours until the filling is completely firm. Don’t rush this part, or your slices will weep chocolate everywhere! Once it’s rock solid, you can loosely cover it if you’re storing it longer.
Tips for a Flawless No-Bake Chocolate Raspberry Tart
Even though this recipe is technically “no-bake,” there are a few little things that separate a good tart from a truly show-stopping one. The main thing is keeping things smooth and ensuring clean presentation when you serve it. If you follow these small tips, your No-Bake Chocolate Raspberry Tart will look professional, I promise!
Achieving the Smoothest Ganache
The absolute key to that mirror-like finish on your ganache is temperature control when mixing the milk and chocolate. Make sure that coconut milk is hot enough to melt the chocolate quickly, but don’t let it scorch—scorched milk means grainy chocolate, and we can’t have that! Also, whisk gently. If you beat air into the ganache too aggressively, it can sometimes seize up or look dull once it cools. Soft, slow incorporation is the way to go for maximum gloss.
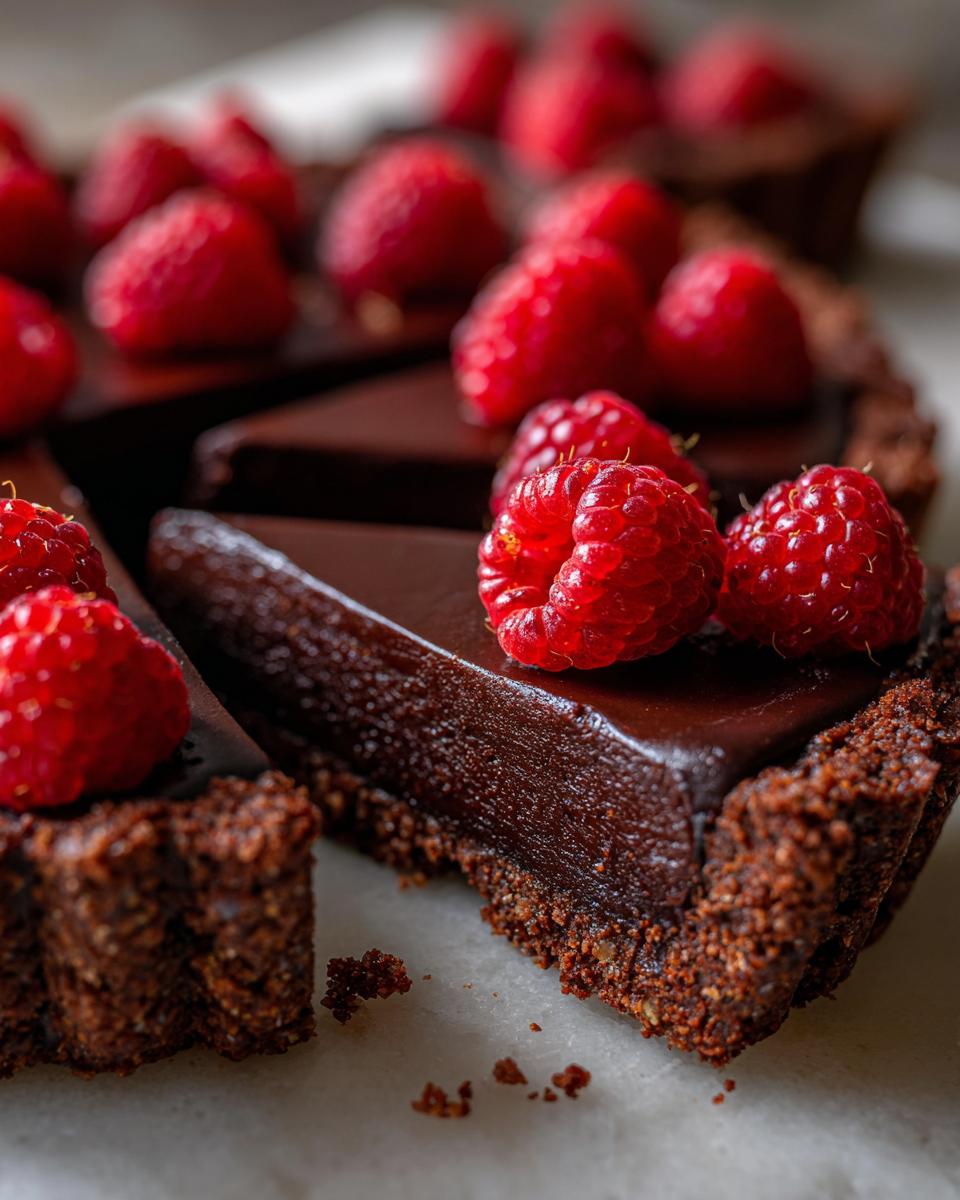
Perfect Slicing Technique for Your No-Bake Chocolate Raspberry Tart
This is the trick my mom taught me that changed everything! Once the tart is fully set, you need a very sharp knife. Before you make your first cut, dip the blade into hot water for a second, wipe it completely dry, and then slice. After every single cut, you repeat that—hot water, wipe dry, then slice the next piece. This prevents the chocolate from dragging and sticking to the blade, giving you those incredibly clean edges everyone always compliments!
Storing and Serving Your No-Bake Chocolate Raspberry Tart
The best part about this dessert is that it’s naturally designed for make-ahead chilling! Once your No-Bake Chocolate Raspberry Tart is fully set after those two hours in the fridge, it’s ready to go. It holds up beautifully because the coconut milk fat keeps the ganache stable. You can leave it uncovered during the initial setting time, but if you plan on keeping it for more than a few hours, cover it loosely with plastic wrap so it doesn’t pick up any fridge smells.
Storing Leftovers Safely
If you happen to have any leftover tart—which I highly doubt, because it vanishes fast—it needs to stay covered in the refrigerator. The recipe notes say you can keep it perfectly good for up to three days. Honestly, it tastes even better on day two once the flavors have really settled into that almond crust!
Frequently Asked Questions About the No-Bake Chocolate Raspberry Tart
I get so many questions about variations, so let’s clear up a few common ones right here. People always ask if they can swap out the flour or change the fruit. Here are the answers!
Can I substitute the almond flour in this No-Bake Chocolate Raspberry Tart?
You certainly can try substituting, but be warned, the texture will change quite a bit! Almond flour gives us the necessary fat and tenderness without needing eggs or baking powder. If you must swap, use an equal amount of finely ground hazelnut flour or maybe even crushed pecans. Just remember that if you switch to a different nut, the flavor profile of your No-Bake Chocolate Raspberry Tart will shift slightly away from the original recipe.
How long does this dessert need to chill before slicing?
The absolute minimum chilling time is two hours, provided your refrigerator is quite cold. I always recommend aiming closer to three hours just to be safe, especially if your kitchen was warm when you assembled it. If the center is still slightly soft when you gently poke it, give it 30 more minutes! Patience here means perfect presentation.
Q. Can I use milk chocolate instead of dark chocolate?
I strongly advise against it! Milk chocolate has too much sugar and not enough cocoa solids, which means your ganache won’t set up nearly as firmly, and it will taste overly sweet against the jam. Stick to 60% or higher dark chocolate.
Q. What if I don’t have seedless raspberry jam?
If you only have jam with seeds, you’ll need to gently press it through a fine-mesh sieve first to remove those seeds before adding it to the coconut milk and chocolate. We want that smooth, velvety texture in our No-Bake Chocolate Raspberry Tart filling!
Estimated Nutritional Data for Your No-Bake Chocolate Raspberry Tart
Since this is a no-bake recipe using whole ingredients, the numbers are estimates, but they give you a good idea of what you’re enjoying per slice. It’s rich, yes, but packed with good fats!
| Metric | Value |
|---|---|
| Serving Size | 1 slice |
| Calories | 295 |
| Fat | 22g |
| Carbohydrates | 24g |
| Protein | 6g |
Share Your Experience Making the No-Bake Chocolate Raspberry Tart
I am so excited for you to try this! Seriously, tell me everything. Did you decorate the top differently? Did you manage to save any leftovers? Drop a rating below, or better yet, share a picture of your finished dessert on social media and tag me! I want to see your gorgeous, chocolatey creations! Check out more ideas here.
Tips for a Flawless No-Bake Chocolate Raspberry Tart
Even though this recipe is technically “no-bake,” there are a few little things that separate a good tart from a truly show-stopping one. The main thing is keeping things smooth and ensuring clean presentation when you serve it. If you follow these small tips, your No-Bake Chocolate Raspberry Tart will look professional, I promise!
Achieving the Smoothest Ganache
The absolute key to that mirror-like finish on your ganache is temperature control when mixing the milk and chocolate. Make sure that coconut milk is hot enough to melt the chocolate quickly, but don’t let it scorch—scorched milk means grainy chocolate, and we can’t have that! Also, whisk gently. If you beat air into the ganache too aggressively, it can sometimes seize up or look dull once it cools. Soft, slow incorporation is the way to go for maximum gloss.
Perfect Slicing Technique for Your No-Bake Chocolate Raspberry Tart
This is the trick my mom taught me that changed everything! Once the tart is fully set, you need a very sharp knife. Before you make your first cut, dip the blade into hot water for a second, wipe it completely dry, and then slice. After every single cut, you repeat that—hot water, wipe dry, then slice the next piece. This prevents the chocolate from dragging and sticking to the blade, giving you those incredibly clean edges everyone always compliments!
Storing and Serving Your No-Bake Chocolate Raspberry Tart
The best part about this dessert is that it’s naturally designed for make-ahead chilling! Once your No-Bake Chocolate Raspberry Tart is fully set after those two hours in the fridge, it’s ready to go. It holds up beautifully because the coconut milk fat keeps the ganache stable. You can leave it uncovered during the initial setting time, but if you plan on keeping it for more than a few hours, cover it loosely with plastic wrap so it doesn’t pick up any fridge smells.
Storing Leftovers Safely
If you happen to have any leftover tart—which I highly doubt, because it vanishes fast—it needs to stay covered in the refrigerator. The recipe notes say you can keep it perfectly good for up to three days. Honestly, it tastes even better on day two once the flavors have really settled into that almond crust!
Frequently Asked Questions About the No-Bake Chocolate Raspberry Tart
I get so many questions about variations, so let’s clear up a few common ones right here. People always ask if they can swap out the flour or change the fruit. Here are the answers!
Can I substitute the almond flour in this No-Bake Chocolate Raspberry Tart?
You certainly can try substituting, but be warned, the texture will change quite a bit! Almond flour gives us the necessary fat and tenderness without needing eggs or baking powder. If you must swap, use an equal amount of finely ground hazelnut flour or maybe even crushed pecans. Just remember that if you switch to a different nut, the flavor profile of your No-Bake Chocolate Raspberry Tart will shift slightly away from the original recipe.
How long does this dessert need to chill before slicing?
The absolute minimum chilling time is two hours, provided your refrigerator is quite cold. I always recommend aiming closer to three hours just to be safe, especially if your kitchen was warm when you assembled it. If the center is still slightly soft when you gently poke it, give it 30 more minutes! Patience here means perfect presentation.
Q. What if I don’t have seedless raspberry jam?
If you only have jam with seeds, you’ll need to gently press it through a fine-mesh sieve first to remove those seeds before adding it to the coconut milk and chocolate. We want that smooth, velvety texture in our No-Bake Chocolate Raspberry Tart filling!
Q. Can I use milk chocolate instead of dark chocolate?
I strongly advise against it! Milk chocolate has too much sugar and not enough cocoa solids, which means your ganache won’t set up nearly as firmly, and it will taste overly sweet against the jam. Stick to 60% or higher dark chocolate for this recipe.
Estimated Nutritional Data for Your No-Bake Chocolate Raspberry Tart
Look, since we aren’t using any processed white sugar or flour here, this tart is surprisingly rich in good fats from the almonds and coconut. These numbers are just estimates based on the ingredients, but it gives you a good idea of what’s in that decadent slice! You’re getting protein and fiber from the nuts, which is a bonus for a chocolate dessert! If you are looking for other healthy dessert ideas, check out our desserts category.
| Metric | Value |
|---|---|
| Serving Size | 1 slice |
| Calories | 295 |
| Fat | 22g |
| Carbohydrates | 24g |
| Protein | 6g |
Share Your Experience Making the No-Bake Chocolate Raspberry Tart
I am so excited for you to try this! Seriously, tell me everything. Did you decorate the top differently? Did you manage to save any leftovers? Drop a rating below, or better yet, share a picture of your finished dessert on social media and tag me! I want to see your gorgeous, chocolatey creations! Follow us on Pinterest for more inspiration.
Tips for a Flawless No-Bake Chocolate Raspberry Tart
Even though this recipe is technically “no-bake,” there are a few little things that separate a good tart from a truly show-stopping one. The main thing is keeping things smooth and ensuring clean presentation when you serve it. If you follow these small tips, your No-Bake Chocolate Raspberry Tart will look professional, I promise!
Achieving the Smoothest Ganache
The absolute key to that mirror-like finish on your ganache is temperature control when mixing the milk and chocolate. Make sure that coconut milk is hot enough to melt the chocolate quickly, but don’t let it scorch—scorched milk means grainy chocolate, and we can’t have that! Also, whisk gently. If you beat air into the ganache too aggressively, it can sometimes seize up or look dull once it cools. Soft, slow incorporation is the way to go for maximum gloss.
Perfect Slicing Technique for Your No-Bake Chocolate Raspberry Tart
This is the trick my mom taught me that changed everything! Once the tart is fully set, you need a very sharp knife. Before you make your first cut, dip the blade into hot water for a second, wipe it completely dry, and then slice. After every single cut, you repeat that—hot water, wipe dry, then slice the next piece. This prevents the chocolate from dragging and sticking to the blade, giving you those incredibly clean edges everyone always compliments!
Storing and Serving Your No-Bake Chocolate Raspberry Tart
The best part about this dessert is that it’s naturally designed for make-ahead chilling! Once your No-Bake Chocolate Raspberry Tart is fully set after those two hours in the fridge, it’s ready to go. It holds up beautifully because the coconut milk fat keeps the ganache stable. You can leave it uncovered during the initial setting time, but if you plan on keeping it for more than a few hours, cover it loosely with plastic wrap so it doesn’t pick up any fridge smells.
Storing Leftovers Safely
If you happen to have any leftover tart—which I highly doubt, because it vanishes fast—it needs to stay covered in the refrigerator. The recipe notes say you can keep it perfectly good for up to three days. Honestly, it tastes even better on day two once the flavors have really settled into that almond crust!
Frequently Asked Questions About the No-Bake Chocolate Raspberry Tart
I get so many questions about variations, so let’s clear up a few common ones right here. People always ask if they can swap out the flour or change the fruit. Here are the answers!
Can I substitute the almond flour in this No-Bake Chocolate Raspberry Tart?
You certainly can try substituting, but be warned, the texture will change quite a bit! Almond flour gives us the necessary fat and tenderness without needing eggs or baking powder. If you must swap, use an equal amount of finely ground hazelnut flour or maybe even crushed pecans. Just remember that if you switch to a different nut, the flavor profile of your No-Bake Chocolate Raspberry Tart will shift slightly away from the original recipe.
How long does this dessert need to chill before slicing?
The absolute minimum chilling time is two hours, provided your refrigerator is quite cold. I always recommend aiming closer to three hours just to be safe, especially if your kitchen was warm when you assembled it. If the center is still slightly soft when you gently poke it, give it 30 more minutes! Patience here means perfect presentation.
Q. What if I don’t have seedless raspberry jam?
If you only have jam with seeds, you’ll need to gently press it through a fine-mesh sieve first to remove those seeds before adding it to the coconut milk and chocolate. We want that smooth, velvety texture in our No-Bake Chocolate Raspberry Tart filling!
Q. Can I use milk chocolate instead of dark chocolate?
I strongly advise against it! Milk chocolate has too much sugar and not enough cocoa solids, which means your ganache won’t set up nearly as firmly, and it will taste overly sweet against the jam. Stick to 60% or higher dark chocolate for this recipe.
Estimated Nutritional Data for Your No-Bake Chocolate Raspberry Tart
Look, since we aren’t using any processed white sugar or flour here, this tart is surprisingly rich in good fats from the almonds and coconut. These numbers are just estimates based on the ingredients, but it gives you a good idea of what’s in that decadent slice! You’re getting protein and fiber from the nuts, which is a bonus for a chocolate dessert! For more healthy recipes, check out our full recipe index.
| Metric | Value |
|---|---|
| Serving Size | 1 slice |
| Calories | 295 |
| Fat | 22g |
| Carbohydrates | 24g |
| Protein | 6g |
Share Your Experience Making the No-Bake Chocolate Raspberry Tart
I am so excited for you to try this! Seriously, tell me everything. Did you decorate the top differently? Did you manage to save any leftovers? Drop a rating below, or better yet, share a picture of your finished dessert on social media and tag me! I want to see your gorgeous, chocolatey creations!
Print
Stunning No-Bake Chocolate Raspberry Tart in 15 mins
- Total Time: 2 hours 15 minutes
- Yield: 10 servings 1x
- Diet: Vegetarian
Description
This no-bake chocolate raspberry tart has a rich dark chocolate ganache filling set in an almond cocoa crust. It requires only refrigerator time to set.
Ingredients
- 2 cups almond flour
- ⅓ cup unsweetened cocoa powder
- ⅓ cup coconut oil, melted and slightly cooled
- 3 tablespoons pure maple syrup
- ¼ teaspoon fine sea salt
- 8 ounces dark chocolate, finely chopped
- ⅔ cup canned full-fat coconut milk
- 3 tablespoons seedless raspberry jam
- 1½ cups fresh raspberries
Instructions
- Lightly coat a 9-inch tart pan with removable bottom with coconut oil and set aside.
- Combine almond flour, cocoa powder, and salt in a medium bowl and whisk to break up any lumps. Add melted coconut oil and maple syrup, then stir with a fork until mixture clumps together when pressed.
- Transfer crust mixture to prepared pan and press firmly into bottom and up the sides using your fingers or the flat bottom of a measuring cup. Place pan in refrigerator while you prepare filling.
- Place finely chopped dark chocolate in a heatproof bowl. Pour coconut milk into a small saucepan and heat over medium heat, stirring occasionally, until it just begins to simmer and small bubbles form around the edges.
- Pour hot coconut milk over chopped chocolate and let stand 1 minute without stirring. Add raspberry jam, then whisk gently until mixture is completely smooth and glossy with no chocolate pieces remaining.
- Pour chocolate filling into chilled crust and gently tap pan on counter three times to release any air bubbles. Arrange fresh raspberries on top while filling is still warm, pressing them gently into the surface so they stick.
- Refrigerate tart uncovered for 2 hours until filling is completely firm and set. Once set, cover loosely with plastic wrap if storing longer.
- Remove outer ring from tart pan before slicing. Use a sharp knife wiped clean between each cut for neat slices. Serve chilled and store leftovers covered in refrigerator up to 3 days.
Notes
- This dessert sets firm in the refrigerator.
- Wipe your knife clean between cuts for best slicing appearance.
- Store leftovers covered in the refrigerator for up to 3 days.
- Prep Time: 15 minutes
- Cook Time: 0 minutes
- Category: Dessert
- Method: No-Bake
- Cuisine: American
Nutrition
- Serving Size: 1 slice
- Calories: 295
- Sugar: N/A
- Sodium: N/A
- Fat: 22g
- Saturated Fat: N/A
- Unsaturated Fat: N/A
- Trans Fat: N/A
- Carbohydrates: 24g
- Fiber: N/A
- Protein: 6g
- Cholesterol: N/A