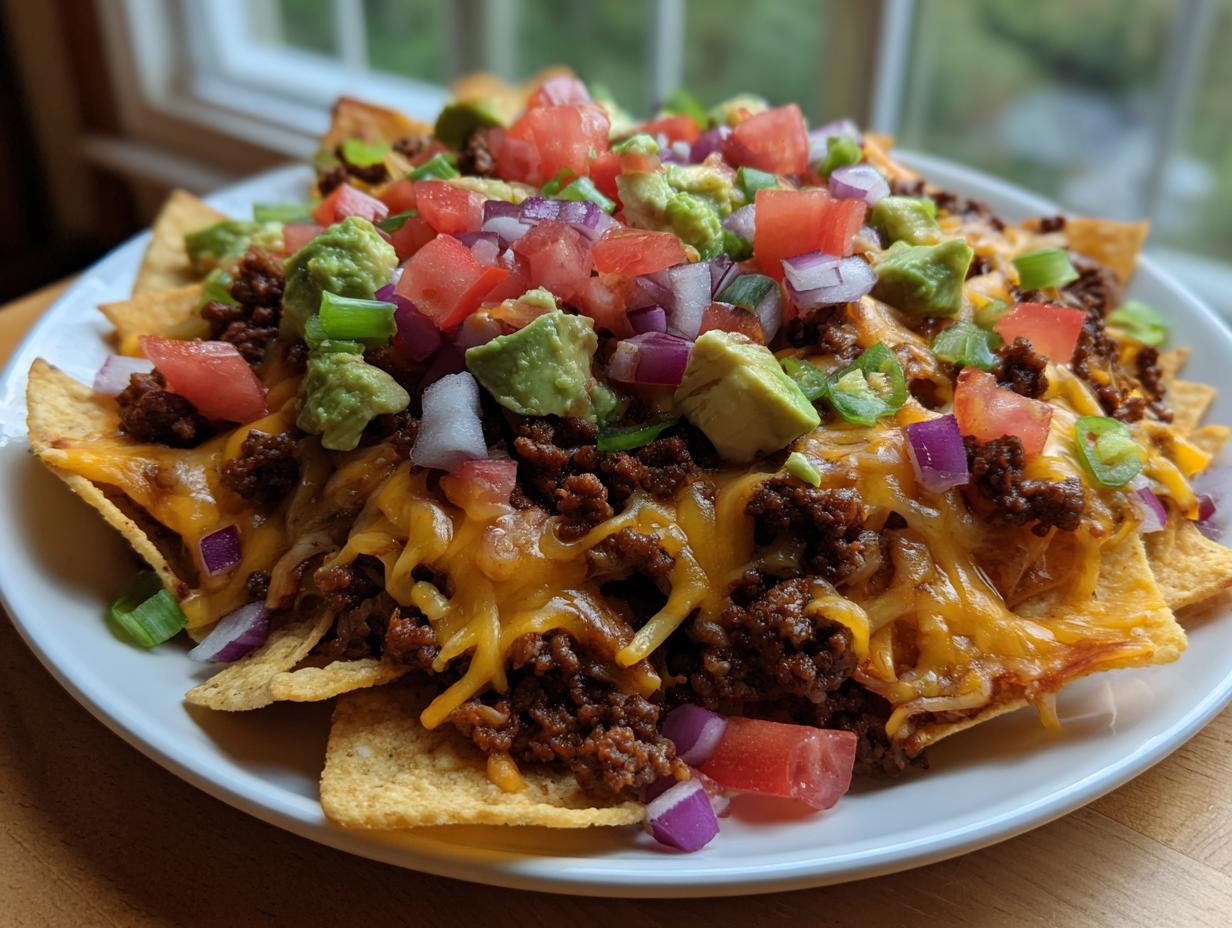
Okay, listen up, because when I say these are the ultimate party food, I mean it! Forget those sad, sparse chip piles you sometimes get. We are making loaded nachos that actually live up to the name. I’m talking about a mountain of flavor that disappears before the first commercial break during the game.
I’ve made these for practically every tailgate party since college, and I’ve learned that the secret isn’t just piling things on—it’s layering the flavor right into the meat. Trust me, once you try this method, you won’t go back to just sprinkling cheese on top. These loaded nachos are rich, satisfying, and honestly, a little bit messy, which is exactly how they should be!
Essential Ingredients for Perfect Loaded Nachos
Getting the right ingredients is half the battle here; you can’t have great loaded nachos without a solid foundation. I’ve listed everything out below, but I want to stress a couple of things before you shop. First, don’t skimp on the cheese! We need that mix for the perfect gooey texture. Second, the toppings need to be fresh—they cut right through the richness of the beef and cheese.
You’ll need 1 tablespoon of olive oil to get us started, 1 pound of good ground beef (I always use zabiha beef, just like the recipe calls for), half a cup of diced onion, and two minced garlic cloves. Then come the flavor boosters, which we’ll talk more about in the next section! You can substitute ground turkey if you prefer leaner meat.
Ground Beef Seasoning Components for Loaded Nachos
This is where the magic starts for our loaded nachos. You need 1 teaspoon of chili powder, half a teaspoon each of cumin and smoked paprika, and a quarter teaspoon of black pepper and salt. This blend is simple but powerful. It creates that classic, hearty flavor that makes you reach for another chip before you’ve finished the last bite. Don’t try to skip the paprika—that little bit of smokiness is crucial!
Fresh Toppings and Cheese Selection
For the cheese, we are using a blend: one and a half cups of shredded cheddar and one cup of Monterey Jack. That Jack melts like a dream! For the fresh elements, you’ll want one cup of diced tomatoes, half a cup of diced red onion, one minced jalapeño (seeds out if you’re nervous!), two tablespoons of chopped cilantro, and one diced avocado. Prep all your fresh stuff while the beef simmers; this way, when the chips come out of the oven, everything is waiting to go on top of your amazing loaded nachos.
Equipment Needed for Assembling Your Loaded Nachos
You don’t need a whole arsenal of fancy gadgets for these, thankfully! Preparation foresight makes assembly so much smoother. You’ll definitely want a large skillet for cooking up that seasoned beef mixture. Make sure you have a large, sturdy baking sheet—the bigger, the better, so you can spread those chips out properly instead of piling them too high.
Also, grab a cutting board and a sharp knife for prepping all your fresh veggies. Having everything ready to go means you can move fast once those chips are perfectly cheesy and bubbly right out of the oven!
Step-by-Step Instructions for Perfect Loaded Nachos
Alright, now for the fun part! Watching these come together is almost as good as eating them. We need to move pretty quickly once the cheese starts melting, so have your fresh toppings ready to go. Follow these steps exactly, and you’ll have the most epic plate of loaded nachos ever seen at a gathering.
Preparing the Flavorful Seasoned Beef for Loaded Nachos
First things first, get your oven preheated to 400°F. That heat needs to be ready when the chips are assembled. Next, grab that large skillet and heat up your olive oil over medium-high heat. Toss in your diced onion and let them soften up for about two minutes—you want them translucent, not browned yet. Then, add your ground beef. You need to cook this for about 6 to 8 minutes until it’s beautifully browned all over. This is super important: drain off all that excess fat! Seriously, nobody likes a greasy chip. Once it’s drained, stir in your minced garlic and all those spices—chili powder, cumin, paprika, salt, and pepper. Let that cook for one minute until it smells incredible, like a real Tex-Mex kitchen! Check out more quick meal ideas.
Finally, stir in your rinsed black beans and that quarter cup of water. Let this whole mixture simmer for about three minutes. The water helps the spices really cling to everything, thickening the sauce just enough so it doesn’t soak our chips right away. Once it’s thickened slightly, take it off the heat. That seasoned beef is the heart of these loaded nachos!
Layering Technique for Maximum Chip Coverage
This layering step is what separates my nachos from everyone else’s. Don’t just dump everything onto one pile! Grab your big baking sheet. Spread out about half of your tortilla chips in a single, relatively even layer. Now, take half of that gorgeous seasoned beef mixture and spread it over those chips. Then, sprinkle half of your cheddar and half of your Monterey Jack cheese right on top of the beef. We need cheese everywhere, right?
Now, repeat the whole process! Lay down the remaining chips right over the first layer. Top those with the rest of the beef mixture, and finish it off with the remaining cheese. This double-layer approach ensures that chips hiding underneath still get some meat and cheese when you dig in. It’s critical for truly loaded nachos.
Baking and Finishing Your Loaded Nachos
Slide that loaded sheet pan into the preheated 400°F oven. You’re looking for 8 to 10 minutes. You want the cheese completely melted, bubbly, and maybe even starting to brown just a tiny bit at the edges. While that’s baking, quickly mix your diced tomatoes, red onion, minced jalapeño, and cilantro in a bowl. That’s your fresh pico de gallo! If you want more ideas for fresh toppings, see our Pinterest board.
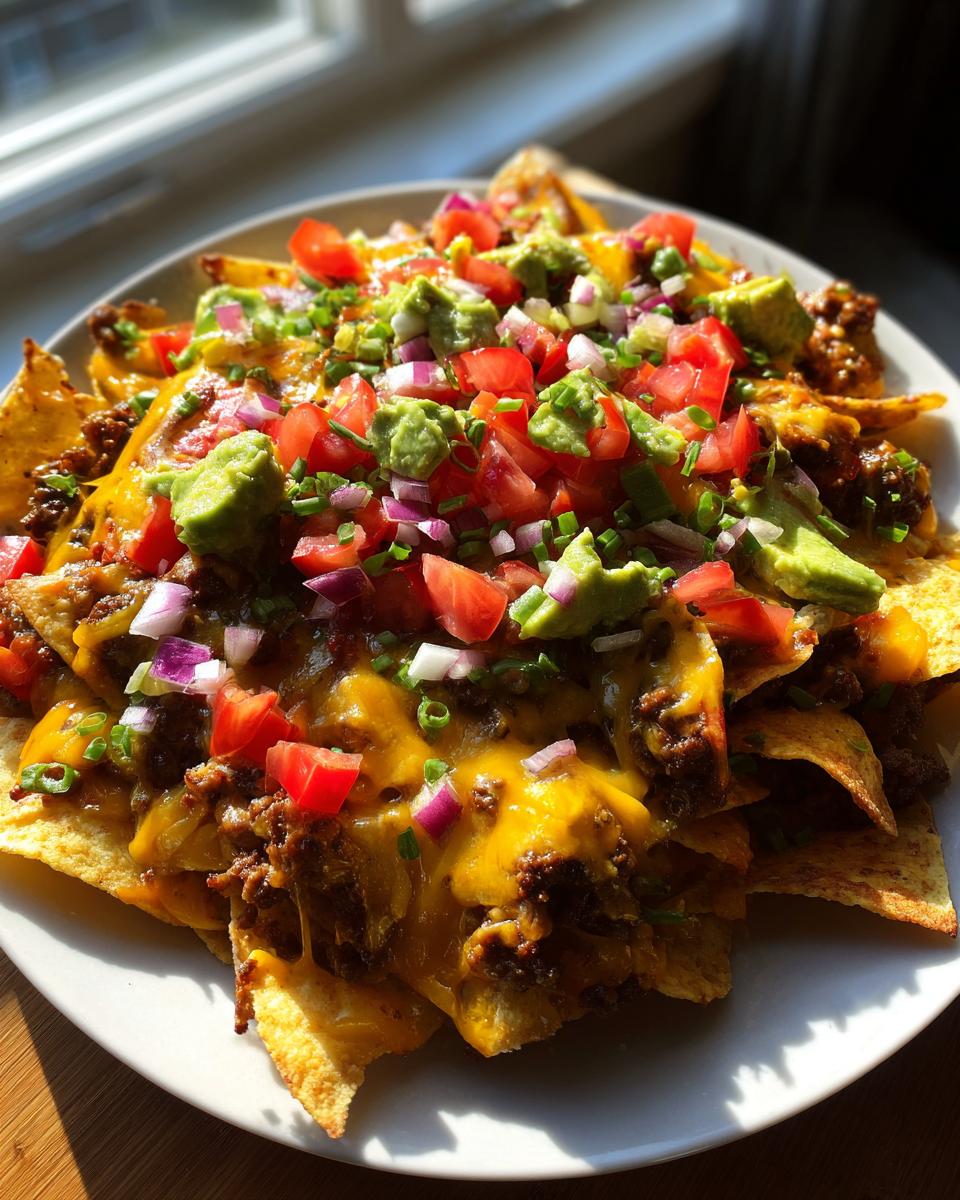
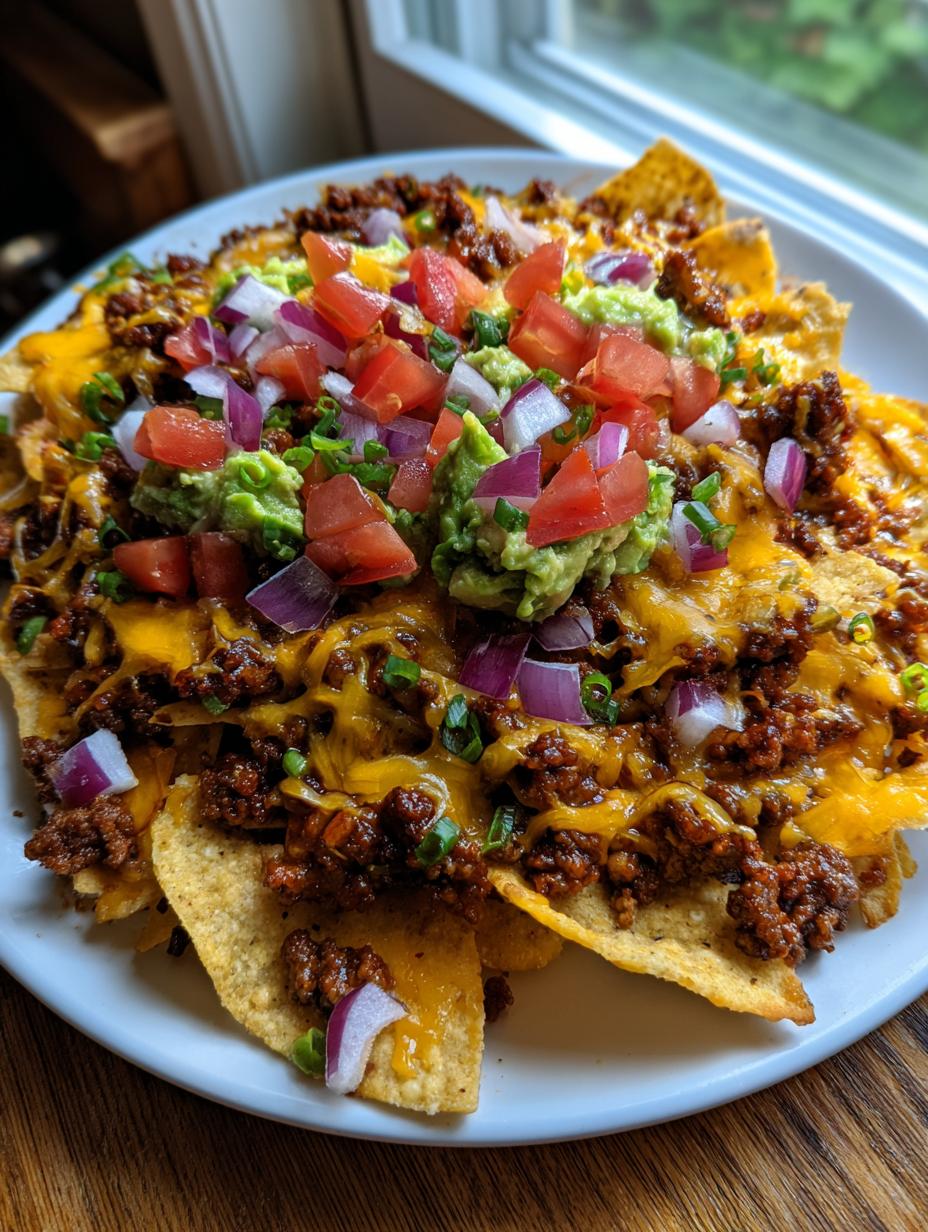
As soon as the nachos come out—and I mean *immediately*—start topping them. Scatter your avocado chunks over the melted cheese. Then, spoon generous dollops of that fresh pico de gallo all over the top layer. Serve them right away with lime wedges on the side. A squeeze of fresh lime right before you bite in brightens everything up!
Tips for Success When Creating Loaded Nachos
I’ve learned a few tricks over the years to make sure these giant plates of loaded nachos don’t turn into a soggy mess halfway through the party. The biggest enemy here is moisture hitting the chips too soon! That’s why we always bake the meat and cheese first.
My absolute top tip is to control the liquid in the beef mixture. When you simmer it with the beans, make sure it’s thickened up enough that it coats the back of a spoon. If it looks soupy, let it reduce longer before you take it off the heat. Soupy meat means soggy chips, and nobody wants that! If you love cheese dips, try this one next.
Another thing that helps with even coverage is using a mix of shredded cheeses. The cheddar melts well but can get a little oily, so the Monterey Jack keeps things creamy and smooth. Make sure you grate the cheese yourself, too; the pre-shredded stuff has anti-caking agents that stop it from melting perfectly over your loaded nachos.
Finally, timing is everything. Have your fresh toppings—the pico, the avocado—cut and ready before the nachos even go into the oven. The second they come out, you need to move fast. The residual heat from the cheese keeps everything warm while the fresh toppings add that vital cool contrast. It’s a balancing act that makes these truly excellent!
Ingredient Notes and Acceptable Substitutions
I always try to stick to the recipe exactly, especially when it comes to the beef. The recipe calls for zabiha ground beef, and I really recommend you use that if it’s important to you or your family. It’s the only way to keep the integrity of this particular recipe intact.
Now, if you’re in a pinch, we can talk substitutions for the other parts. For the beans, if you don’t have black beans on hand, kidney beans work just fine, but make sure you rinse and drain them really, really well! You don’t want that extra liquid making your nachos wet. Beans are great in salads too.
When it comes to cheese, if you can’t find Monterey Jack, Colby or even mild Pepper Jack would be a decent swap. The main thing is that you need a good melting cheese alongside your cheddar. Don’t use pre-shredded mozzarella, though—it just doesn’t get that beautiful, stringy pull we want on our loaded nachos.
If you run out of fresh cilantro, dried cilantro just isn’t going to cut it here; maybe skip it or use a tiny bit of dried oregano instead for a different kind of herbal note. And for the avocado, if yours isn’t ripe, a dollop of plain Greek yogurt or sour cream is a perfectly acceptable, creamy substitute!
Storing and Reheating Leftover Loaded Nachos
Okay, let’s be real, sometimes you can’t finish the whole giant platter of loaded nachos—though I usually try! The key to leftovers is separating the hot, baked components from the fresh, cold ones. If you store everything together, you’ll wake up to a soggy, cheesy brick the next day, and nobody wants that disappointment.
For the best results, scrape off any leftover avocado, pico de gallo, or cilantro and keep those in a separate airtight container in the fridge. They only last a day or two, max. The baked chips, meat, and cheese mixture can be stored together, but they need to be cooled completely first. Once cooled, put them in a container or a large zip-top bag.
Storage Table for Leftover Loaded Nachos
Here’s how I manage the different parts of the leftover nachos so they taste as good as possible when you reheat them:
-
Component: Baked Chips, Meat & Cheese Mix
Storage Method: Airtight container at room temperature or in the fridge.
Duration: Up to 2 days.
Reheating Method: Spread thinly on a baking sheet at 350°F for 5-7 minutes.
-
Component: Fresh Toppings (Pico, Guac, etc.)
Storage Method: Small, separate airtight container in the fridge.
Duration: 1-2 days max.
Reheating Method: Do not reheat; serve cold on top of reheated chips.
Frequently Asked Questions About Loaded Nachos
I get so many questions after people try this recipe because they realize how much better it is than anything they’ve made before! Here are the ones I hear most often about making truly great party food.
If you’re planning a big event, you absolutely can make the meat ahead of time. That’s one of the best parts about this recipe for party food! Just cook the beef mixture completely, let it cool down, and store it in an airtight container in the fridge for up to three days before you plan to serve. When it’s time to assemble your loaded nachos, just reheat the beef mixture on the stovetop until it’s hot before layering it over the chips. This saves so much time right before your guests arrive!
Can I Prepare the Beef Topping Ahead of Time?
Yes, you totally can! Cooking the seasoned beef mixture ahead of time is a huge time-saver. Just make sure it cools completely before you seal it up in the fridge. You can keep that flavorful meat ready to go for about three days. When you’re ready to build your platter, just warm the beef back up on the stove first before spreading it on the chips. It helps keep the chips from getting steamed while the meat warms up in the oven.
What is the Best Way to Avoid Soggy Loaded Nachos?
This is the million-dollar question! The very best way to avoid soggy loaded nachos is to use the double-layering technique we talked about. Spreading the chips out on the pan in two distinct layers, separated by meat and cheese, means fewer chips are touching the bottom layer of moisture. Also, make absolutely sure you simmer that beef mixture long enough so that the sauce is thick and clings to the meat, not watery. If you follow those two rules, your chips should stay crisp until the very last bite!
Share Your Experience with These Loaded Nachos
Now that you’ve made the ultimate plate of loaded nachos, I just have to know what you thought! Did they disappear as fast at your house as they do at mine? Please take a moment to leave a rating below or drop a quick comment telling me how your game day turned out. I love hearing about your kitchen successes!
Print
Awesome 5-Star Loaded Nachos Recipe
- Total Time: 30 minutes
- Yield: 6 servings 1x
- Diet: N/A
Description
These loaded nachos are piled high with seasoned beef, beans, melty cheese, and fresh toppings. The ultimate game day or family snack platter!
Ingredients
- 1 tablespoon olive oil
- 1 pound ground beef (zabiha)
- ½ cup diced onion
- 2 garlic cloves, minced
- 1 teaspoon chili powder
- ½ teaspoon cumin
- ½ teaspoon smoked paprika
- ¼ teaspoon black pepper
- ½ teaspoon salt
- 1 cup canned black beans, rinsed and drained
- ¼ cup water
- 10 ounces tortilla chips
- 1½ cups shredded cheddar cheese
- 1 cup shredded Monterey Jack cheese
- 1 cup diced tomatoes
- ½ cup diced red onion
- 1 small jalapeño, minced
- 2 tablespoons chopped cilantro
- 1 avocado, diced
- Lime wedges for serving
Instructions
- Preheat oven to 400°F.
- Heat olive oil in a large skillet over medium-high heat. Add onion and sauté 2 minutes until soft.
- Add ground beef and cook 6 to 8 minutes until browned. Drain excess fat.
- Stir in garlic, chili powder, cumin, paprika, pepper, and salt. Cook 1 minute.
- Add black beans and water. Simmer 3 minutes until slightly thickened. Remove from heat.
- On a large baking sheet, spread half of the tortilla chips. Layer with half of the beef mixture and half of each cheese.
- Repeat with another layer of chips, beef, and cheese.
- Bake 8 to 10 minutes, until cheese is fully melted and bubbly.
- While baking, mix tomatoes, red onion, jalapeño, and cilantro to make fresh pico de gallo.
- Remove nachos from oven. Top with avocado and spoonfuls of pico de gallo.
- Serve immediately with lime wedges.
Notes
- Use zabiha ground beef as specified.
- Drain excess fat from the ground beef after browning.
- Prep Time: 15 minutes
- Cook Time: 15 minutes
- Category: Appetizer
- Method: Baking
- Cuisine: Mexican-American
Nutrition
- Serving Size: 1 serving
- Calories: 420
- Sugar: N/A
- Sodium: N/A
- Fat: 22g
- Saturated Fat: N/A
- Unsaturated Fat: N/A
- Trans Fat: N/A
- Carbohydrates: 28g
- Fiber: N/A
- Protein: 25g
- Cholesterol: N/A