When the craving for cheesecake hits and you’re sticking to low-carb or keto, waiting for a full-sized dessert to bake feels like an eternity. That’s why I developed this recipe for Keto Mug Cheesecake. Seriously, it’s my absolute secret weapon for those moments when I need something rich, creamy, and satisfying in under five minutes total.
This isn’t just fast; it’s portion control heaven! You mix everything right in the dish you’re going to eat it from. Forget trying to save slices or dealing with a whole cake sitting on the counter tempting you all week. This single-serve treat delivers all that tangy, creamy goodness without the guilt or the massive cleanup.
Trust me, when you’re deep into a low-carb lifestyle, having this quick fix ready to go is a game-changer. It’s the closest you’ll get to a perfect cheesecake texture using just the microwave. I’ve burned so many microwave desserts trying to get this right, but I finally cracked the code on timing!
Essential Ingredients for Your Keto Mug Cheesecake
The success of any microwave dessert hinges entirely on what you put into it, and this Keto Mug Cheesecake is no exception. Because we aren’t baking for a long time, the ingredients need to blend perfectly to avoid any grainy texture. We need full-fat dairy here—no low-fat substitutes, or you’ll end up with something watery, not creamy!
Getting the right balance of tang from the lemon and sweetness from the powdered sweetener is what makes this taste like the real deal. I learned the hard way that liquid sweeteners just don’t work well in this microwave method, so stick to what I use!
Gathering Components for Keto Mug Cheesecake
Precision matters when you’re only making a single serving. If you measure the egg wrong, the whole thing turns into scrambled eggs! You’ll want to use a small whisk or a fork to get these components combined really well before they hit the microwave. Here is exactly what you need for two perfect little portions of Keto Mug Cheesecake:
Ingredient Breakdown Table
| Ingredient | Amount | Notes |
|---|---|---|
| Full Fat Cream Cheese | 4 ounces | Must be softened to room temperature |
| Large Egg | 1 | Whisked well before measuring |
| Powdered Monk Fruit Sweetener | 1 1/2 tablespoons | Must be powdered, not granulated |
| Vanilla Extract | 1/2 teaspoon | For warmth |
| Fresh Lemon Zest | 1/4 teaspoon | Adds brightness |
| Fresh Lemon Juice | 1/2 teaspoon | For that classic cheesecake tang |
| Light Olive Oil | Light coating | For greasing the ramekins safely |
Ingredient Notes and Smart Substitutions
If you don’t have monk fruit, erythritol works fine, but again, please use the powdered version. If you try to use granulated sweetener, you’ll end up with a gritty texture, and that’s just sad for a cheesecake.
I’ve tried swapping the egg, but honestly, the egg is what gives it structure in the microwave. Without it, you get warm cream cheese dip! If you absolutely can’t use a whole egg, you might try using just the yolk, but you’ll need to reduce the cooking time by about 10 seconds.
For the citrus, if you truly hate lemon, you can skip the zest and juice, but you’ll lose that signature cheesecake flavor that cuts through the richness of the cream cheese. A tiny drop of almond extract could sub in for vanilla if you’re out, but vanilla is my first choice for flavor depth.
Step-by-Step Guide to Perfect Keto Mug Cheesecake
Okay, this is where the magic happens, and it happens fast! Because we are dealing with the microwave, we have to be quick but precise. If you rush the mixing or the cooking, you’ll end up with a disaster. But follow these steps exactly, and you’ll have the best Keto Mug Cheesecake you’ve ever made in minutes.
I always make sure my cream cheese is truly soft—room temperature is key! If you try to mix cold cream cheese, you’ll get lumps, and no amount of whisking will fix that once it’s cooked. It needs to be smooth like soft butter before you even think about adding the egg.
Preparing the Ramekins and Batter
First things first: stop your ramekins from sticking! I use a tiny bit of light olive oil—just a smear with a paper towel works—to coat the inside of my 6-ounce ramekins. You don’t want thick globs, just a very thin barrier. This saves you so much heartache later when you try to get the cheesecake out.
Next, get that batter mixed. Put the softened cream cheese, the egg, the powdered sweetener, vanilla, zest, and juice all into one small bowl. Use a whisk and go to town! You need to whisk vigorously until every single particle of sweetener is dissolved and the mixture is totally smooth. I mean it—no little white specks floating around. This thorough mixing is crucial for the final texture of your Keto Mug Cheesecake.
Once it’s perfect, divide the batter evenly between your two prepared dishes. Do not fill them higher than three-quarters full. Seriously, these things puff up like little volcanoes when they cook, and you do not want hot cream cheese batter spilling all over your microwave!
Microwave Cooking Times for Your Keto Mug Cheesecake
This is the make-or-break moment for any microwave dessert. You have to cook these one at a time. Put the first ramekin in and start with 60 seconds on high power. When it’s done, you’re looking for the edges to look firm and set, but the very center should still have a tiny wobble, like soft gelatin.
If the center looks completely dry, you’ve gone too far, and your Keto Mug Cheesecake will be rubbery! If it still looks like liquid batter, give it another 15 to 20 seconds, checking every 5 seconds after that first minute. It cooks incredibly fast, so stand there and watch it. That slight jiggle is your signal that you’ve nailed the timing.
Setting and Chilling for Optimal Texture
Once you pull that wobbly masterpiece out, don’t eat it yet! I know it’s tempting, but you have to let it cool down on the counter for about 10 minutes first. This lets the internal temperature start to even out.
After that initial cool-down, it needs a good chill. Pop them in the fridge for at least 30 minutes. This chilling time is non-negotiable. It’s what transforms that warm, soft center into that dense, cool, creamy texture we all love in a proper cheesecake. If you skip this, it’s just warm, sweet cream cheese!
Tips for Making the Best Keto Mug Cheesecake
I’ve made this Keto Mug Cheesecake so many times that I know exactly what separates a good one from a truly amazing, creamy one. You’ve got the ingredients right, you’ve got the timing down, but here are the little secrets I rely on every single time to ensure perfection.
First, and I can’t stress this enough: use room-temperature cream cheese. If you try to rush it by microwaving the block, it gets melty and oily, and that oil separates during the cooking process. Take it out an hour before you plan to mix. A quick poke test should leave a soft dent without your finger sinking right through.
Second, don’t use a huge mug! I know the temptation is to make a giant single serving, but the heat distribution in a very large container is uneven. That’s why I specified 6-ounce ramekins. They are the perfect size to cook quickly and evenly, which is the secret to avoiding that tough, rubbery texture so common in microwave desserts.
Third, think about your sweetener again. Powdered is mandatory. If you use a granular sweetener, you’ll end up stirring forever trying to dissolve it, and then you risk over-developing the egg protein while you stir. Powdered melts right into the fats and liquids, giving you that smooth, silky mouthfeel that makes this Keto Mug Cheesecake taste professional.
Finally, resist the urge to eat it right out of the microwave! That 30 minutes in the fridge is just as important as the 60 seconds you spend microwaving. It firms up the structure beautifully.
Serving Suggestions for Your Single-Serve Keto Mug Cheesecake
The beauty of this dessert is that it’s fantastic all by itself, but it’s also the perfect blank canvas for some keto-friendly toppings! Since these are single servings, you don’t need huge piles of toppings, just a little flourish to make it feel extra special.
My absolute favorite thing to do is top it with a few fresh raspberries or maybe half a small strawberry right on top. The slight tartness of the berries cuts through the richness of the cream cheese, and they look so pretty against the pale yellow cheesecake.
If you’re looking for something crunchy, a light sprinkle of chopped pecans or walnuts is wonderful. Toasting them in a dry pan for just a couple of minutes before you chop them really brings out their flavor. It adds a necessary textural contrast to the creamy center.
For a chocolate fix, skip the sugary syrup and melt down a square of 90% dark chocolate very gently. Just a small drizzle over the top when it’s slightly cooled is enough to satisfy that craving without adding many carbs. Remember, since this is a quick treat, keep your toppings simple so you can enjoy it right away!
Storing and Reheating Your Keto Mug Cheesecake
Even though this recipe is generally made for immediate enjoyment, sometimes life happens, and you might have one ramekin left over! Since the texture is best when chilled, you can absolutely save it for later. Just make sure you cover it tightly before it goes into the fridge.
The biggest thing to remember is that reheating microwave-cooked egg dishes can be tricky. We want to gently warm it up, not cook it again, because that’s how you get that rubbery texture we worked so hard to avoid!
Storage and Leftover Table
| Storage Location | Duration | Reheating Method |
|---|---|---|
| Refrigerator | Up to 3 days | Microwave for 10-15 seconds only, or eat cold |
| Freezer (Not Recommended) | Up to 1 week | Thaw overnight in the fridge, then eat cold |
Frequently Asked Questions About Keto Mug Cheesecake
I get so many questions about this recipe because people are worried about messing up their quick dessert! It’s really forgiving if you follow the basic rules, but these common issues pop up often. Here are the things I hear most when people are making their first batch of Keto Mug Cheesecake.
Can I use a different sweetener in this Keto Mug Cheesecake?
You definitely can switch up the sweetener, but you must use a powdered version! If you use granulated monk fruit or granular erythritol, you’ll spend forever whisking, and you’ll still likely have tiny, crunchy crystals left over. For the smoothest texture, use powdered sweetener, or if you only have granulated, pop it in your blender or spice grinder first to turn it into a fine powder. That little extra step makes a huge difference in the final mouthfeel.
How do I prevent my mug cheesecake from overflowing?
This is all about volume control. The batter expands quite a bit when the egg cooks in the microwave. Never fill your ramekin or mug more than three-quarters full. Seriously, watch that level! If you fill it higher, you are basically guaranteeing a messy cleanup adventure when that hot cream cheese mixture bubbles over the sides. It’s better to have two smaller, perfectly cooked portions than one giant, messy overflow situation.
What happens if I microwave it too long?
Oh, you’ll know it happened immediately! If you cook it past that slight wobble stage, the proteins in the egg seize up too much, and you end up with something that feels exactly like rubber. It’s dense, it’s tough, and it’s definitely not creamy. That’s why I always tell people to undercook slightly and add 10-second bursts rather than cooking the full time at once. A slightly jiggly center is always better than a solid, dry center!
Understanding the Nutrition of This Keto Mug Cheesecake
It’s amazing how much satisfaction you can get from a dessert that fits perfectly into a low-carb plan! When I make this Keto Mug Cheesecake, I love knowing I’m getting a rich treat without derailing my day. Since this recipe is designed for two servings, these numbers reflect just half of the total mixture. It’s a great way to enjoy something decadent while keeping the macros in check.
Because we use full-fat cream cheese and an entire egg, the fat content is satisfying, which helps keep you full longer. It’s a much better option than reaching for sugary snacks when those cravings hit in the evening!
Estimated Nutritional Information Table
| Nutrient | Amount (Per Serving) |
|---|---|
| Calories | 220 |
| Fat | 20 grams |
| Protein | 9 grams |
| Carbohydrates | 3 grams |
Share Your Experience with This Quick Keto Mug Cheesecake
I really hope this recipe saves your low-carb day like it saves mine! This Keto Mug Cheesecake is proof that you don’t need an oven or hours of time to enjoy a truly satisfying dessert. I’d love to know what you thought! You can also check out my thoughts on Medium.
Did you try a topping I didn’t mention? Did the timing work perfectly for your microwave? Please drop a rating below and leave a comment so I can see how your quick cheesecake turned out! You can also follow my latest updates on Pinterest.
Print
Amazing 2-Minute Keto Mug Cheesecake Secret
- Total Time: 38 minutes
- Yield: 2 servings 1x
- Diet: Low Fat
Description
This keto mug cheesecake is a fast and satisfying dessert when you want cheesecake without baking a full cake. Cream cheese, egg, and powdered sweetener blend into a smooth batter that cooks in the microwave in under two minutes. Lightly flavored with vanilla and lemon zest, it sets with a creamy center and rich texture. Perfect for weight loss friendly and low carb lifestyles, this single serve treat keeps portions simple and satisfying.
Ingredients
- 4 ounces full fat cream cheese, softened
- 1 large egg
- 1 1/2 tablespoons powdered monk fruit sweetener
- 1/2 teaspoon vanilla extract
- 1/4 teaspoon fresh lemon zest
- 1/2 teaspoon fresh lemon juice
- Light olive oil for greasing
Instructions
- Lightly grease two 6 ounce ramekins with a thin layer of olive oil to prevent sticking.
- In a small mixing bowl, whisk together the cream cheese, egg, powdered sweetener, vanilla extract, lemon zest, and lemon juice until completely smooth with no lumps remaining.
- Divide the batter evenly between the prepared ramekins. Do not fill more than three quarters full to prevent overflow.
- Microwave one ramekin at a time on high for 60 seconds. The edges should look set while the center remains slightly jiggly.
- Microwave for an additional 15 to 20 seconds if needed, watching carefully to avoid overcooking. The center should still have a slight wobble.
- Let cool at room temperature for 10 minutes, then refrigerate for at least 30 minutes to fully set and improve texture.
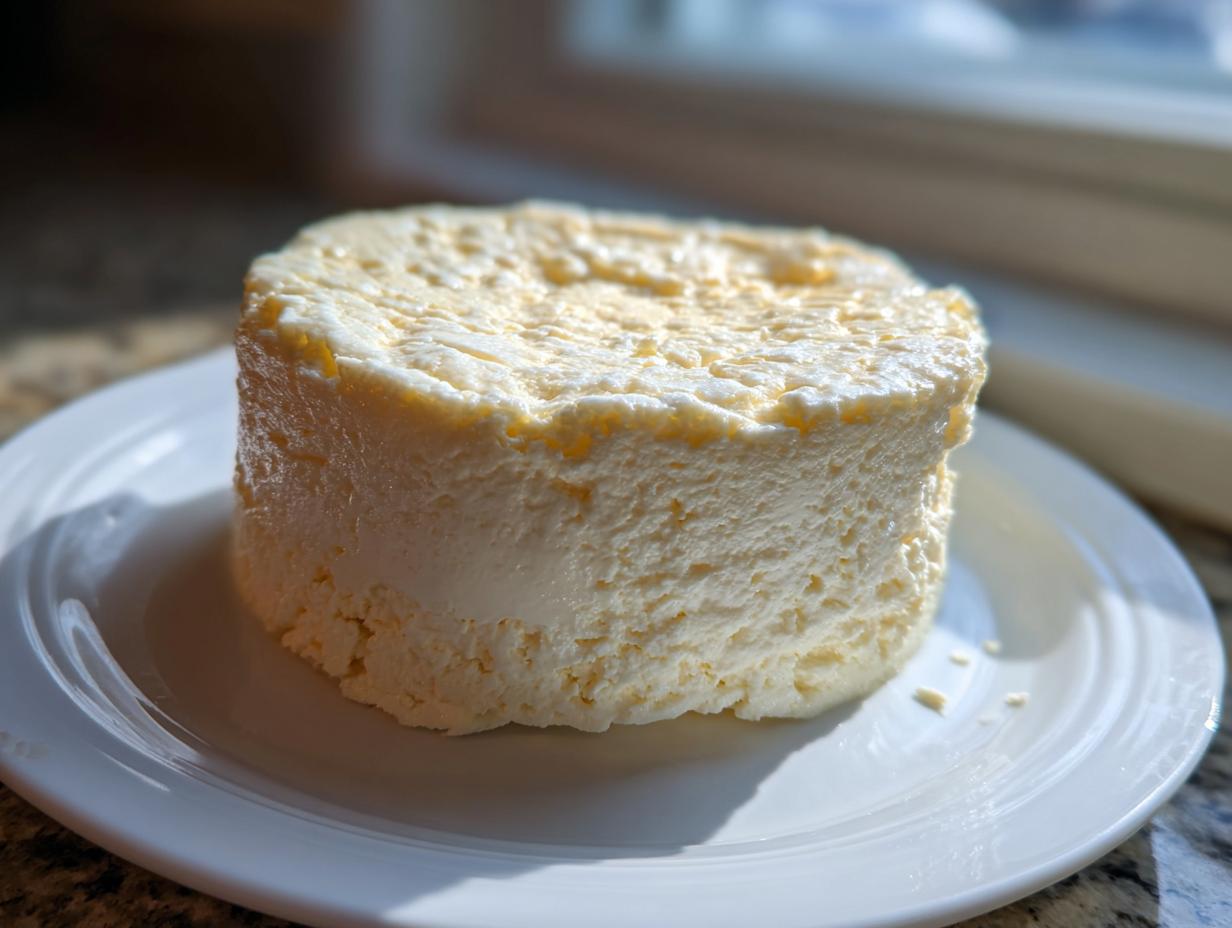
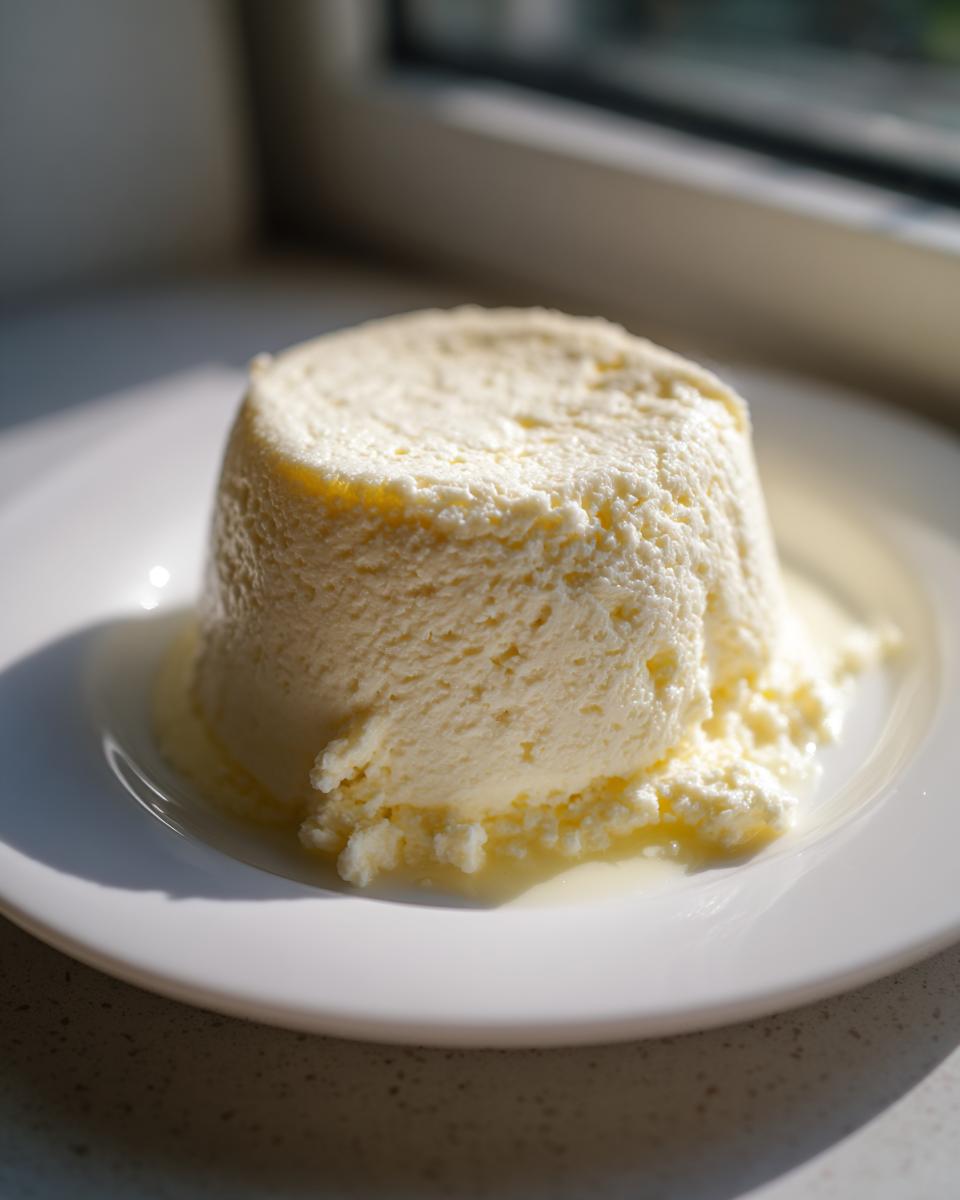
- Serve directly from the ramekin or run a knife around the edges and invert onto a plate.
Notes
- This recipe makes two servings.
- Watch the microwave time closely; overcooking results in a rubbery texture.
- The final texture is best after chilling for the full 30 minutes.
- Prep Time: 5 minutes
- Cook Time: 3 minutes
- Category: Dessert
- Method: Microwave
- Cuisine: American
Nutrition
- Serving Size: 1 serving
- Calories: 220
- Sugar: N/A
- Sodium: N/A
- Fat: 20 grams
- Saturated Fat: N/A
- Unsaturated Fat: N/A
- Trans Fat: N/A
- Carbohydrates: 3 grams
- Fiber: 0 grams
- Protein: 9 grams
- Cholesterol: N/A