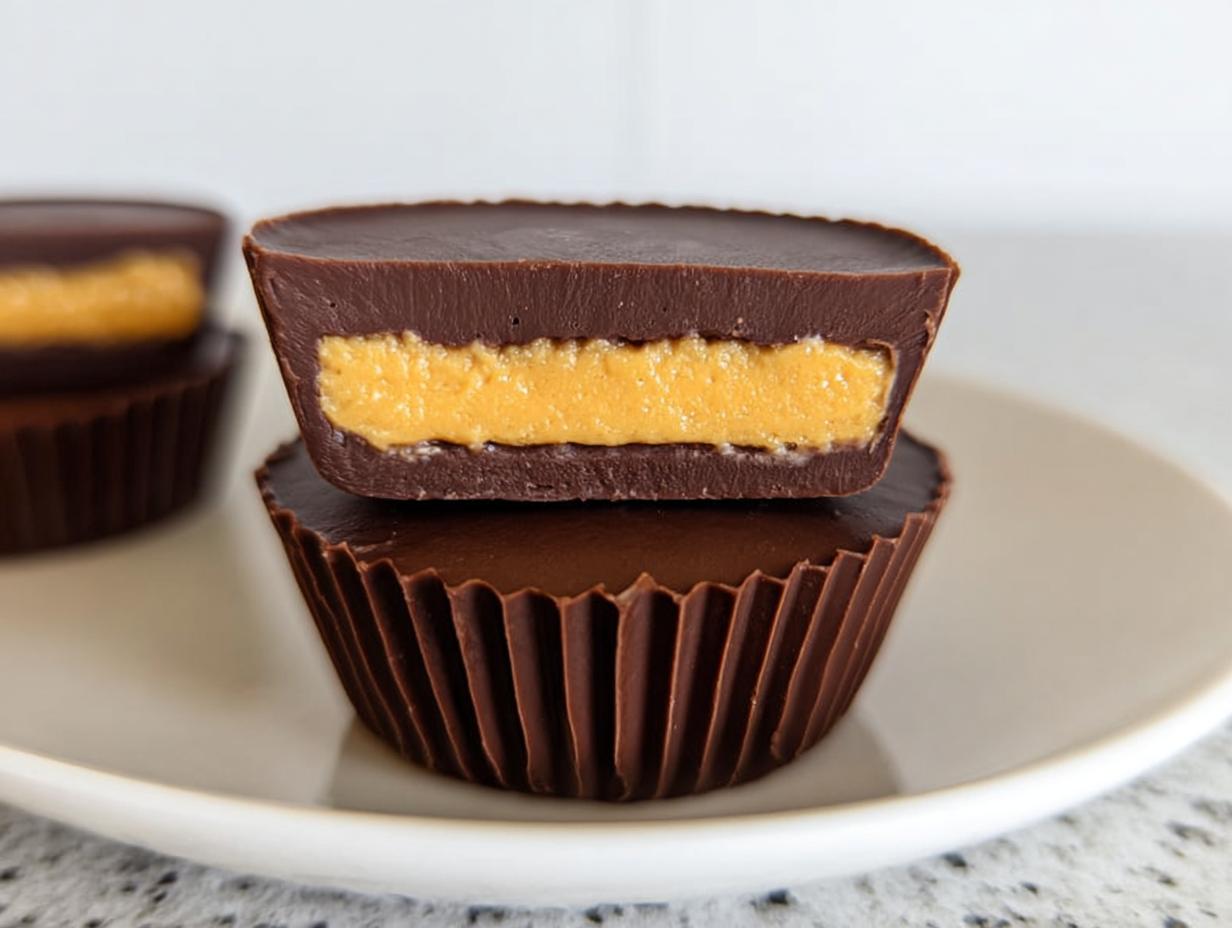
Forget those waxy, overly sweet store-bought versions you grab in a panic. Seriously, throw those out! I’ve been dabbling in easy candies for years—my friends always ask me to bring something simple yet impressive to parties—and I can tell you that making your own homemade peanut butter cups is the absolute best decision you’ll make all week. This recipe is ridiculously simple; we’re talking five main ingredients! That’s it!
The best part? No baking required, just a little patience while they chill out in the freezer. When you use good quality chocolate and natural peanut butter, the texture that sets up is so incredibly creamy and rich. They are worlds better than anything you find wrapped in foil. Trust me, once you master this quick technique, you’ll never go back to the candy aisle again. These little cups are my secret weapon for instant dessert gratification!
Essential Ingredients for Homemade Peanut Butter Cups
I always preach that for super simple recipes like these homemade peanut butter cups, the quality of your ingredients really shines through. Since there are only five main players here, we can’t hide behind a long ingredient list! We need things that blend well and melt beautifully together.
The chocolate needs to be rich, and the peanut butter must be the natural kind. If you use the heavily processed stuff with added sugars and stabilizers, the filling won’t set up right, and frankly, it won’t taste as good. Keep reading for the exact list and my thoughts on swapping things out!
Ingredient List for Homemade Peanut Butter Cups
Here is everything you need to have ready for your homemade peanut butter cups:
- 1 cup dark or semi-sweet chocolate chips
- 1 tablespoon coconut oil
- ½ cup natural creamy peanut butter
- ¼ cup honey or pure maple syrup
- 2 tablespoons melted coconut oil
- Pinch of fine sea salt
Ingredient Notes and Substitutions
Let’s talk specifics so your cups turn out perfectly creamy. For the chocolate, dark or semi-sweet chips work best because they have the right amount of cocoa butter to melt smoothly with the added coconut oil. Milk chocolate is okay, but it might be a little too sweet for my taste!
For the sweetener, I prefer honey because it binds the filling nicely. But if you need to keep these vegan or just don’t love honey, pure maple syrup is a fantastic swap—just make sure it’s real maple syrup, not pancake syrup! And don’t skip that pinch of salt; it really wakes up the flavor of the peanut butter in these homemade peanut butter cups.
Equipment Needed for Your Homemade Peanut Butter Cups
You won’t need much gear for these simple homemade peanut butter cups, which is part of the fun! Make sure you have these basics ready before you start melting your chocolate. It moves fast once you get going.
- 12-cup muffin tin
- Paper or silicone liners
- Two microwave-safe bowls (or one if you’re washing quickly between steps!)
- A whisk or spatula for stirring
Step-by-Step Instructions for Perfect Homemade Peanut Butter Cups
Okay, now for the fun part! This is where we bring those five simple ingredients together to create the most decadent homemade peanut butter cups you’ve ever tasted. The key here is moving quickly when we need to and letting the freezer do the heavy lifting for us. Don’t worry about the timing too much; just keep an eye on those layers!
Preparing the Chocolate Base Layer
First things first, get your muffin tin lined up with those liners. You need twelve little cups ready to go. Now, grab your chocolate chips and that first tablespoon of coconut oil. I always melt mine in the microwave. Pop it in for a full minute, stir it up—it usually looks like it hasn’t melted at all, but trust me, it has—and then continue zapping it in short 20-second bursts until it’s beautifully smooth. If you try to rush it all at once, you’ll scorch it, and that’s a sad start to any candy making!
Once it’s glossy, spoon about two teaspoons of that melted chocolate into the bottom of each liner. This is your base layer. Gently tilt the whole tin so the chocolate coats the bottom evenly. Then, send them into the freezer for about five to ten minutes. We need that base to be totally set before we pile anything on top.
Crafting the Creamy Peanut Butter Filling
While the chocolate base is chilling, we make the filling. This is so easy it feels like cheating! In a separate bowl, just combine your natural peanut butter, your honey or maple syrup, the two tablespoons of melted coconut oil, and that pinch of salt. Whisk it all together until it’s completely smooth. You aren’t trying to whip air into this; you just want a uniform, pourable mixture. If it looks too thick, add just a tiny splash more oil or honey until it flows nicely off your whisk.
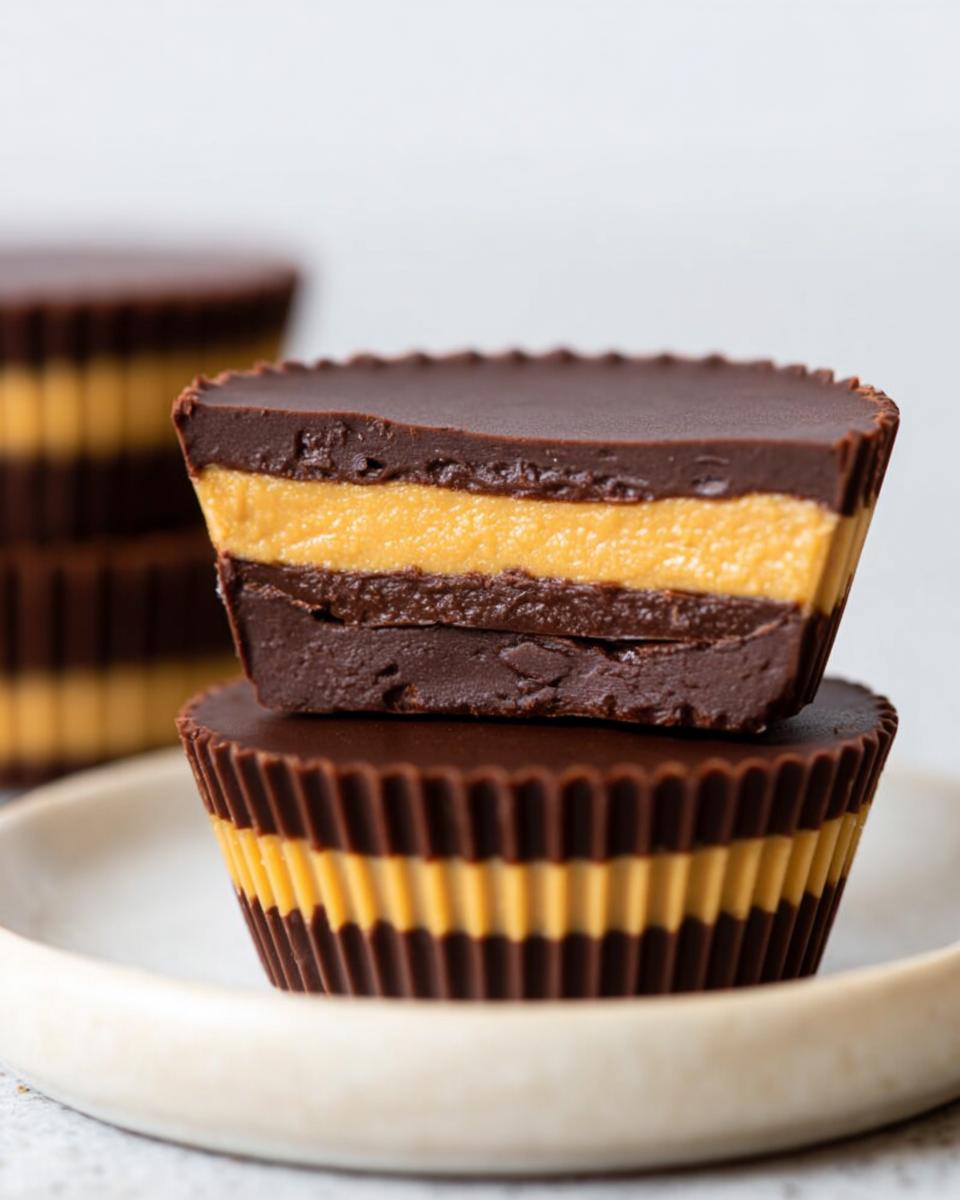
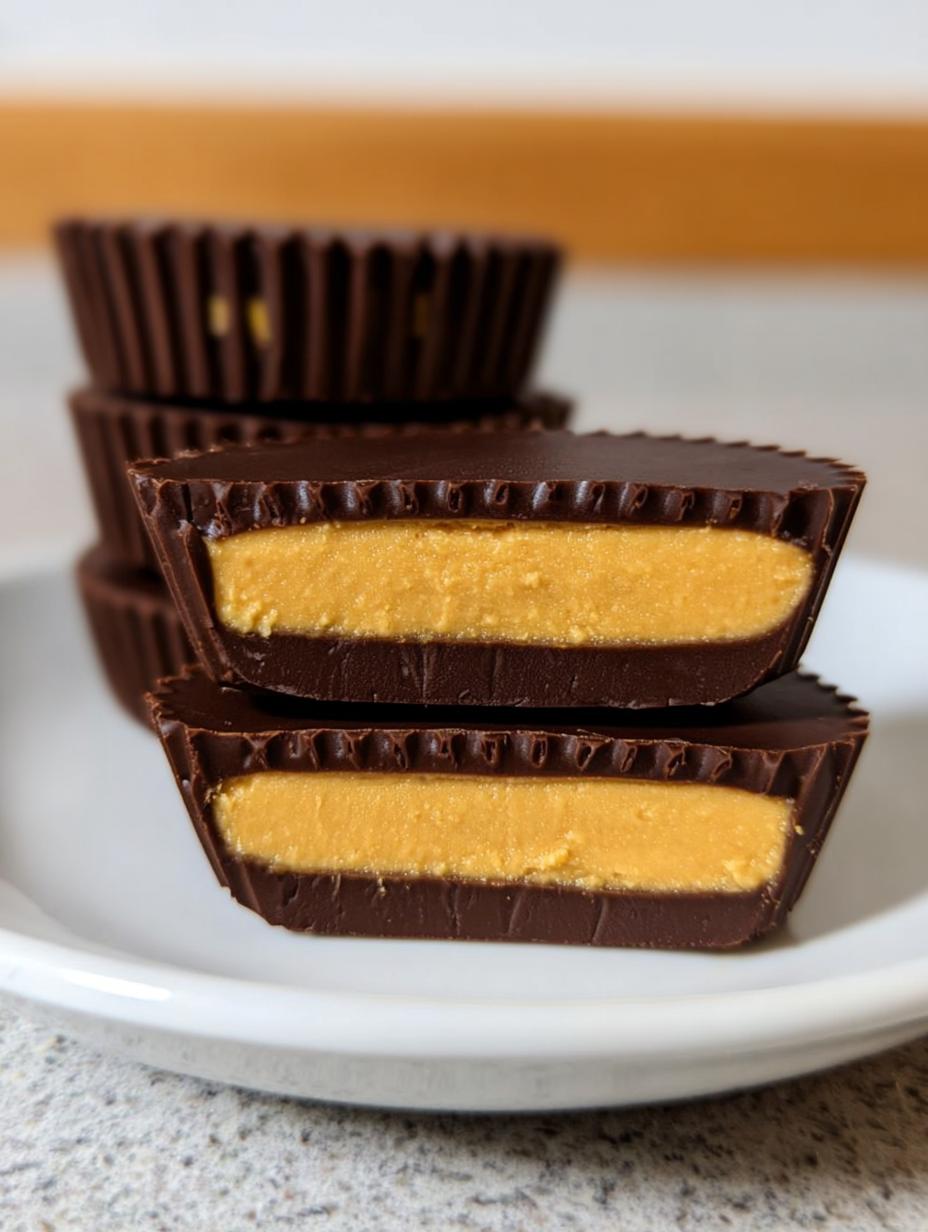
Assembling and Freezing the Homemade Peanut Butter Cups
Pull that muffin tin out of the freezer—the chocolate base should be firm to the touch. Now, divide that peanut butter filling evenly over the set chocolate layer. I use a heaping teaspoon for each cup; you want a nice thick layer here. Back into the freezer they go for just five quick minutes. This keeps the filling from mixing into the top layer of chocolate, which is crucial for those clean, distinct layers in your homemade peanut butter cups.
Finally, check your leftover chocolate. If it’s gotten stiff, give it 15 more seconds in the microwave to loosen up. Spoon the rest of the chocolate right over the peanut butter filling until everything is completely covered. Pop the whole tin back into the freezer for at least 30 minutes, or until they are super firm. That’s it! You’ve made amazing candy!
Tips for Success When Making Homemade Peanut Butter Cups
Making these homemade peanut butter cups is easy, but a few little tricks make them truly professional quality. Don’t forget that optional sprinkle of flaky sea salt right after you pour the final layer of chocolate—it adds the most wonderful little pop against the sweet peanut butter!
Also, keep an eye on your leftover chocolate. If you’re working in a warm kitchen, that melted chocolate can thicken up fast between layering. A quick 10-second zap in the microwave is all it needs to get pourable again so you don’t end up with chunky tops. Another thing I learned? Don’t overfill the base layer of chocolate; if it’s too thick, the cup gets too top-heavy and messy when you try to peel the liner off!
Finally, if you’re using paper liners, make sure they are pressed firmly into the tin cups before you start. These little tips guarantee your homemade peanut butter cups look exactly like they came from a fancy candy shop. If you want more quick dessert ideas, check out my 3 ingredient no bake treats!
Storage and Reheating Instructions for Homemade Peanut Butter Cups
The best part about these homemade peanut butter cups is that they are freezer-friendly! You can store them in an airtight container in the refrigerator for up to a week, and they stay wonderfully chilled and firm. If you really want them to last, pop them in the freezer for up to two months. For more freezer-friendly ideas, take a look at these no bake peanut butter balls.
When you pull them out of the freezer, don’t try to bite right in! They need just about five minutes on the counter to thaw slightly. That little bit of warmth softens the chocolate just enough so you get that perfect, creamy melt when you enjoy your delicious freezer treat.
Frequently Asked Questions About Homemade Peanut Butter Cups
I get so many questions about this recipe because people can’t believe how simple these homemade peanut butter cups are! Here are a few things I hear most often. You can also find more tips on my Medium page.
Q1. Can I make these without coconut oil?
Honestly, you really shouldn’t skip the coconut oil in the chocolate layer. It helps the chocolate melt smoothly and gives the final cup that signature slight firmness when cold. For the filling, you could *maybe* use softened butter instead, but the texture won’t be quite as smooth when frozen, so I recommend sticking to the oil for the best easy candy result. If you are looking for other easy treats, check out my chocolate peanut butter balls recipe.
Q2. What kind of peanut butter is best?
You absolutely need natural, creamy peanut butter—the kind where the oil separates on top if you don’t stir it. This means it has fewer stabilizers, which allows the honey and oil to mix properly for that perfect filling consistency. Processed peanut butter makes the filling stiff and dulls the overall flavor of your homemade peanut butter cups.
Q3. Can I make these ahead of time?
Yes! That’s why they are such a fantastic freezer treat. You can make them weeks in advance and keep them tucked away. Just let them sit on the counter for five minutes before serving so they aren’t rock hard. They hold up beautifully, which is why I always make a double batch!
Q4. Do I have to freeze them?
You do! Freezing is what sets the layers without baking. If you just tried to refrigerate them, the filling would likely stay too soft and ooze out when you peel the liner off. The freezer makes these homemade peanut butter cups set perfectly every time.
Enjoying Your Homemade Peanut Butter Cups
Now that you’ve gone through all the steps, it’s time for the reward! Remember what I said about letting them thaw just a tiny bit? Five minutes is usually perfect. When they soften slightly, the rich chocolate and the creamy peanut butter filling really sing together.
These little gems are wonderful all on their own with a big glass of cold milk. But if you want to get fancy, try crumbling a few of the finished homemade peanut butter cups over vanilla bean ice cream. It’s decadent, but you deserve it after all that chilling time! For more decadent ideas, check out my chocolate caramel pretzel lasagna.
Print
5 Amazing Homemade peanut butter cups
- Total Time: 47 minutes
- Yield: 12 cups 1x
- Diet: Vegetarian
Description
Make these creamy homemade peanut butter cups with just 5 ingredients. Simple, rich, and freezer-friendly—better than store-bought!
Ingredients
- 1 cup dark or semi-sweet chocolate chips
- 1 tablespoon coconut oil
- ½ cup natural creamy peanut butter
- ¼ cup honey or pure maple syrup
- 2 tablespoons melted coconut oil
- Pinch of fine sea salt
Instructions
- Line a 12-cup muffin tin with paper or silicone liners.
- In a microwave-safe bowl, combine chocolate chips and 1 tablespoon coconut oil. Heat for 1 minute, stir, then continue heating in 20–30 second intervals until smooth.
- Spoon about 2 teaspoons of melted chocolate into the bottom of each liner. Tilt or swirl gently to coat the bottom evenly. Freeze for 5 to 10 minutes until set.
- In another bowl, stir together peanut butter, honey (or maple syrup), melted coconut oil, and salt until smooth and pourable.
- Remove muffin tin from the freezer and divide the peanut butter mixture evenly over the set chocolate layer, about 1 heaping teaspoon per cup. Freeze again for 5 minutes.
- Reheat the remaining chocolate if it has thickened, then spoon over the peanut butter layer to cover completely.
- Freeze for 30 minutes to 1 hour, or until firm.
- Store cups in an airtight container in the fridge for up to 1 week or in the freezer for up to 2 months. Let thaw 5 minutes before enjoying.
Notes
- For an elegant touch, sprinkle a few flakes of sea salt or crushed roasted peanuts on top before the final freeze.
- Prep Time: 15 minutes
- Cook Time: 2 minutes
- Category: Dessert
- Method: No-Bake/Freezer
- Cuisine: American
Nutrition
- Serving Size: 1 cup
- Calories: 210
- Sugar: Not specified
- Sodium: Not specified
- Fat: 15g
- Saturated Fat: Not specified
- Unsaturated Fat: Not specified
- Trans Fat: Not specified
- Carbohydrates: 20g
- Fiber: Not specified
- Protein: 4g
- Cholesterol: Not specified