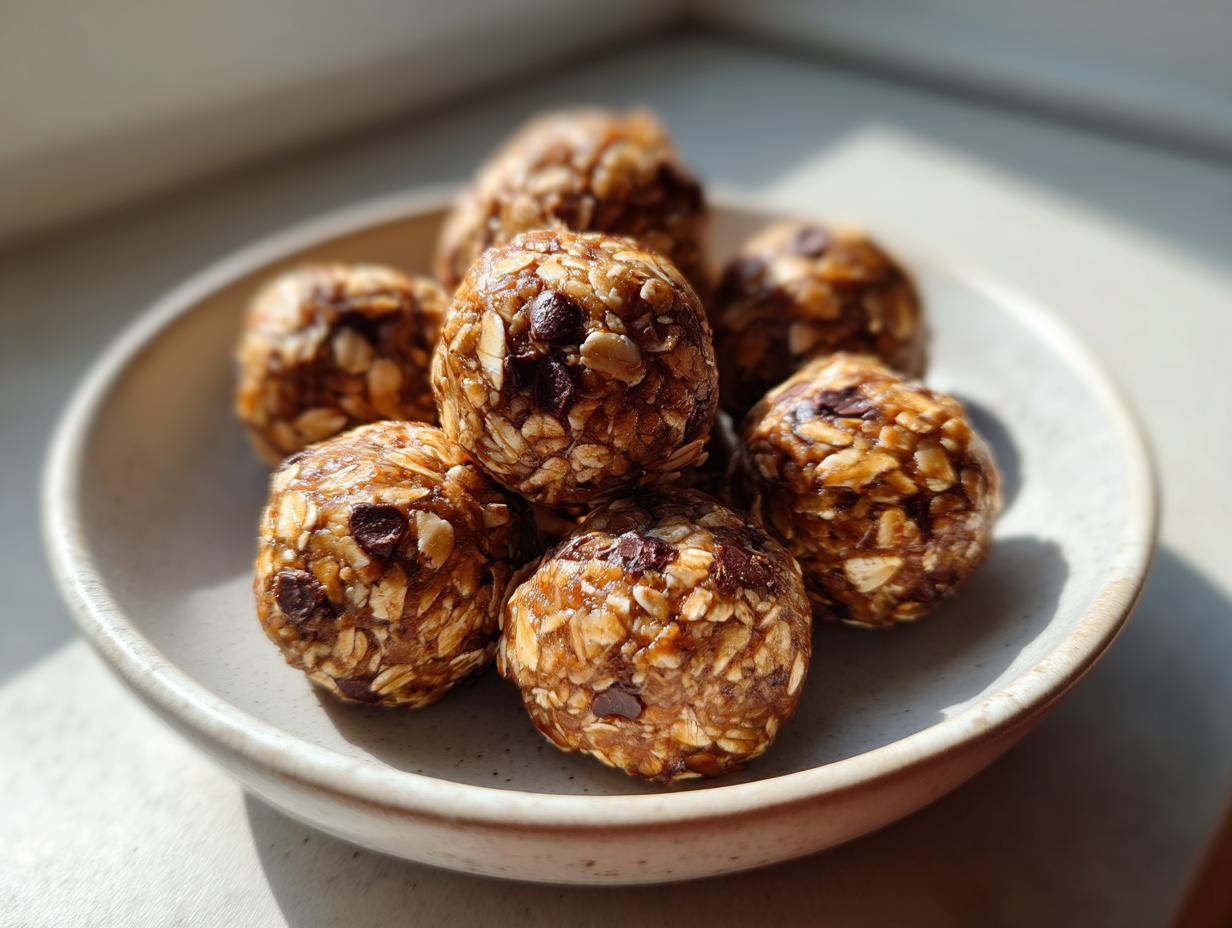
Listen, if you’re anything like me, you need snacks that are ready *yesterday*. Seriously, who has time for an oven when hunger strikes? That’s why I live and breathe these High Protein Oatmeal Protein Balls No Bake Snack recipes. They come together in literally fifteen minutes, and they pack such a serious protein punch you won’t be reaching for junk food an hour later.
I first whipped these up when I was training for a half marathon and needed quick fuel that tasted like dessert. My first batch was a little sticky—whoops!—but I figured out the trick to the perfect texture right away. The secret isn’t complicated; it’s about using the right powders and knowing when to stop adding water. Trust me, these are about to become your new favorite grab-and-go item for meal prep or that 3 PM slump! You can check out more quick snack ideas on my Medium profile.
Gathering Your Ingredients for High Protein Oatmeal Protein Balls No Bake Snack
Okay, before we dive into the magic part—the mixing—we need to get our ducks in a row. Because these are no-bake, the quality of what you put in really matters since you can’t rely on heat to fix anything later! I always tell people that these High Protein Oatmeal Protein Balls No Bake Snack are only as good as the powders you choose. Don’t just grab the first protein powder you see; we need one that plays nice with peanut butter.
We’re going for soft, chewy, and satisfying here, not rock hard! The beauty of this recipe is how fast you can pull everything together once you have the ingredients measured out. It’s all about having everything ready to go on the counter before you start Step 1. It really cuts down on that frantic searching mid-mix! If you are looking for other no-bake options, check out my Peanut Butter Balls No Bake Recipe.
Detailed Ingredient Requirements for High Protein Oatmeal Protein Balls No Bake Snack
Here is the exact lineup I use every single time. Pay special attention to the water amount—it’s the wild card here because different protein powders absorb liquid differently. You might need slightly more or less than I do, so just feel the dough as you go!
- 1 cup unsweetened peanut butter powder
- 1/4 cup vanilla or unflavored protein powder
- 1/8 teaspoon sea salt
- 1/2 cup rolled oats
- 1/4 cup mini dark chocolate chips
- 3 tablespoons maple syrup
- 6 to 8 tablespoons water
Essential Equipment List
You don’t need anything fancy, which is the best part! Just standard kitchen gear:
- One large mixing bowl (you want space to stir without spilling!)
- A sturdy spatula or mixing spoon
- A small cookie scoop or measuring spoon for portioning
- Parchment paper or wax paper for lining a plate
Step-by-Step Guide to Making High Protein Oatmeal Protein Balls No Bake Snack
This is where the magic happens, and honestly, it’s so fast you’ll think you did something wrong! We are moving quickly here because we aren’t using any heat, so everything needs to be mixed well enough to bind properly. Follow these steps for the best High Protein Oatmeal Protein Balls No Bake Snack you’ve ever had. Remember, this whole process takes about fifteen minutes of actual work!
Preparing the Dry Base for High Protein Oatmeal Protein Balls No Bake Snack
First things first: grab that big mixing bowl. We need to make sure our powders are perfectly incorporated before anything wet touches them. I’m talking about the peanut butter powder, the protein powder, and just a tiny pinch of sea salt. Give that a really good stir—I mean, really dig in there with your spoon. You want zero clumps of protein powder hiding in the bottom corners. If you skip this, you might end up with a bite that tastes overwhelmingly like one ingredient, and nobody wants that!
Achieving the Ideal Dough Consistency
Now for the wet stuff! Pour in your maple syrup—that’s our main binder and sweetener. Then, add the water. Start with six tablespoons. Stir it all up. It’s going to look shaggy at first, but keep mixing. You are waiting for it to suddenly turn into something that resembles thick, slightly stiff dough. If, after a minute of stirring, you still have dry powder floating around, add the water one teaspoon at a time. Be careful! If you add too much water, your balls will be greasy and won’t hold their shape. We are aiming for a texture that holds together when you squeeze a piece between your fingers. If it crumbles, add a tiny bit more water. If it’s too sticky, add a teaspoon of extra protein powder.
Incorporating Oats and Chocolate Chips
Once you have that perfect, slightly firm dough, it’s time for the texture makers! Gently fold in your rolled oats and those gorgeous mini dark chocolate chips. I say “fold” because we don’t want to flatten out all the air we just worked to create, even though this isn’t a traditional cake batter. Use your spatula and press the additions into the dough until everything looks evenly distributed. Make sure those oats aren’t just sitting on top; they need to be mixed throughout so every bite is chewy! For more oat-based recipes, see my Banana Oatmeal Muffins Recipe.
Shaping and Chilling Your High Protein Oatmeal Protein Balls No Bake Snack
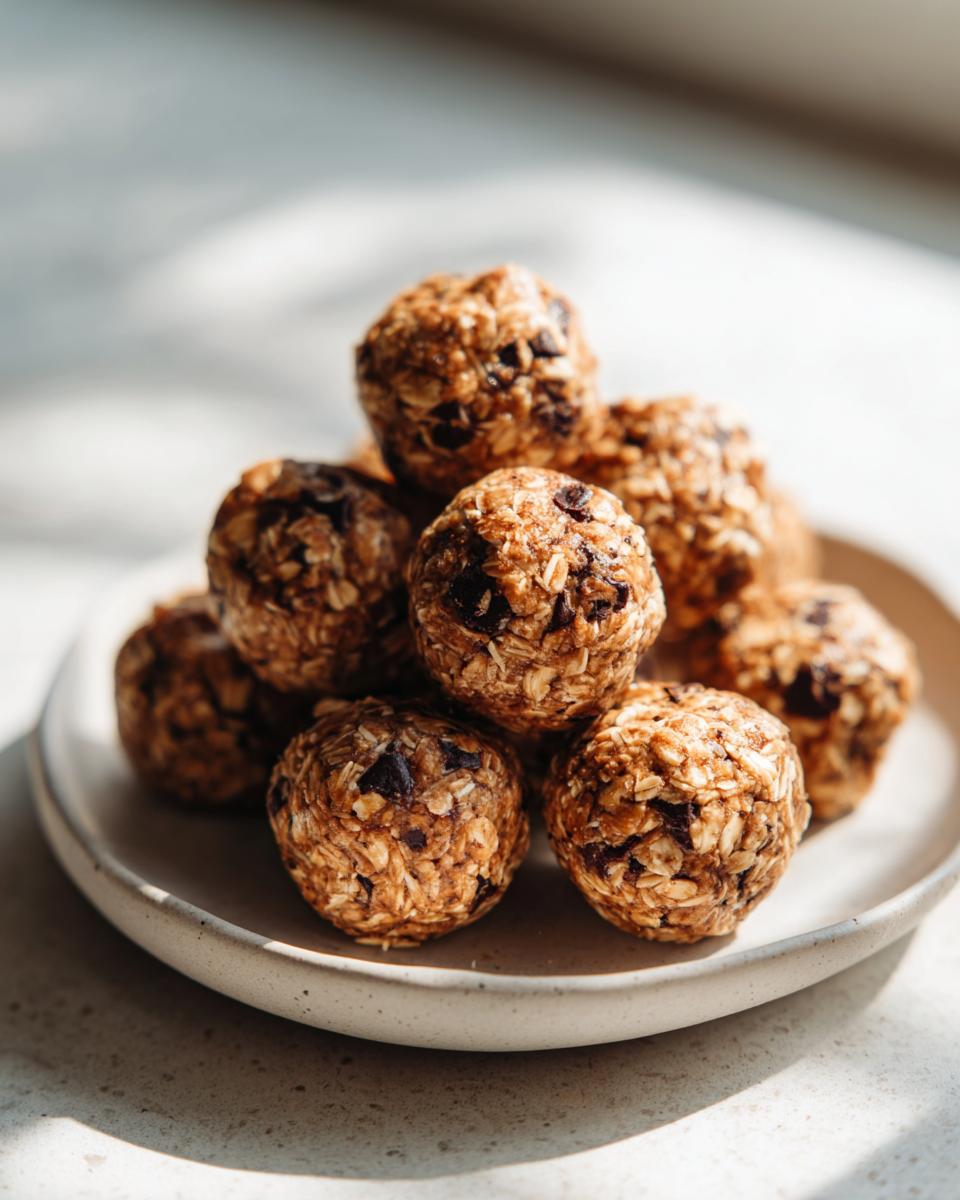
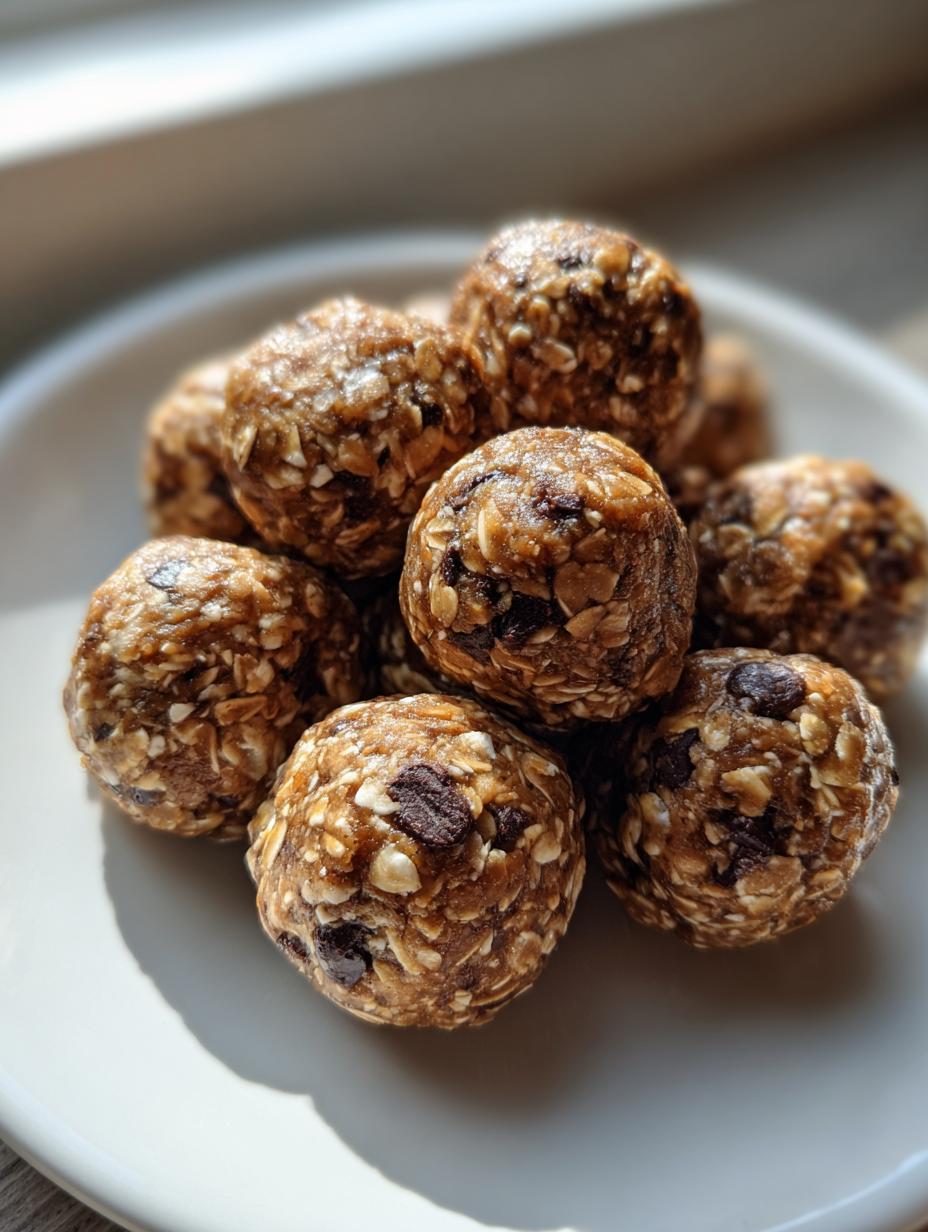
Time to make them look like little energy orbs! I highly recommend using a small cookie scoop if you have one—it keeps them uniform, which is great for even chilling. Scoop out the dough and roll it firmly between your palms. They should be about one inch round. If they feel a bit too soft while rolling, just pop the whole bowl of dough back in the fridge for five minutes to firm up before you finish rolling. Place the finished balls on a plate lined with parchment paper. This is non-negotiable—it keeps them from sticking! They are safe to eat right away, but for the best texture, pop them in the refrigerator for at least thirty minutes. Chilling firms them up so they don’t squish when you grab them later.
Pro Tips for Achieving Superior High Protein Oatmeal Protein Balls No Bake Snack Results
You’ve got the basic recipe down, but I want these to be absolutely perfect every time you make them. Texture is everything when you’re dealing with protein powder; it can sometimes go from perfect to totally dry in a heartbeat. These little tricks are what I learned after my first few sticky batches back when I first started making these for quick post-workout fuel.
Troubleshooting Common Texture Issues
If your finished balls feel too sticky after chilling—meaning they are leaving residue all over your fingers—it means you added too much liquid or your protein powder is just naturally softer. Don’t panic! Just take whatever is left in the bowl and mix in another tablespoon of peanut butter powder or maybe a teaspoon of extra oats. This will absorb the extra moisture. If they end up too dry and crumbly even after chilling, your fix is simple: microwave a tiny amount of water (like a tablespoon) and drizzle it over the remaining dough, kneading it in slowly until it just comes together again. A little patience here saves you from wasting the batch!
Selecting the Right Protein Powder Substitute
I usually stick to whey or a nice casein blend because they bind really well, but I know not everyone uses those. If you want to use plant-based protein, you might need to add an extra tablespoon or two of water or perhaps a touch more maple syrup. Plant proteins tend to be thirstier! If you use a collagen powder instead, know that it won’t add the same bulk, so you’ll definitely need to increase the oats slightly to keep the structure firm enough to roll into your High Protein Oatmeal Protein Balls No Bake Snack.
Storing and Enjoying Your High Protein Oatmeal Protein Balls No Bake Snack
The best thing about these is that they are perfect for making ahead. I often double the recipe on a Sunday afternoon so I have fuel ready for the whole week. Since there’s no baking, they don’t dry out like cookies do, but they do need a cold environment to stay firm.
Always use an airtight container. If you stack them, make sure you put a small piece of parchment paper between the layers. This prevents them from sticking together into one giant protein ball brick, which is a sad sight! You can find more great meal prep ideas on my Pinterest boards.
| Storage Location | Longevity | Notes |
|---|---|---|
| Refrigerator | Up to 1 week | Keeps them firm and fresh. |
| Freezer | Up to 3 months | Great for long-term meal prep! |
When you pull them straight from the fridge, they are nice and firm—perfect for a quick grab-and-go. If you freeze them, just let them sit on the counter for about ten minutes before you want to eat one. They thaw super fast! They are delicious straight out of the fridge, but they are also great crumbled over yogurt for an extra boost of protein.
Frequently Asked Questions About High Protein Oatmeal Protein Balls No Bake Snack
I get asked the same things over and over about these little powerhouses, so let’s clear up any lingering doubts you have about making the best batch of High Protein Oatmeal Protein Balls No Bake Snack!
Can I make these High Protein Oatmeal Protein Balls No Bake Snack without maple syrup?
You absolutely can, but you need a sticky liquid binder! Maple syrup works so well because it’s liquid but also thick. If you don’t like maple syrup, try using honey—just use slightly less since honey is often sweeter. Agave nectar works in a pinch too. If you try to use a dry sweetener like stevia or monk fruit, the mixture will just turn into dry powder, so you must replace the liquid volume with something sticky to help everything hold together.
How long do these High Protein Oatmeal Protein Balls No Bake Snack last in the fridge?
They keep beautifully for up to one week in the refrigerator when stored properly in an airtight container. Because they are so dense and contain powdered peanut butter, they don’t spoil quickly. I’ve honestly forgotten about some in the back of the fridge and they were still good after 10 days, but I stick to the one-week rule just to be safe and keep that fresh chewy texture.
Are these High Protein Oatmeal Protein Balls No Bake Snack suitable for quick meal prep?
Oh my gosh, yes! This is what they were made for. Making a double batch takes maybe twenty minutes total, and you have healthy, portion-controlled snacks ready for your entire work week. They are the ultimate easy snack solution when you’re busy and need something to tide you over between meals. Just roll them up, chill them, and toss them into little containers! If you need other meal prep ideas, check out my High Protein Yogurt Snack Bars.
Understanding the Nutrition Profile of Your High Protein Oatmeal Protein Balls No Bake Snack
One of the biggest reasons I rely on this recipe is the nutrition payoff for so little effort. When you’re trying to hit those protein goals, every little snack counts. These aren’t just empty calories; they are packed with the good stuff to keep you full and energized. We’re getting a solid dose of protein alongside some healthy fats from the peanut butter powder.
When you look at the nutrition breakdown, remember that this is based on eating two balls, which is a perfect little snack size. You get ten grams of protein per serving, which is fantastic for something that tastes like a peanut butter treat! And only four grams of sugar—that’s because we rely mostly on the natural sweetness from the peanut butter powder and just a touch of maple syrup.
| Nutrient | Amount (per 2 balls) |
|---|---|
| Calories | 120 |
| Protein | 10 grams |
| Sugar | 4 grams |
| Carbohydrates | 12 grams |
| Fat | 3 grams |
It’s a balanced profile that works great for pre-workout fuel or just crushing that afternoon slump without the sugar crash. See? Delicious *and* functional. That’s what I aim for in my kitchen! For another protein-packed option, take a look at my Greek Yogurt Protein Balls.
Pro Tips for Achieving Superior High Protein Oatmeal Protein Balls No Bake Snack Results
You’ve got the basic recipe down, but I want these to be absolutely perfect every time you make them. Texture is everything when you’re dealing with protein powder; it can sometimes go from perfect to totally dry in a heartbeat. These little tricks are what I learned after my first few sticky batches back when I first started making these for quick post-workout fuel.
Troubleshooting Common Texture Issues
If your finished balls feel too sticky after chilling—meaning they are leaving residue all over your fingers—it means you added too much liquid or your protein powder is just naturally softer. Don’t panic! Just take whatever is left in the bowl and mix in another tablespoon of peanut butter powder or maybe a teaspoon of extra oats. This will absorb the extra moisture. If they end up too dry and crumbly even after chilling, your fix is simple: microwave a tiny amount of water (like a tablespoon) and drizzle it over the remaining dough, kneading it in slowly until it just comes together again. A little patience here saves you from wasting the batch!
Selecting the Right Protein Powder Substitute
I usually stick to whey or a nice casein blend because they bind really well, but I know not everyone uses those. If you want to use plant-based protein, you might need to add an extra tablespoon or two of water or perhaps a touch more maple syrup. Plant proteins tend to be thirstier! If you use a collagen powder instead, know that it won’t add the same bulk, so you’ll definitely need to increase the oats slightly to keep the structure firm enough to roll into your High Protein Oatmeal Protein Balls No Bake Snack.
Storing and Enjoying Your High Protein Oatmeal Protein Balls No Bake Snack
The best thing about these is that they are perfect for making ahead. I often double the recipe on a Sunday afternoon so I have fuel ready for the whole week. Since there’s no baking, they don’t dry out like cookies do, but they do need a cold environment to stay firm.
Always use an airtight container. If you stack them, make sure you put a small piece of parchment paper between the layers. This prevents them from sticking together into one giant protein ball brick, which is a sad sight!
| Storage Location | Longevity | Notes |
|---|---|---|
| Refrigerator | Up to 1 week | |
| Freezer | Up to 3 months | Great for long-term meal prep! |
When you pull them straight from the fridge, they are nice and firm—perfect for a quick grab-and-go. If you freeze them, just let them sit on the counter for about ten minutes before you want to eat one. They thaw super fast! They are delicious straight out of the fridge, but they are also great crumbled over yogurt for an extra boost of protein.
Frequently Asked Questions About High Protein Oatmeal Protein Balls No Bake Snack
I get asked the same things over and over about these little powerhouses, so let’s clear up any lingering doubts you have about making the best batch of High Protein Oatmeal Protein Balls No Bake Snack!
Can I make these High Protein Oatmeal Protein Balls No Bake Snack without maple syrup?
You absolutely can, but you need a sticky liquid binder! Maple syrup works so well because it’s liquid but also thick. If you don’t like maple syrup, try using honey—just use slightly less since honey is often sweeter. Agave nectar works in a pinch too. If you try to use a dry sweetener like stevia or monk fruit, the mixture will just turn into dry powder, so you must replace the liquid volume with something sticky to help everything hold together.
How long do these High Protein Oatmeal Protein Balls No Bake Snack last in the fridge?
They keep beautifully for up to one week in the refrigerator when stored properly in an airtight container. Because they are so dense and contain powdered peanut butter, they don’t spoil quickly. I’ve honestly forgotten about some in the back of the fridge and they were still good after 10 days, but I stick to the one-week rule just to be safe and keep that fresh chewy texture.
Are these High Protein Oatmeal Protein Balls No Bake Snack suitable for quick meal prep?
Oh my gosh, yes! This is what they were made for. Making a double batch takes maybe twenty minutes total, and you have healthy, portion-controlled snacks ready for your entire work week. They are the ultimate easy snack solution when you’re busy and need something to tide you over between meals. Just roll them up, chill them, and toss them into little containers!
Understanding the Nutrition Profile of Your High Protein Oatmeal Protein Balls No Bake Snack
One of the biggest reasons I rely on this recipe is the nutrition payoff for so little effort. When you’re trying to hit those protein goals, every little snack counts. These aren’t just empty calories; they are packed with the good stuff to keep you full and energized. We’re getting a solid dose of protein alongside some healthy fats from the peanut butter powder.
When you look at the nutrition breakdown, remember that this is based on eating two balls, which is a perfect little snack size. You get ten grams of protein per serving, which is fantastic for something that tastes like a peanut butter treat! And only four grams of sugar—that’s because we rely mostly on the natural sweetness from the peanut butter powder and just a touch of maple syrup.
| Nutrient | Amount (per 2 balls) |
|---|---|
| Calories | 120 |
| Protein | 10 grams |
| Sugar | 4 grams |
| Carbohydrates | 12 grams |
| Fat | 3 grams |
It’s a balanced profile that works great for pre-workout fuel or just crushing that afternoon slump without the sugar crash. See? Delicious *and* functional. That’s what I aim for in my kitchen!
Print
7 Divine High Protein Oatmeal Protein Balls No Bake Snack
- Total Time: 15 minutes
- Yield: 12 servings 1x
- Diet: Vegetarian
Description
These high protein oatmeal protein balls feature peanut butter, oats, and chocolate chips. They are an easy no bake snack ready in 15 minutes. The balls are soft, chewy, and satisfy hunger with balanced sweetness.
Ingredients
- 1 cup unsweetened peanut butter powder
- 1/4 cup vanilla or unflavored protein powder
- 1/8 teaspoon sea salt
- 1/2 cup rolled oats
- 1/4 cup mini dark chocolate chips
- 3 tablespoons maple syrup
- 6 to 8 tablespoons water
Instructions
- In a large mixing bowl, stir together peanut butter powder, protein powder, and sea salt until evenly combined.
- Add maple syrup and 6 tablespoons water. Stir until a thick dough begins to form. If the mixture seems dry or crumbly, add water 1 teaspoon at a time until the texture resembles soft dough that holds together when pressed.
- Fold in the rolled oats and chocolate chips. Mix thoroughly, pressing with a spatula to evenly distribute.
- Using a small cookie scoop or tablespoon, portion the mixture and roll into 1 inch balls with your hands.
- Place on a parchment lined plate or tray. Chill in the refrigerator for at least 30 minutes for a firmer texture or enjoy immediately.
Notes
- Store in an airtight container in the refrigerator for up to 1 week or freeze for up to 3 months.
- Prep Time: 15 minutes
- Cook Time: 0 minutes
- Category: Snack
- Method: No Bake
- Cuisine: American
Nutrition
- Serving Size: 2 balls
- Calories: 120
- Sugar: 4 grams
- Sodium: N/A
- Fat: 3 grams
- Saturated Fat: N/A
- Unsaturated Fat: N/A
- Trans Fat: N/A
- Carbohydrates: 12 grams
- Fiber: 3 grams
- Protein: 10 grams
- Cholesterol: N/A