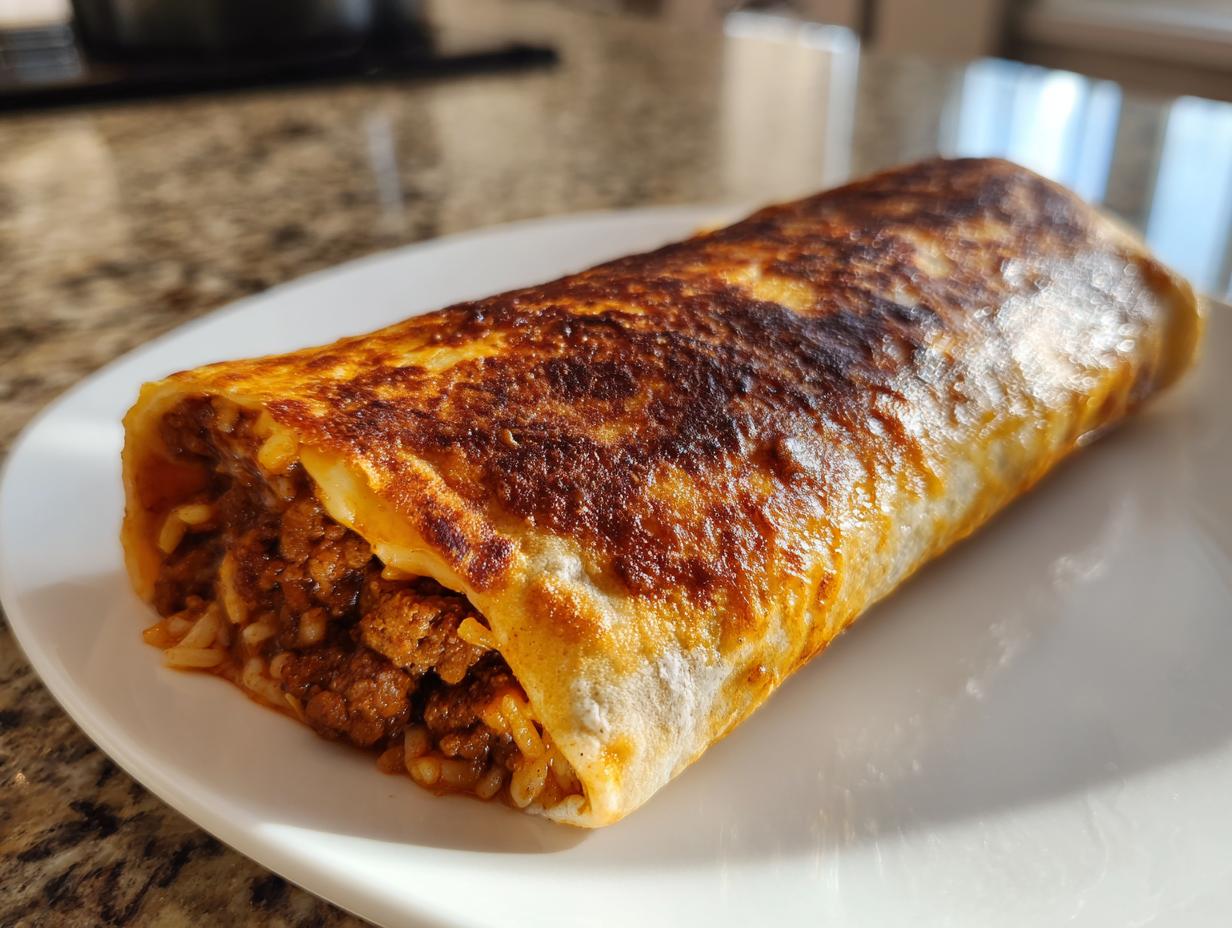
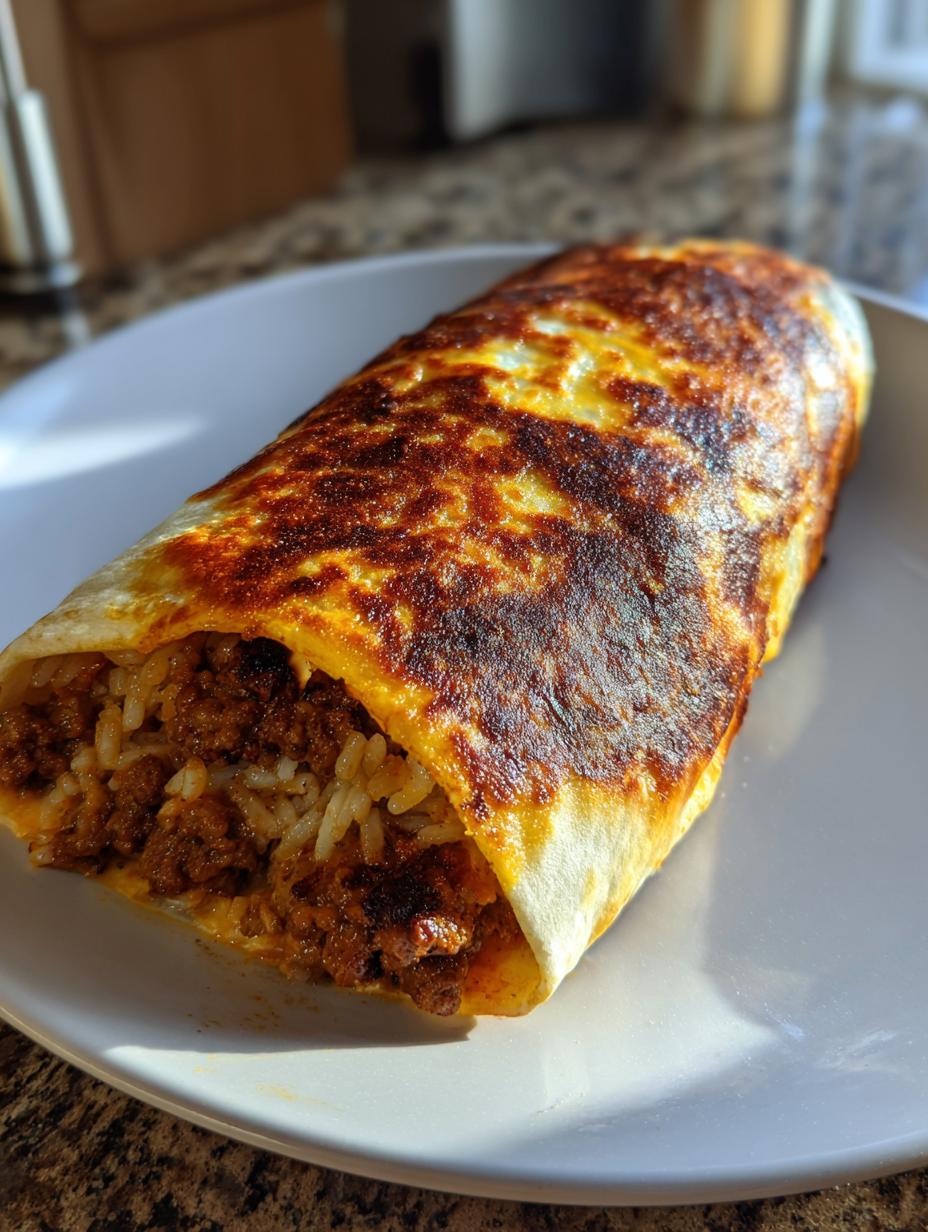
Okay, forget everything you think you know about sad, soggy weeknight dinners. We are elevating the humble sandwich into something truly spectacular: the Grilled Cheese Burrito With Crispy Cheese Crust. Seriously, that crust! It’s what makes this recipe a showstopper.
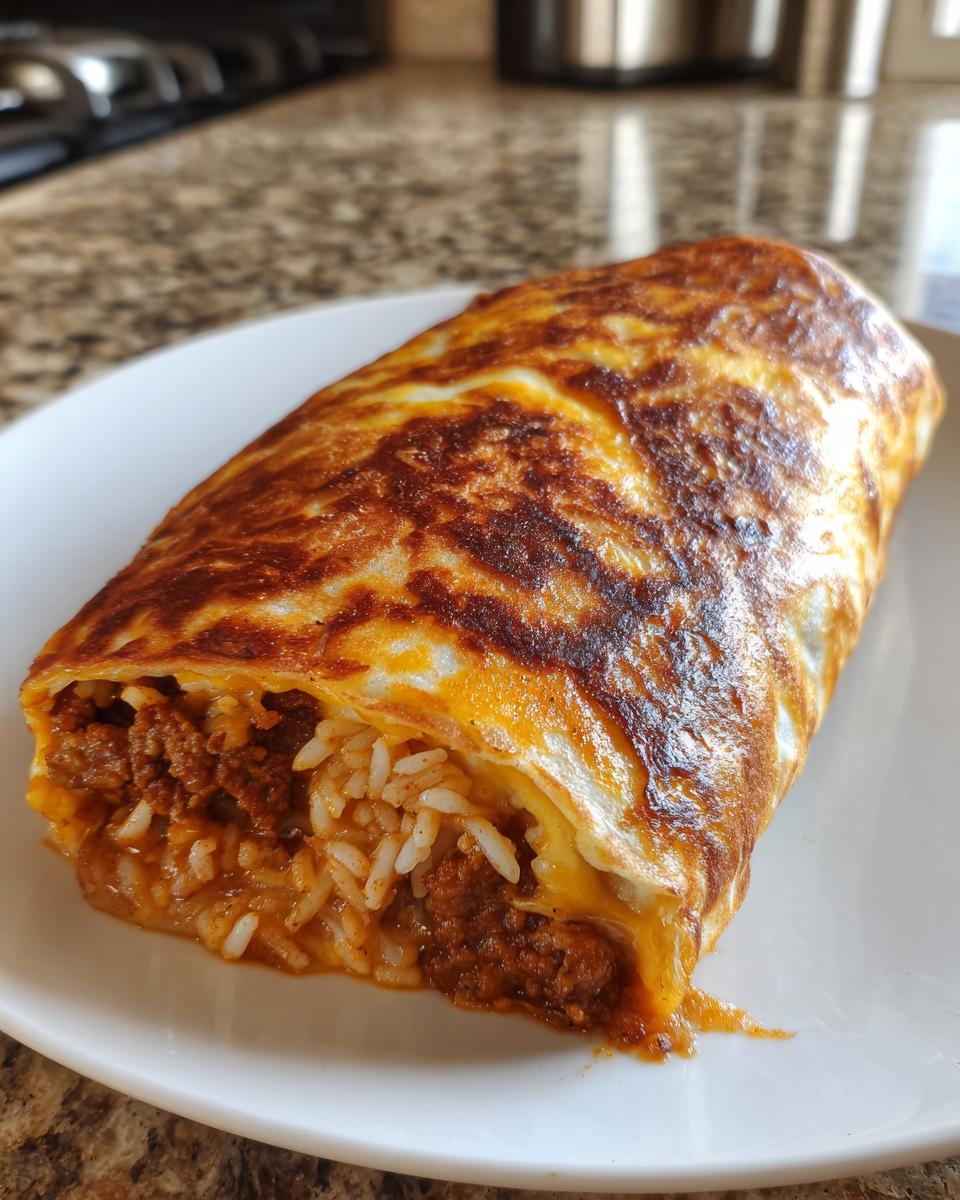
I first tried this idea years ago when I had leftover taco meat and a mountain of tortillas staring me down. I wanted something that held together better than a standard wrap, something with real texture. Trust me, once you bite through that crunchy, golden-brown cheese shell into the saucy interior, you’ll never look back. This isn’t just comfort food; it’s architecturally sound comfort food!
Essential Components for Your Grilled Cheese Burrito With Crispy Cheese Crust
This amazing creation isn’t just one simple layer; it’s a powerhouse built in three distinct sections. If you nail these three components—the deeply seasoned beef, the perfectly cooked saucy rice, and that bright, creamy chipotle sauce—the final assembly for your Grilled Cheese Burrito With Crispy Cheese Crust is going to be flawless. Don’t skimp on quality here; the flavor really comes through.
We need big flavor in the filling to stand up to that crunchy exterior. Everything should taste robust before it even gets wrapped up tight.
Preparing the Seasoned Beef Filling
For the beef, we’re using a full pound of ground beef, and we’re going heavy on the smoky spices. That smoked paprika is non-negotiable; it gives the filling that authentic, warm Tex-Mex hug. You need to sauté the onion and garlic first until they’re smelling incredible—that’s your flavor base! Then, brown the beef and make sure you let it simmer with the broth and tomato sauce for a good ten minutes. This simmering step is crucial; it makes the beef saucy instead of dry, which is exactly what we want for the final Grilled Cheese Burrito With Crispy Cheese Crust.
Cooking the Saucy Rice Base
Now for the rice. Don’t just boil it! You have to toast it first in a little olive oil for about a minute before adding the liquid. This toasting step prevents the rice from getting gummy and gives it a slightly nutty depth. We’re using broth and tomato sauce here too, not just water, because every single ingredient needs to pull its weight in flavor city. Cook it low and slow, bay leaf and all, until it’s tender and has soaked up all that delicious liquid. This sticky, saucy rice acts like glue inside the burrito. If you are looking for other hearty beef options, check out this healthy beef skillet with rice.
Crafting the Zesty Chipotle Sauce
This sauce is the cool counterpoint to the spicy beef. It’s just mayonnaise, sour cream, and a little kick from the chipotle peppers—don’t forget the lime zest! That zest wakes everything up. Whisk it all together until it’s perfectly smooth. It should be thick enough to coat a spoon but thin enough to drizzle easily over the rice and beef. This moisture is what keeps the interior of the burrito from feeling dry when you bite into that amazing cheese crust.
Equipment Required for Perfect Grilled Cheese Burrito With Crispy Cheese Crust
You don’t need a ton of fancy gadgets for this, thankfully! We are keeping it simple, but you do need a couple of things ready to go before you start rolling. Having the right skillet is key for that crust, so make sure yours is nonstick and heavy-bottomed. Trust me, you don’t want to wrestle this burrito out of the pan!
Equipment List Table
| Tool | Purpose |
|---|---|
| Large nonstick skillet | For creating the crispy cheese crust |
| Separate medium pot | For cooking the saucy rice |
| Large skillet or Dutch oven | For browning the seasoned beef filling |
| Small mixing bowl | For whipping up the chipotle sauce |
| Spatula or press | For gently flattening the burrito while grilling |
Step-by-Step Assembly of the Grilled Cheese Burrito With Crispy Cheese Crust
Alright, fillings are cooked, sauce is mixed—now comes the fun part where we turn these components into a handheld masterpiece. We’re building this burrito for ultimate structural integrity so it doesn’t explode when it hits the heat. Remember, we want the fillings contained so the outside cheese can do its job perfectly.
Building Your Burrito Layers
First things first: warm those large tortillas! A quick 15 seconds per side in a dry pan or microwave makes them pliable so they won’t tear when you roll them up tight. Now, listen to the order because it matters for stability. Start with a layer of your saucy rice base down the center. Don’t overfill, or you’ll never seal it! Next, pile on the seasoned beef. Drizzle on some of that creamy chipotle sauce—just enough to add moisture, don’t drown it! Then comes a little sprinkle of the nacho cheese sauce, maybe a spoonful of plain sour cream, and finally, those crushed tortilla chips for internal crunch.
Roll it up like you mean it! You want tight seams on the sides and a firm roll so everything stays snug inside. This tight wrapping is what prepares the exterior for its big moment.
Achieving the Signature Crispy Cheese Crust
This is where we earn the name Grilled Cheese Burrito With Crispy Cheese Crust. Forget oil in the pan; we are using the cheese as our cooking medium! Heat up your nonstick skillet over medium heat—this is important, medium, not high! Sprinkle just a small, thin layer of shredded cheddar directly onto the hot pan. Let it melt for about 30 seconds until it starts bubbling.
Quickly place your rolled burrito seam-side down right onto that melting cheese pad. Gently press down with a spatula for about three minutes. You are looking for a deep, golden-brown, almost lacey texture. When it’s perfectly crisp on one side, flip it carefully and repeat the process on the other side, adding a tiny bit more cheese if the pan looks dry. This crust seals the whole thing shut and gives you that incredible textural contrast! If you want more ideas on creative comfort food, check out my Medium page.
Tips for Success When Making Grilled Cheese Burrito With Crispy Cheese Crust
Honestly, the final grilling step is where people sometimes mess up this perfect Grilled Cheese Burrito With Crispy Cheese Crust. You have all this amazing filling, and you don’t want to end up with a burnt shell and cold center. The goal here is to use the melted cheese to essentially weld the tortilla shut, locking everything in place. It takes a little finesse, but once you get the heat right, it’s foolproof.
My biggest piece of advice is to watch the cheese, not the clock. The cheese tells you when it’s ready to release the burrito and when it’s done browning.
Temperature Control for Optimal Crispness
Seriously, medium heat is your best friend here. If the pan is too hot, the shredded cheese will burn to a bitter crisp before the tortilla even has a chance to heat through, let alone get that beautiful golden color. If it’s too low, the cheese just gets greasy and separates instead of forming that signature crust. Keep the heat steady, and if you see the cheese browning too fast, just pull the pan off the burner for 30 seconds to let it cool slightly before placing the next burrito down.
Tortilla Warming Technique
If you skip warming the tortillas, you are asking for tears, guaranteed. When a cold tortilla hits the filling, it resists rolling and snaps right in the middle. Warming them up—I use a dry skillet over low heat until they are soft and floppy—makes them so much more cooperative. They stretch beautifully around the generous filling, ensuring a tight wrap that holds up perfectly to the melting cheese crust you’re about to make. For more easy dinner ideas, see this simple healthy orzo weeknight meal.
Storing and Reheating Your Grilled Cheese Burrito With Crispy Cheese Crust
Even though these burritos are dangerously good and usually disappear in one sitting, sometimes you end up with leftovers. Don’t even think about microwaving them! That will turn that glorious crispy crust into sad, soggy cardboard. The secret to enjoying leftovers of your Grilled Cheese Burrito With Crispy Cheese Crust is bringing back that crunch.
Wrap them up tightly in plastic wrap or foil before tossing them in the fridge. They keep well for about three days like this. When you’re ready to eat one, just remember: we need dry heat to revive that beautiful cheese shell! You can find more storage tips on my Pinterest page.
Storage and Reheating Table
| Storage Method | Reheating Method (Best) | Reheating Method (Quick) |
|---|---|---|
| Wrap tightly in plastic wrap or foil | Dry, nonstick skillet over medium heat (5-7 minutes total) | Toaster oven or air fryer (350°F until hot) |
| Store in an airtight container in the fridge | Skillet is preferred to restore the crust | Microwave is discouraged due to texture loss |
Frequently Asked Questions About This Recipe
I get so many questions about tweaking this recipe, which is totally understandable! It’s so good, people want to make it perfect for their family dinners. Don’t worry about substitutions; we can usually make them work, especially when it comes to that amazing Crispy Crust.
Can I use different cheese for the crust?
Yes, you absolutely can play around with the cheese for the crust! The key requirement is excellent meltability. Cheddar and Marble cheese work great because they melt smoothly and crisp up nicely. If you try something like a very dry Parmesan, it might burn before it melts into a proper shell. I’d stick to a good melting cheese like Monterey Jack, Colby, or even a Mexican blend. Just make sure whatever you use is shredded finely so it melts quickly when it hits the hot pan. If you are looking for a similar cheesy side, check out this slow cooker cheesy broccoli potato casserole.
How can I adjust the spice level in the Beef Burrito?
This is where you take control! If you want a milder Beef Burrito, start by halving the chipotle peppers in adobo used in the sauce—those peppers pack some heat. You could even leave them out entirely and just use a dash of smoked paprika in the sauce instead. If you want it hotter, add a pinch of cayenne pepper to the beef seasoning mix when you add the cumin and oregano. Taste the sauce before you roll it up; that’s your last chance to adjust the heat before it gets sealed inside!
Can I make the filling ahead of time?
Oh, absolutely! Meal prep is a lifesaver here. You can make both the seasoned beef and the saucy rice up to two days ahead of time. Store them separately in airtight containers in the fridge. When you’re ready to assemble your Grilled Cheese Burrito With Crispy Cheese Crust, just reheat the fillings thoroughly on the stovetop before layering them. The cold fillings will cool down your tortilla too much during rolling, so make sure they are warm before you wrap them up!
Understanding the Nutrition of This Comfort Food
Now, let’s talk fuel. I’m not going to lie, this delicious Grilled Cheese Burrito With Crispy Cheese Crust is a satisfying, hearty meal. It’s packed with protein from the beef and carbs for energy, but yes, it’s definitely on the richer side thanks to all that melted cheese and creamy sauce. It’s a treat, not an everyday lunch, but totally worth every calorie!
Estimated Nutritional Breakdown Table
Here’s a quick look at what you can generally expect per burrito, but remember, these figures are just estimates based on the ingredients listed!
| Nutrient | Amount (Estimate) |
|---|---|
| Calories | 720 |
| Fat | 40 g |
| Carbohydrates | 58 g |
| Protein | 36 g |
Eat responsibly, friends!
Share Your Perfect Grilled Cheese Burrito With Crispy Cheese Crust
I truly hope this recipe brings as much joy and messy, cheesy goodness to your kitchen as it does to mine! Now it’s your turn to join the crispy crust club. When you make your first Grilled Cheese Burrito With Crispy Cheese Crust, please come back and let me know how it went.
Did you try using Pepper Jack in the crust? How many stars are you giving this ultimate comfort food? Drop a comment below—I can’t wait to hear all about your success!
Print
7 Amazing Grilled Cheese Burrito Crust Tips
- Total Time: 45 minutes
- Yield: 4 servings 1x
- Diet: N/A
Description
This grilled cheese burrito features seasoned beef, saucy rice, and melty cheese, finished with a crispy grilled cheese crust.
Ingredients
- For the beef filling:
- 1 pound ground beef
- 1 tablespoon olive oil
- 2 garlic cloves minced
- 1/2 white onion diced
- 2 teaspoons smoked paprika
- 1 teaspoon ground cumin
- 1 teaspoon dried oregano
- 1 teaspoon garlic powder
- 1 teaspoon onion powder
- 1 teaspoon salt
- 1 teaspoon black pepper
- 1/3 cup beef broth
- 1/4 cup tomato sauce
- For the rice:
- 1 1/2 tablespoons olive oil
- 1 cup jasmine rice
- 1 1/2 cups beef broth
- 1/2 cup tomato sauce
- 1 teaspoon garlic powder
- 1 teaspoon onion powder
- 1 teaspoon salt
- 1 bay leaf
- For the sauce:
- 1/2 cup mayonnaise
- 1/2 cup sour cream
- 2 tablespoons chipotle peppers in adobo minced
- Zest of 1 lime
- 1 teaspoon maple syrup
- For assembly:
- 4 large flour tortillas about 10 inches
- 1 cup shredded marble or cheddar cheese
- 1/2 cup nacho cheese sauce
- 1/2 cup sour cream
- 1 cup crushed tortilla chips
Instructions
- Heat olive oil in a large skillet over medium high heat, add onion and garlic, and cook for 2 minutes until softened.
- Add ground beef and all seasonings, cooking until browned and no pink remains, reaching an internal temperature of 160°F.
- Stir in beef broth and tomato sauce, reduce heat, and simmer for 10 minutes until saucy.
- In a separate pot, heat olive oil, add rice, and toast for 1 minute. Add broth, tomato sauce, garlic powder, onion powder, salt, and bay leaf. Bring to a boil, cover, reduce to low, and cook for 12 minutes until tender.
- In a small bowl, mix mayonnaise, sour cream, chipotle peppers, lime zest, and maple syrup until smooth.
- Warm tortillas slightly, then layer rice, beef, nacho cheese, sour cream, crushed chips, and sauce. Roll tightly into burritos.
- Heat a nonstick skillet over medium heat and sprinkle a small amount of shredded cheese directly into the pan.
- Place burrito seam side down onto the melting cheese and cook for 3 minutes until golden and crisp. Flip and repeat on the other side.
- Serve hot with extra sauce if desired.
Notes
- Cooking the burrito directly on melted cheese creates the signature crispy crust and locks everything together.
- Prep Time: 15 minutes
- Cook Time: 30 minutes
- Category: Main Dish
- Method: Grilling
- Cuisine: Tex-Mex
Nutrition
- Serving Size: 1 burrito
- Calories: 720
- Sugar: N/A
- Sodium: N/A
- Fat: 40 g
- Saturated Fat: N/A
- Unsaturated Fat: N/A
- Trans Fat: N/A
- Carbohydrates: 58 g
- Fiber: N/A
- Protein: 36 g
- Cholesterol: N/A