
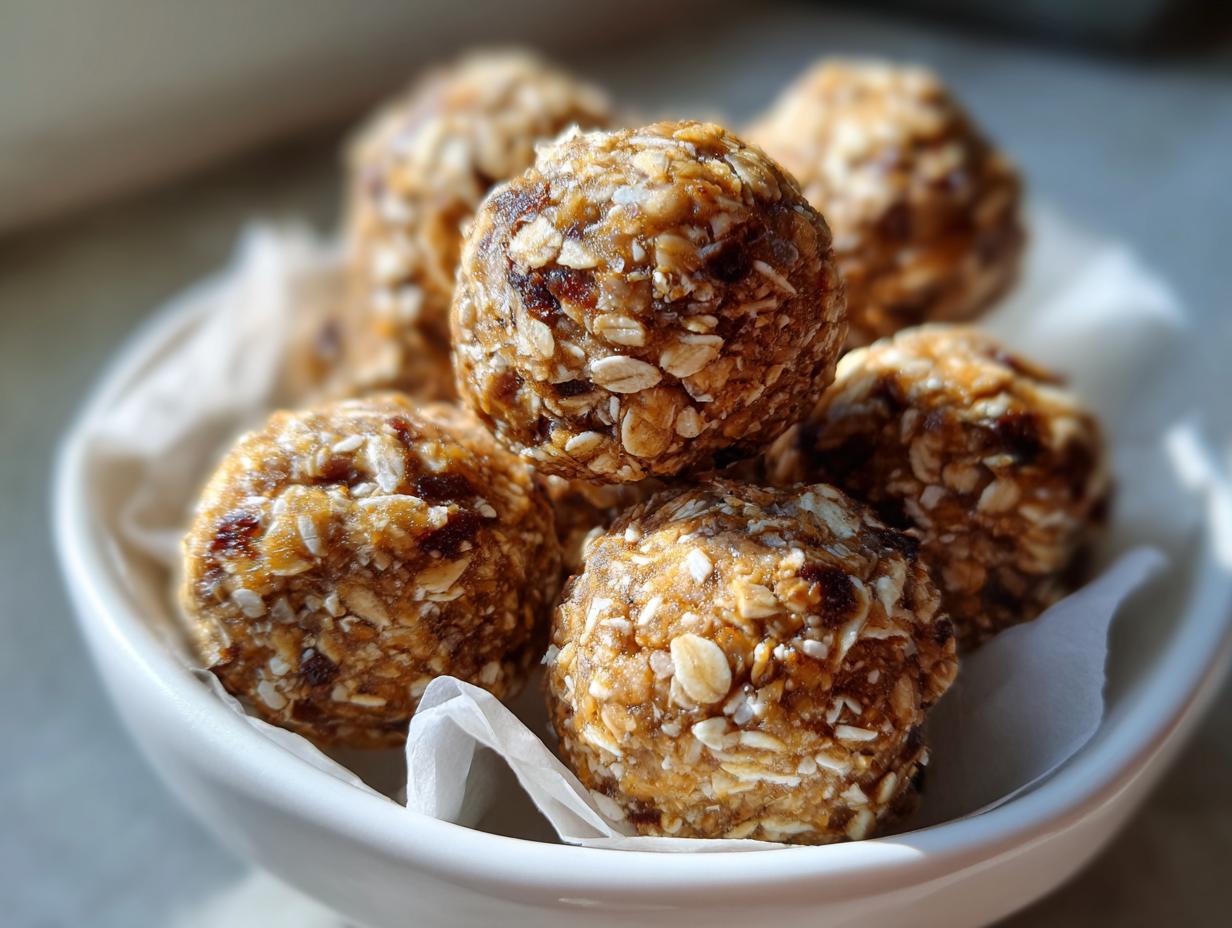
If you’re anything like me, you’re always hunting for that perfect snack that hits all the right notes: fast, filling, and doesn’t require turning on the oven, especially when it’s hot outside! That’s why I absolutely swear by these Greek Yogurt Protein Balls. Seriously, forget those chalky, crumbly protein bars you find at the store. These are different.
The real game-changer here is the creamy texture we get from the yogurt and peanut butter. It makes them feel like a little treat instead of just fuel. I’ve made dozens of batches of no-bake snacks over the years—some turned out too sticky, others too hard—but this specific combination of ingredients locks in the moisture perfectly. We’re talking about a high-protein, low-carb snack that comes together faster than brewing a pot of coffee. You’ll be shocked how simple it is to get this amazing texture without any baking whatsoever.
Essential Ingredients for Your Greek Yogurt Protein Balls
Getting the right ratio of wet to dry is crucial when you’re making no-bake snacks, and these Greek Yogurt Protein Balls are no exception. Don’t skimp on the quality here; using good, plain Greek yogurt makes all the difference in the final creaminess. Since we aren’t baking anything, the ingredients have to work hard to bind together and hold their shape.
I always use vanilla whey protein because it blends so smoothly, but feel free to experiment once you nail the base recipe. Trust me, having these ingredients on hand means you can whip up a week’s worth of high-protein snacks in under 30 minutes total. Let’s look at exactly what you need to gather.
Detailed Ingredient Breakdown for Greek Yogurt Protein Balls
You’ll need a medium bowl for mixing everything up. Make sure your oats are finely ground—I usually pulse mine in a small food processor until they look almost like coarse flour. This helps them absorb moisture better than whole oats would in these Greek Yogurt Protein Balls.
Here is the exact lineup I use for the best texture and flavor:
| Ingredient | Amount | Preparation Note |
|---|---|---|
| Plain Greek Yogurt | \u00be cup | Full-fat or 2% works best for texture |
| Vanilla Whey Protein Powder | \u00bd cup | Or your favorite protein flavor |
| Natural Peanut Butter | \u00bc cup | Stirred well before measuring |
| Honey | 2 tablespoons | Adjust to taste for sweetness |
| Finely Ground Rolled Oats | \u00bd cup | Pulse old-fashioned oats in a blender |
| Ground Flaxseed | 2 tablespoons | Adds healthy fats and binding power |
| Chia Seeds | 2 tablespoons | Do not soak beforehand |
| Salt | \u00bc teaspoon | Just a pinch to enhance sweetness |
Equipment Needed for Making Greek Yogurt Protein Balls
You don’t need a fancy stand mixer for these, thank goodness! The beauty of these Greek Yogurt Protein Balls is how little equipment they require. Seriously, clean-up is a breeze, which is a huge win when you’re making a quick snack.
Make sure you have a sturdy mixing bowl ready—one that can handle a little bit of thick stirring. Parchment paper is non-negotiable because it prevents sticking during the critical chilling phases. You’ll also want a tablespoon measure for scooping out uniform portions. That’s it! Simple tools for a simple, delicious result.
Step-by-Step Instructions for Preparing Greek Yogurt Protein Balls
Okay, here’s where the magic happens! Even though these are no-bake, the order matters, especially when dealing with wet ingredients like yogurt and peanut butter. We need to create a stable dough that won’t fall apart when you try to roll it. I always set up my workstation first. Grab that plate or small baking sheet and line it with parchment paper immediately—you don’t want to be searching for it later when the mixture starts getting sticky.
Follow these steps exactly, and you’ll have perfectly formed Greek Yogurt Protein Balls every single time. Don’t rush the chilling, that’s my biggest piece of advice! You can find more visual inspiration here.
Mixing the Base of Your Greek Yogurt Protein Balls
Start with your wet ingredients in that medium bowl. I like to use a whisk at this stage because it helps break down the peanut butter nicely before we add the powders. Whisk together the Greek yogurt, your protein powder, the peanut butter, the honey, and that little pinch of salt. You need to mix this until it looks completely smooth and thick. If it looks thin or runny right now, don’t panic, but know that the dry stuff will firm it up significantly in the next step.
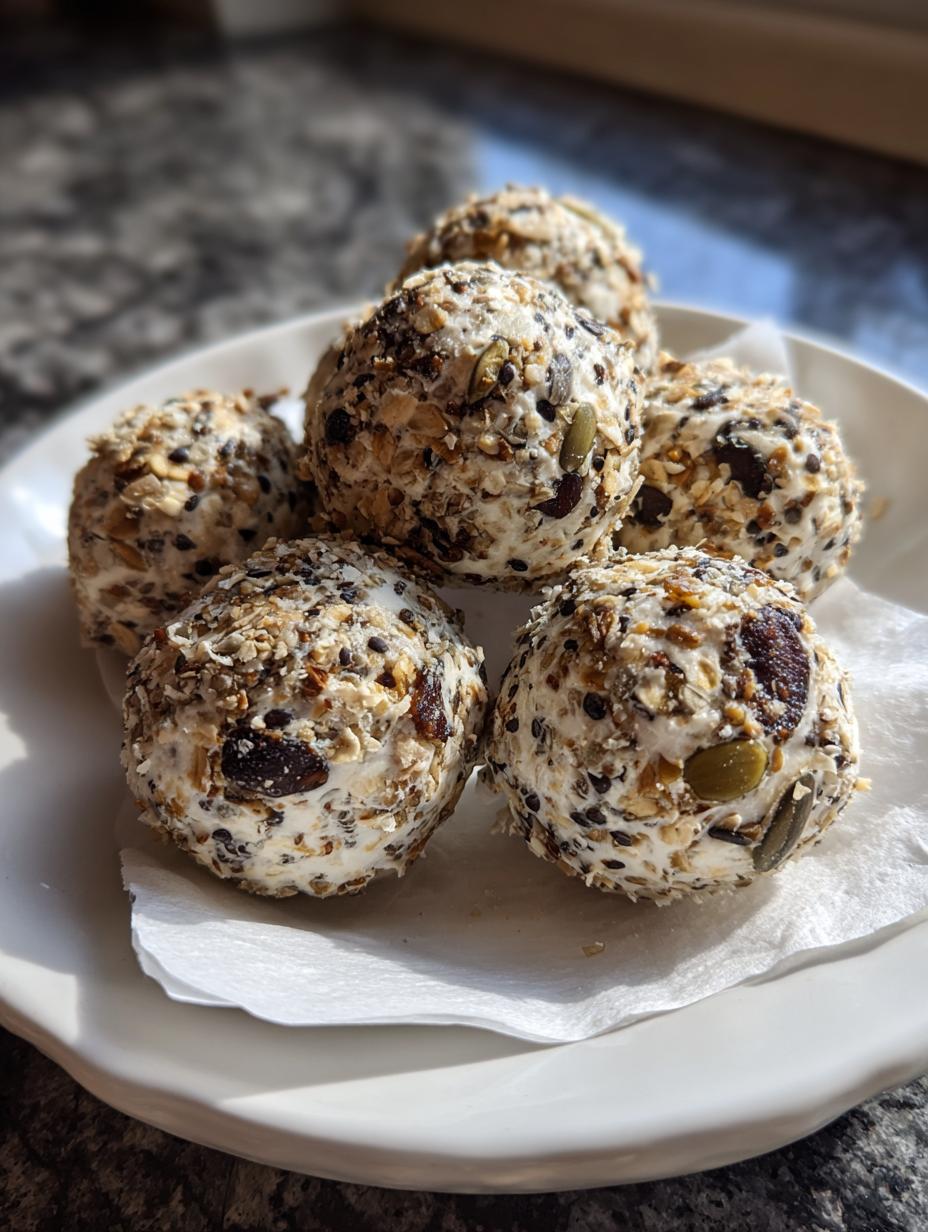
Once that base is uniform, it’s time for the binders! Gently stir in your finely ground oats, the ground flaxseed, and the chia seeds. Use a sturdy spoon or spatula here. You’ll notice it transforms quickly from a thick paste into something that resembles a proper dough. Dump everything in and mix just until you don’t see any dry streaks of protein powder left. Overmixing at this stage isn’t a huge disaster, but we want to keep things quick! If you like no-bake snacks, you might enjoy these cups too.
Chilling and Forming the Greek Yogurt Protein Balls
This next part is non-negotiable if you want nicely shaped Greek Yogurt Protein Balls: you MUST chill the mixture. Cover the bowl and pop it into the refrigerator for a solid 20 minutes. This resting time allows the oats and seeds to absorb some of that moisture from the yogurt, making the dough much firmer and less sticky to touch. Trust me, trying to roll it when it’s warm is a recipe for sticky hands!
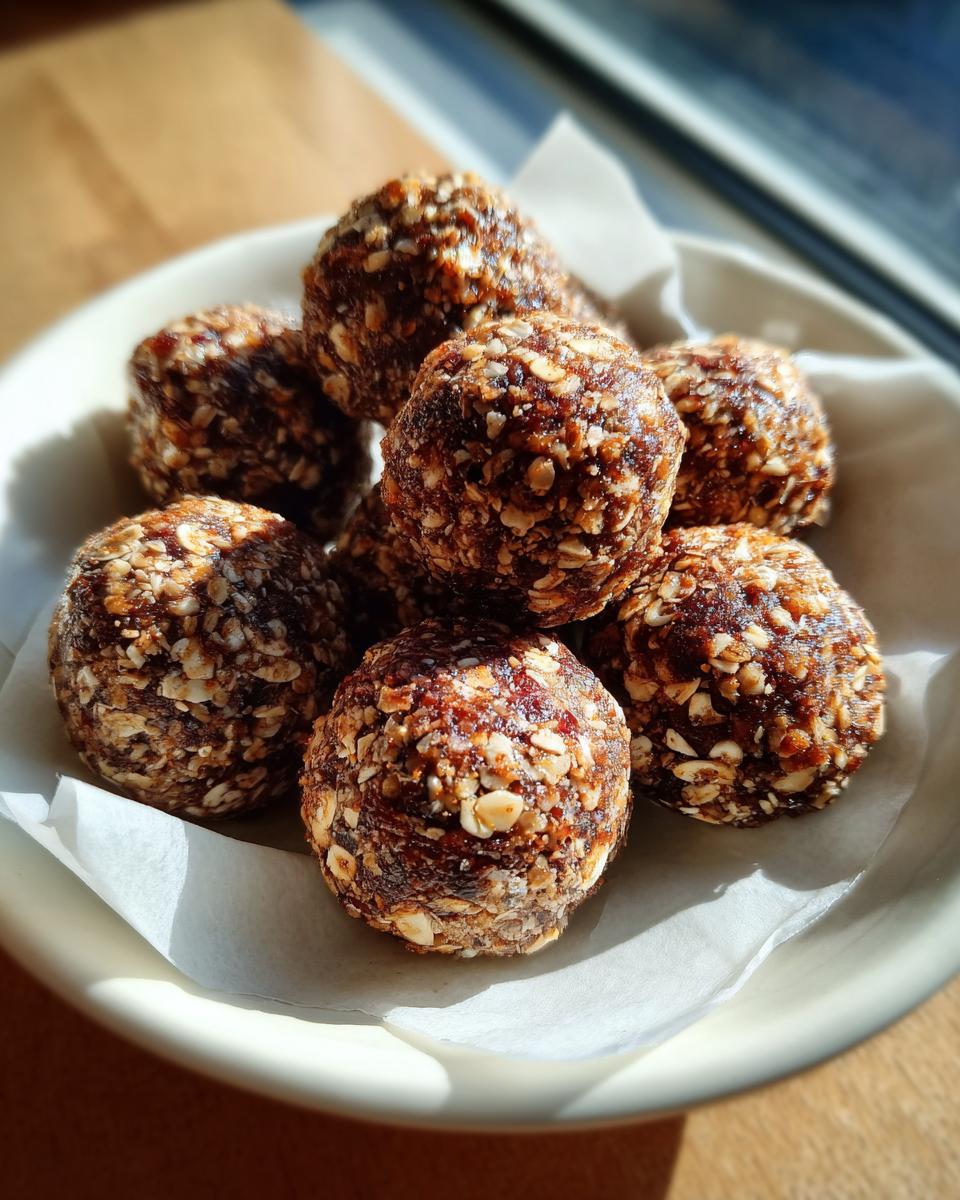
After 20 minutes, take the mixture out. Scoop out about one tablespoon of the dough—a small cookie scoop works perfectly for consistency—and roll it firmly between your palms into a nice, neat ball. Place each finished ball onto that parchment-lined plate you prepared earlier.
Once all your dough is rolled, we need one final firming session. Pop the entire tray back into the fridge for an additional 40 minutes. This second chilling phase is what locks the shape in so they don’t flatten out later. After that hour total of chilling time, they are ready to eat or transfer to your storage container!
Tips for Success with Greek Yogurt Protein Balls
Even though these Greek Yogurt Protein Balls are incredibly forgiving, I’ve learned a few tricks over the years to make sure they hold together perfectly, especially if you’re making a big batch for meal prep. The main thing people run into is the mixture being too soft. If your base seems too wet after the first 20-minute chill, don’t worry! Just stir in another tablespoon of protein powder or ground oats. It thickens up fast.
Conversely, if your dough is too dry and crumbly right after mixing, it means your yogurt might have been thicker than mine, or maybe your protein powder absorbed too much liquid. In that case, add just a *tiny* drizzle of water or milk—I mean half a teaspoon at a time—and mix until it just comes together. You want it firm enough to roll without sticking excessively to your hands.
Also, remember that the type of nut butter you use matters! Really natural, oily peanut butter will make the mixture softer than those highly processed, stiff versions. If you use oily natural butter, definitely lean into that second 40-minute chill time. These simple adjustments ensure your Greek Yogurt Protein Balls turn out perfectly creamy and stable every time. For more quick tips and ideas, check out my Medium page.
Storing and Handling Your Greek Yogurt Protein Balls
Since these wonderful Greek Yogurt Protein Balls rely on fresh yogurt and have no baking involved, they definitely need to stay cold to keep their shape and freshness. I always tell people to treat them like little yogurt bites—they need the fridge! They are fantastic for meal prep because you can make a big batch on Sunday, and they’ll be ready for grab-and-go snacking all week long.
The refrigeration is key to keeping them firm so they don’t smoosh together in the container. Honestly, I rarely reheat mine; they are designed to be eaten cold, straight from the fridge, which makes them super refreshing. But if you’re having a tough morning and need them slightly softer, I have a quick trick. If you prefer chocolate, try this snack variation!
Storage and Reheating Guidelines
For best results, keep your finished Greek Yogurt Protein Balls in an airtight container. They stay perfectly good in the refrigerator for about a week. If you need them softer than fridge-cold, just leave them on the counter for about 10 minutes before you plan to eat them—that’s usually enough time to take the chill off without turning them mushy.
If you want them to last longer, you can absolutely freeze them! Here’s a quick guide on shelf life:
| Storage Location | Shelf Life | Serving Suggestion |
|---|---|---|
| Airtight Container (Fridge) | Up to 7 days | Eat cold or let sit out 10 mins |
| Freezer (Airtight Bag) | Up to 2 months | Thaw in the fridge overnight |
Common Questions About Greek Yogurt Protein Balls
I get so many great questions about customizing these! Once you have the basic formula down for your Greek Yogurt Protein Balls, it’s fun to start tweaking them for flavor or dietary needs. Since these are no-bake, we have to be a little more careful with substitutions than if we were baking a cake, but it’s totally doable.
The main goal is always maintaining that scoopable, firm-but-creamy texture we worked so hard for in the mixing stage. If you’re looking to cut carbs further or avoid nuts, I have some easy fixes that keep these high-protein snacks tasting amazing. Don’t be afraid to experiment once you see how reliable this base recipe is!
Can I Substitute the Nut Butter in These Greek Yogurt Protein Balls
Absolutely! If you or someone you’re making these for has a nut allergy, swapping out the peanut butter is simple. You can use sunflower seed butter (SunButter) or tahini. Just be aware that tahini has a much stronger flavor, so it will change the taste profile of your Greek Yogurt Protein Balls slightly. Sunflower butter is usually a close second in terms of neutral flavor.
If you aren’t avoiding nuts but just want a different flavor, almond butter or cashew butter work beautifully too. Just make sure whatever butter you choose is natural and well-stirred, as the difference in oil content can affect how firm the dough sets up.
Adjusting the Texture of the Protein Balls
This is probably the most frequent question I receive. Texture is everything with these snacks! If your mixture is too wet—meaning it’s sticking everywhere and won’t quite hold a shape after the first 20 minutes of chilling—you need more dry binder. Slowly mix in another tablespoon of protein powder or ground flaxseed until it firms up enough to roll. Don’t add too much at once, or you’ll end up with dry, crumbly Greek Yogurt Protein Balls.
If the dough is too dry right out of the fridge, it means the ingredients absorbed more liquid than expected. Fix this by adding liquid binder, but go slow! Add about half a teaspoon of water or milk at a time, mixing well after each addition, until you get that perfect soft, pliable dough consistency that rolls easily between your palms.
Nutritional Estimates for Greek Yogurt Protein Balls
Now, I always say these are treats because they are so delicious, but they really are fantastic for hitting your macros! Since we are using protein powder and minimal added sugar, these Greek Yogurt Protein Balls are a powerhouse snack. Keep in mind these numbers are estimates based on the specific ingredients listed, especially the protein powder you choose, which can vary wildly.
If you’re tracking carefully for low-carb or high-protein goals, this is super helpful information to have on hand. But remember, this is just a guide! Always verify if you have strict dietary needs. Here is the breakdown per single serving ball:
| Nutrient | Estimated Value (Per Ball) |
|---|---|
| Calories | 110 |
| Protein | 9 g |
| Fat | 5 g |
| Carbohydrates | 7 g |
Amazing 9g Protein Greek Yogurt Protein Balls
- Total Time: 1 hour 15 minutes
- Yield: 14 protein balls 1x
- Diet: Vegetarian
Description
Creamy no-bake Greek yogurt protein balls made with nut butter and seeds. A high-protein, low-carb snack perfect for meal prep.
Ingredients
- ¾ cup plain Greek yogurt
- ½ cup vanilla whey protein powder
- ¼ cup natural peanut butter
- 2 tablespoons honey
- ½ cup finely ground old-fashioned rolled oats
- 2 tablespoons ground flaxseed
- 2 tablespoons chia seeds
- ¼ teaspoon salt
Instructions
- Line a plate or small baking sheet with parchment paper.
- In a medium bowl, whisk the Greek yogurt, protein powder, peanut butter, honey, and salt until smooth and thick.
- Stir in the ground oats, ground flaxseed, and chia seeds until a dough forms.
- Refrigerate the mixture for 20 minutes to make it easier to handle.
- Scoop out about 1 tablespoon of mixture and roll into a ball using your hands.
- Place each ball onto the prepared parchment-lined plate.
- Refrigerate for an additional 40 minutes until firm.
- Transfer to an airtight container and keep refrigerated until ready to eat.
Notes
- These are best stored in the refrigerator.
- Adjust sweetness by adding a little more or less honey.
- Prep Time: 15 minutes
- Cook Time: 1 hour
- Category: Snack
- Method: No-Bake
- Cuisine: American
Nutrition
- Serving Size: 1 ball
- Calories: 110
- Sugar: Unknown
- Sodium: Unknown
- Fat: 5 g
- Saturated Fat: Unknown
- Unsaturated Fat: Unknown
- Trans Fat: Unknown
- Carbohydrates: 7 g
- Fiber: Unknown
- Protein: 9 g
- Cholesterol: Unknown
