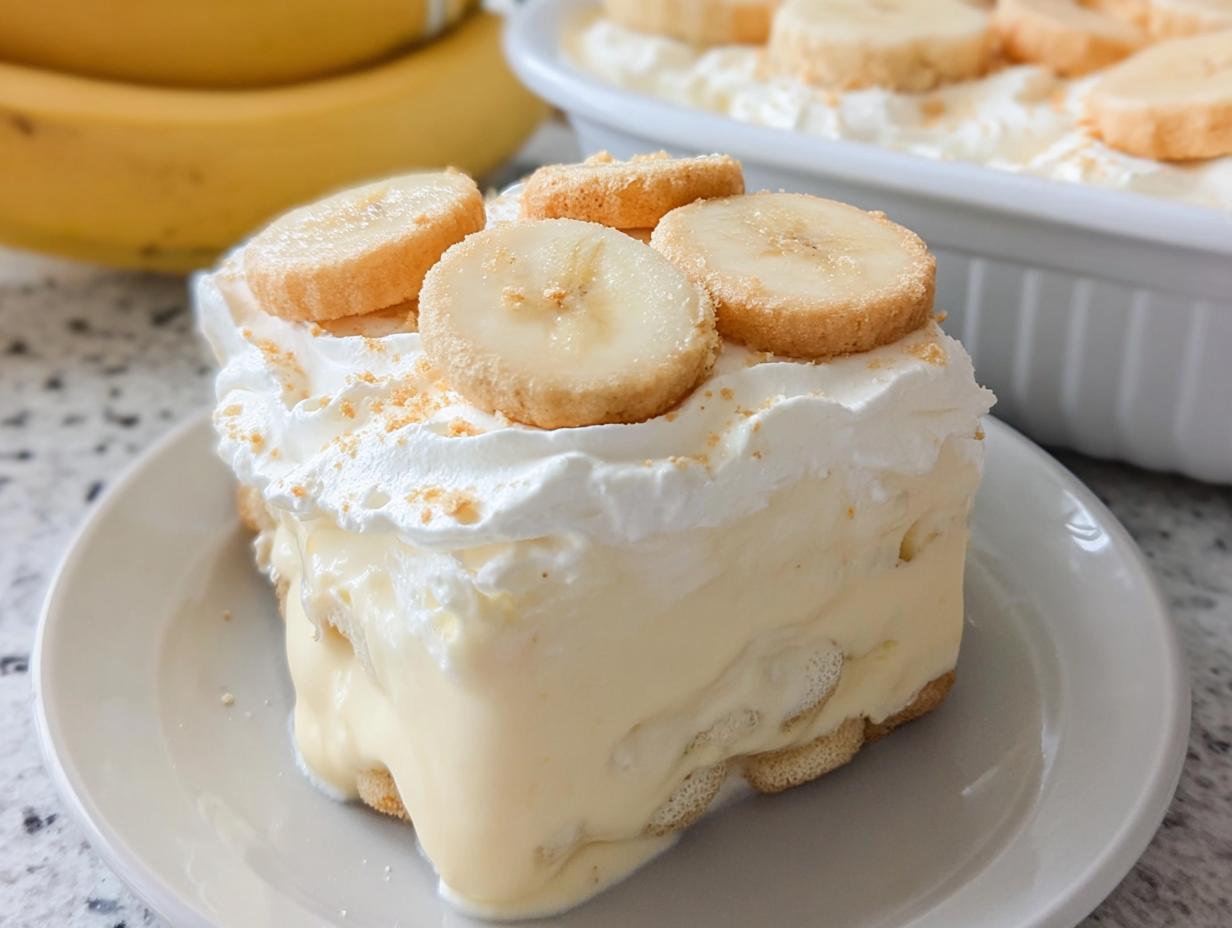
Oh my gosh, let me tell you about this dessert. If you grew up loving that classic, creamy, spoon-licking goodness, but now you need to keep things gluten-free, this is your recipe. Seriously, this Gluten-Free Banana Pudding Easy No-Bake Dessert is pure nostalgia in a dish. I’ve made this so many times for family gatherings—it’s my go-to because it requires absolutely zero oven time, which is a lifesaver in the summer!
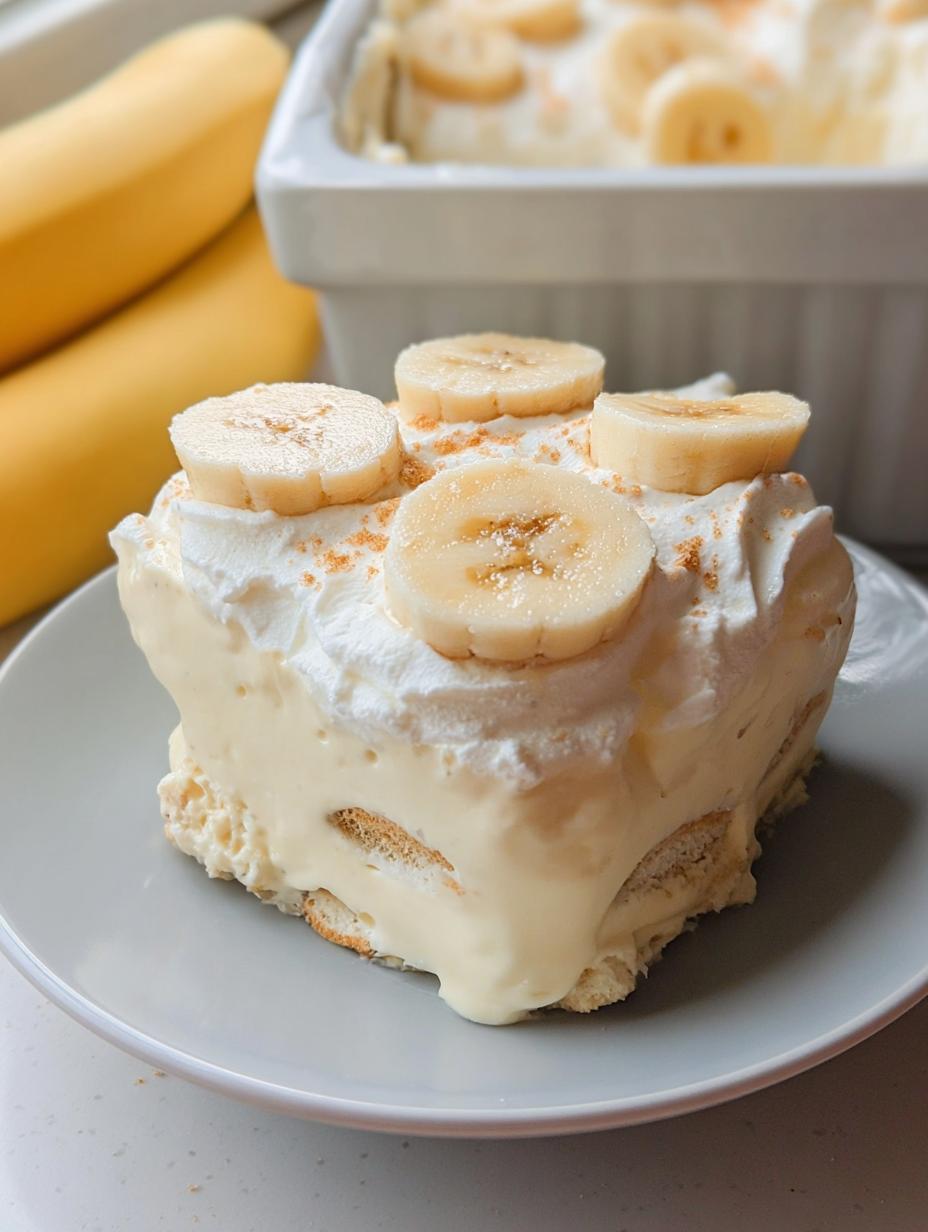
The beauty of this pudding is the layering. We’re talking soft bananas, sweet vanilla cream, and those crunchy gluten-free wafers that soften up just enough as they sit. I’ve perfected the ratios over the years to make sure it’s thick enough to hold its shape but still melts in your mouth. Trust me, after making this specific family favorite a dozen times, I know exactly what makes it work perfectly every single time.
Forget fussy baking; this whole thing comes together in about 20 minutes of assembly, and then the fridge does all the heavy lifting. It’s the easiest, creamiest, and most satisfying no-bake dessert you’ll ever whip up!
Gathering What You Need for Gluten-Free Banana Pudding Easy No-Bake Dessert
Okay, getting ready to assemble this glorious Gluten-Free Banana Pudding Easy No-Bake Dessert is super straightforward, but you have to make sure a few things are ready to go before you start mixing. Since this is a no-bake situation, the temperature and consistency of your ingredients matter a lot! I always lay everything out on the counter first, just like when I bake my grandmother’s pound cake.
You want your milk and heavy cream ice-cold, but you absolutely must have that cream cheese softened up so you don’t end up with hard lumps in your beautiful pudding base. Follow this list closely, and you won’t have any issues getting that perfect, thick, creamy texture.
Essential Ingredients List
Here is everything you need to grab before you start whisking. Pay close attention to the states required—especially that cream cheese!
- 1 box gluten-free instant vanilla pudding mix (5 ounces)
- 2 cups whole milk (must be cold)
- 8 ounces cream cheese (softened completely)
- 14 ounces sweetened condensed milk
- 2 cups heavy whipping cream (must be cold)
- ½ cup powdered sugar
- 1 teaspoon vanilla extract
- 6 medium bananas (sliced ¼ inch thick—don’t cut them too thin!)
- 12 ounces gluten-free vanilla wafers
Equipment List for Your Gluten-Free Banana Pudding Easy No-Bake Dessert
You don’t need an oven, which is the best part! But you do need the right tools to whip everything up into that dreamy state. For this Gluten-Free Banana Pudding Easy No-Bake Dessert, grab the following:
- A medium bowl for whisking the pudding
- A large bowl for the cream cheese base
- A separate, clean bowl for whipping the heavy cream
- An electric hand mixer or a stand mixer (your arm will thank you!)
- A sturdy whisk and rubber spatula
- A 9 by 13 inch baking dish for layering
Ingredient Notes and Substitutions for Gluten-Free Banana Pudding Easy No-Bake Dessert
Listen, even though this is an easy no-bake recipe, the ingredients are what make or break the texture here. We’re aiming for creamy, structured layers, not soup! When you’re putting together your Gluten-Free Banana Pudding Easy No-Bake Dessert, pay special attention to the two main players that aren’t the dairy: the bananas and those crucial gluten-free wafers. These two things need a little guidance.
I’ve learned the hard way that if you use bananas that are too far gone—you know, the super brown, mushy ones—your pudding ends up a watery mess after sitting in the fridge. We want structure, people!
Choosing the Right Bananas
The recipe note is super important here: use just barely ripe bananas. I look for ones that are yellow with maybe just a hint or two of small brown spots starting to form. If they are pure bright yellow, they are too firm and won’t give that lovely soft texture when you bite into them after chilling. If they are already heavily speckled, they’ll turn to mush and seep liquid into your beautiful pudding layers. It’s a fine line, but totally worth watching for!
Selecting Gluten-Free Wafers
Finding certified gluten-free vanilla wafers can sometimes feel like a treasure hunt. You have to be vigilant and check those labels! Not all brands are created equal, and sometimes a wafer that seems fine might have cross-contamination warnings. Look for explicit “Certified Gluten-Free” seals on the package. If you truly can’t find any, don’t panic. You can use gluten-free shortbread cookies instead, but you might want to crush those a bit more finely than the wafers, as they are usually denser.
Step-by-Step Assembly of Your Gluten-Free Banana Pudding Easy No-Bake Dessert
Alright, now for the fun part! We move from ingredient prep to actual assembly. This is where your patience pays off, especially when we start folding everything together. Remember, this Gluten-Free Banana Pudding Easy No-Bake Dessert is all about building those distinct, gorgeous layers. Take your time here; rushing the mixing is how you end up with a flat dessert!
Preparing the Vanilla Pudding Base
First things first, grab that instant pudding mix and the cold milk. Whisk them together in a medium bowl until they are completely smooth—I mean zero lumps! It will start thickening up almost immediately, which is exactly what we want. Set that bowl aside for just a minute.
Next, tackle the main body of the cream. In your large bowl, you need to beat that softened cream cheese until it’s silky smooth. Then, slowly pour in your can of sweetened condensed milk while the mixer is running. Beat these two together until they are totally unified and look like thick, luxurious frosting. No grit allowed!
Creating the Light Whipped Topping
This step is crucial for that airy texture we talked about. Grab your clean bowl—make sure there’s zero fat or water residue in there, or your cream won’t whip! Pour in the cold heavy cream, the powdered sugar, and the vanilla extract. Start slow, then ramp up the speed. You are whipping this until you get what we call stiff peaks. That means when you lift the whisk out, the peak stands straight up without flopping over. That’s the sign of a perfectly aerated topping!
Combining the Creamy Layers
Now we merge the bases. Pour that slightly thickened pudding mixture into the cream cheese base. Mix them until they are just combined. This mixture will be thick—it should look like a very rich custard. Here’s the secret: take that beautiful whipped cream you just made and gently fold it in using a rubber spatula. I mean *gently*. You want to maintain all that air you just whipped in. Don’t stir it like you’re making soup; use an under-and-over motion until no white streaks remain.
Layering Your Gluten-Free Banana Pudding Easy No-Bake Dessert
Time to build! Grab that 9 by 13 inch dish. Start by covering the entire bottom evenly with a layer of your gluten-free vanilla wafers. Don’t overlap them too much. Next, spread a single, even layer of your sliced bananas right over the wafers. Now, spoon half of your glorious pudding mixture over the bananas and smooth the top gently with your spatula.
We just repeat that process! Add the rest of your wafers, then the final layer of bananas, and top it all off with the remaining pudding mixture. Make sure the top layer is as smooth as you can get it!
The Final Chill
This is the hardest part, but you absolutely cannot skip it. Cover your dish tightly with plastic wrap—make sure the wrap isn’t touching the top of the pudding if you can help it. Pop it into the refrigerator for a minimum of four hours. Honestly, if you can leave it overnight, it’s even better! Chilling is non-negotiable because it allows the pudding to fully set up and, more importantly, lets those wafers soften up just enough to blend perfectly with the bananas. Don’t try to rush this!
Tips for Perfect Gluten-Free Banana Pudding Easy No-Bake Dessert Results
Even though this is called an easy no-bake dessert, there are a few little things that can trip you up if you aren’t watching closely. My biggest piece of advice for anyone making this Gluten-Free Banana Pudding Easy No-Bake Dessert is to respect the cold temperatures! If your milk or cream isn’t cold enough, your pudding won’t set right, and your whipped cream will deflate before you even get it folded in.
Another common mistake I see is over-mixing after the whipped cream goes in. That step where you fold? That’s where the air is! If you stir too hard, you’ll knock all the volume out, and your pudding will end up dense instead of fluffy on top. Aim for just a few gentle turns until you see no more white streaks.
Also, don’t be tempted to slice those bananas super thin! Remember, they need to hold up against all that creaminess for four hours in the fridge. Slicing them about a quarter-inch thick creates a nice substantial layer that won’t turn into total mush. If you follow these little tricks, your Gluten-Free Banana Pudding Easy No-Bake Dessert will come out perfect every time.
Serving Suggestions for This Gluten-Free Dessert
Once you pull this beauty out of the fridge, it’s ready to go, but sometimes a little something extra makes it feel extra special. Since the pudding is already so rich and creamy, you don’t need much! A light dusting of extra powdered sugar right before serving is always a classic touch—it just looks so pretty.
If you want a little crunch contrast, a sprinkle of crushed gluten-free vanilla wafers on top works wonders. For a bit of tang, a few thin slices of fresh strawberry placed around the edge of the dish really brighten up the whole flavor profile. Honestly, though, it’s perfect just scooped straight from the dish!
Storing and Handling Your Gluten-Free Banana Pudding Easy No-Bake Dessert
Because this dessert is packed with fresh fruit and dairy, storage is really important to keep it tasting its best. Since it’s a no-bake recipe, you can’t really “reheat” it—we want it cold and refreshing! The texture actually improves after the first 24 hours in the fridge, as the wafers absorb just the right amount of moisture from the pudding layers.
Here’s my quick guide on handling leftovers. Make sure you cover it well, or the pudding tends to soak up every smell in your refrigerator!
| Handling Aspect | Best Practice |
|---|---|
| Refrigeration Time | Keeps well for 3 to 4 days when tightly covered. |
| Serving Temperature | Always serve straight from the refrigerator. It should be quite firm. |
| Freezing | I don’t recommend freezing. The bananas and dairy don’t thaw well together. |
| Best Flavor Window | Day 2 is usually peak flavor when the wafers have softened nicely. |
Frequently Asked Questions About Gluten-Free Banana Pudding Easy No-Bake Dessert
I get so many questions about this recipe because everyone wants that perfect, thick pudding! It’s a classic for a reason, and knowing these little troubleshooting tips will guarantee your Gluten-Free Banana Pudding Easy No-Bake Dessert comes out right. Don’t worry if you mess up the first time; baking is all about learning!
Can I make this Gluten-Free Banana Pudding Easy No-Bake Dessert ahead of time?
Yes, you absolutely should make it ahead of time! That four-hour minimum chill time isn’t just a suggestion; it’s necessary for the pudding to firm up properly. I actually think it tastes best when assembled the day before serving. The longer it rests, the more the wafers absorb that creamy flavor, and the bananas settle in nicely. Just make sure you cover it really well so the bananas don’t oxidize and turn brown on top.
What if I cannot find gluten-free vanilla wafers?
If you look everywhere and the gluten-free vanilla wafers are sold out, don’t throw in the towel! You can use a sturdy gluten-free shortbread cookie instead. Just know that shortbread is usually a little denser and has more butter. If you use those, I recommend crushing them slightly more coarsely than you would the wafers, just so they don’t create one hard, solid layer at the bottom of your Gluten-Free Banana Pudding Easy No-Bake Dessert.
Why is my pudding mixture not setting?
Usually, if your pudding isn’t setting up firmly, it comes down to two things. First, was your milk and heavy cream ice cold when you started? Instant pudding relies on that cold temperature to activate and thicken quickly. Second, did you fold the whipped cream in too aggressively? If you stir too hard, you’ll knock all the air out, and the mixture stays loose. If it’s still runny after the 4-hour chill, cover it and give it another 2 hours!
Sharing Your Gluten-Free Banana Pudding Easy No-Bake Dessert Success
Well, that’s it! You’ve made the creamiest, easiest, no-bake dream dessert. I truly hope this recipe brings back some happy memories for you and your family, just like it does for mine every single time I make it.
Now that you’ve dug into your delicious Gluten-Free Banana Pudding Easy No-Bake Dessert, I want to hear all about it! Drop a comment below and let me know how it turned out. And if you loved it, please leave a rating so others can find this great gluten-free treat! You can also check out my latest ideas on Medium or save this recipe on Pinterest.
Print
Amazing 4-Hour Gluten-Free Banana Pudding Easy No-Bake Dessert
- Total Time: 20 minutes plus 4 hours chilling
- Yield: 10 servings 1x
- Diet: Gluten Free
Description
This gluten-free banana pudding is creamy, nostalgic, and easy to make. It features layers of bananas, vanilla pudding, and gluten-free wafers.
Ingredients
- 1 box gluten-free instant vanilla pudding mix 5 ounces
- 2 cups whole milk cold
- 8 ounces cream cheese softened
- 14 ounces sweetened condensed milk
- 2 cups heavy whipping cream cold
- ½ cup powdered sugar
- 1 teaspoon vanilla extract
- 6 medium bananas sliced ¼ inch thick
- 12 ounces gluten-free vanilla wafers
Instructions
- Whisk the pudding mix and milk in a medium bowl until smooth and beginning to thicken. Set aside.
- Beat the cream cheese and sweetened condensed milk in a large bowl until completely smooth.
- Whip the heavy cream, powdered sugar, and vanilla extract in a separate bowl until stiff peaks form.
- Stir the prepared pudding into the cream cheese mixture until fully combined.
- Gently fold the whipped cream into the pudding mixture until light and fluffy.
- Spread a layer of gluten-free vanilla wafers over the bottom of a 9 by 13 inch dish.
- Add a single layer of sliced bananas on top of the wafers.
- Spoon half of the pudding mixture over the bananas and smooth the top.
- Repeat the layers with remaining wafers, bananas, and pudding mixture.
- Cover and refrigerate for at least 4 hours until fully set before serving.
Notes
- Use just barely ripe bananas for the best texture after chilling.
- Prep Time: 20 minutes
- Cook Time: 0 minutes
- Category: Dessert
- Method: No-Bake
- Cuisine: American
Nutrition
- Serving Size: 1 serving
- Calories: 260
- Sugar: Unknown
- Sodium: Unknown
- Fat: 15 g
- Saturated Fat: Unknown
- Unsaturated Fat: Unknown
- Trans Fat: Unknown
- Carbohydrates: 28 g
- Fiber: Unknown
- Protein: 4 g
- Cholesterol: Unknown