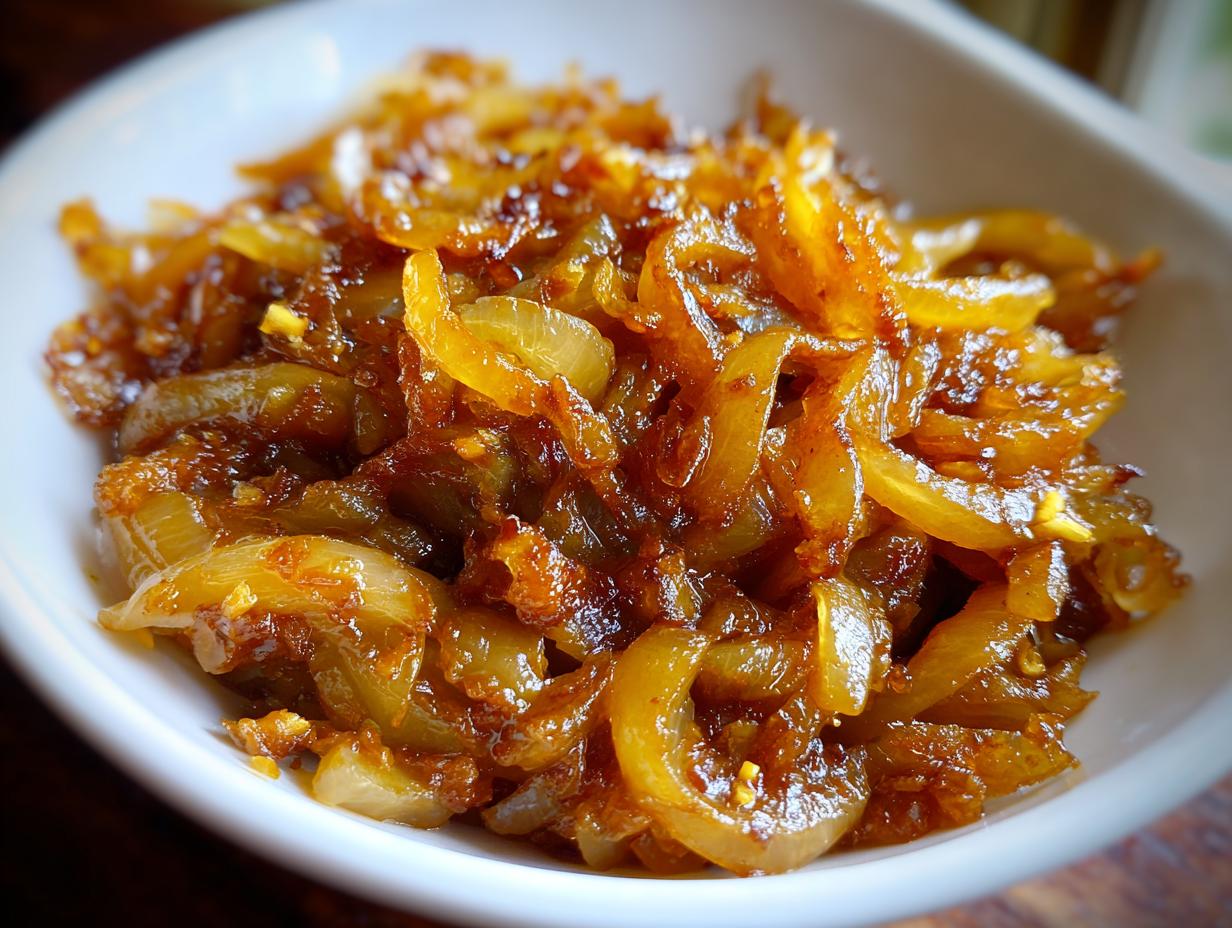
I used to think making truly amazing garlic caramelized onions meant dedicating half a weekend afternoon to babying a pan of onions. You know the drill—low and slow for hours until they turn this deep, jammy brown? Well, I’m here to tell you that’s old news! This recipe is my absolute game-changer. I figured out a little trick that gets us that rich, sweet flavor profile in just 30 minutes of actual cooking time.
Seriously, these garlic caramelized onions are golden, tender, and packed with savory depth. My first time trying this quicker method, I almost didn’t believe it. I was waiting for that bitter, burnt taste you sometimes get when you rush things, but nope! It was perfect. The secret is balancing the heat and using just a splash of water at the right time to steam them slightly while they brown. 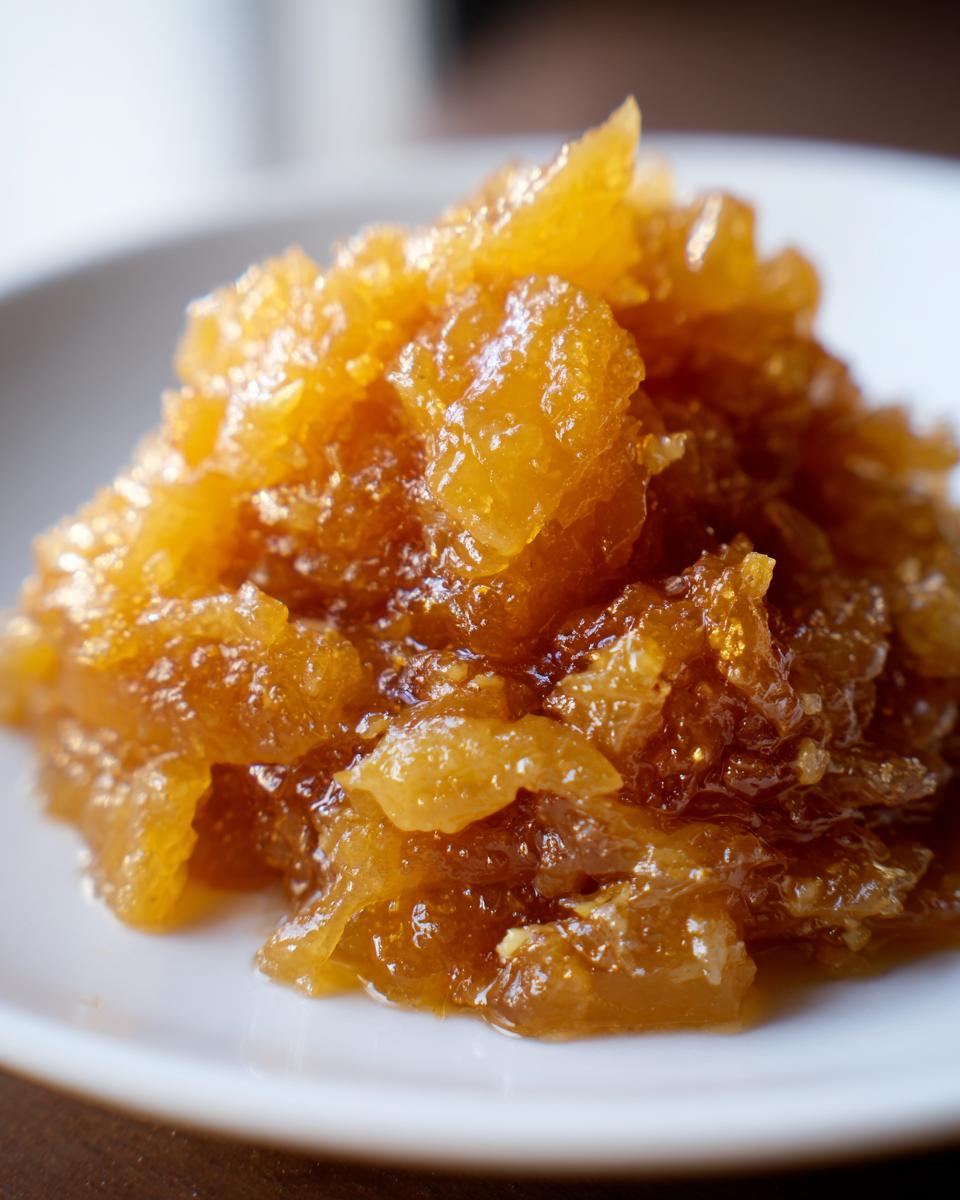
I needed this speed because I kept forgetting to prep toppings for our weeknight burgers. Now, I can whip up a batch of these sweet savory onions right before dinner, and they elevate everything from a simple grilled cheese to a fancy pasta dish. Trust me, you’ll never go back to the slow-and-low method once you see what 30 minutes can do! Check out more quick tips on our Medium page.
Why You Will Love Our garlic caramelized onions Recipe
I’m telling you, these onions are the weeknight hero your kitchen needs. They deliver all that deep, complex flavor without the hours of tending. They are incredibly simple to make, and they fit right into almost any meal plan you have going on. Plus, they happen to be totally vegetarian, so everyone at the table gets to enjoy them!
Quick Preparation and Cooking Time
We are talking about a total commitment of just 35 minutes from start to finish. Seriously! The stovetop method takes care of most of the work while you prep the rest of your meal. It’s fast, it’s easy, and it’s incredibly rewarding. If you are looking for other fast meals, check out our quick snack board ideas.
Versatile Flavor Enhancer
These onions aren’t just a side dish; they’re a flavor upgrade. Throw them on burgers—it’s a must. They are amazing melted over pizza crusts. They give pasta sauces an instant richness. Even tossing them into a fresh salad adds a beautiful sweet savory note. They are just that good!
Equipment Needed for Your garlic caramelized onions
Before you even think about slicing those beautiful sweet onions, let’s make sure your kitchen is set up for success. You don’t need fancy gadgets for this, thankfully! Having the right tools just makes the 30-minute process smoother, so you aren’t scrambling when the heat goes on.
Essential Cooking Gear
- A large skillet, preferably heavy-bottomed, so the heat stays even.
- A sharp knife and a sturdy cutting board for slicing.
- A wooden spoon or silicone spatula for stirring—you’ll be doing a lot of that!
- A small bowl for holding your smashed garlic cloves.
Gathering Ingredients for Sweet savory garlic caramelized onions
Okay, ingredient quality matters here, but don’t panic! Since we are rushing the cooking time a bit, we need those onions to cooperate quickly. You want sweet yellow onions—they have higher sugar content, which helps them caramelize beautifully instead of just turning bitter when you turn the heat down. Don’t try to rush this with white onions; they just don’t have the same sweetness!
The garlic is smashed, not minced. This is important! Mincing garlic means it burns in about five minutes flat, which ruins the whole batch of sweet savory onions. Smashing the cloves releases the oils slowly, allowing them to infuse the olive oil gently while the onions soften up. Make sure your salt is ready, and save the water for when we really need that moisture boost later on. 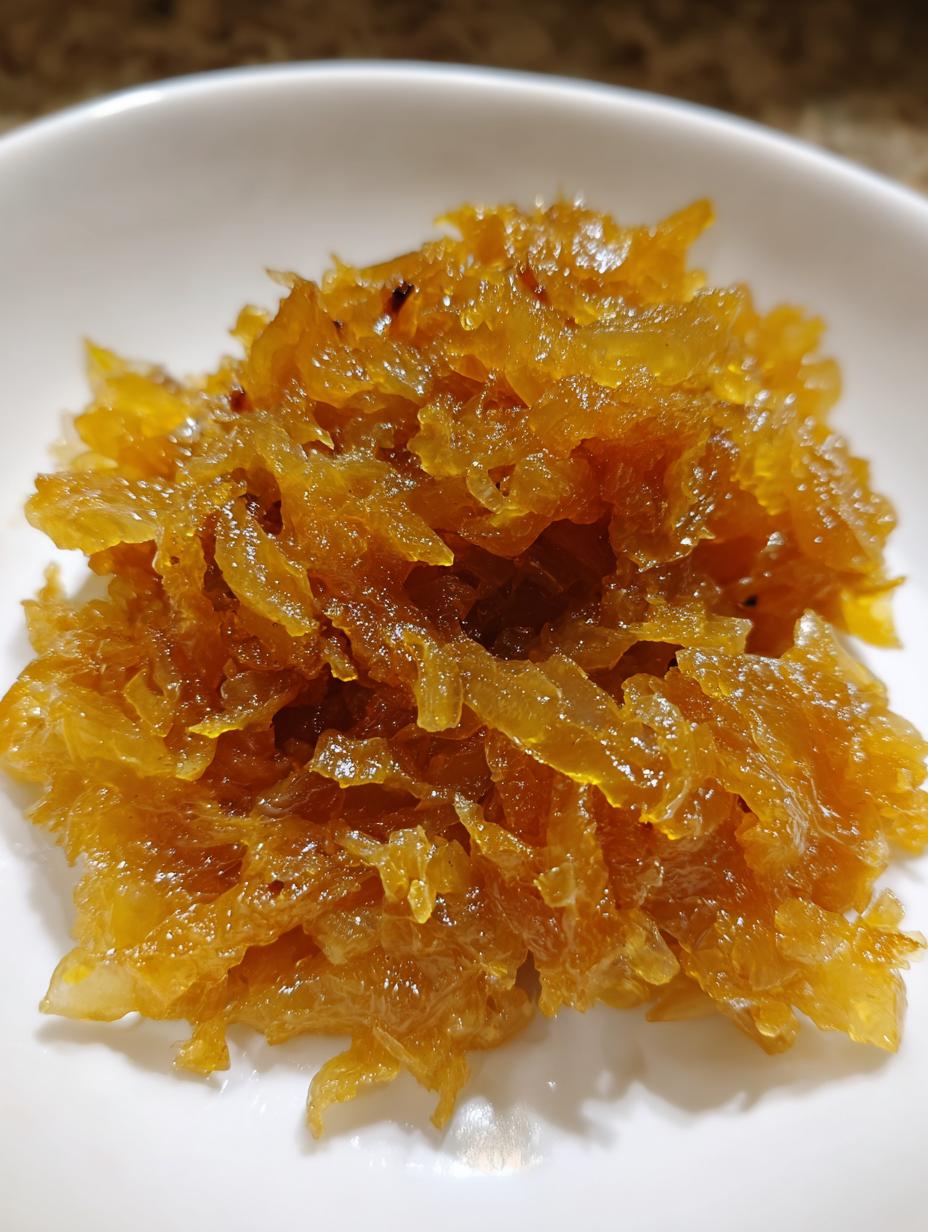
Ingredient List Breakdown
Ingredient Table
| Ingredient | Amount | Preparation Note |
|---|---|---|
| Sweet yellow onions | 2 large | Thinly sliced |
| Olive oil | 1/4 cup | For sautéing |
| Garlic | 1 small head | Cloves peeled and smashed |
| Salt | 1/2 teaspoon | To draw out moisture |
| Water | 2 tablespoons | For deglazing/steaming |
Ingredient Notes and Substitutions
I mentioned the water trick earlier, and it’s crucial for this faster method. Adding just a couple of tablespoons of water when the onions start feeling too dry or sticking to the pan helps create steam. This steams the onions slightly, making them tender before the final browning phase. It’s like a little cheat code for patience! If you are interested in other quick flavor hacks, see our post on miso butter.
As for onion substitution, if you absolutely cannot find sweet yellow onions, Vidalia onions work in a pinch because they are also sweet. But please, avoid red onions or strong white onions for this recipe. They just don’t break down into that jammy texture we are aiming for when we cook them for only 30 minutes.
Step-by-Step Instructions for garlic caramelized onions
This is where the magic happens! Follow these timing cues closely, and you’ll have those beautiful, rich onions ready before you even finish setting the table. Remember, while this is faster than the traditional method, it still requires your attention—don’t wander off to scroll social media!
Starting the Sauté Process
First things first: get that large skillet nice and warm over medium heat. Don’t rush the preheating; we want an even start. Once it’s warm, pour in your quarter cup of olive oil. Now, add your thinly sliced onions, those smashed garlic cloves, and the half teaspoon of salt all at once. Give everything a really good stir right away. You want every single slice coated in that fragrant oil and salt mixture. This initial coating is key to even cooking.
The Softening Stage
Let this mixture cook undisturbed for about 10 minutes. During this time, the onions will start to wilt down significantly. You need to stir them every two minutes or so to make sure the garlic isn’t scorching on the bottom. When they are properly softened, they won’t be brown yet, but they will look translucent and floppy.
Achieving the Deep Golden Color with garlic caramelized onions
Once they are soft, it’s time to bring the heat down to medium-low—this is non-negotiable if you want them golden and not burnt! Now, add those two tablespoons of water to the pan. This might look weird, but trust me, it helps release the sugars without burning the fond on the bottom. Now, you cook for another 20 minutes, stirring frequently. If you notice the bottom of the pan drying out or the onions start sticking hard, splash in just one more tablespoon of water. Keep stirring until they deepen into that gorgeous, jam-like color. This slow browning is what makes our garlic caramelized onions so flavorful! For more savory ideas, check out our broccoli cheddar pasta.
Finishing and Resting
When they reach that deep golden brown—almost the color of dark maple syrup—you’re done cooking! Pull the skillet right off the heat immediately. They will continue to cook slightly in the residual heat, so take them off just before you think they are *perfect*. Let them cool down for about five minutes before you serve them or stash them away. This resting time allows the texture to set into that perfect, tender consistency.
Tips for Perfecting Your garlic caramelized onions
Look, I know 30 minutes seems fast, but rushing the heat management is the number one way to ruin these. You have to respect the temperature stages, even when you’re trying to be quick. If you manage the heat right, you’ll get that sweet, savory flavor without any bitter edges creeping in. I learned this the hard way when I tried to do it all on medium heat! You can find more helpful cooking advice on our Pinterest boards.
Managing Heat is Key
Start strong with medium heat just to soften the onions quickly. That initial 10 minutes sets the stage. But as soon as you see them start to shrink and turn pale yellow, you must drop that temperature down to medium-low. If you leave it on medium, the sugars will scorch before they truly caramelize. Keep that heat low for the final 20 minutes so they cook slowly and deeply.
Recognizing Tender Caramelization
How do you know they are done? Forget the clock for a second and look at them! They should be significantly reduced—maybe a quarter of their original volume. They need to look glossy, sticky, and deep golden brown, almost like a thick jam. When you press them against the side of the pan with your spoon, they should offer almost no resistance. If they are still a bit stiff, they need another five minutes on that low heat.
Storage and Reheating Instructions
These sweet savory onions are even better the next day, honestly! They get richer overnight as those flavors really marry. Don’t worry about making too much—they keep beautifully, which means you can prep once and flavor your meals all week long. They are so handy to have ready to go! For another great make-ahead side, try our recipe for make-ahead mashed potatoes.
Storing Your Leftover Onions
Make sure your garlic caramelized onions have cooled down completely before you put them away. Pop them into an airtight container—a small glass jar works perfectly for me. They stay great in the fridge for up to five days. If you try to store them warm, you risk condensation, and nobody wants soggy onions!
Storage and Reheating Table
| Storage Duration | Reheating Method |
|---|---|
| Up to 5 days (Refrigerated) | Stovetop on low heat, stirring gently |
| Up to 3 months (Frozen) | Thaw overnight, then reheat on stovetop |
Frequently Asked Questions About garlic caramelized onions
I get so many emails asking about tweaking this recipe, especially since we are trying to keep the cook time down. It’s a balancing act, but once you know the rules, these sweet savory onions are foolproof! Here are the top things people ask me when they try this method.
Can I make garlic caramelized onions faster than 30 minutes?
You technically can, but I wouldn’t recommend it if you want that true, deep flavor. Rushing past the 30-minute mark means you aren’t giving the natural sugars enough time to break down and caramelize properly. You’ll probably end up with soft, sweet onions, but they won’t have that rich, jammy texture we are looking for. Patience for those 30 minutes really pays off!
What is the best type of onion to use for this recipe?
Stick with sweet yellow onions! They have the highest sugar content, which is exactly what we need to achieve that deep golden brown color quickly without tasting harsh. If you use a standard white onion, they tend to cook up watery and can turn slightly bitter if you push them too hard on the heat.
How do I keep the garlic from burning during the process?
This is where smashing the garlic comes in handy instead of mincing it. We add the smashed cloves right in with the onions at the beginning. Because the onions release moisture and the heat is only medium for the first 10 minutes, the garlic gently infuses the oil. If you mince it, it burns before the onions even soften. If you notice your garlic browning too fast during the last 20 minutes, just pull the pan off the heat for 30 seconds while you stir!
Share Your Sweet savory onions Creation
So there you have it—my secret to fast, fantastic garlic caramelized onions! They truly transform simple meals in minutes. I hope you love this recipe as much as my family does. Please come back and let me know how you used them!
Did you put them on a burger? Maybe they made your pizza legendary? Drop a rating below and tell me what you served them with—I’m always looking for new ways to use up a fresh batch of these sweet savory onions!
Print
30-min garlic caramelized onions reveal
- Total Time: 35 minutes
- Yield: 4 servings 1x
- Diet: Vegetarian
Description
Make rich golden garlic caramelized onions in just 30 minutes with this simple stovetop method. Perfect topping for burgers, pizzas, pastas, and salads adds sweet savory depth.
Ingredients
- 2 large sweet yellow onions, thinly sliced
- 1/4 cup olive oil
- 1 small head garlic, cloves peeled and smashed
- 1/2 teaspoon salt
- 2 tablespoons water
Instructions
- Heat a large skillet over medium heat.
- Add olive oil, sliced onions, smashed garlic cloves, and salt to the skillet.
- Stir well to coat onions and garlic evenly.
- Cook for 10 minutes, stirring every 2 minutes until onions soften.
- Reduce heat to medium-low and add water to the pan.
- Continue cooking for 20 minutes more, stirring frequently.
- Add more water by the tablespoon if onions stick or dry out.
- Cook until onions turn deep golden brown and jam-like.
- Remove from heat when onions reach tender caramelized texture.
- Let cool slightly before using.
Notes
- The water trick speeds up browning while keeping onions tender and sweet.
- Use them to elevate everyday meals year-round.
- Prep Time: 5 minutes
- Cook Time: 30 minutes
- Category: Side Dish
- Method: Stovetop
- Cuisine: American
Nutrition
- Serving Size: 1 serving
- Calories: 140
- Sugar: N/A
- Sodium: N/A
- Fat: 11g
- Saturated Fat: N/A
- Unsaturated Fat: N/A
- Trans Fat: N/A
- Carbohydrates: 12g
- Fiber: N/A
- Protein: 1g
- Cholesterol: N/A