If you’re like me and sometimes just need that perfect, soft, garlicky bite of comfort food without derailing your entire week, then you’re in the right place for these amazing Garlic Knots! I’m Jordan Bell, and I’m based right here in Asheville, NC. When I was working to drop over 80 pounds, I realized that giving up Southern staples wasn’t an option; I just needed to clean them up.
That realization is what launched my Easy Detox Recipes blog! I specialize in taking those deep-down, craveable Southern comfort foods and making them lighter, cleaner, and totally approachable. You don’t need hours in the kitchen, and you certainly don’t need complicated ingredients. These buttery knots come together faster than ordering pizza, and they prove that easy weeknight sides can still taste like a weekend treat. Get ready for the best 30-minute bread you’ve ever made!
Essential Components for Perfect Garlic Knots
You might think these are just simple rolls dunked in butter, but trust me, the quality of your ingredients makes a huge difference in the final texture and flavor of these Garlic Knots. Since we’re aiming for that perfect balance—soft inside, slightly crisp outside—we have to pay attention to the details. It’s not about being fussy; it’s about making sure that quick bake time gives you the best result possible.
We want that rich, savory punch, and that starts long before they hit the oven. These components are non-negotiable if you want that fantastic, melt-in-your-mouth experience.
Selecting Your Dough Base
Okay, let’s talk dough. I use store-bought pizza dough most of the time because, honestly, who has time to make a full yeast dough on a Tuesday night? But here’s the thing: make sure the dough you buy is decent quality! If it’s rock hard from the fridge, let it sit on the counter for at least an hour. Warmed dough is pliable, and that’s key to shaping those nice, loose knots. If you roll tight knots, they bake dense. We want them airy, so be gentle when you’re handling the dough for your Garlic Knots.
Crafting the Signature Garlic Butter for Garlic Knots
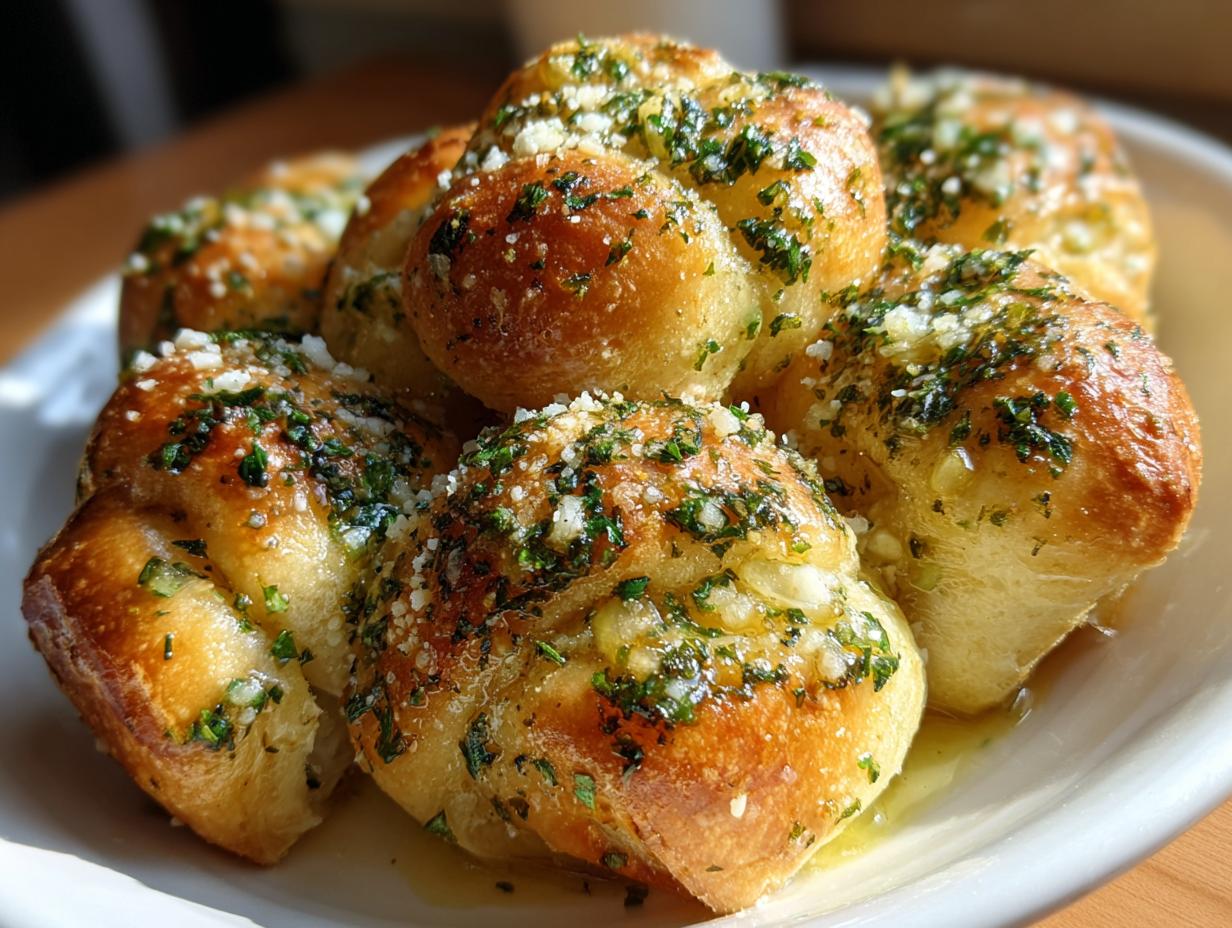
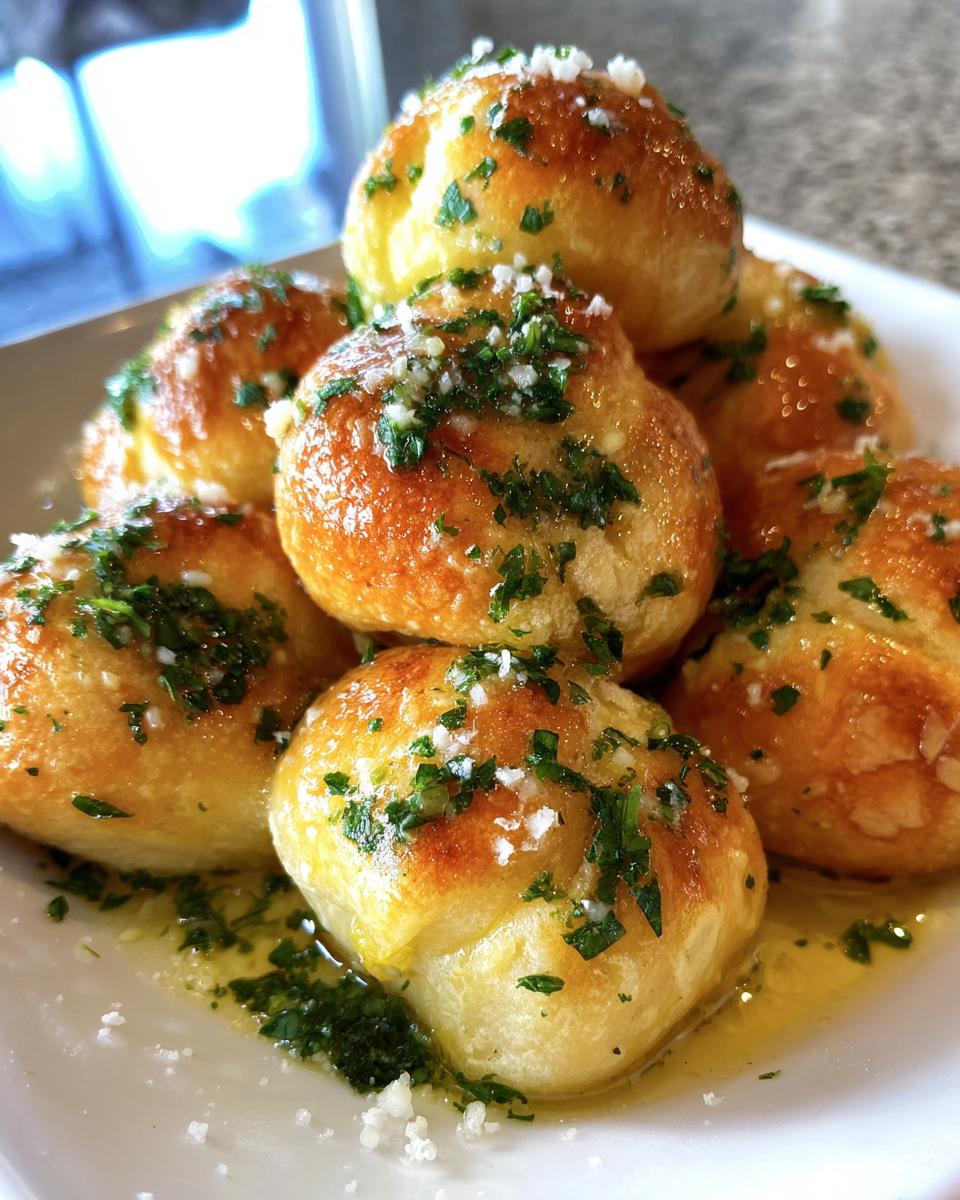
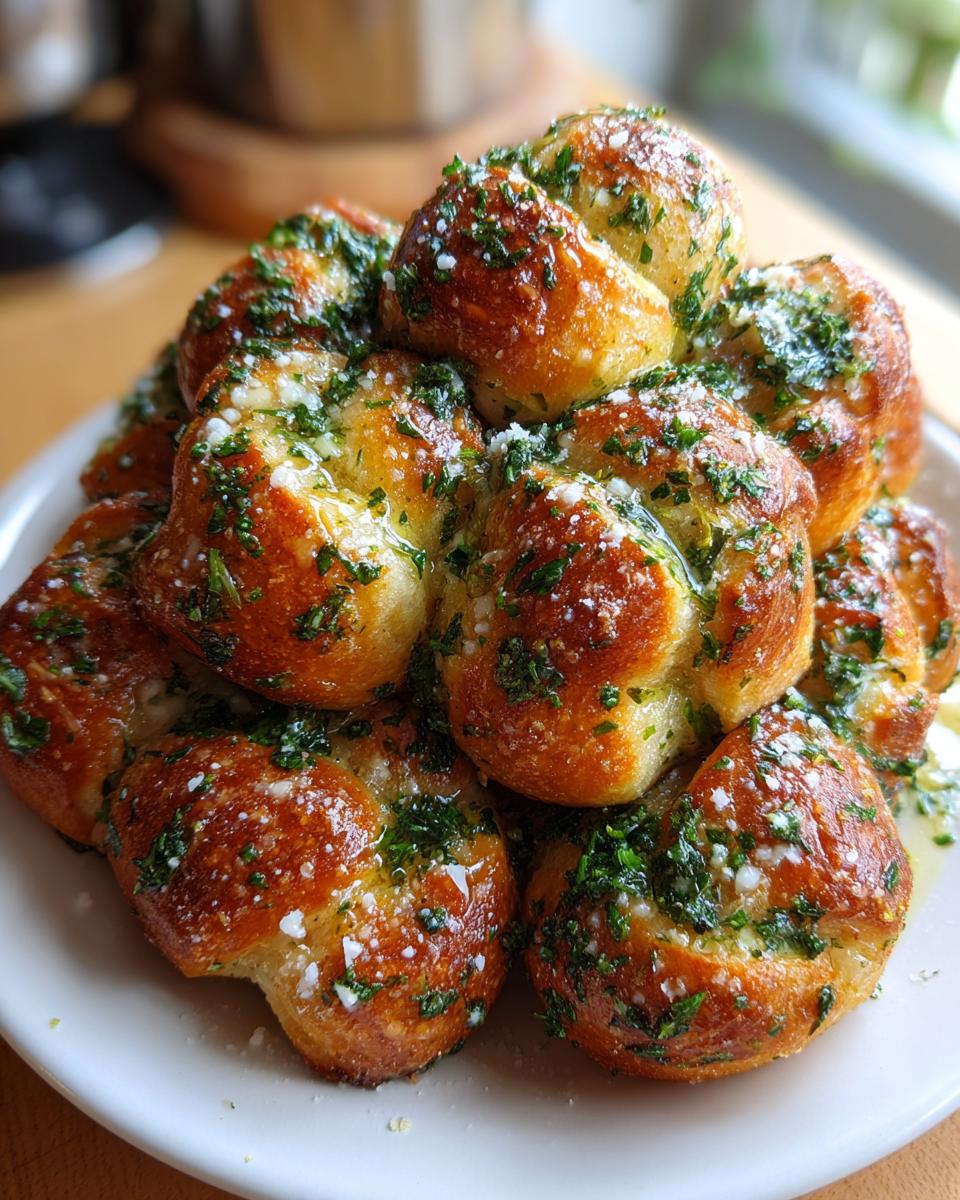
This is where the magic truly happens, and this is the secret to why my Garlic Knots always disappear first! You must use fresh garlic. Pre-minced jar stuff just tastes flat and a little sour when heated. Melt four tablespoons of good butter—real butter, please!—and stir in three cloves of finely minced fresh garlic, along with that vibrant, chopped parsley. Don’t skip the salt and pepper, and if you have it, that tiny dash of dried oregano adds a subtle, earthy depth that really elevates the whole dish. Taste your butter mixture before you brush it on!
Equipment Needed for Making Your Garlic Knots
You truly don’t need a fancy setup for these, which is why I love them for quick meals. The most important things you’ll grab are a standard baking sheet—and please line it with parchment paper! Trust me on the parchment; it makes cleanup a breeze. You’ll also need a sharp knife or pizza cutter to divide the dough evenly. Finally, grab a small bowl for mixing up that incredible garlic butter and a pastry brush to make sure every surface of your knots gets coated evenly.
Step-by-Step Instructions for Amazing Garlic Knots
Alright, let’s get these beauties into the oven! These instructions move fast, which is why they are perfect for weeknights. Remember, everything moves quickly once you start cutting the dough, so have your butter mixture ready to go before you even preheat the oven.
Preparing the Dough and Shaping
First things first: get that oven cranking up to 400°F (200°C). While it’s warming up, grab your baking sheet and lay down that sheet of parchment paper. This saves you scrubbing later, I promise. Now, take your room-temperature pizza dough—about a pound’s worth—and gently roll it out into a long, rough 12-inch log shape. You don’t need a perfect circle here, just get it elongated.
Next, use your pizza cutter or a sharp knife to slice that log into 12 equal pieces. They don’t have to be perfect, but try to keep them consistent so they bake evenly. Take each piece and gently roll it between your palms or on the counter until you have a rope about 6 inches long. Here’s the most important part for texture: tie each rope into a loose knot. I mean loose! If you tie them tight, they turn into dense little dough balls. We want air pockets, remember? Place them onto the prepared baking sheet with a little space between each one.
Baking and Finishing Your Garlic Knots
Pop that sheet into the hot oven for about 12 to 15 minutes. Keep an eye on them—you want them to look gloriously golden brown, but not dark brown. If you overbake them, they won’t soak up the butter properly later. While they are baking, quickly mix up your melted butter, minced garlic, parsley, salt, pepper, and oregano in that small bowl we talked about.
The moment those fantastic Garlic Knots come out of the oven, they need that butter bath! Don’t let them sit around cooling; that butter needs to melt right into the hot bread. Brush that garlic butter mixture over every surface of the hot knots generously. If you are feeling extra indulgent, now is the time to grate some Parmesan right on top so it melts slightly. Serve these immediately while they are still piping hot. That’s when they are truly unbeatable!
Expert Tips for the Best Garlic Knots Experience
Even with the recipe laid out, sometimes things go sideways, right? Baking is chemistry, but with these Garlic Knots, we can troubleshoot common issues easily. My biggest piece of advice, learned the hard way, is timing. If the knots cool down even slightly before you apply the butter, the absorption just isn’t the same. You want that rich, buttery flavor soaking deep into the crumb, not just sitting on top like an oily glaze. Check out more quick tips on my Medium page!
Also, if you’re using a dough that’s a bit cold, you’ll struggle to roll it out, which leads back to those tight knots we talked about earlier. Warm dough is happy dough! These little bits of know-how are what separate a good batch from the batch that makes everyone ask for the recipe.
Achieving Ideal Texture and Absorption
To keep the inside of your Garlic Knots soft, you need to pull them right as they turn golden. If you wait until they look dark brown, the exterior will be tough, and the inside will dry out during the final brushing. The key to maximum butter soak is temperature contrast: hot knots meeting room-temperature butter mixture. Brush them twice if you need to! The first coat sinks in; the second coat delivers that amazing fresh garlic punch right before serving.
Ingredient Substitutions for Garlic Knots
Since I focus on cleaner eating, I always push fresh herbs, but I know parsley isn’t always on hand. If you run out of fresh parsley, dried parsley works in a pinch, but use about half the amount called for, or swap it out for fresh chives for a milder onion flavor. If you skip the oregano, no big deal—it’s just a background note. But please, if you’re looking to keep this clean, avoid garlic powder if you can. Fresh garlic is the backbone of these Garlic Knots; it’s worth the extra minute of chopping. For more clean eating inspiration, see my thoughts on pink salt.
Frequently Asked Questions About Homemade Garlic Knots
I get so many questions about these, especially from folks who are used to ordering them out. Here are the things I hear most often about making fantastic Garlic Knots at home! See my visual recipe boards for more inspiration.
Q1. Can I make these ahead of time if I’m having company?
You absolutely can! The absolute best way to serve them is immediately, but if you need to prep, bake them completely, let them cool, and store them airtight. Then, follow the reheating instructions later. They won’t be *quite* as soft as fresh, but they’ll still be delicious.
Q2. Why are my Garlic Knots dense instead of fluffy?
This almost always comes down to two things: either your dough was too cold and you had to fight it, or you tied the knots too tightly. Remember, we want a loose, airy loop. The dough needs room to expand during that quick bake time!
Q3. How long does the dough really need to warm up?
If your dough is straight from the fridge, give it at least an hour on the counter—maybe less if your kitchen is warm. It needs to be soft enough to easily roll into a six-inch rope without tearing or snapping back at you. Pliable dough equals easy shaping for perfect Garlic Knots.
Q4. Is 15 minutes enough time to bake them? They seem fast!
It is fast, and that’s the beauty of it! Because we are using pre-made dough that’s already risen, we are just heating it through and browning the outside. If your knots are very thick, check them at 12 minutes, but usually, that golden color hits right around 14 minutes. Don’t walk away!
Storing and Reheating Your Delicious Garlic Knots
I hope you have leftovers, but if you do, we have to make sure they taste almost as good the next day. Dealing with leftover bread is always a struggle because the microwave turns everything rubbery, and nobody wants sad, dry Garlic Knots! Luckily, these hold up pretty well if you store them right.
You can keep them on the counter for up to two days. The key is minimizing air exposure so they don’t dry out overnight. Here is my quick guide on how to manage them:
| Storage Method | Duration | Best For |
|---|---|---|
| Airtight Container (Room Temp) | Up to 2 days | Short-term flavor retention |
| Freezer (Wrapped tightly) | Up to 1 month | Long-term storage |
Best Practices for Leftover Garlic Knots
When you put them away, make sure they are completely cool first! Putting warm bread into an airtight container basically steams them, and that’s how you get a soggy bottom. Once they are cool, tuck them into a sturdy airtight container. They can stay on the counter for a couple of days.
Now for reheating—this is crucial if you want that fresh-from-the-oven texture back! Do not, under any circumstances, use the microwave unless you enjoy biting into something chewy and sad. Instead, preheat your oven (or toaster oven) to 350°F. Lay those leftover Garlic Knots directly on the rack or a small baking sheet and warm them for about 5 to 7 minutes. This gentle heat dries out any excess moisture from storage and crisps the exterior just enough. They come out perfectly soft inside and wonderfully aromatic, just like they were fresh! If you need a quick bread recipe for next time, try my 5-minute bread recipe.
Sharing Your Delicious Garlic Knots
These buttery, herby knots disappear so fast in my house, I’m always making a double batch! If you tried these easy Garlic Knots and they brought a little comfort to your table, I’d love to hear about it. Snap a picture and tag me, or just leave a quick note below telling me how your dinner turned out! For more comfort food ideas, check out my list of chicken casseroles.
Print
Amazing Garlic Knots in 30 Minutes
- Total Time: 25 minutes
- Yield: 12 knots 1x
- Diet: N/A
Description
Soft, buttery Homemade Garlic Knots with fresh garlic and herbs bake in 30 minutes for an easy weeknight side or snack. These are perfect comfort food made from simple dough and topped with melted garlic butter and parsley.
Ingredients
- 1 pound pizza dough (store-bought or homemade)
- 4 tablespoons unsalted butter, melted
- 3 cloves garlic, minced
- 2 tablespoons fresh parsley, chopped
- 1/2 teaspoon salt
- 1/4 teaspoon black pepper
- 1/4 teaspoon dried oregano (optional)
- Grated Parmesan cheese for topping (optional)
Instructions
- Preheat oven to 400°F (200°C). Line a baking sheet with parchment paper.
- Roll pizza dough into a 12-inch log; cut into 12 equal pieces.
- Roll each piece into a rope about 6 inches long; tie each rope into a loose knot. Place on baking sheet.
- Bake 12-15 minutes until golden brown.
- Meanwhile, mix melted butter, minced garlic, parsley, salt, pepper, and oregano.
- Brush garlic butter generously over hot knots immediately after baking.
- Optional: sprinkle with grated Parmesan. Serve warm.
Notes
- Use warmed dough for easy rolling.
- Do not tie knots too tight.
- Brush butter while knots are hot for better absorption.
- Bake until just golden for a soft interior.
- Serve immediately for the best texture.
- Store in an airtight container up to 2 days. Reheat in a 350°F oven for 5-7 minutes for crispiness. Avoid microwaving to keep texture.
- Prep Time: 10 minutes
- Cook Time: 15 minutes
- Category: Bread/Side Dish
- Method: Baking
- Cuisine: American
Nutrition
- Serving Size: 1 knot
- Calories: 120
- Sugar: N/A
- Sodium: N/A
- Fat: 5g
- Saturated Fat: N/A
- Unsaturated Fat: N/A
- Trans Fat: N/A
- Carbohydrates: 15g
- Fiber: N/A
- Protein: 3g
- Cholesterol: N/A