Crispy roasted chickpeas are about to become your new favorite obsession, trust me on this one! I’m Jordan Bell, cooking up clean comfort food magic right here in Asheville, NC. If you’ve followed my journey, you know I shed over 80 pounds by figuring out how to make the food I *love* actually good for me. That means saying goodbye to greasy fried snacks and hello to flavor-packed, whole-food alternatives.
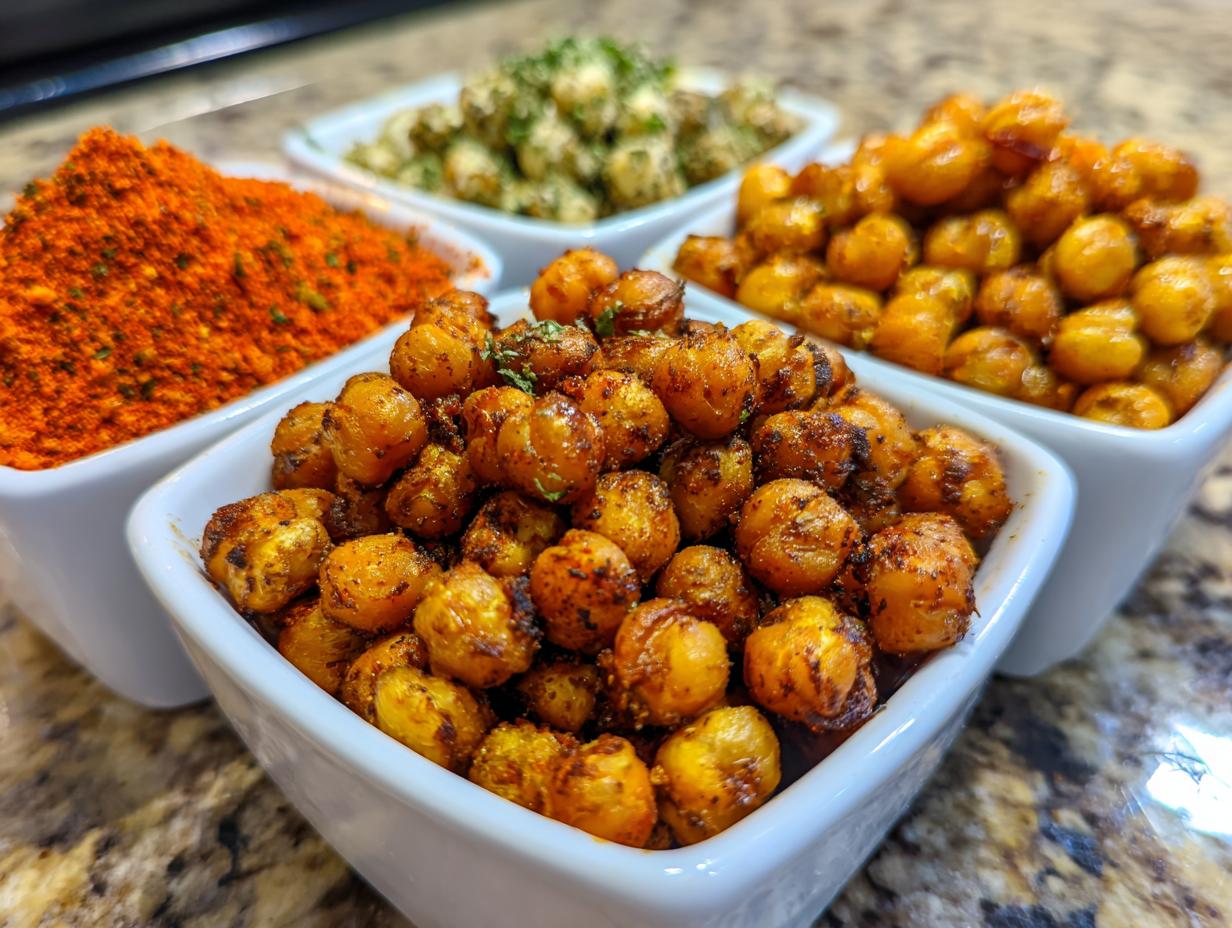
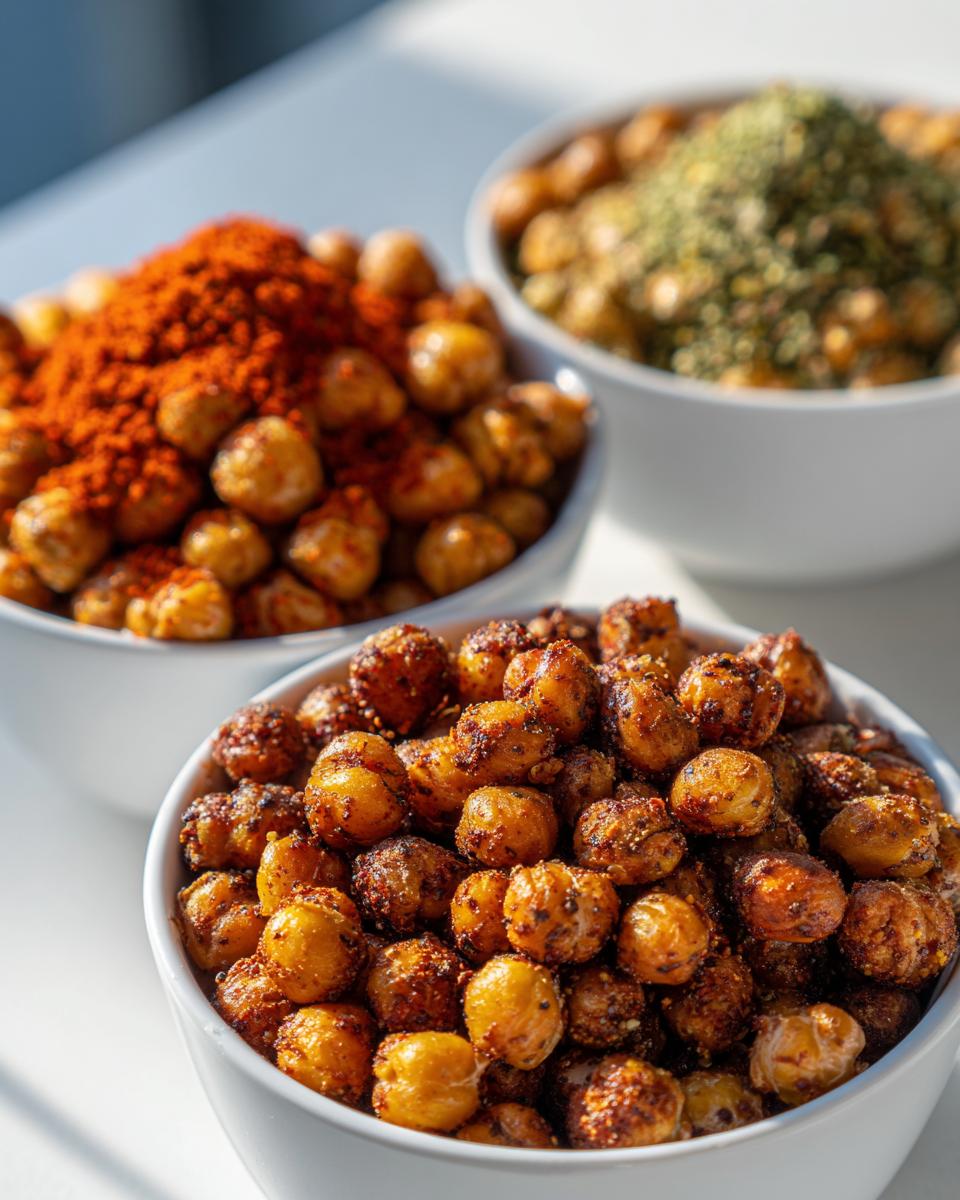
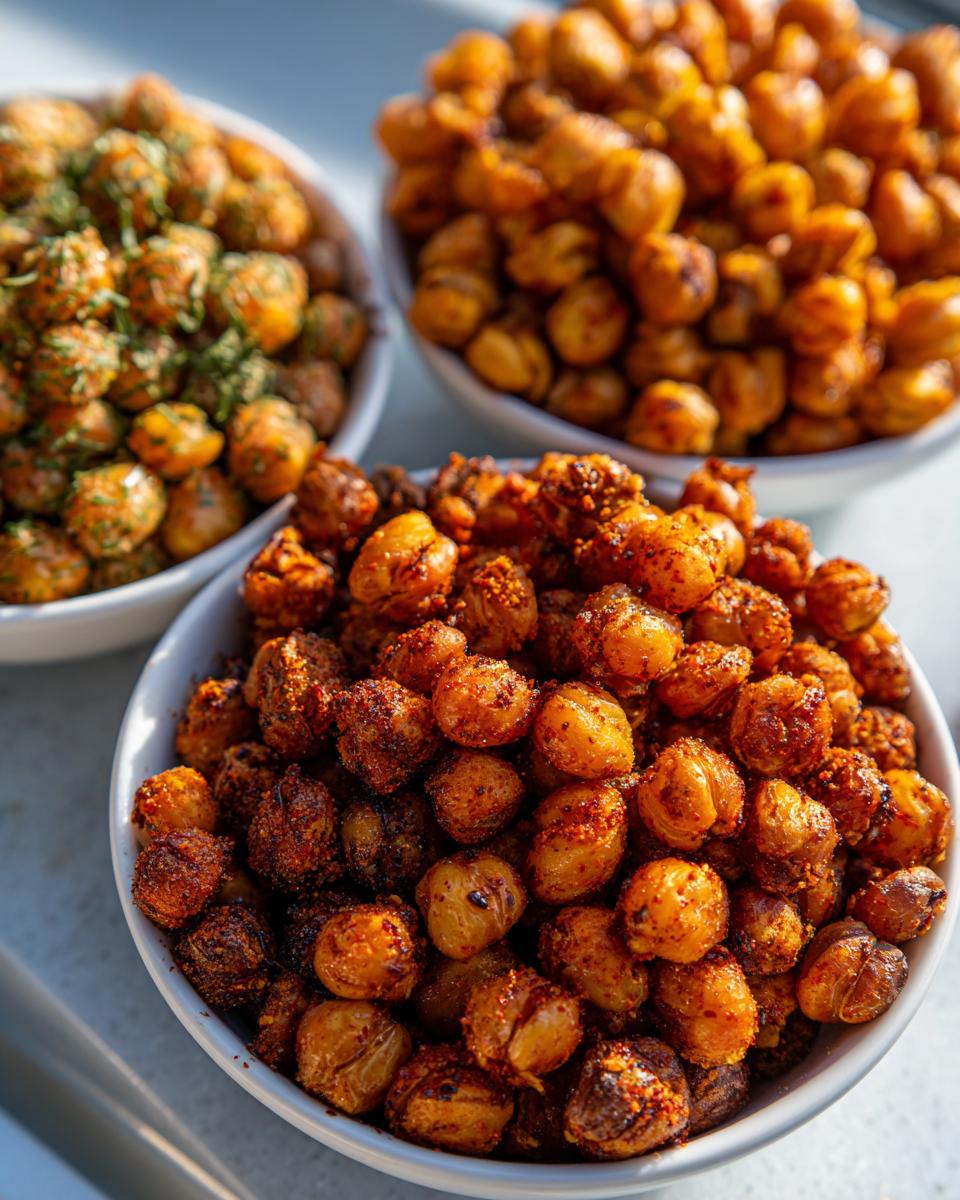
That’s why I’m obsessed with this recipe. It takes the satisfying crunch of a salty chip or fried appetizer and swaps it for plant-based protein and fiber. It’s the perfect snack for when you’re craving something savory, sweet, or spicy, but you don’t want that heavy, sluggish feeling afterward. We’re turning humble chickpeas into three incredible flavors—Ranch, Maple Cinnamon, and Spicy—that will keep your snack drawer interesting all week long. Forget those sad, bland diet foods; these are pure satisfaction!
Why You’ll Love These Crispy Roasted Chickpeas
Seriously, if you need a snack that hits all the right notes—crunchy, flavorful, and guilt-free—this is it. I developed this recipe because I needed something fast that fit my clean eating goals. You’re going to be amazed how much flavor we pack into these little gems.
- Packed with 5g of plant protein and 6g of fiber per serving.
- Completely gluten-free and dairy-free, perfect for almost everyone!
- Three distinct flavor profiles so you never get bored.
- They taste like a real treat but are genuinely heart-healthy.
Quick Prep and Total Time
The best part? You are looking at maybe 10 minutes of actual hands-on work. The whole process, from rinsing the cans to pulling the final crispy batch out of the oven, takes right around 40 minutes total. That means you can whip these up while the kids are getting off the bus or while you’re waiting for dinner to cook. It’s maximum payoff for minimal effort, which is exactly how I like my healthy recipes to be!
Gather Your Ingredients for Crispy Roasted Chickpeas
Alright, let’s get this done! Since we are making three different versions of these amazing crispy roasted chickpeas, you’ll need to keep your bowls and your ingredients organized. We need one main base, and then three separate spice mixes. Don’t try to dump everything together—we want three distinct personalities here! Make sure you have three 15-ounce cans of low-sodium chickpeas ready to go. This recipe is super flexible, but these base amounts are what you need for the perfect batch sizes.
Base Ingredients for Crispy Roasted Chickpeas
For the foundation of all three batches, you’ll need the rinsed and dried chickpeas, of course. We’re using olive oil to help them crisp up and stick to the seasonings later on. You’ll divide the oil among the three pans, so roughly 1 to 2 tablespoons per can.
- 3 15-oz cans organic low-sodium chickpeas (drained and rinsed)
- 3 to 6 tablespoons olive oil (divided)
Sweet Cinnamon Maple Seasoning Blend
If you’re like me and sometimes need that little bit of sweet comfort, this one is your winner. It’s simple, but the maple syrup really caramelizes nicely in the oven, giving you that perfect coating.
- 1 tablespoon maple syrup
- \u00bd teaspoon ground cinnamon
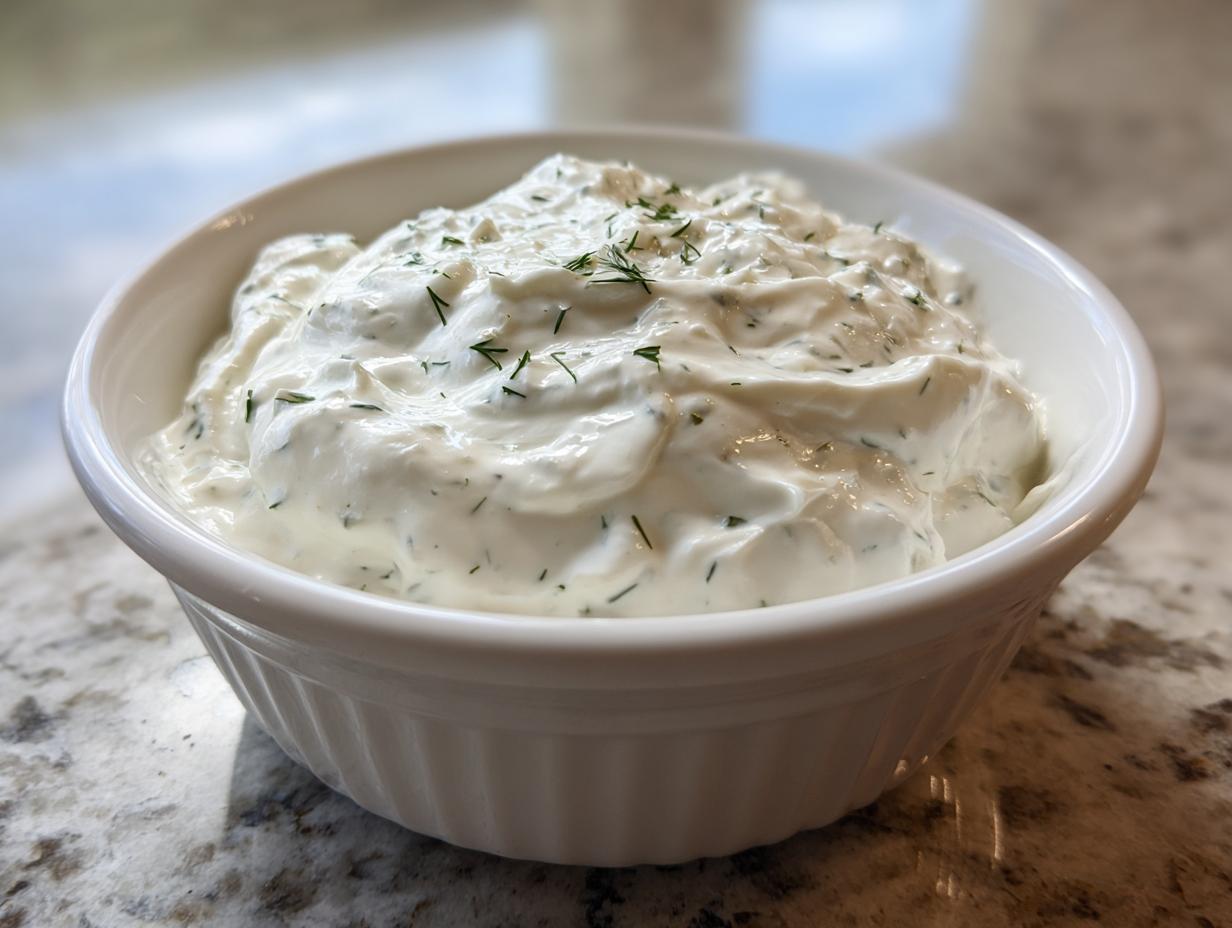
Savory Ranch Seasoning Blend
This is my nod to classic Southern flavors, cleaned up! It’s savory, herby, and dangerously addictive. Make sure you have your dried dill—it really makes the ranch flavor pop.
- 1 teaspoon garlic powder
- 1 teaspoon onion powder
- \u00bd teaspoon dried dill
- \u00bd teaspoon dried parsley
- \u00bd teaspoon salt
Bold Spicy Seasoning Blend
For the days when you need a little kick! This one brings the heat, but we balance it out with cumin and paprika so it’s smoky, not just hot. Don’t skip the cayenne pepper here if you want that real zing!
- \u00bd teaspoon chili powder
- \u00bd teaspoon ground cumin
- \u00bd teaspoon paprika
- \u00bd teaspoon cayenne pepper
- \u00bc teaspoon garlic powder
- \u00bc teaspoon salt
Essential Equipment for Perfect Crispy Roasted Chickpeas
Getting that amazing crunch isn’t just about the recipe; it’s about using the right tools! Since we are managing three separate flavors, organization is key here. You don’t need fancy gadgets, just a few basics to make sure everything spreads out correctly for roasting.
- Three large baking sheets (this is crucial for single-layer roasting!)
- Parchment paper (don’t skip this, it helps with cleanup and release)
- A colander for rinsing
- Plenty of paper towels or a clean kitchen towel for drying
- Three small bowls for mixing your seasonings
Step-by-Step Instructions for Crispy Roasted Chickpeas
If you follow these steps exactly, especially the drying part, I promise you’ll get the best crispy roasted chickpeas you have ever made. This process is designed to remove every bit of moisture before we even think about adding oil. That initial dry bake is my biggest secret weapon for true crunch!
Initial Drying and Baking Setup
First things first: preheat your oven to 400\u00b0F. I like to get it nice and hot while I’m prepping the beans. Line three large baking sheets with parchment paper. Remember, we are doing three separate batches, so three sheets are non-negotiable if you want them to be truly crispy. Drain and rinse your chickpeas really well under cold water. Now, the most important part: pat them completely dry. I mean it—use paper towels or a clean kitchen towel and rub them around until they feel dry to the touch. Moisture is the enemy of crunch!
Spread one can of those perfectly dry chickpeas onto each prepared baking sheet. Keep them in a single layer; don’t let them overlap too much. Pop them into the hot oven and bake them plain for 15 minutes. This step is pure dehydration, getting them ready for the real magic.
Seasoning Preparation and Oiling
While those beans are getting their initial dry roast, you need to mix up your three seasoning blends in those small bowls we talked about. Get the Maple Cinnamon, the Ranch, and the Spicy mixes ready to go. When the 15 minutes are up, pull those sheets out—be careful, they’ll be hot! Drizzle 1 to 2 tablespoons of olive oil over each can’s worth of chickpeas, tossing everything right there on the pan to coat them evenly. Back into the oven they go for another 10 minutes.
Final Crisping and Cooling Method
After that second bake, pull them out again and stir each pan thoroughly. This ensures they crisp up evenly on all sides. Bake them for a final 5 to 10 minutes, but watch them like a hawk during this stage because they can go from perfect to burnt very quickly! Once they look golden brown and sound crunchy when you shake the pan, turn the oven OFF. Seriously, turn it off. Open the oven door just a crack and let those chickpeas cool down inside the oven for a few minutes. This slow cooling transition locks in that fantastic crispiness.
Applying Flavor to Your Crispy Roasted Chickpeas
This step is crucial for flavor adherence! As soon as you take them out of that slightly warm oven, transfer each batch immediately to their separate serving bowls. Toss them with their designated seasoning blends while they are still hot. The heat and the residual oil help the spices stick perfectly. Make sure you keep the Spicy batch separate from the Ranch batch! Once they have cooled down completely in the bowls, they are ready to eat or store.
Tips for Achieving Maximum Crispy Roasted Chickpeas Results
I spent way too many batches making mediocre, slightly chewy chickpeas before I figured out the non-negotiables for truly great crispy roasted chickpeas. If you want that satisfying loud crunch every single time, you have to respect the process, especially when it comes to moisture management. Trust me, taking an extra minute here saves you from disappointment later!
Moisture Control is Key
I can’t stress this enough: pat those beans dry until your hands get tired! If you skip this, they will steam instead of roast, and you end up with a soft center. When you are rubbing them with the paper towels, you’ll notice some skins might come off—that’s okay, just brush those loose skins off the baking sheet before you oil them up. Less debris means better roasting! I aim for them to feel almost fuzzy-dry before they ever hit the heat.
Flavor Variations and Substitutions
While the olive oil works beautifully, if you’re worried about burning the oil at 400 degrees, go ahead and use avocado oil instead. It has a much higher smoke point, which is great insurance for a long roast time. And if you want to try the sweet version but don’t have maple syrup, honey is a fantastic, clean swap. It will give you a similar sticky glaze when baked. For savory lovers, don’t be afraid to try adding a dash of smoked paprika to the spicy mix for an extra layer of depth!
Storing and Refreshing Your Crispy Roasted Chickpeas
Okay, so you made a huge batch (because you should!), and now you need to keep them crunchy for snacking later in the week. The number one rule for storing any crispy snack is keeping air and humidity out. These crispy roasted chickpeas are great for meal prep, but only if you store them right.
Proper Airtight Storage Guidelines
You must let them cool completely before putting them away—otherwise, the trapped steam will ruin all your hard work and make them soft again. Once they are totally cool to the touch, transfer each flavor batch into separate, airtight containers. I use glass jars with tight-sealing lids. Stored this way at room temperature, they should stay perfectly crisp for about 3 to 4 days. Don’t stick them in the fridge; that just introduces more moisture!
Restoring Crispiness After Storage
Inevitably, after day three, they might lose a little snap, especially if the air is humid. Don’t throw them out! This is my favorite part of the recipe notes. If they’ve gone a little soft, just spread them back out on a baking sheet—no oil needed—and pop them into a 350\u00b0F oven for just 5 to 8 minutes. They crisp right back up! It’s like magic, and they taste freshly made again.
Frequently Asked Questions About Crispy Roasted Chickpeas
I get so many questions about this recipe because everyone wants to nail that crunch. Here are a few things I hear often from folks trying to perfect their batches.
Can I use oil-free methods for Crispy Roasted Chickpeas?
You absolutely can try to make them oil-free, and the initial dry baking steps are the same. However, the oil really helps the seasonings adhere, and it aids in that final crisping process. If you skip the oil, you’ll need to bake them longer in the final stages, and they might end up a bit drier and less golden than the oil-coated versions.
How long do these snacks last?
If you store them correctly in a sealed, airtight container at room temperature, they are best eaten within 3 to 4 days. If you find they’ve softened up, just pop them back in the oven for a quick refresh!
What is the protein and fiber content per serving?
This is why I love them so much! You get a great nutritional boost from these beans. Each 1/4 cup serving provides about 5 grams of plant-based protein and 6 grams of dietary fiber. They really help keep you full between meals.
Estimated Nutritional Data for Crispy Roasted Chickpeas
Here’s a quick snapshot of what you can expect from one serving of these snacks. Remember, these values are estimations based on the base ingredients before you add your specific seasoning amounts, as the maple syrup and salt content will vary slightly between the three flavors.
Nutritional Table Overview
I’ve put the key stats below so you can see how easily they fit into a clean eating plan. This is based on a 1/4 cup serving size.
| Nutrient | Amount (Approx.) |
|---|---|
| Calories | 110 |
| Fat | 4g |
| Total Carbohydrates | 18g |
| Fiber | 6g |
| Protein | 5g |
Share Your Favorite Crispy Roasted Chickpeas Flavor
I truly believe the Spicy version is the best for game day, but my kids always fight over the Maple Cinnamon! Now that you’ve made a batch (or three!), I want to hear what you think. Did you stick to the plan, or did you try one of those fun variations I mentioned? Drop a comment below and let me know which flavor reigned supreme in your kitchen this week! Check out my latest thoughts.
Tips for Achieving Maximum Crispy Roasted Chickpeas Results
I spent way too many batches making mediocre, slightly chewy chickpeas before I figured out the non-negotiables for truly great crispy roasted chickpeas. If you want that satisfying loud crunch every single time, you have to respect the process, especially when it comes to moisture management. Trust me, taking an extra minute here saves you from disappointment later!
Moisture Control is Key
I can’t stress this enough: pat those beans dry until your hands get tired! If you skip this, they will steam instead of roast, and you end up with a soft center. When you are rubbing them with the paper towels, you’ll notice some skins might come off—that’s okay, just brush those loose skins off the baking sheet before you oil them up. Less debris means better roasting! I aim for them to feel almost fuzzy-dry before they ever hit the heat.
Flavor Variations and Substitutions
While the olive oil works beautifully, if you’re worried about burning the oil at 400 degrees, go ahead and use avocado oil instead. It has a much higher smoke point, which is great insurance for a long roast time. And if you want to try the sweet version but don’t have maple syrup, honey is a fantastic, clean swap. It will give you a similar sticky glaze when baked. For savory lovers, don’t be afraid to try adding a dash of smoked paprika to the spicy mix for an extra layer of depth!
Storing and Refreshing Your Crispy Roasted Chickpeas
Okay, so you made a huge batch (because you should!), and now you need to keep them crunchy for snacking later in the week. The number one rule for storing any crispy snack is keeping air and humidity out. These crispy roasted chickpeas are great for meal prep, but only if you store them right.
Proper Airtight Storage Guidelines
You must let them cool completely before putting them away—otherwise, the trapped steam will ruin all your hard work and make them soft again. Once they are totally cool to the touch, transfer each flavor batch into separate, airtight containers. I use glass jars with tight-sealing lids. Stored this way at room temperature, they should stay perfectly crisp for about 3 to 4 days. Don’t stick them in the fridge; that just introduces more moisture!
Restoring Crispiness After Storage
Inevitably, after day three, they might lose a little snap, especially if the air is humid. Don’t throw them out! This is my favorite part of the recipe notes. If they’ve gone a little soft, just spread them back out on a baking sheet—no oil needed—and pop them into a 350\u00b0F oven for just 5 to 8 minutes. They crisp right back up! It’s like magic, and they taste freshly made again.
Frequently Asked Questions About Crispy Roasted Chickpeas
I get so many questions about this recipe because everyone wants to nail that crunch. Here are a few things I hear often from folks trying to perfect their batches.
Can I use oil-free methods for Crispy Roasted Chickpeas?
You absolutely can try to make them oil-free, and the initial dry baking steps are the same. However, the oil really helps the seasonings adhere, and it aids in that final crisping process. If you skip the oil, you’ll need to bake them longer in the final stages, and they might end up a bit drier and less golden than the oil-coated versions.
How long do these snacks last?
If you store them correctly in a sealed, airtight container at room temperature, they are best eaten within 3 to 4 days. If you find they’ve softened up, just pop them back in the oven for a quick refresh!
What is the protein and fiber content per serving?
This is why I love them so much! You get a great nutritional boost from these beans. Each 1/4 cup serving provides about 5 grams of plant-based protein and 6 grams of dietary fiber. They really help keep you full between meals.
Estimated Nutritional Data for Crispy Roasted Chickpeas
Since these are such a healthy snack, I always like to give you the breakdown of what you’re getting when you reach for a handful. Keep in mind these numbers are based on a standard 1/4 cup serving size, and they are estimations since the exact amount of oil and seasonings can shift a little between my three flavor profiles.
Nutritional Table Overview
I’ve put the key stats below so you can see how easily they fit into a clean eating plan. This is based on a 1/4 cup serving size. This table is a great reference point when you’re planning out your meals for the week! You can also find more healthy tips on my Pinterest board.
| Nutrient | Amount (Approx.) |
|---|---|
| Calories | 110 |
| Fat | 4g |
| Total Carbohydrates | 18g |
| Fiber | 6g |
| Protein | 5g |
Share Your Favorite Crispy Roasted Chickpeas Flavor
Now that you’ve got three amazing, crunchy snacks ready to go, I’m dying to know which one you love most! Did the savory Ranch win out, or are you hooked on the sweet Maple Cinnamon? Don’t keep your favorite flavor a secret! Head down to the comments section and let me know what you think, or even give this recipe a quick star rating so others know how easy and delicious these are!
Tips for Achieving Maximum Crispy Roasted Chickpeas Results
I spent way too many batches making mediocre, slightly chewy chickpeas before I figured out the non-negotiables for truly great crispy roasted chickpeas. If you want that satisfying loud crunch every single time, you have to respect the process, especially when it comes to moisture management. Trust me, taking an extra minute here saves you from disappointment later!
Moisture Control is Key
I can’t stress this enough: pat those beans dry until your hands get tired! If you skip this, they will steam instead of roast, and you end up with a soft center. When you are rubbing them with the paper towels, you’ll notice some skins might come off—that’s okay, just brush those loose skins off the baking sheet before you oil them up. Less debris means better roasting! I aim for them to feel almost fuzzy-dry before they ever hit the heat.
Flavor Variations and Substitutions
While the olive oil works beautifully, if you’re worried about burning the oil at 400 degrees, go ahead and use avocado oil instead. It has a much higher smoke point, which is great insurance for a long roast time. And if you want to try the sweet version but don’t have maple syrup, honey is a fantastic, clean swap. It will give you a similar sticky glaze when baked. For savory lovers, don’t be afraid to try adding a dash of smoked paprika to the spicy mix for an extra layer of depth!
Storing and Refreshing Your Crispy Roasted Chickpeas
Okay, so you made a huge batch (because you should!), and now you need to keep them crunchy for snacking later in the week. The number one rule for storing any crispy snack is keeping air and humidity out. These crispy roasted chickpeas are great for meal prep, but only if you store them right.
Proper Airtight Storage Guidelines
You must let them cool completely before putting them away—otherwise, the trapped steam will ruin all your hard work and make them soft again. Once they are totally cool to the touch, transfer each flavor batch into separate, airtight containers. I use glass jars with tight-sealing lids. Stored this way at room temperature, they should stay perfectly crisp for about 3 to 4 days. Don’t stick them in the fridge; that just introduces more moisture!
Restoring Crispiness After Storage
Inevitably, after day three, they might lose a little snap, especially if the air is humid. Don’t throw them out! This is my favorite part of the recipe notes. If they’ve gone a little soft, just spread them back out on a baking sheet—no oil needed—and pop them into a 350\u00b0F oven for just 5 to 8 minutes. They crisp right back up! It’s like magic, and they taste freshly made again.
Frequently Asked Questions About Crispy Roasted Chickpeas
I get so many questions about this recipe because everyone wants to nail that crunch. Here are a few things I hear often from folks trying to perfect their batches.
Can I use oil-free methods for Crispy Roasted Chickpeas?
You absolutely can try to make them oil-free, and the initial dry baking steps are the same. However, the oil really helps the seasonings adhere, and it aids in that final crisping process. If you skip the oil, you’ll need to bake them longer in the final stages, and they might end up a bit drier and less golden than the oil-coated versions.
How long do these snacks last?
If you store them correctly in a sealed, airtight container at room temperature, they are best eaten within 3 to 4 days. If you find they’ve softened up, just pop them back in the oven for a quick refresh!
What is the protein and fiber content per serving?
This is why I love them so much! You get a great nutritional boost from these beans. Each 1/4 cup serving provides about 5 grams of plant-based protein and 6 grams of dietary fiber. They really help keep you full between meals.
Estimated Nutritional Data for Crispy Roasted Chickpeas
I’ve put the key stats below so you can see how easily they fit into a clean eating plan. This is based on a 1/4 cup serving size. This table is a great reference point when you’re planning out your meals for the week! If you are interested in learning more about clean eating, check out my About Me page for my story.
Nutritional Table Overview
I’ve put the key stats below so you can see how easily they fit into a clean eating plan. This is based on a 1/4 cup serving size.
| Nutrient | Amount (Approx.) |
|---|---|
| Calories | 110 |
| Fat | 4g |
| Total Carbohydrates | 18g |
| Fiber | 6g |
| Protein | 5g |
Share Your Favorite Crispy Roasted Chickpeas Flavor
Now that you’ve got three amazing, crunchy snacks ready to go, I’m dying to know which one you love most! Did the savory Ranch win out, or are you hooked on the sweet Maple Cinnamon? Don’t keep your favorite flavor a secret! Head down to the comments section and let me know what you think, or even give this recipe a quick star rating so others know how easy and delicious these are!
Print
Amazing 3-Flavor Crispy roasted chickpeas
- Total Time: 40 minutes
- Yield: Serves 12 (1/4 cup per serving) 1x
- Diet: Gluten Free
Description
Crispy Roasted Chickpeas – 3 Flavors. This heart-healthy snack offers sweet cinnamon maple, savory ranch, and bold spicy variations. Ready in 40 minutes, these provide 5 grams of plant-based protein and 6 grams of fiber per serving, making them a nutritious, gluten-free, and dairy-free snack alternative.
Ingredients
- 3 15-oz cans organic low-sodium chickpeas, drained and rinsed
- 3 to 6 tablespoons olive oil, divided
- Sweet Cinnamon Maple: 1 tablespoon maple syrup
- Sweet Cinnamon Maple: ½ teaspoon ground cinnamon
- Ranch: 1 teaspoon garlic powder
- Ranch: 1 teaspoon onion powder
- Ranch: ½ teaspoon dried dill
- Ranch: ½ teaspoon dried parsley
- Ranch: ½ teaspoon salt
- Spicy: ½ teaspoon chili powder
- Spicy: ½ teaspoon ground cumin
- Spicy: ½ teaspoon paprika
- Spicy: ½ teaspoon cayenne pepper
- Spicy: ¼ teaspoon garlic powder
- Spicy: ¼ teaspoon salt
Instructions
- Preheat your oven to 400°F and line three large baking sheets with parchment paper.
- Drain and rinse each can of chickpeas thoroughly under cold running water in a colander.
- Pat the chickpeas completely dry using paper towels or a clean kitchen towel, removing as much moisture as possible for maximum crispiness.
- Spread one can of dried chickpeas onto each prepared baking sheet, ensuring they are in a single layer with space between them.
- Bake the chickpeas for 15 minutes without any oil or seasonings to dry them out further and begin crisping.
- While the chickpeas are baking, prepare your three seasoning blends in separate small bowls according to the flavor combinations listed in the ingredients.
- Remove the baking sheets from the oven and drizzle each batch with 1 to 2 tablespoons of olive oil, tossing to coat evenly.
- Return the chickpeas to the oven and bake for 10 minutes, then remove and stir each pan thoroughly.
- Bake for an additional 5 to 10 minutes until the chickpeas are golden brown and crispy to your desired level, checking frequently to prevent burning.
- Turn off the oven and open the door slightly, allowing the chickpeas to cool inside the oven for maximum crispiness.
- Transfer each batch of warm chickpeas to separate bowls and toss with their designated seasoning blends while still hot so the seasonings adhere properly.
- Let cool completely before serving or storing to maintain crispiness and ensure food safety.
Notes
- Try za’atar, sumac, and harissa for a Mediterranean flavor profile.
- Use curry powder, turmeric, and black pepper for an Indian-spiced version.
- Make Italian-style with dried oregano, basil, and grated parmesan cheese.
- Add truffle salt for an elegant, gourmet variation.
- Use honey instead of maple syrup for the sweet version.
- Replace olive oil with avocado oil for a higher smoke point.
- Store completely cooled roasted chickpeas in an airtight container at room temperature for 3 to 4 days.
- To restore crispiness, warm chickpeas on a baking sheet in a 350°F oven for 5 to 8 minutes.
- Prep Time: 10 minutes
- Cook Time: 30 minutes
- Category: Snack
- Method: Roasting
- Cuisine: American
Nutrition
- Serving Size: 1/4 cup
- Calories: 110
- Sugar: N/A
- Sodium: N/A
- Fat: 4g
- Saturated Fat: N/A
- Unsaturated Fat: N/A
- Trans Fat: N/A
- Carbohydrates: 18g
- Fiber: 6g
- Protein: 5g
- Cholesterol: 0mg