
Okay, listen up, because I’ve cracked the code on the ultimate Cottage Cheese Wrap. Forget those dry, brittle low-carb shells you’ve tried before! This recipe is my absolute favorite for meal prepping because it comes out soft, flexible, and sturdy enough to actually roll without tearing—seriously, no more sad, ripped lunches.
It’s incredibly high in protein, super low in carbs, and tastes way better than it has any right to. I spent weeks testing different ratios in my blender to get this batter just right. You want it silky smooth, almost like pancake batter, or you end up with weird lumps. Trust me, when you see how easy this is, you’ll toss out every store-bought tortilla!
Essential Components for Your Cottage Cheese Wrap
When you’re making something this good with simple ingredients, you can’t afford to skimp on quality or preparation. Every item in this list plays a huge role in making sure your cottage cheese wrap holds up to a heavy filling. We aren’t just making a flimsy pancake here; we need structure!
The combination of cheese, eggs, and flour creates the magic. The cottage cheese brings the moisture and protein, but the mozzarella is what really gives it that satisfying stretch and helps it brown nicely. If you skip the seasoning, it tastes a little bland, so don’t leave out that Italian spice mix!
| Ingredient | Quantity |
| Cottage Cheese | 1 cup |
| Large Eggs | 2 |
| Egg Whites | 2 large |
| Shredded Mozzarella | 1 cup |
| Almond Flour | 1/4 cup |
| Italian Seasoning & Garlic Powder | To Taste |
Selecting Quality Ingredients for the Cottage Cheese Wrap
The texture of your cottage cheese matters a lot. You definitely want the standard kind, not the whipped stuff. If yours has huge curds, just give it a quick pulse in the blender before adding anything else—we need a smooth base before we introduce the eggs. For the almond flour, it absolutely has to be finely ground, almost like powder. If you use coarse almond meal, your wrap will be crumbly and won’t roll well.
And please, use good quality shredded mozzarella. It melts beautifully and acts like the glue holding everything together. If you use pre-shredded cheese that has anti-caking agents, it might not melt as smoothly, so if you have the choice, shredding it yourself is always the way to go, even for this quick recipe!
Equipment Needed for Preparation
You can’t fake this part—you need power! A good blender or a food processor is non-negotiable here. Trying to mix this thick batter by hand with a whisk will leave you with cottage cheese chunks, and that’s a recipe for tearing later on. You need that batter completely uniform.
Also, make sure you have a large, rimmed baking sheet. We are spreading this thin, and having those edges keeps the batter contained while it bakes. And don’t forget the parchment paper! I learned the hard way that trying to peel this off a greased pan is a nightmare. Parchment paper is your best friend for easy release.
Step-by-Step Guide to Your Cottage Cheese Wrap Recipe
I know you’re excited to eat this, but we have to follow a few simple steps in order. Don’t rush the preheat, and definitely don’t skip the cooling time—that’s where the final structure sets up. Once you get the hang of this, you’ll have four perfect wraps ready for lunch in less than 20 minutes total!
Blending the Cottage Cheese Wrap Batter Smoothly
First things first, crank that oven up to 400°F right away so it’s ready when you are. Line that big baking sheet with parchment paper—I can’t stress this enough! Now, toss everything into your blender: cottage cheese, both types of eggs, mozzarella, almond flour, and all those spices. You need to blend this until it looks like a beautiful, smooth, slightly bubbly liquid. If you stop too soon, you’ll have little white pockets of cheese that won’t blend into the structure, leading to weak spots in your wrap.
Keep blending until you can’t see any distinct curds or spice clumps. It should look almost like a thin, pale pancake batter ready to go. If you see any lumps clinging to the side, stop, scrape them down, and blend for another 30 seconds. We want perfection here!
Baking and Setting the Cottage Cheese Wrap
Pour that smooth batter right onto the middle of your lined sheet. Grab your spatula—a flexible silicone one works best—and spread it out quickly and evenly. You’re aiming for a very thin layer, maybe about an eighth of an inch thick. If it’s too thick, it won’t dry out enough to be flexible; it’ll just be a soft, eggy scramble. Try to get it close to the edges, but don’t worry if the corners are a little thicker.
Slide it into that hot oven for 10 to 12 minutes. You are looking for the edges to just start turning golden brown. It should look set in the middle—no liquid wobbling when you gently shake the pan. It needs to feel firm but still pliable when you touch it lightly. If it looks wet, give it two more minutes, but be careful not to let it get crunchy!
Cooling and Cutting the Cottage Cheese Wrap
This is the most important part for roll-ability! Take the sheet out of the oven and just let it sit right there on the counter for a full 15 minutes. I know you want to fill it immediately, but if you try to peel or fold it hot, it will definitely tear. Cooling allows the proteins to stabilize and firm up properly so it won’t stick to itself.
Once it’s cooled down and cool enough to handle, carefully slide that parchment paper right onto your cutting board. Use a sharp knife or pizza cutter to slice the big rectangle into four equal rectangles. These are your perfect high-protein wraps, ready for whatever fillings you dream up!
Tips for Success with Your Cottage Cheese Wrap
Even with the best ingredients, a few small mistakes can ruin the texture of your beautiful high-protein wrap. I’ve learned these tricks the hard way so you don’t have to! The main enemies here are thickness and impatience. If you respect the cooling time and spread it thin, you’ll be golden.
Remember, this isn’t a flour tortilla; it bakes differently. It needs that thinness to dry out enough to be sturdy but stay flexible enough to fold without cracking when you add your lunch fillings.
Achieving the Ideal Thinness for the Cottage Cheese Wrap
When spreading that batter, think ‘windowpane thin.’ If you can see the parchment paper clearly through the batter in most spots, you’ve nailed it. I use the back of a large offset spatula to gently push the batter outwards from the middle, almost like icing a very large, thin cake. If you make any section too thick—say, a quarter of an inch—that spot will remain spongy and won’t hold up when you try to roll it later.
If you notice a thick patch, try to smooth it out immediately before it hits the oven. It’s much easier to fix when it’s wet batter than when it’s partially baked!
Handling the Wraps After Baking
Once the wraps have cooled for that crucial 15 minutes, you need to be gentle. They are firm, but they are not indestructible yet. When you slide the parchment paper and the wrap onto the cutting board, peel the parchment off the bottom slowly. If you pull too fast, the wrap might stick to the paper and stretch unevenly.
When it comes time to fill and roll, be firm but not aggressive. You want a snug roll, especially if you are using something bulky like lettuce or sliced turkey. Start at one end and roll it up tightly, like a cigar, so the filling stays put when you pick it up for that perfect high-protein lunch! Check out more tips on making healthy swaps!
Creative Ways to Fill Your Cottage Cheese Wrap
Now that you have these amazing, sturdy, low-carb shells, the fun really begins! Since this cottage cheese wrap is already packed with protein, you can load it up guilt-free. Think about what you usually put in a regular tortilla or sandwich bread, and swap it out. These wraps shine when they are filled with fresh, vibrant ingredients.
Don’t be shy! These are sturdy enough for wet fillings too, as long as you don’t overstuff them right near the edges. I love making a big batch of these plain wraps on Sunday so I can just grab one and go during the busy work week. For other meal prep ideas, check out my high-protein turkey wrap options!
Savory Filling Ideas for a High Protein Wrap
For maximum protein impact, think lean meats and healthy fats. My go-to is a scoop of tuna or chicken salad made with Greek yogurt instead of heavy mayo—it keeps the whole thing light and boosts the protein even more. Another winner is thinly sliced deli turkey, a slice of provolone, and some crisp lettuce and tomato. If you’re vegetarian, try a thick layer of hummus, sliced cucumbers, bell peppers, and a sprinkle of feta cheese.
Also, don’t forget simple seasoning inside the wrap! A little drizzle of hot sauce or a dash of ranch powder mixed into your fillings makes a huge difference in flavor complexity.
Quick Lunch Swaps Using the Cottage Cheese Wrap
This wrap is your secret weapon against boring sandwiches. Instead of using two slices of bread for your lunchtime deli meat, use one of these wraps—you instantly cut the carbs and add 19 grams of protein! It works perfectly as a substitute for a taco shell if you keep the filling simpler, or use it instead of pita bread for dipping into guacamole.
My kids love them rolled up with just a smear of cream cheese and some thinly sliced ham—they think it’s a fancy, healthy pinwheel! It makes assembling a quick, satisfying, high-protein lunch so much faster than waiting for bread to toast. If you are looking for other quick lunch ideas, see my post on veggie tortilla roll ups.
Storing and Reheating Your Cottage Cheese Wrap
The best part about this recipe is that it holds up beautifully for meal prep! You can make a stack of these on Sunday, and they’ll still be perfect by Thursday. Just remember, you are storing them plain—don’t add your wet fillings until you are ready to eat them, or the wrap will get soggy way too fast.
We need to keep them separate so they don’t fuse into one giant, cheesy sheet in the fridge. I always make sure I have enough parchment paper on hand for this step. Here’s a quick look at how long they last:
| Storage Item | Duration |
| Plain Wraps (Refrigerator) | Up to 5 days |
| Filled Wraps (Refrigerator) | 1-2 days maximum |
Best Practices for Storing Plain Wraps
When you cut your four rectangles, stack them up, but you have to separate every single layer with a piece of parchment paper. If you skip this, they will absolutely glue themselves together overnight, and you’ll ruin the texture trying to pry them apart later. Just cut squares slightly larger than the wraps themselves and layer them in an airtight container. You can find more meal prep organization ideas on my Pinterest board.
They keep great in the fridge for about five days. If you need to reheat them, I just pop mine in a dry skillet for about 30 seconds per side over medium heat until they are warm and pliable again. Don’t microwave them unless you want a rubbery texture!
Frequently Asked Questions About the Cottage Cheese Wrap
Okay, I know you’ve got questions, because when I first made these, I had a million! It seems too simple to work, right? But these tips address the most common concerns I hear from people trying the cottage cheese wrap for the first time. Don’t worry, we’ve got answers for texture, flavor, and substitutions!
Can I Make a Thicker Cottage Cheese Wrap?
You technically can, but I really advise against it if you want that signature rollable, sturdy texture! If you use more batter or spread it thicker than that 1/8-inch guidance, the center won’t bake enough to dry out properly. It will end up soft and almost custardy, which means it will tear easily when you try to fill it or roll it up. You need that thinness for the proteins to set into a flexible sheet.
Do These Wraps Taste Like Cottage Cheese?
This is the number one question! And the answer is a resounding no, thankfully. When you blend the cottage cheese with the eggs, mozzarella, and spices, the texture completely transforms. The mozzarella melts in and takes over the texture, while the baking process mellows out any strong dairy flavor. Once you add your savory fillings, you won’t taste the cottage cheese at all—you just taste a mild, slightly cheesy, bread-like wrapper. It’s amazing!
What If I Do Not Have Almond Flour for the Cottage Cheese Wrap?
This one is tricky, because the almond flour is crucial for structure and keeping the carbs low. If you absolutely must substitute it, you can try using an equal amount of finely ground coconut flour, but be warned: coconut flour absorbs way more liquid, so your batter will get incredibly thick, fast. You might need to add an extra tablespoon of egg white to get it back to the right consistency. Honestly though, the almond flour works best for that neutral flavor and perfect texture! For other low-carb baking ideas, check out my cottage cheese bagels recipe.
Sharing Your Cottage Cheese Wrap Creations
I really hope you love making these high-protein cottage cheese wraps as much as I do! They are such a game-changer for quick lunches. Once you’ve filled yours up, I want to hear about it! Drop a comment below and let me know what fillings you chose and how they held up. Don’t forget to rate the recipe if you think it deserves five stars!
Print
Amazing 4-Ingredient Cottage Cheese Wrap Recipe
- Total Time: 15 minutes
- Yield: 4 wraps 1x
- Diet: Low Carb
Description
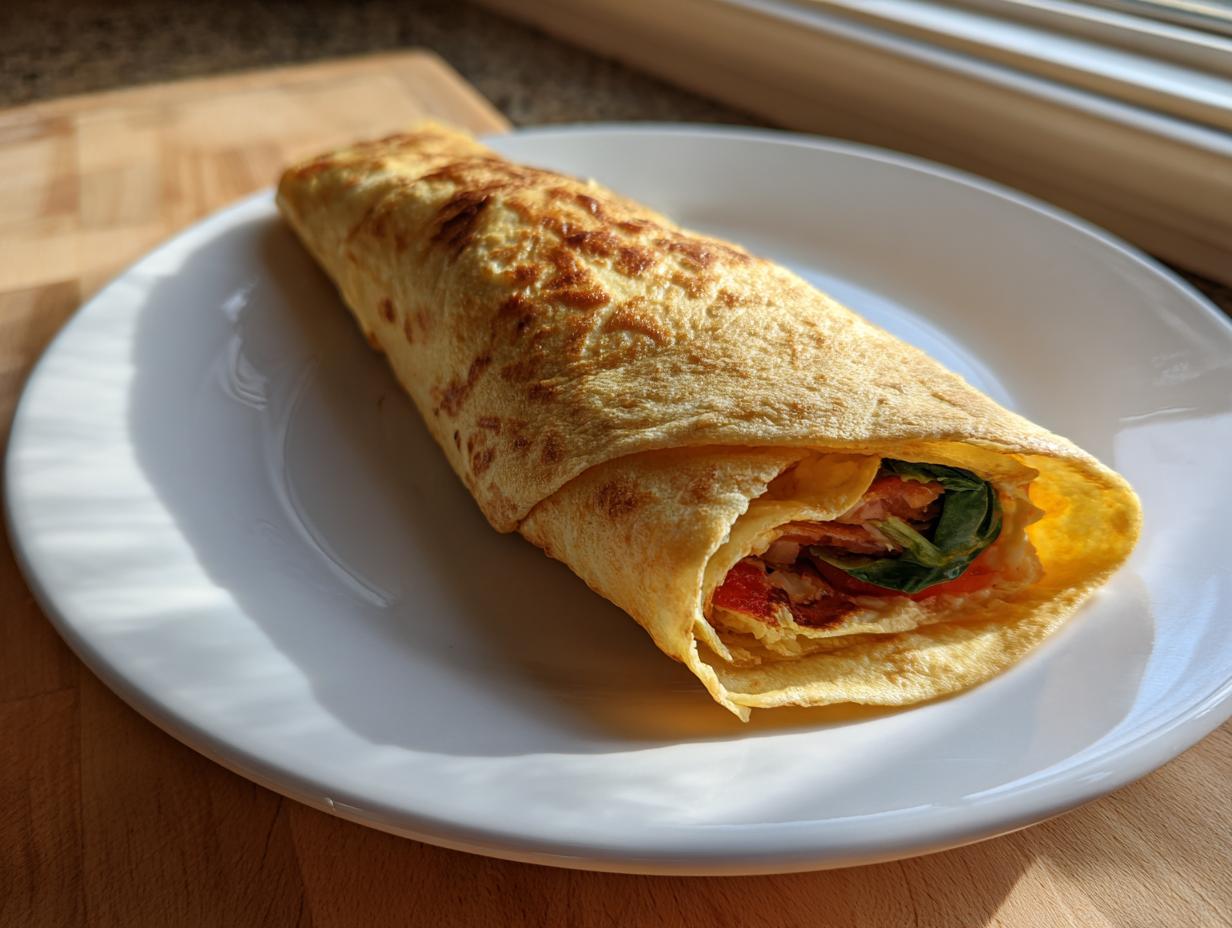
This cottage cheese wrap is soft, flexible, and sturdy enough to roll without tearing. Blended cottage cheese, eggs, mozzarella, and almond flour bake into a thin, bread like wrap that is naturally low carb and packed with protein. Each wrap delivers impressive protein before adding any fillings, making it perfect for high protein lunches, meal prep, or quick sandwich swaps.
Ingredients
- 1 cup cottage cheese
- 2 large eggs
- 2 large egg whites
- 1 cup shredded mozzarella cheese
- 1/4 cup finely ground almond flour
- 1/2 teaspoon Italian seasoning
- 1/4 teaspoon garlic powder
Instructions
- Preheat oven to 400°F. Line a large rimmed baking sheet with parchment paper.
- In a blender or food processor, combine cottage cheese, eggs, egg whites, mozzarella, almond flour, Italian seasoning, and garlic powder. Blend until completely smooth and slightly frothy.
- Pour the batter onto the prepared baking sheet. Using a spatula, spread into a thin, even layer about 1/8 inch thick, reaching close to the edges.
- Bake for 10 to 12 minutes until set in the center and lightly golden around the edges. The wrap should feel firm but still flexible.
- Remove from the oven and allow to cool for at least 15 minutes. The wrap will firm up as it cools.
- Carefully slide the parchment onto a cutting board and cut into 4 equal rectangles.
- Add desired fillings to one end of each rectangle and roll gently but firmly. Serve immediately or store for later.
Notes
- Store plain wraps in an airtight container in the refrigerator for up to 5 days with parchment between layers to prevent sticking.
- Prep Time: 5 minutes
- Cook Time: 10 minutes
- Category: Lunch
- Method: Baking
- Cuisine: American
Nutrition
- Serving Size: 1 wrap
- Calories: 210
- Sugar: 2 grams
- Sodium: N/A
- Fat: 13 grams
- Saturated Fat: N/A
- Unsaturated Fat: N/A
- Trans Fat: N/A
- Carbohydrates: 4 grams
- Fiber: 1 gram
- Protein: 19 grams
- Cholesterol: N/A
