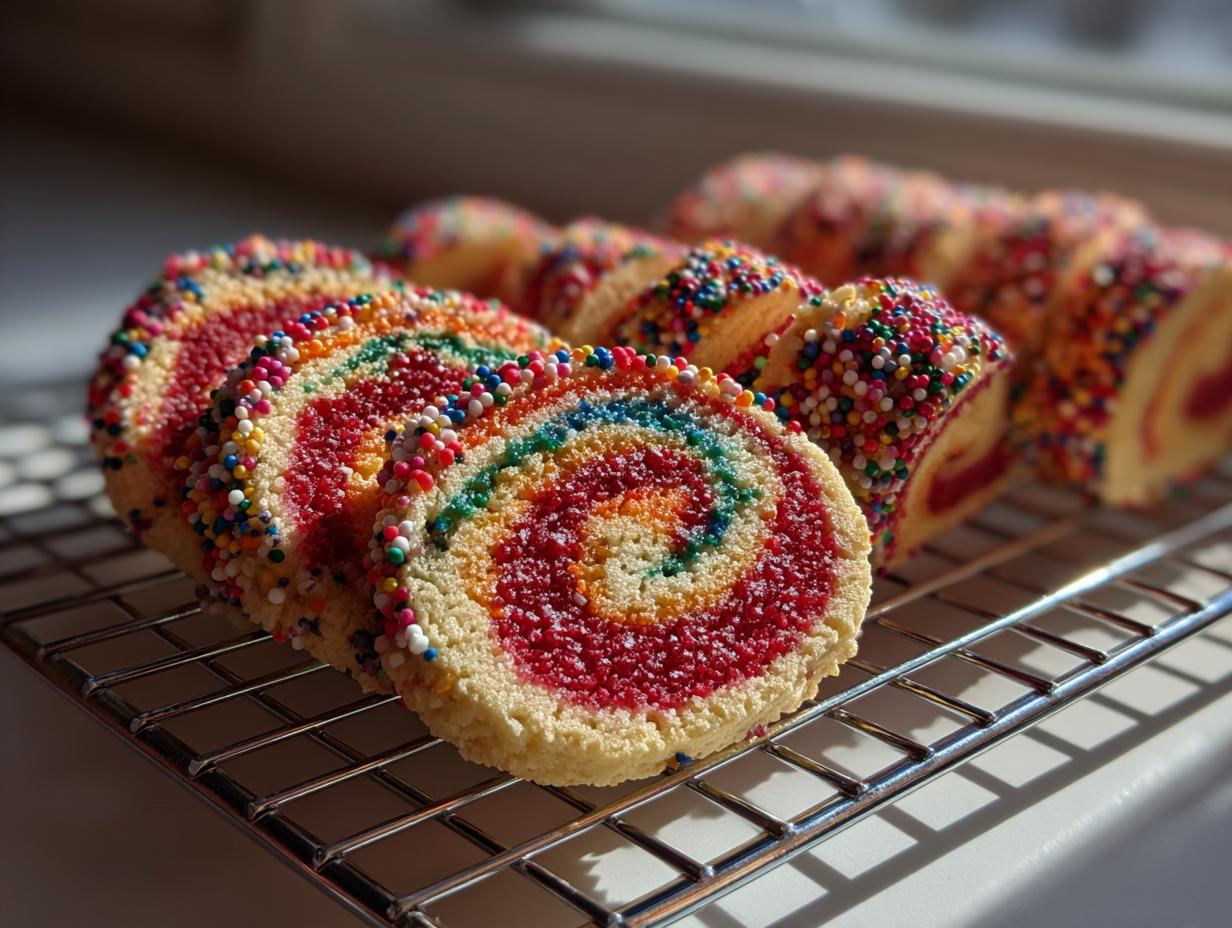
If you want cookies that stop people in their tracks, you have to go for visual impact! I first made these years ago for my niece’s birthday party, and people seriously thought I’d spent all day fussing over them. They are totally slice-and-bake, which is my favorite kind of magic trick. 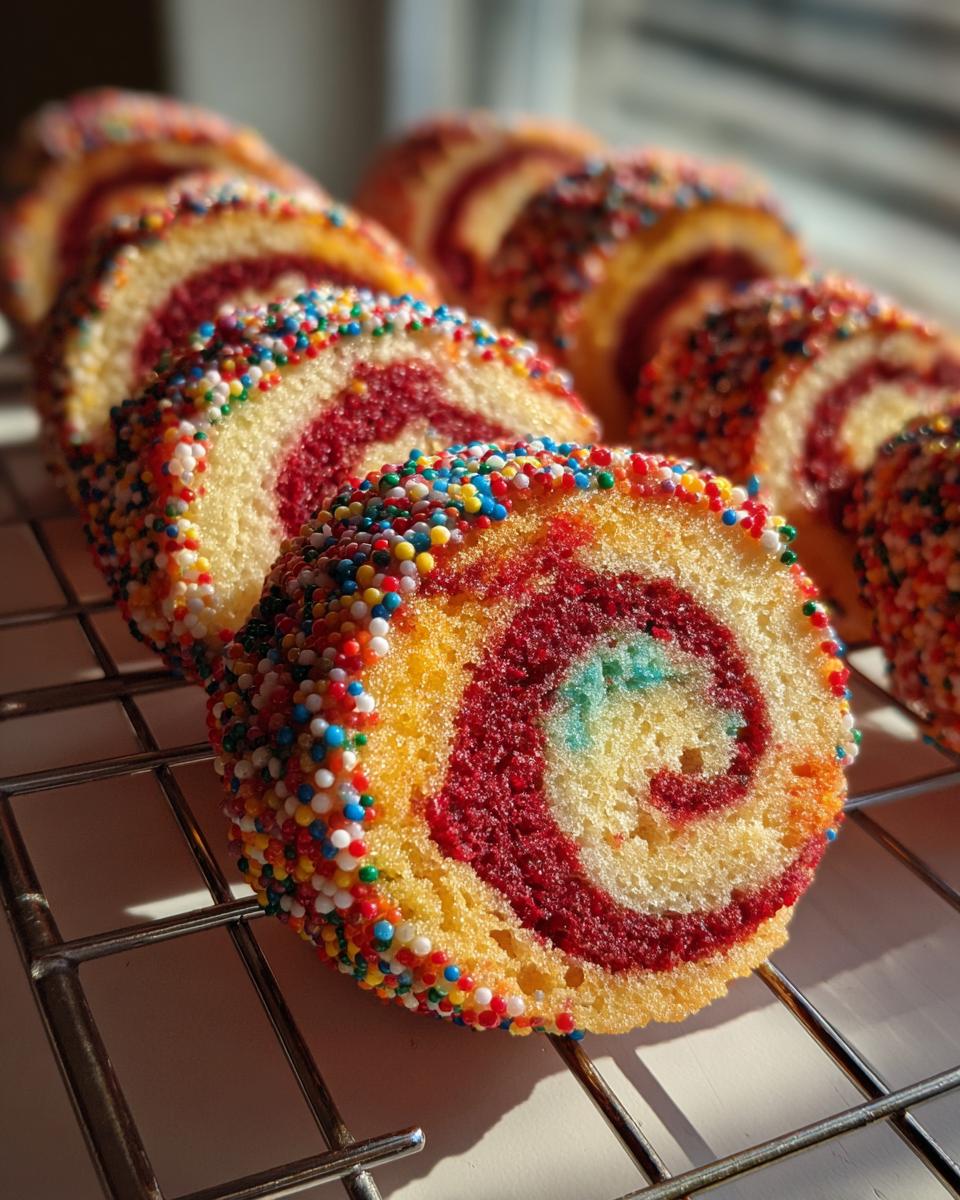
The secret isn’t complicated layering; it’s just about getting two distinct colors rolled up tightly together. Trust me, the vibrant dough layers and the coating of sprinkles make these irresistible. Forget fiddly piping or messy frosting; we’re using simple technique to get those gorgeous pinwheels. It’s the perfect recipe when you need a big batch of impressive-looking treats ready in under an hour of active time. You are going to love how these look coming out of the oven! If you want more baking inspiration, check out our latest posts!
Gather Your Tools for the Colorful Swirl Cookies Recipe
Before we dive into the dough, let’s make sure your kitchen is set up for success. Since we are making a slice-and-bake, organization is key! You’ll definitely want your stand mixer ready to go because beating that butter and sugar properly is non-negotiable for the right texture. Don’t forget parchment paper—lots of it!
You’ll need a good sturdy rolling pin, your sharpest knife for slicing those logs later, and at least two sturdy baking sheets. Having everything ready means we can move straight from mixing to rolling without any panic!
Essential Ingredients for Colorful Swirl Cookies Recipe
Okay, let’s talk ingredients. These are straightforward, but pay attention to the butter and the coloring! We need that butter softened—not melted, softened! If it’s too cold, it won’t cream right, and if it’s melty, the whole dough structure collapses. Also, make sure you grab **gel food coloring**, not the liquid kind, if you want that deep, gorgeous red color without thinning out the dough.
Here is exactly what you need to pull together these beauties:
| Ingredient | Amount |
|---|---|
| All-Purpose Flour | 2 cups |
| Baking Powder | 1/2 teaspoon |
| Salt | 1/4 teaspoon |
| Powdered Sugar | 2/3 cup |
| Granulated Sugar | 1/4 cup |
| Unsalted Butter (Softened) | 1 cup |
| Vanilla Extract | 1 teaspoon |
| Red Gel Food Coloring | 1/2 teaspoon |
| Multicolored Nonpareil Sprinkles | 1 1/2 cups |
Preparing the Dough Bases for Your Colorful Swirl Cookies Recipe
Alright, let’s get mixing! We are starting with the dry ingredients first. Grab a big bowl and whisk together your flour, baking powder, and salt. Whisking is better than just stirring because it helps break up any lumps and makes sure the leavening agent is evenly distributed. Set that aside for a minute.
Now for the fun part: the wet base! In your mixer bowl, cream together the powdered sugar, granulated sugar, and that beautifully softened butter. You want this mixture really creamy and light—it takes about two minutes on medium speed. This step incorporates the air that gives our cookies that lovely, soft texture later on. Once it looks pale and fluffy, mix in your vanilla extract.
Next, we slowly add the dry ingredients to the wet. Don’t rush this! Add the flour mixture gradually, mixing on low speed until it just comes together into a nice, cohesive dough ball. If you overmix here, the cookies get tough, and we absolutely don’t want tough cookies! Once it balls up, stop the mixer immediately.
Coloring and Shaping the Dough Sections
This is where the color magic happens! Take that beautiful, plain dough and divide it exactly in half. Put one half back in the mixer bowl, add your red gel coloring, and mix it until it’s a uniform, vibrant red. Don’t worry if the red half seems a little stiffer; that’s normal.
Now, we roll! Place each dough half—the plain one and the red one—between two sheets of parchment paper. I like to use my heavy rolling pin for this part. You need to roll both sections out to exactly 11 inches by 9 inches, and they must be about 1/4-inch thick. Precision matters here so the layers line up perfectly later! Once rolled, slide both sheets onto a baking tray and pop them in the fridge for a full hour until they are nice and firm.
Achieving the Perfect Pinwheel Look in Your Colorful Swirl Cookies Recipe
Once those dough slabs are chilled and firm—seriously, don’t skip that hour—it’s time to marry the two colors! Carefully peel the top sheet of parchment off the plain dough. Then, you need to gently brush the entire surface of that plain dough with a tiny bit of water. This water is our secret weapon; it’s what makes the red dough stick without squishing the layers.
Now, take your red dough (still between its parchment layers) and peel off the top sheet. Flip the red dough right on top of the watered plain dough. Line up the edges as best you can, and then use your hands to gently press them together. Go slow! Once they are sealed, trim the edges with a knife to make a nice, even rectangle. That’s when you peel off the second sheet of parchment paper.
The final step for the swirl is rolling it tight! Starting from the long 11-inch side, roll the dough into a log as tightly as you possibly can without tearing it. You want zero air gaps in the center, or you’ll end up with flat spots instead of perfect pinwheels when you bake them. Once it’s rolled up, give the seam a gentle press to seal it shut. Brush the entire outside of the log lightly with water one last time—this is critical for the sprinkles to stick evenly! 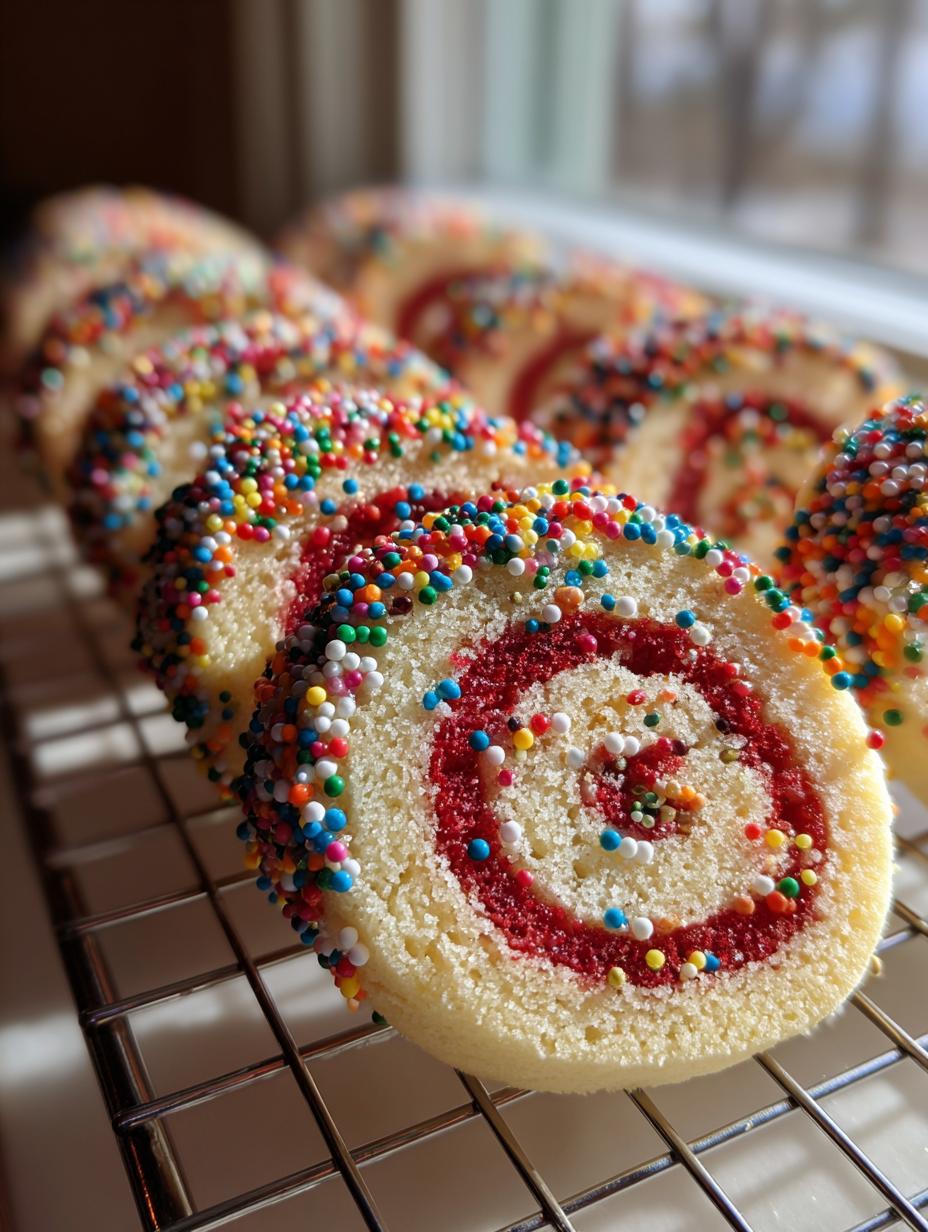
Immediately roll that log in your multicolored nonpareil sprinkles. Press the sprinkles firmly all around the log until it’s completely coated in color. Wrap the whole thing tightly in plastic wrap. This log needs a good, long rest in the fridge, so pop it in for at least two hours. This chilling time is what keeps the cookie from spreading into a blob when it hits the hot oven! You can see more fun baking ideas over on our Pinterest page.
Chilling and Slicing the Colorful Swirl Cookies Log
We talked about chilling before, but I need to stress how important these two rest periods are for great slice and bake cookies! Remember, the first chill after rolling the two sheets flat takes one full hour. That firms up the individual colors so they don’t smear when you stack them.
The second, longer chill for the sprinkle-coated log requires at least two hours in the fridge. Don’t try to rush this part, seriously! If the log is soft, you’ll end up with misshapen cookies that look like blobs instead of neat little circles. Once it’s rock solid, unwrap the log.
Use a sharp knife to slice the log into rounds that are exactly 1/4-inch thick. This consistency means they all bake evenly. Lay them out on your parchment-lined baking sheets, making sure to leave about 2 inches between each cookie because they will spread just a tiny bit while baking. If you are looking for other great cookie recipes, check out our monster cookies recipe!
Baking Your Colorful Swirl Cookies Recipe to Golden Perfection
The moment of truth! Preheat your oven to 350 degrees Fahrenheit. Make sure your baking sheets are lined with fresh parchment paper—we don’t want any sticky surprises after all that work layering the dough. Get those sliced rounds onto the prepared sheets, leaving plenty of space between them, like I mentioned.
Now, slide them in and set your timer for 11 minutes. The baking time range is usually 11 to 13 minutes. You aren’t looking for them to turn dark brown; that would mean they are overbaked and crispy, and we want a soft texture! What you’re watching for are just the edges turning faintly golden. If you see that soft golden rim, they are done!
Pull the sheets out. Here’s a crucial step for keeping that soft texture: let the cookies cool right there on the hot baking sheet for about 5 minutes. This lets them firm up just enough so they don’t break when you move them. After 5 minutes, carefully transfer them to a wire rack to cool completely. Enjoy watching those vibrant swirls pop as they cool down! For another fun baking project, try our banana oatmeal bars.
Tips for Success with Your Colorful Swirl Cookies Recipe
I’ve learned a few things over the years making these pinwheels, mostly through trial and error—and sometimes scraping dough off the counter! The number one piece of advice? Make sure that dough is firm before you slice it. If it’s even slightly soft, the knife drags, and your beautiful swirl gets mushed. If you think it’s ready to slice but the red is smearing, just pop it back in the freezer for 15 minutes!
When you roll the log in sprinkles, press them in firmly! If you just gently roll, you’ll end up with bare patches after baking. I actually press the sprinkle-covered log gently against a flat surface to really cement those nonpareils onto the dough. Also, if you find your dough sticking to the rolling pin when you flatten the layers, use a little extra parchment paper on top—it saves so much cleanup time!
Storing and Keeping Your Colorful Swirl Cookies Recipe Fresh
We put so much effort into getting those perfect swirls, so we definitely want to keep them tasting fresh! Because these are slice and bake, they hold up really well, provided you store them correctly. The key here is keeping the air out so they stay soft.
Always use an airtight container. If you stack them, put a small piece of parchment paper between the layers so the sprinkles don’t transfer or stick to each other. They honestly taste best within the first few days, but they hold up beautifully.
| Storage Method | Duration |
|---|---|
| Airtight Container (Room Temp) | Up to 5 days |
| Airtight Container (Freezer) | Up to 3 months |
Frequently Asked Questions About Colorful Swirl Cookies
I get so many questions about these pinwheels because everyone wants that perfect swirl! Here are the ones I hear most often when people are making their first batch of these colorful treats.
Q1. How long do slice and bake cookies last?
These cookies are best enjoyed within the first three to five days when stored at room temperature in an airtight container. Because they are softer, they don’t last quite as long as a crisp cookie, but they freeze wonderfully! You can freeze the baked cookies for up to three months if you wrap them well.
Q2. Can I use different colors instead of red?
Absolutely! That’s the fun part. You can use any combination of gel food coloring you like. For a holiday look, try green and white, or maybe pink and yellow for spring. Just remember that whatever color you choose, it must be a gel coloring so it doesn’t add excess liquid to the dough, which ruins the texture.
Q3. Why did my swirl cookies spread out flat when I baked them?
This almost always comes down to the chilling time. If your log wasn’t chilled for the full two hours, the butter melts too fast in the oven, causing spread. Also, make sure you are using the right amount of flour and that your butter was properly softened, not melted, when you started creaming it!
Q4. Do I need to use the water brush between the layers?
Yes, you really do! The water acts as a gentle adhesive to seal the two dough layers together before you roll the log. If you skip that step, the layers might separate during the rolling or baking process, and you won’t get that beautiful, defined pinwheel effect in your finished cookies. For more baking tips, see our lemon raspberry eclairs recipe.

Amazing Colorful Swirl Cookies Recipe: 1 Secret
- Total Time: 3 hours 55 minutes
- Yield: 36 cookies 1x
- Diet: Vegetarian
Description
Make stunning swirl cookies with vibrant dough layers and sprinkles. This easy slice-and-bake treat is perfect for sharing at gatherings and is ready in under an hour of active time. These cookies suit busy home bakers seeking impressive visuals without complex steps.
Ingredients
- 2 cups all-purpose flour
- 1/2 teaspoon baking powder
- 1/4 teaspoon salt
- 2/3 cup powdered sugar
- 1/4 cup granulated sugar
- 1 cup unsalted butter, softened
- 1 teaspoon vanilla extract
- 1/2 teaspoon red gel food coloring
- 1 1/2 cups multicolored nonpareil sprinkles
Instructions
- Whisk flour, baking powder, and salt in a large bowl.
- Beat powdered sugar, granulated sugar, and butter in a stand mixer on medium until creamy, about 2 minutes.
- Mix in vanilla until combined.
- Add dry ingredients gradually; mix until dough forms a ball.
- Divide dough in half.
- Return one dough half to mixer; add food coloring and mix until uniform red.
- Roll each dough half between two sheets of parchment to 11×9 inches and 1/4-inch thick.
- Chill on a baking sheet for 1 hour until firm.
- Peel parchment from plain dough; brush lightly with water.
- Place red dough atop plain dough; press edges to seal and trim to even rectangle.
- Roll tightly from long side into a log; brush lightly with water.
- Roll log in sprinkles to coat; wrap in plastic and chill 2 hours.
- Preheat oven to 350°F; line sheets with parchment.
- Slice log into 1/4-inch rounds; place 2 inches apart.
- Bake 11 to 13 minutes until edges are lightly golden.
- Cool on sheet 5 minutes, then transfer to rack.
Notes
- Two dough colors roll together for a striking pinwheel effect.
- Soft texture holds shape well for gifting or parties.
- Prep Time: 30 minutes
- Cook Time: 25 minutes
- Category: Dessert
- Method: Slice and Bake
- Cuisine: American
Nutrition
- Serving Size: 1 cookie
- Calories: 110
- Sugar: N/A
- Sodium: N/A
- Fat: 6g
- Saturated Fat: N/A
- Unsaturated Fat: N/A
- Trans Fat: N/A
- Carbohydrates: 13g
- Fiber: N/A
- Protein: 1g
- Cholesterol: N/A